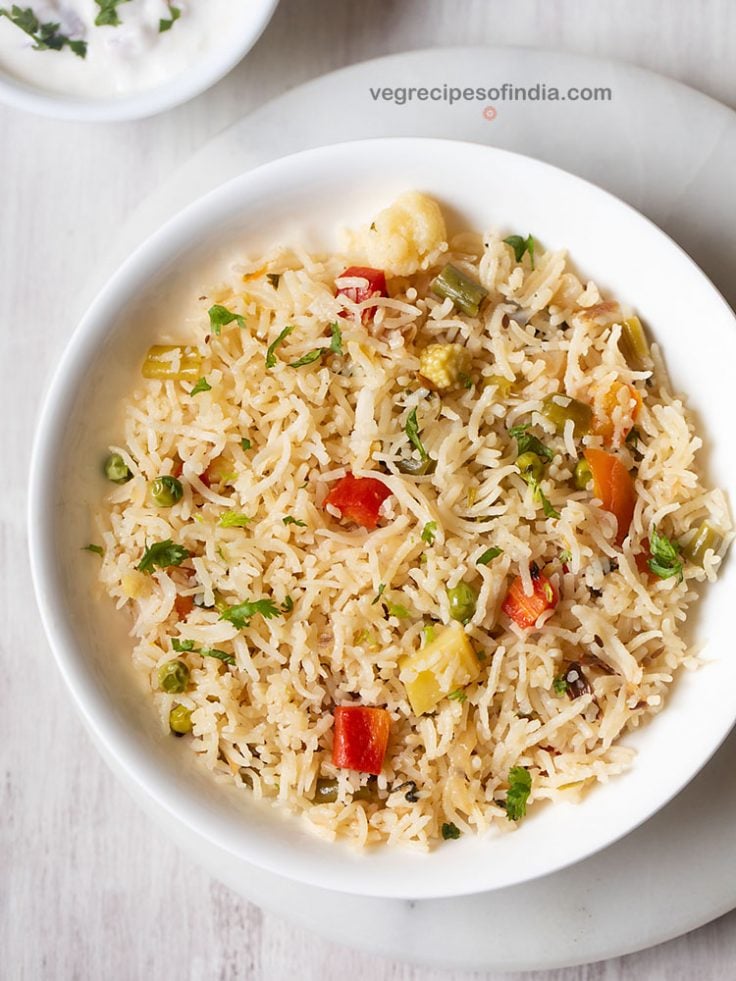
Vegetable Dum Biryani | Hyderabadi Veg Dum Biryani
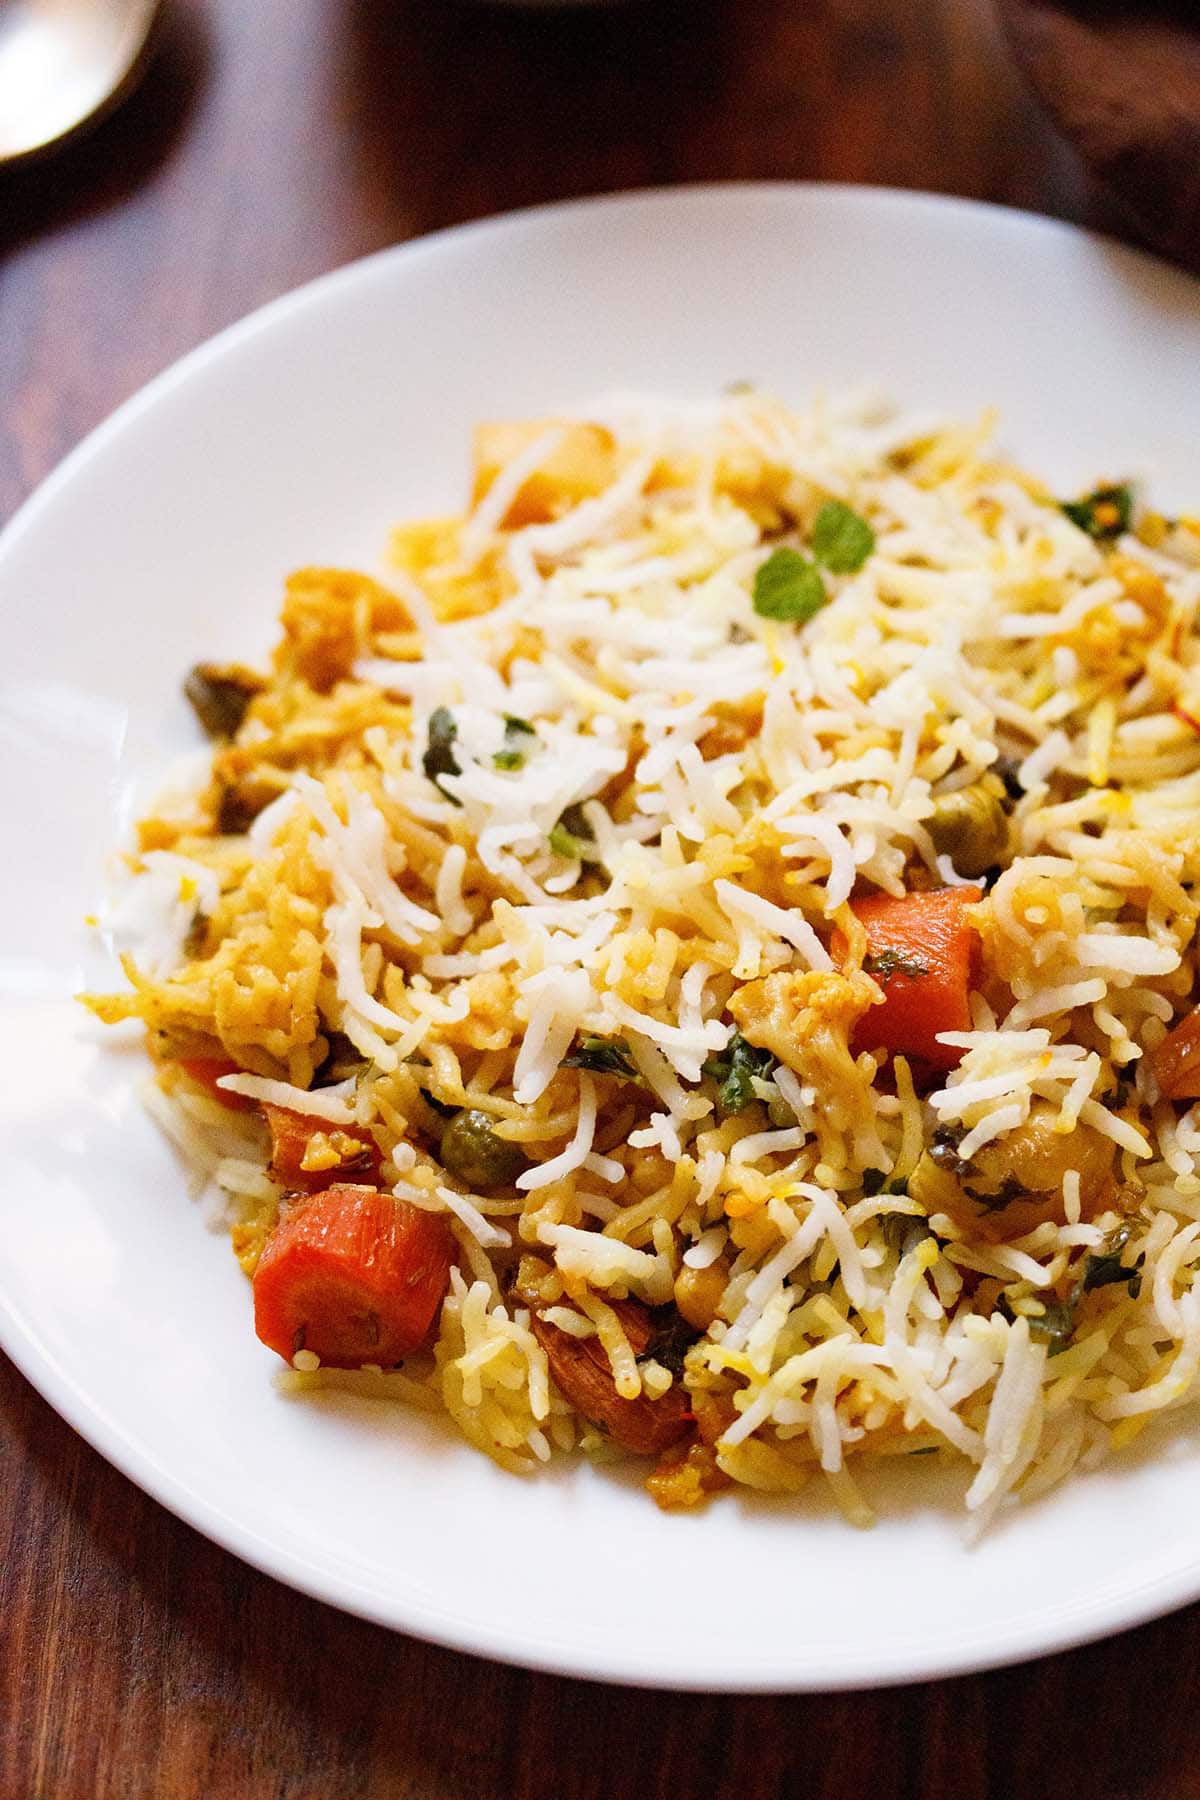
Vegetable Dum Biryani is a Hyderabadi rice dish made by layering basmati rice with a spiced mixed vegetable gravy, herbs, saffron, and kewra water. The pan or pot is sealed and slow-cooked so the rice absorbs all the rich flavors. Each grain turns fragrant, flavorful, and perfectly cooked. This Veg Dum Biryani is known for its rich flavors and royal taste. It truly captures the essence of Hyderabadi cuisine.
About Veg Dum Biryani
Biryani, also spelled biriyani, is one of the most popular rice dishes in India and across South Asia. It’s a layered rice and curry dish where a spiced yogurt based gravy made with meat, vegetables, paneer, or mushrooms is cooked together with partially cooked rice until the flavors blend beautifully.
In most traditional versions, the meat is marinated first, while vegetable biryanis skip this step and are quicker to prepare.
Though biryani is usually layered and slow-cooked, many South Indian versions are made as one-pot dishes, where rice and curry cook together much like a Pulao.
The spices and ingredients vary from region to region. Some use curry leaves, coconut milk, yogurt or black pepper. Thus no two biryanis ever taste the same.
Some recipes also use a ground Biryani Masala, but in this version, whole spices alone bring out the aroma and plenty of flavor.
This Veg Dum Biryani is an authentic Hyderabadi-style vegetarian dum biryani made with basmati rice, assorted mix vegetables, spices, and herbs.
It’s a recipe close to my heart and one I’ve been making for over a decade; loved by family, friends, and readers alike.
Made with patience and care, this Vegetable Dum Biryani needs attention to detail, but the flavor in every bite makes the effort worth it.
My version is loosely inspired by my mom’s recipe and a Jiggs Kalra cookbook I bought years ago. Over time, I’ve refined the ratios and technique to create a biryani that’s light, a bit spicy, and full of aroma.
The caramelized onions, garam masala, and yogurt bring out a perfect balance of flavor, and each grain of rice carries the essence of the masala beautifully.
About Dum Cooking Method
A traditional biryani is always cooked on dum, a slow-cooking method where the pot is tightly sealed so steam can’t escape. Known as dum pukht, this technique came from Persia and became a hallmark of Mughlai and Hyderabadi cooking.
The rice and curry are layered in a heavy pot, sealed with dough, and cooked over gentle heat so the ingredients steam in their own juices.
This slow process lets the flavors blend deeply and keeps the biryani moist and aromatic. Traditionally, clay pots were used for dum cooking, which also helped retain nutrients and gave the dish its distinct earthy flavor.
Ingredients You Need
- Rice: Use aged basmati rice for long, separate grains and the best aroma. Regular basmati rice also works well. You could also use parboiled basmati rice (sella rice)
- Vegetables: You can make Dum Biryani with one or several vegetables. I like to use a mix of cauliflower, onions, potatoes, carrots, beans, bell pepper, mushrooms, and peas. You can also add aubergine, cabbage, broccoli or spinach.
- Milk Products: Ghee (clarified butter), curd (yogurt), and milk add richness and flavor.
- Nuts & Raisins: Cashews, raisins and almonds add texture and a mild sweetness.
- Spices and Seasonings Used: Cardamoms, cloves, caraway seeds (shahi jeera), cinnamon, bay leaf, mace, saffron, salt, turmeric, red chili powder, or cayenne.
- Herbs: Ginger, garlic, green chilies, coriander leaves, and fresh mint leaves for layering and garnish.
- Water: Needed for soaking rice and cooking both the rice and vegetable gravy. You’ll also need kewra water (pandanus extract) or rose water for layering.
Like Dum Cooked Biryanis? Try These Too!
How to Make Veg Dum Biryani
Making Hyderabadi Veg Dum Biryani takes a bit of time but the steps are simple once you get into the rhythm. The key is to prepare everything before you start cooking.
Chop the vegetables, soak the rice, and keep the spices ready. This helps the layering and dum process go smoothly.
Follow the steps below to make a flavorful, aromatic Vegetable Dum Biryani that tastes just like the ones served in Hyderabadi homes.
Soak Rice
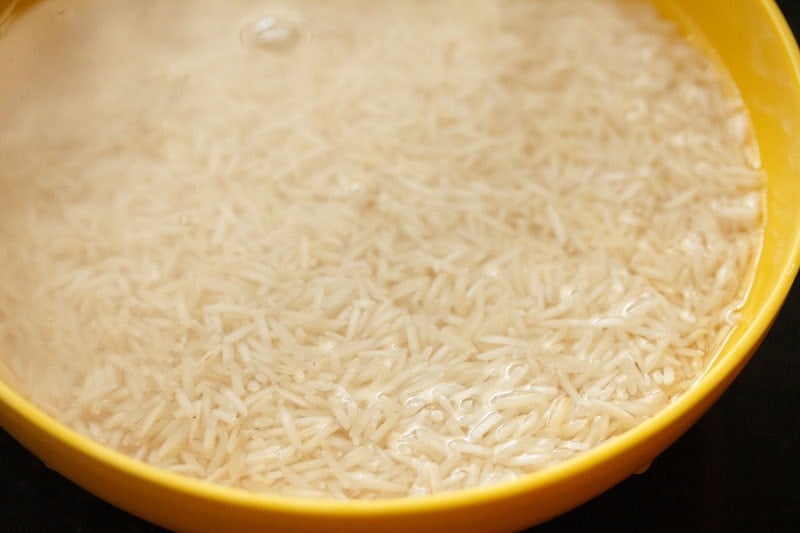
1. First, rinse 1.5 cups of basmati rice (300 grams) in clean water until the water runs clear of starch. You can use a bowl or colander to rinse the rice. Make sure you soak the rice grains in water for 30 minutes after rinsing them.
Tip: If possible try to use aged basmati rice or sella basmati rice (parboiled basmati rice) to make this veg dum biryani.
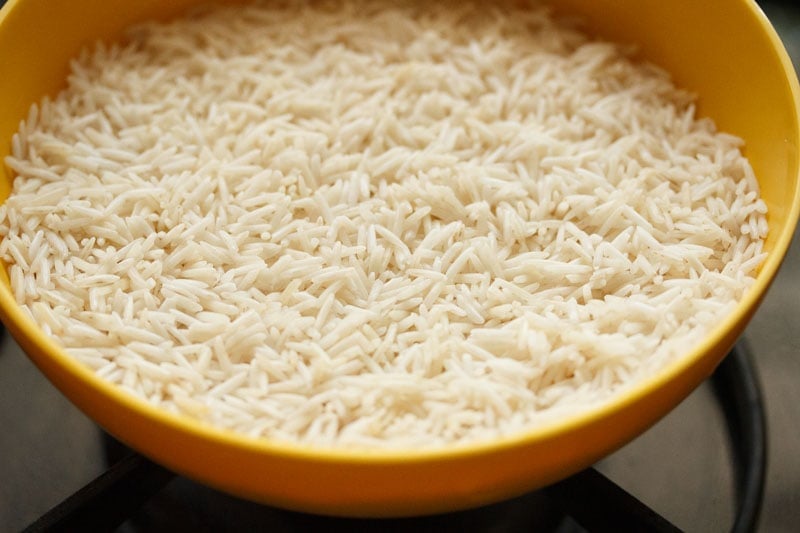
2. Once the rice has been able to soak for 30 minutes, drain all the water and set aside.
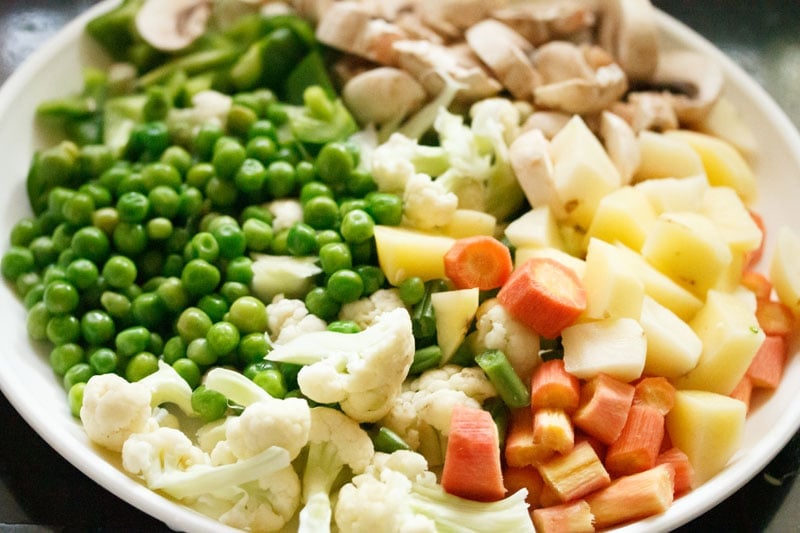
Prep Vegetables
3. While the basmati rice is soaking, use that time to prep the other ingredients. First, you will want to rinse, peel and chop all of the veggies. This will make the process of cooking go by much quicker.
What to use: I have used 3 cups mixed veggies including green peas. You can use your choice of mixed vegetables for your veg dum biryani.
- Onion: Slice 1 large onion thinly (about 1 heaped cup thinly sliced onion).
- Ginger: Finely chop or crush 10 grams ginger (2 pieces of 2 inch ginger or 1.5 tablespoons finely chopped ginger). You should get 1 tablespoon of ginger paste.
- Garlic: Finely chop or crush 5 grams garlic (10 to 12 medium garlic cloves or 1 tablespoon finely chopped garlic). You will need ½ tablespoon garlic paste.
- Chilies: Slit 3 to 4 green chilies.
- Cilantro: Chop coriander leaves (cilantro) and mint leaves. You should get ⅓ cup each of chopped coriander leaves and mint leaves.
Cook Rice
4. After you have organized and chopped all of your vegetables, it is time to cook the basmati rice. You can use any method to cook your rice – microwave, pressure cooking, instant pot or cooking in a pot.
If cooking your rice in a pot, use a deep bottomed pan and add 5 cups water.
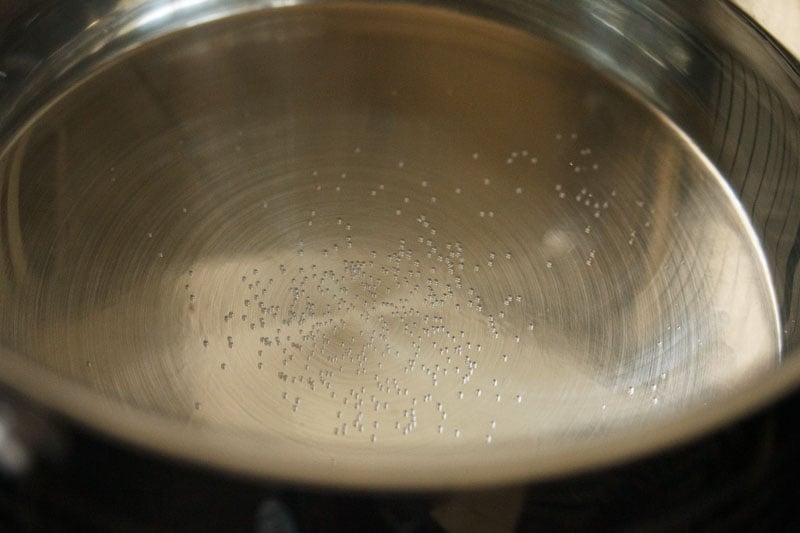
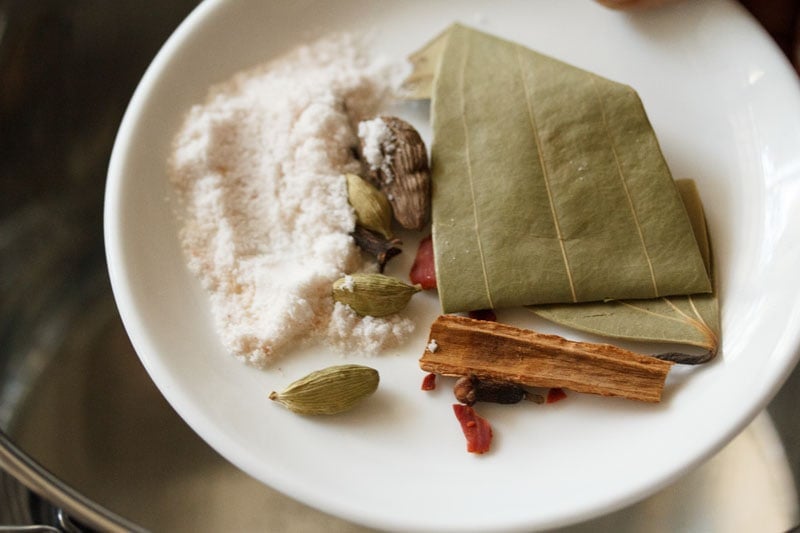
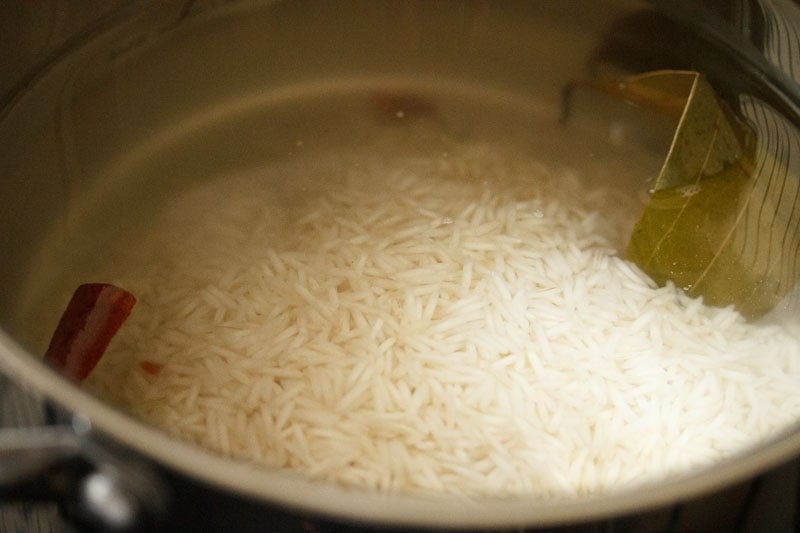
5. When the water is hot, add all the spices and 1 teaspoon salt. Here’s what you want to include for your veg dum biryani in this step:
- 1 tej patta
- 3 green cardamoms
- 3 cloves
- 1 black cardamom
- 1 inch true cinnamon or 1 inch cassia cinnamon
- 2 single strands of mace
6. After adding the ingredients, bring the water to a boil on a high heat.

7. Now it is time to add the rice to the spiced water in the pot.
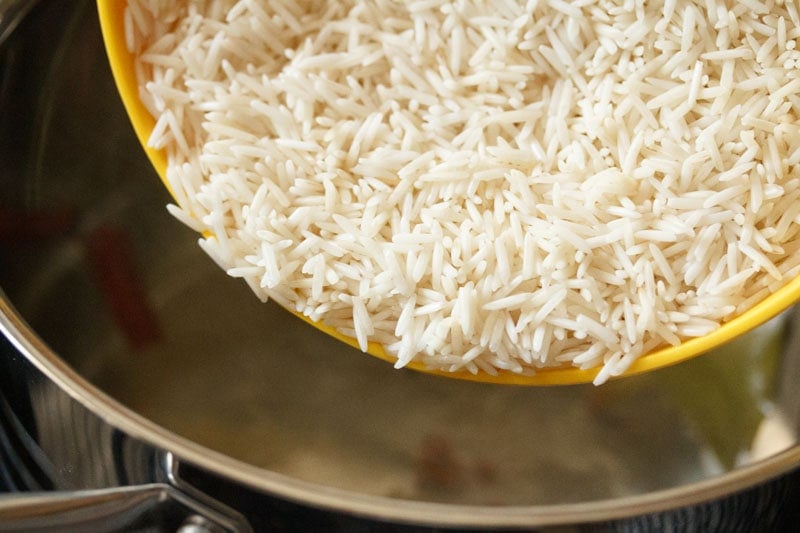
8. Gently stir with a spoon or fork after you add the soaked basmati rice. Check the taste of water and ensure it is slightly salty.
Tip: If the water is not tasting slightly salty, then add some more salt.
9. Do not reduce the heat and continue to cook the rice grains.
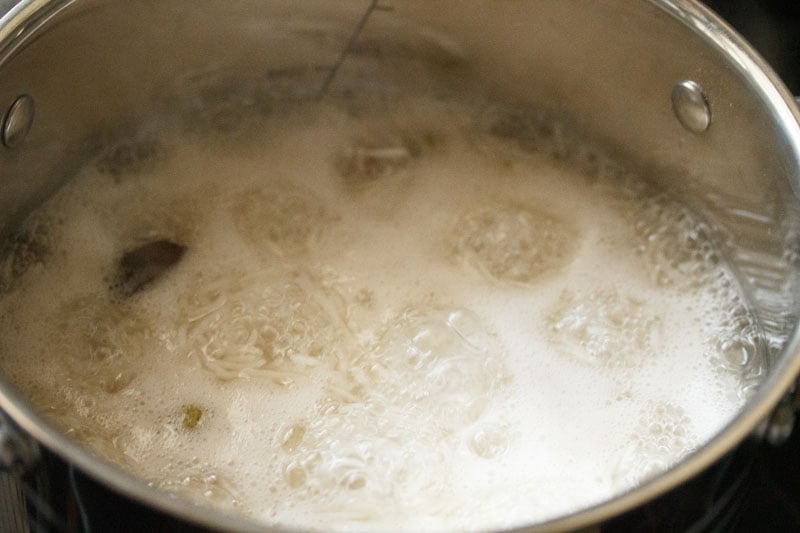
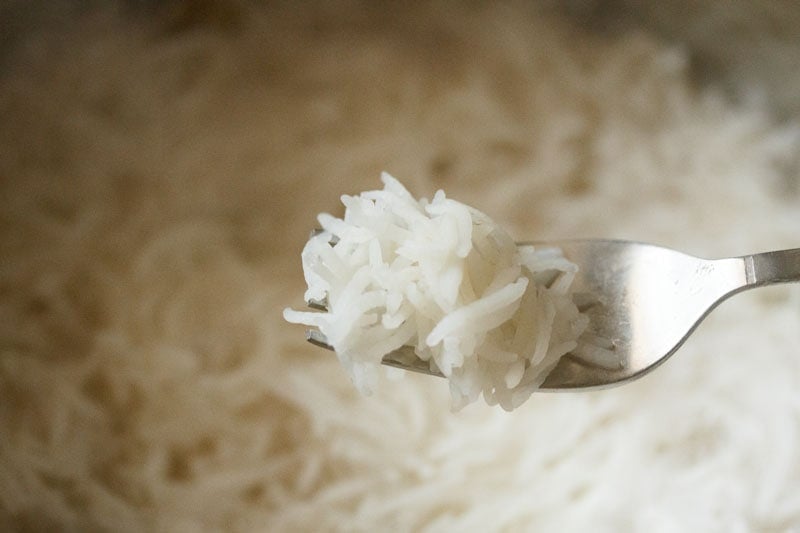
10. The rice should not be fully cooked, but a bit undercooked or about 75% or ¾ of the way cooked.
Tip: Taste the rice! The grains should still have a slight bite to them.
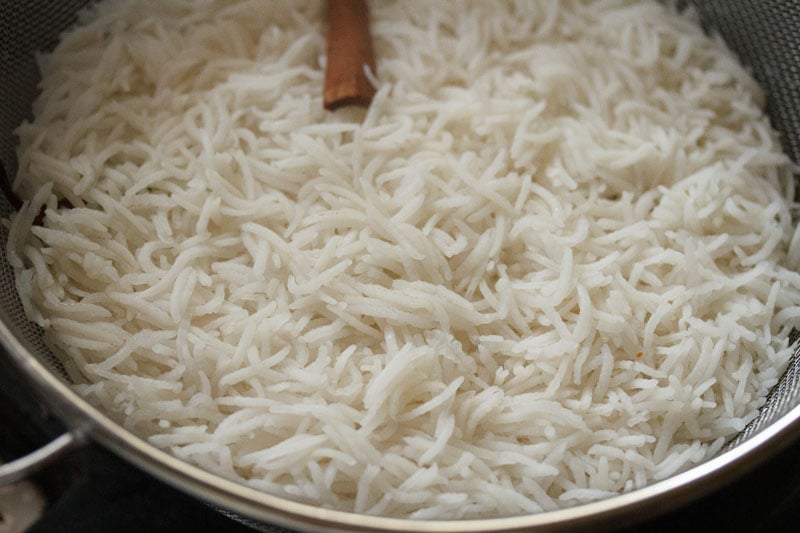
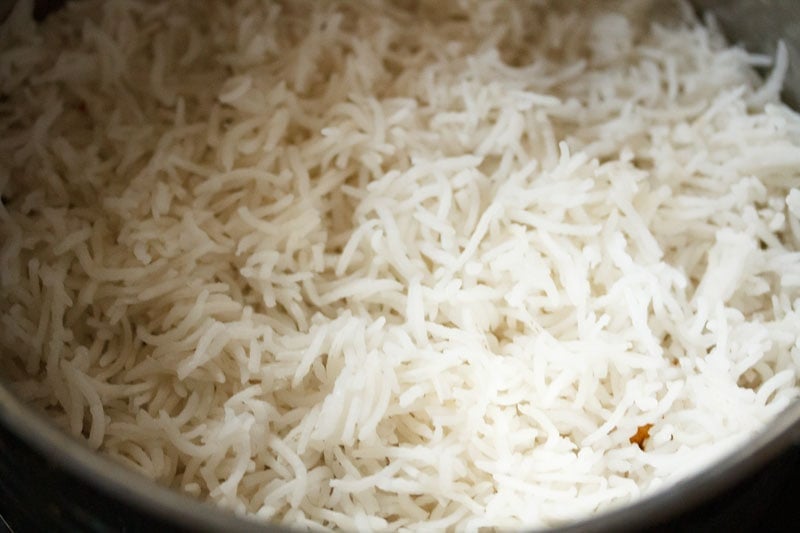
11. Drain the semi-cooked rice in a colander. You can also rinse them gently with water so that the grains stop cooking.
Make Biryani Gravy
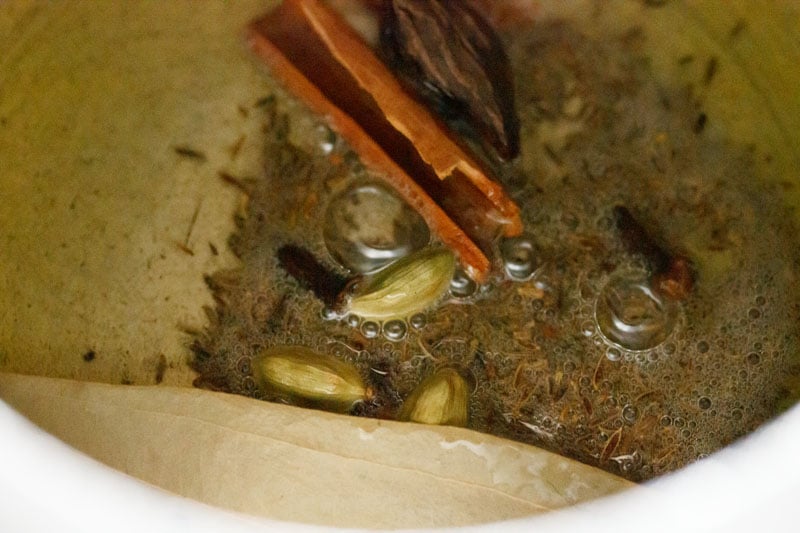
12. In a 2-litre pressure cooker or a pan, heat 3 tablespoons of ghee, then add the following spices. Sauté the whole spices until they crackle. You can make the vegetable gravy in a pan as well.
- 1 teaspoon shah jeera (caraway seeds)
- 1 tej patta
- 3 green cardamoms
- 3 cloves
- 1 black cardamom
- 1 inch cinnamon
13. Next, add the sliced onions.
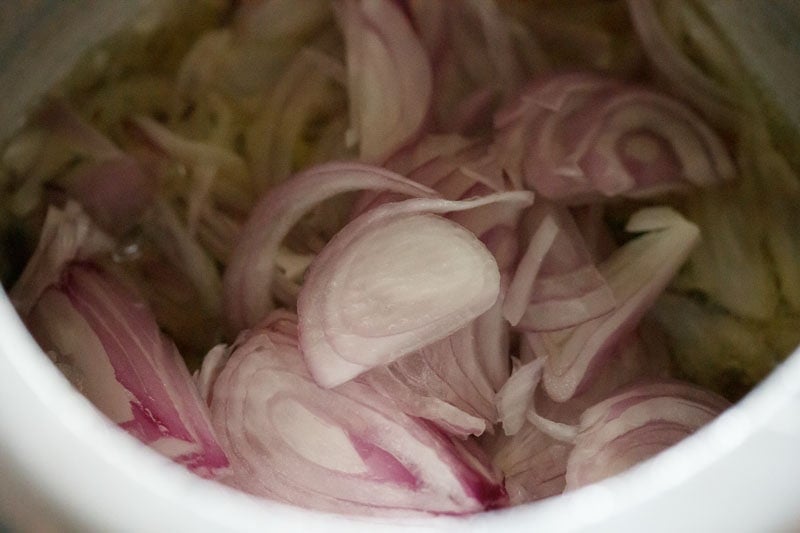
14. Stir and sauté the onions on a low to medium heat. Onions can take a long time to cook, so add a pinch of salt to quicken the cooking process.
Stirring often sauté the onions, so that they cook evenly.
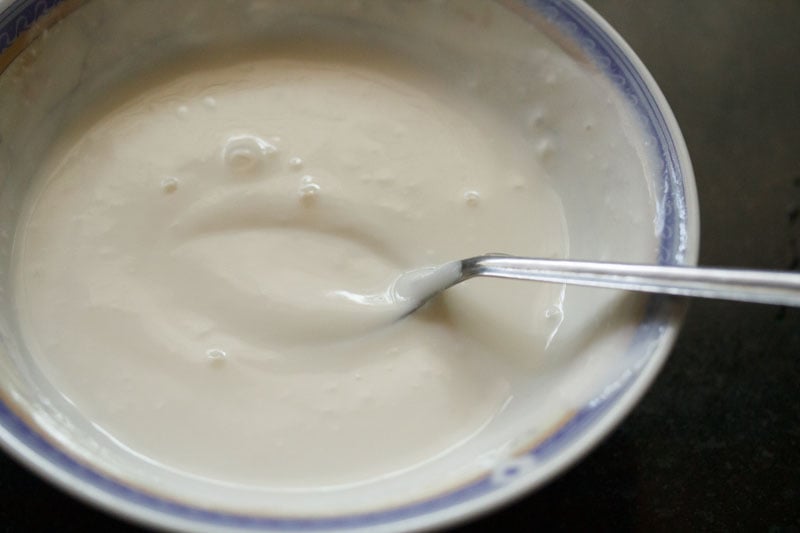
16. When the onions are cooking, take 1 cup fresh curd or yogurt in a bowl. Beat the curd with a spoon or whisk until it becomes smooth.
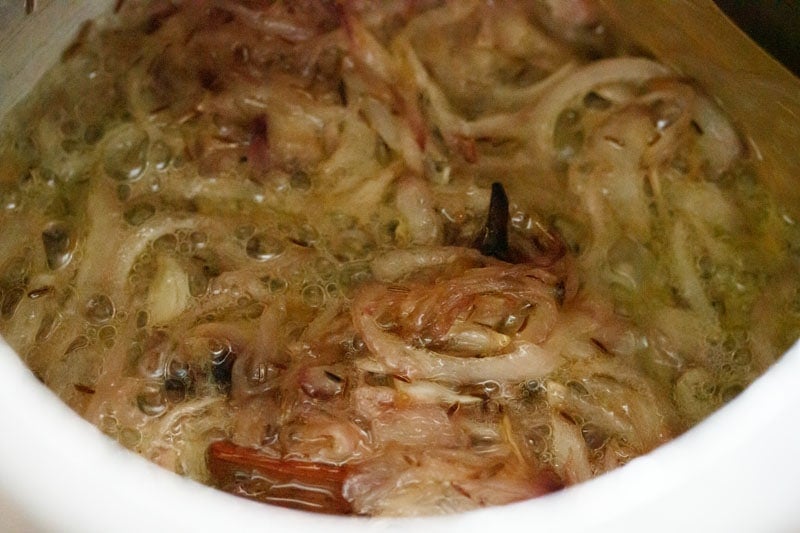
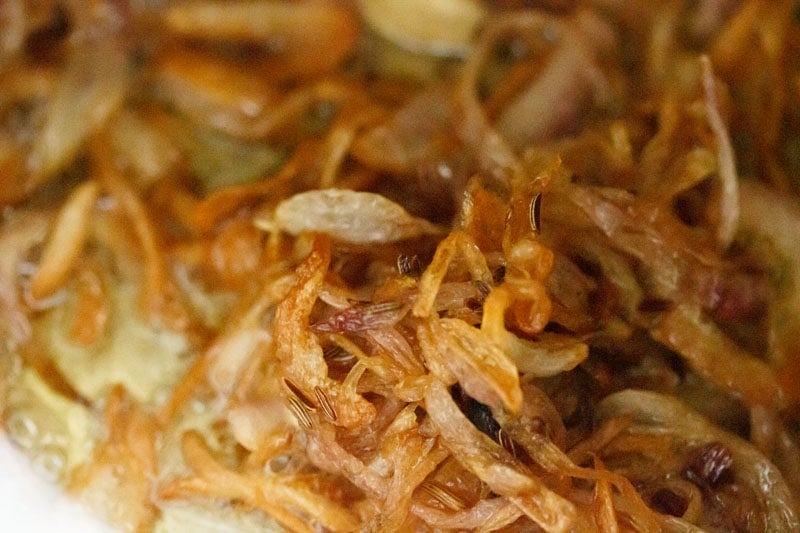
17. Sauté the onions until they become golden brown or caramelize. Try not to burn them.
18. Add the ginger-garlic paste and sliced green chilies. You can also finely chop the ginger-garlic and add if desired.
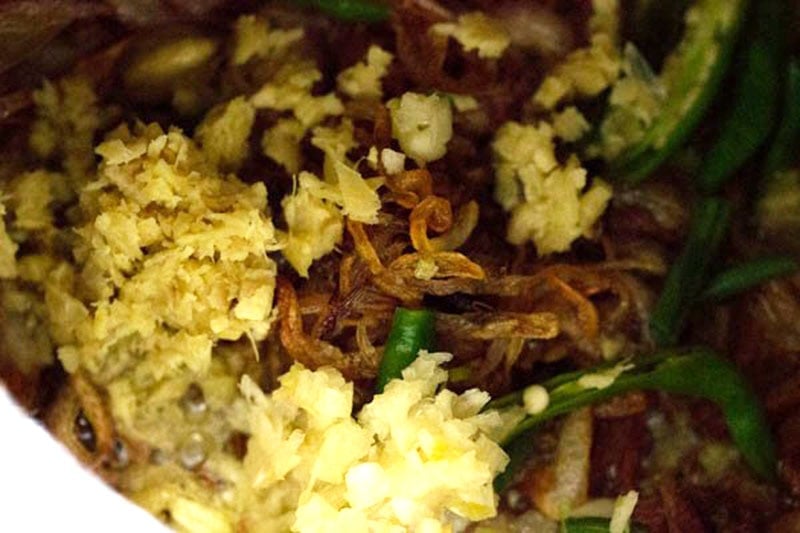
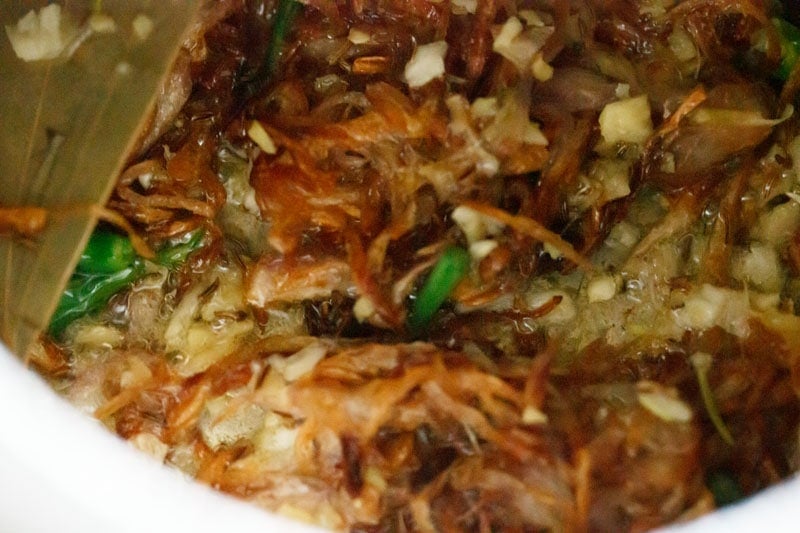
19. Sauté the mixture for some seconds until the raw aroma of ginger-garlic goes away.
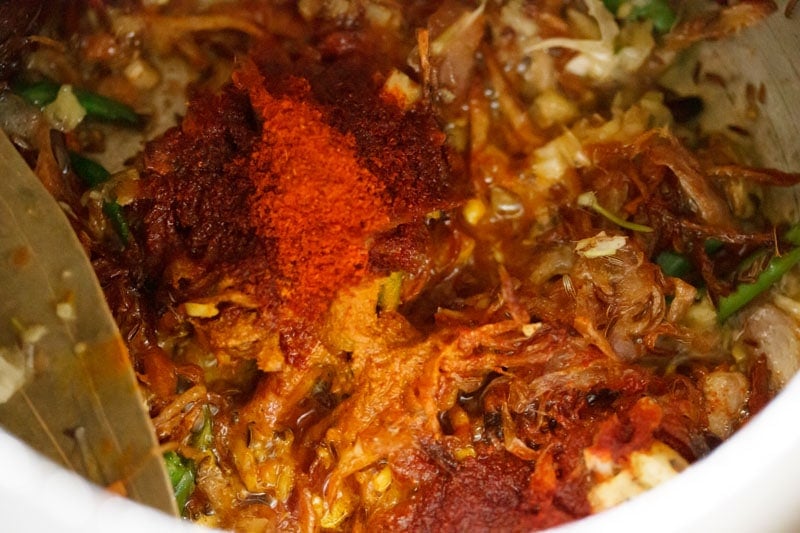
20. Add the ½ teaspoon turmeric powder and 1 teaspoon red chili powder or cayenne. Stir and mix well.
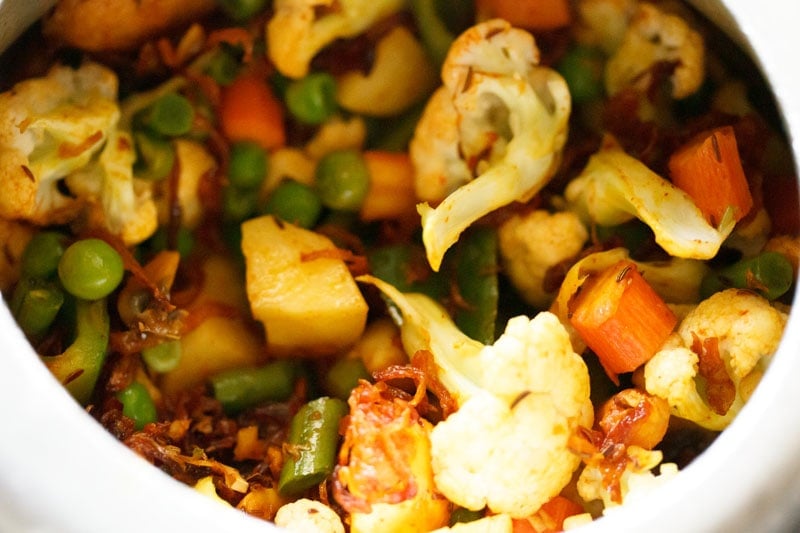
21. Next add the chopped veggies.
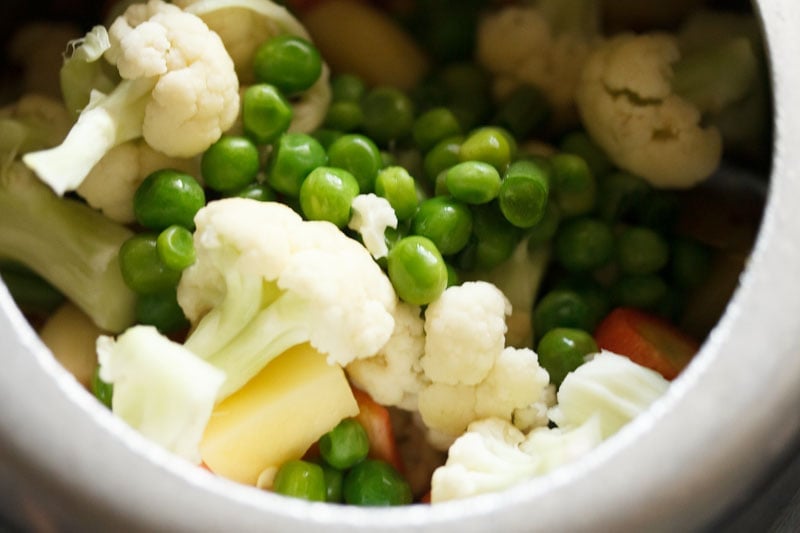
21. Mix thoroughly and sauté veggies for 1 to 2 minutes.
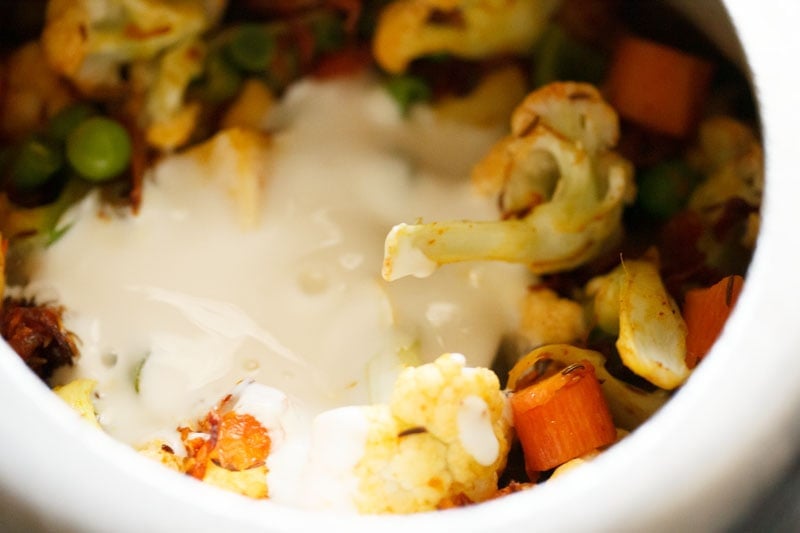
22. Lower the heat and add the beaten yogurt or curd. Stir as soon as you add the curd.
23. Then add ½ cup of water in the pressure cooker. If you decide to cook the veggies in a pot, add ¾ cup water.

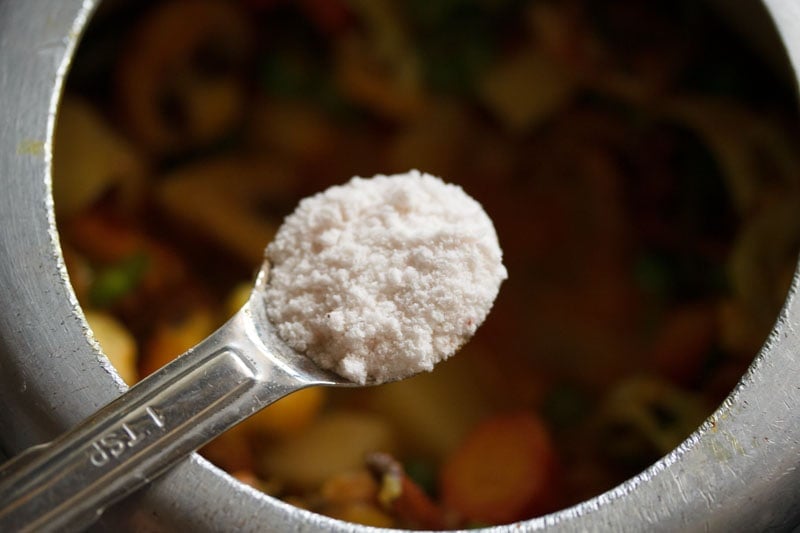
24. Season with salt according to taste and mix again.
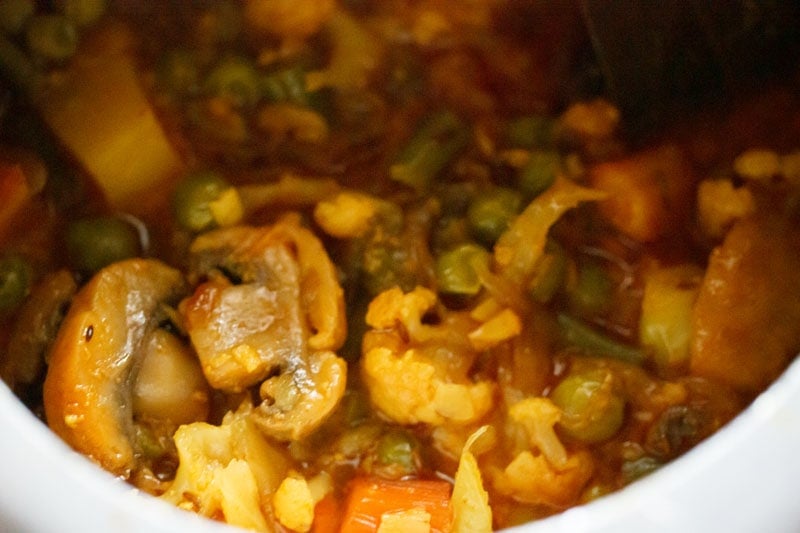
25. Pressure cook for 1 whistle or 3 to 4 minutes on medium heat. If cooking in a pot, then cook until the veggies are done. Don’t overcook the vegetables.

26. When the pressure settles down on its own, remove the lid and check the gravy.
- If the vegetables are not cooked well, then keep the pressure cooker on the stove top and simmer the biryani gravy without the lid, till the vegetables are tender.
- If there is too much water or stock in the gravy, then simmer till some water dries up. The vegetable gravy should have a medium or slightly thick consistency and should not be watery.
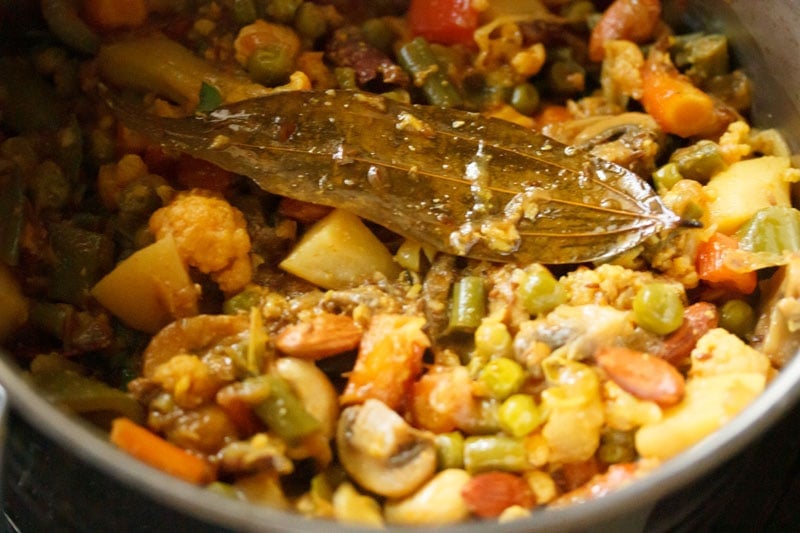
27. Add 2 tablespoons cashews, 1 tablespoons raisins and 2 tablespoons almonds (blanched or raw) to the vegetable gravy.
Tip: Do check the salt and add more if required. You can chop the nuts before adding.
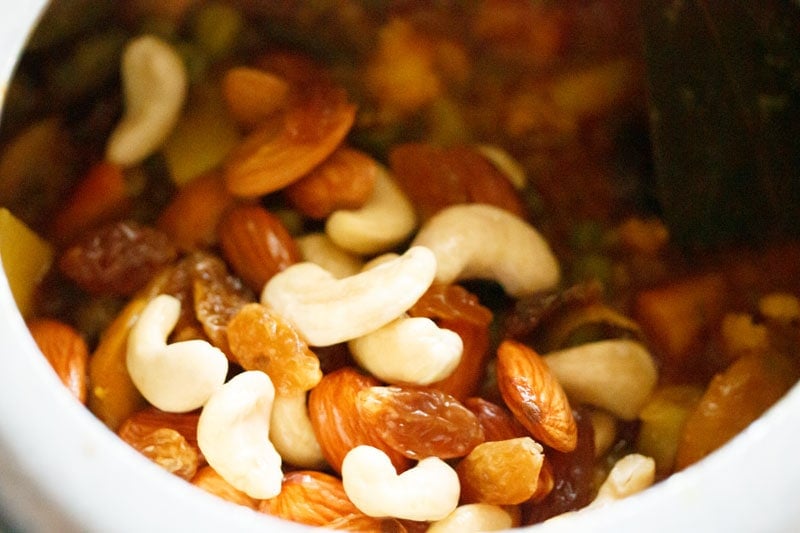
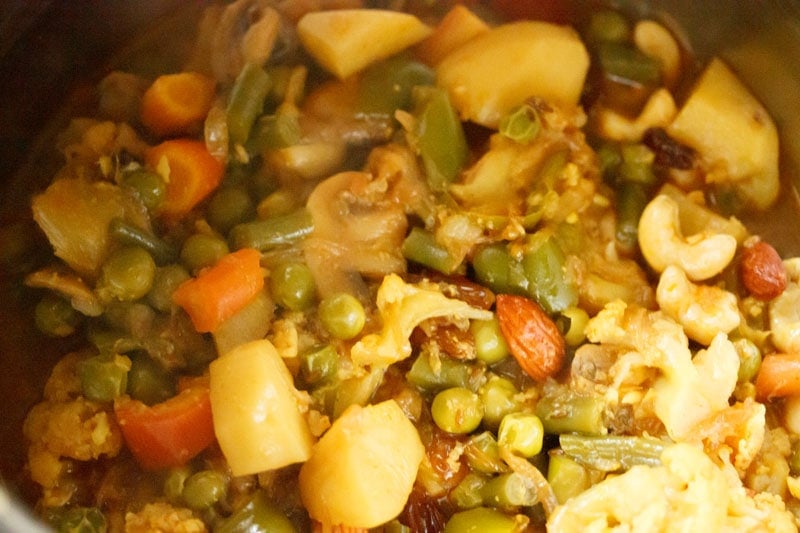
28. Mix, stir, and set aside.
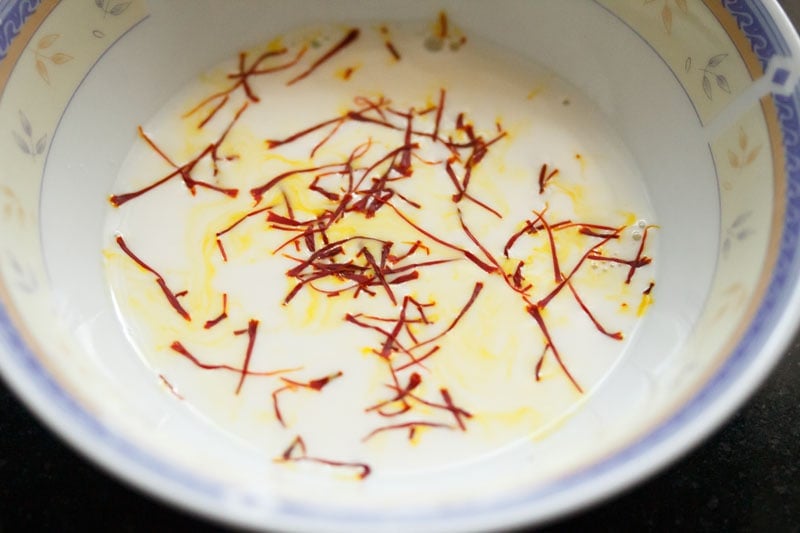
29. While the veggies are cooking, warm 4 to 5 tablespoons of milk in a microwave or in a small pan on the stove top. Add ¼ teaspoon of saffron strands. Stir and set aside.
Assemble and Layer
30. Now in a thick bottomed pan, layer half of the vegetable curry first.
31. Then layer half of the semi cooked rice.
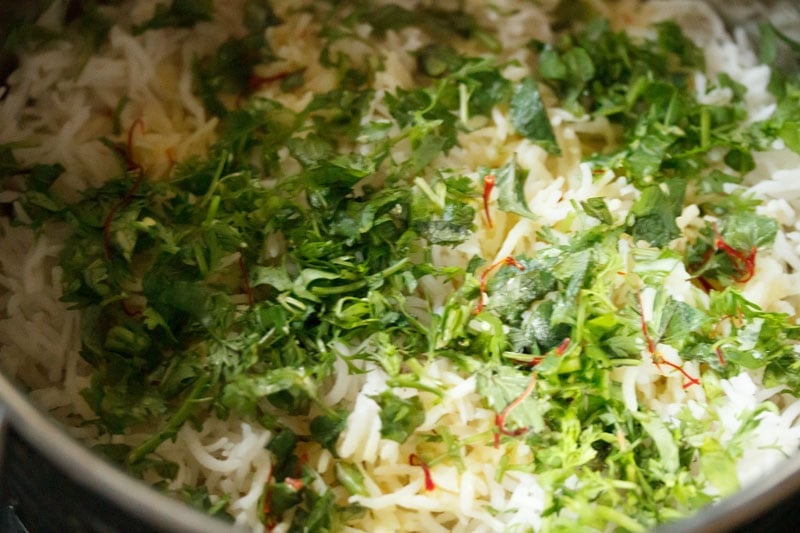
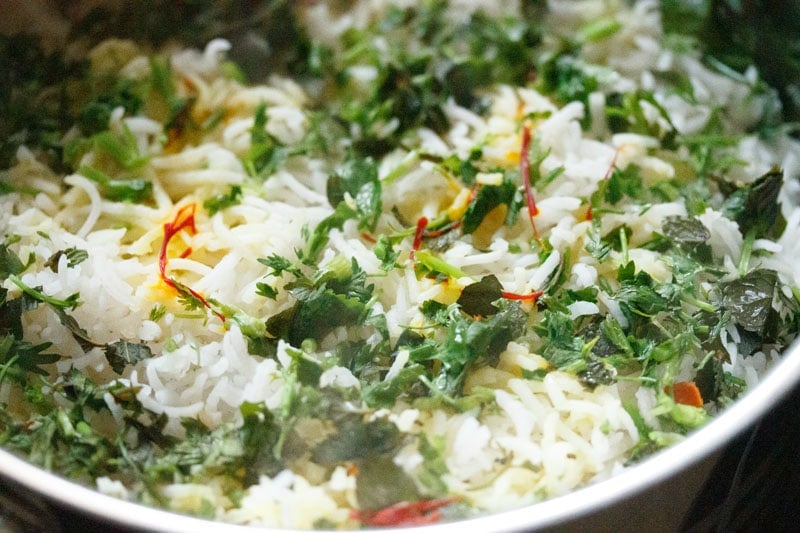
32. Sprinkle half of the chopped coriander (cilantro), mint leaves and saffron infused milk.
33. Layer the remaining gravy.
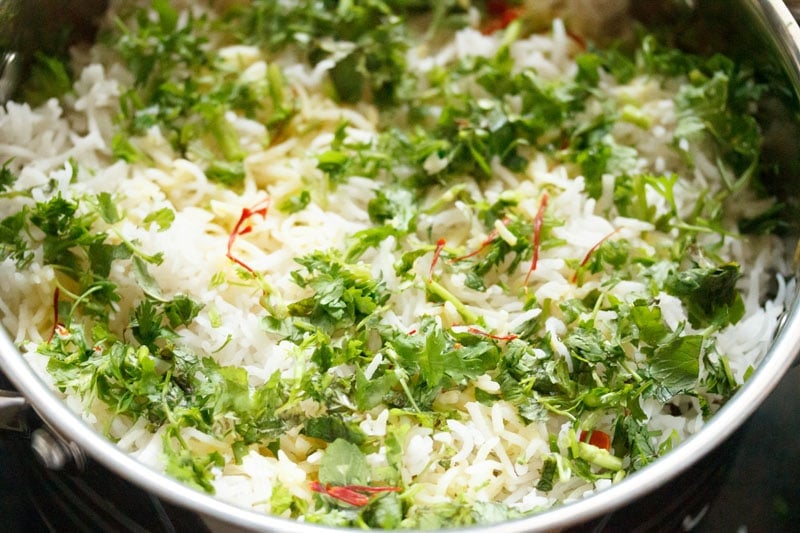
34. Layer the remainder of the rice, and sprinkle the remaining coriander leaves (cilantro), mint leaves, saffron milk on the top. You can also sprinkle 2 teaspoon of rose water or kewra water (pandanus extract) at this point.
Tip: If you’d like, you can even add ⅓ to ½ cup of golden fried onions (birista) if you have these. You can make 2 layers or 4 layers like I have done. But do remember that rice should be the top layer and the vegetable gravy should be the bottom layer.
Three Ways To Cook
Method 1
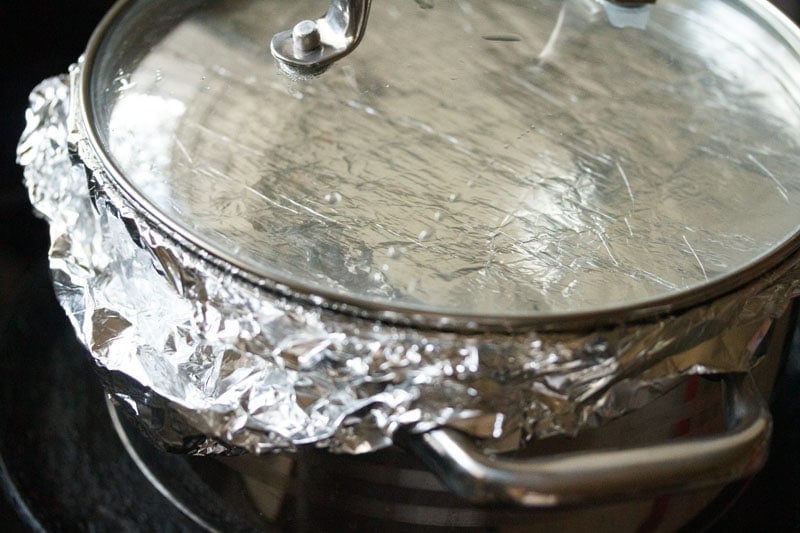
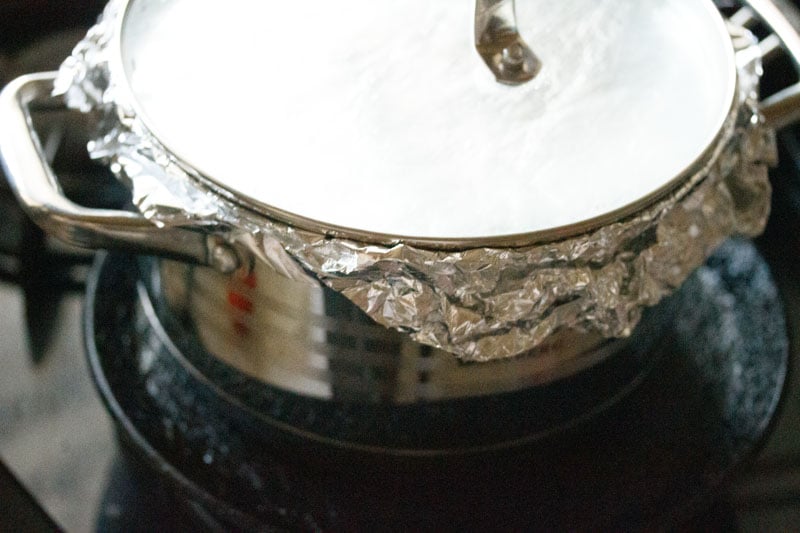
35. Seal and secure the pot with aluminium foil.

36. Then cover the pan/pot with a tight fitting lid.
Method 2
37. You can also seal the pan with a moist cotton cloth.

38. Then keep a lid on top.

39. Then keep a heavy weight on the lid.

40. Take a tawa (griddle/skillet) and heat it on medium heat. You can begin to preheat the tava when you start assembling the Hyderabadi Veg Dum Biryani.
Lower the heat when the skillet becomes hot, and keep the sealed Vegetable Dum Biryani pan on the tawa. Keep the flame to the lowest and cook for 30 to 35 minutes.
Tip: You can also dum cook the biryani for the first 15 minutes on direct low flame and then for the last 10 minutes, place the pan on the hot tawa or skillet and cook on a low flame.
Method 3 – Bake Veg Dum Biryani
41. Preheat the oven to 180 degree celsius for 15 minutes and then bake the Veg Dum Biryani in a preheated oven for 30 to 40 minutes.
Remember to use an oven safe glass bowl or casserole dish like the pyrex bowl or use a dutch oven.
You have to assemble the Vegetable Dum Biryani as mentioned above in the casserole dish or your dutch oven. Seal tightly with aluminium foil or an oven safe heat resistant lid and then bake.
Check Vegetable Dum Biryani
42. After 30 to 25 minutes, turn off the heat, and use a fork or spoon check the bottom layer of the biryani. There should be no liquids at the bottom.
If there are liquids, then continue to dum cook. After dum cooking is over, turn off the heat and give a resting time of 5 to 7 minutes and later serve Hyderabadi Veg Dum Biryani.
While serving the Vegetable Dum Biryani, make sure you equally serve the vegetables as well as rice layers.
Serving Suggestions
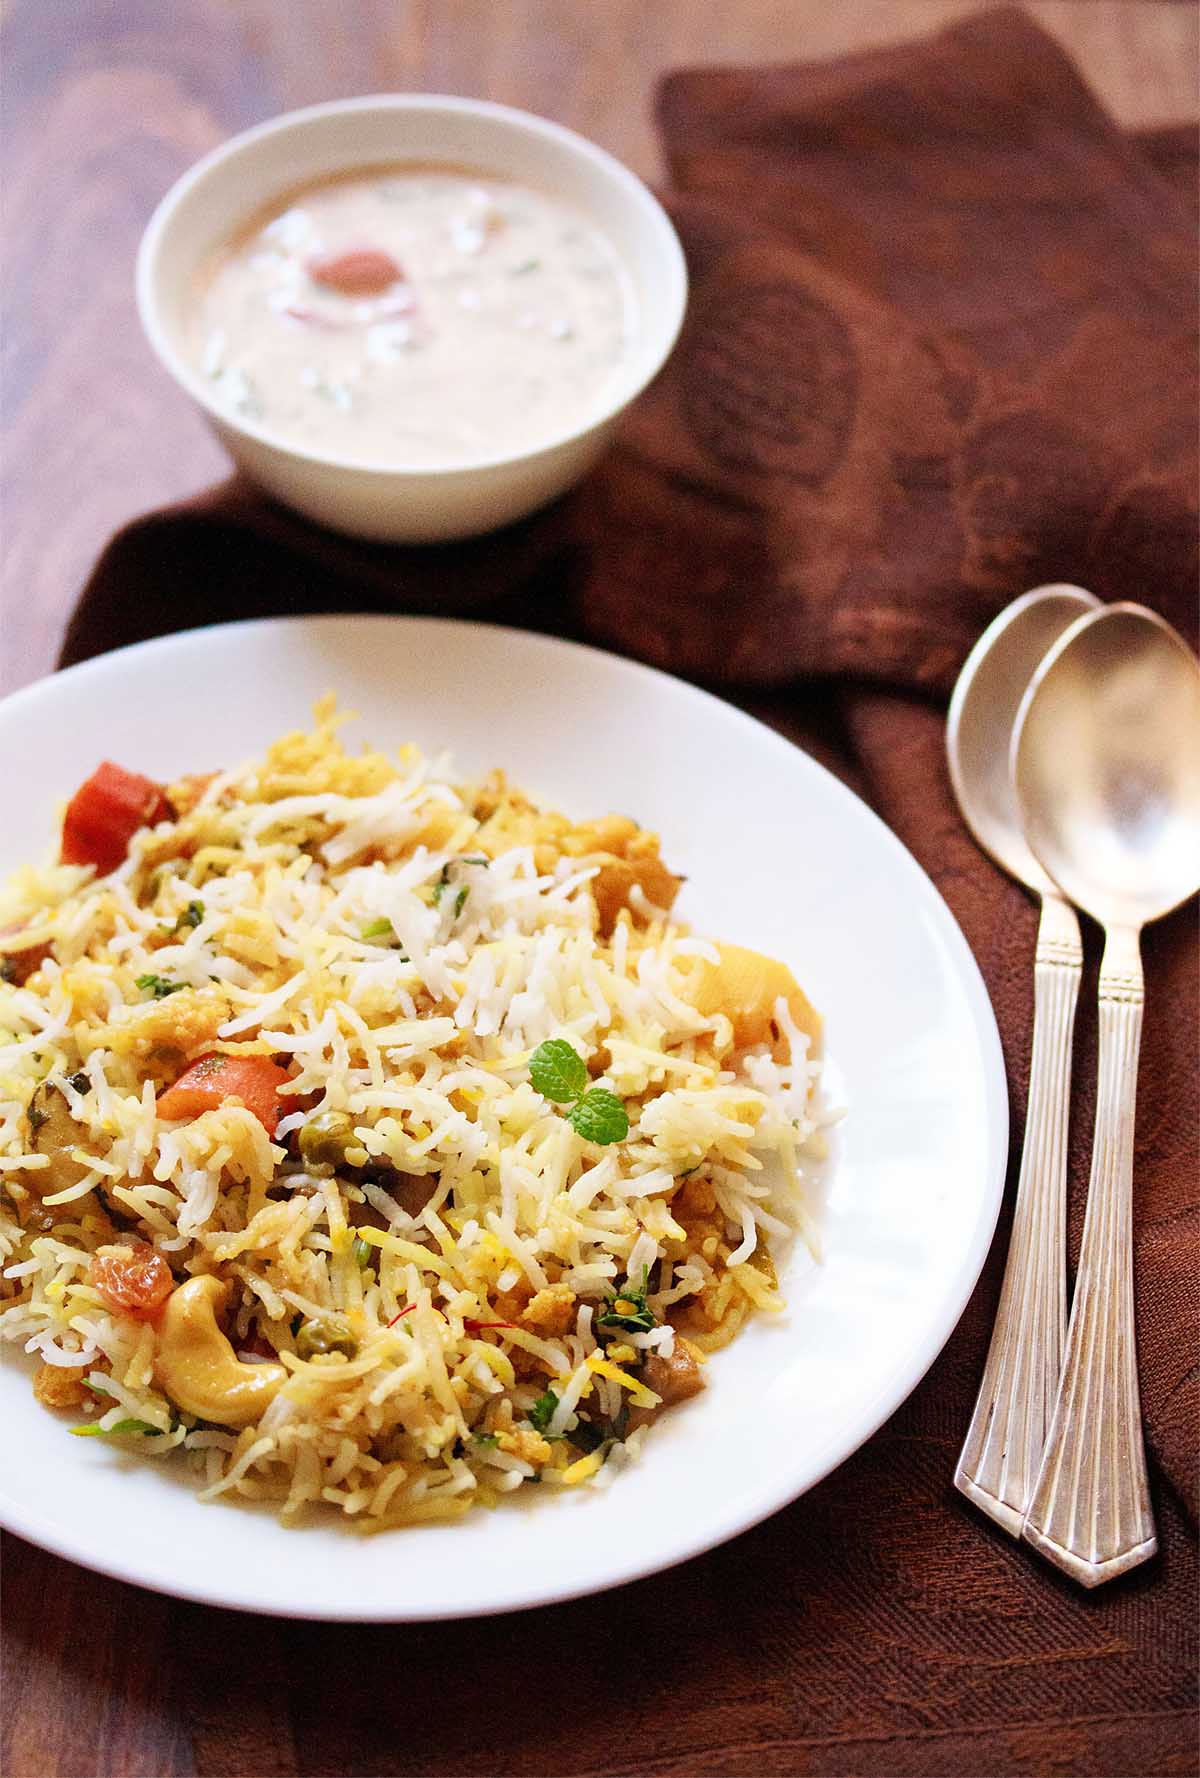
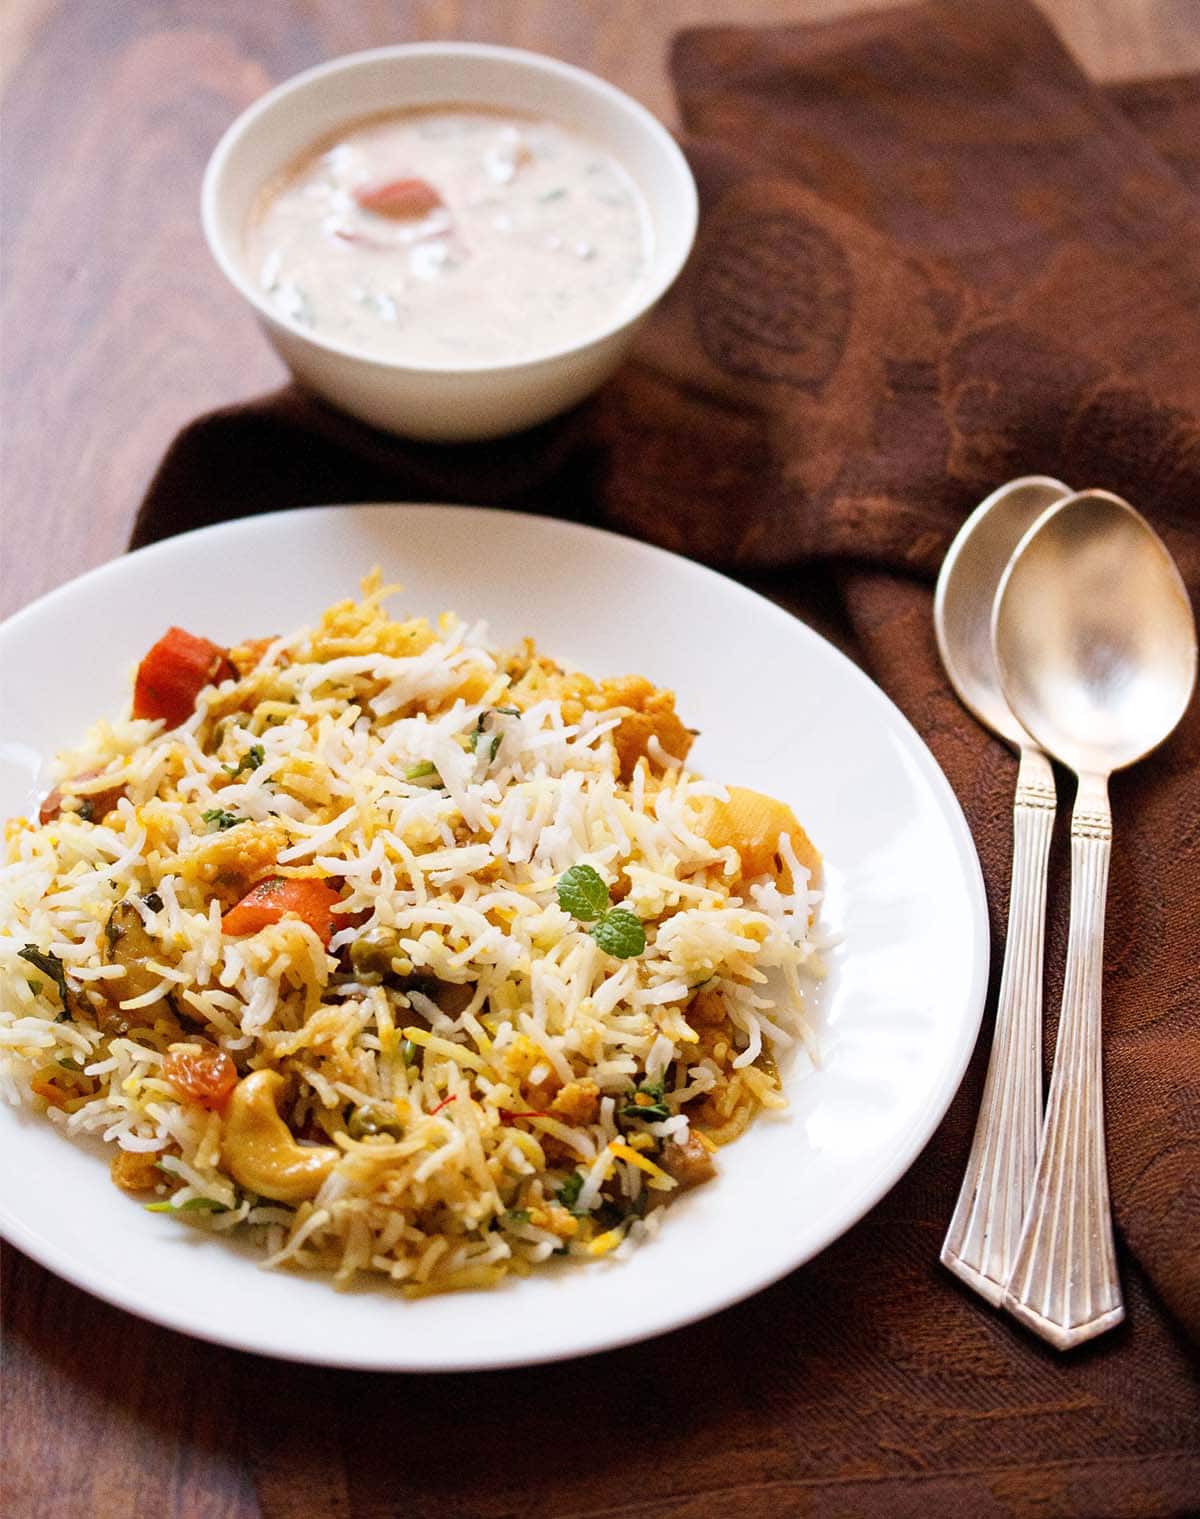
There are various sides that pair best with a Veg Dum Biryani. Biryani is usually accompanied with a raita (yogurt dip). The raita can be a simple onion raita or made with a mix of onion, tomatoes and cucumber.
While we personally love Cucumber Raita, Onion Raita and Boondi Raita, you could enjoy Vegetable Dum Biryani with any savory raita of your liking.
You can also pair it with Kachumber Salad (onion-tomato salad), plain Curd (Yogurt), Lemon Pickle, some lemon wedges or roasted papad.
The Hyderabadi Biryani is usually served with Mirchi ka Salan (Green Chilly Curry) and raita. If desired you can serve Biryani with a simple soupy Shorba gravy or Bagara Baingan.
Dum Biryani can also be enjoyed on its own without any sides or accompaniments.
Finish the meal with Hyderabadi special desserts like Shahi Tukda, Khubani ka Meetha, Double ka Meetha and Bread Halwa.
Storage
Store the biryani leftovers in your refrigerator for a day only. While reheating steam for 5 minutes in a pan or Instant pot. You could even lightly sauté the Vegetable Dum Biryani stirring frequently in a frying pan or skillet until warm or hot.
Dassana’s recipe Tips
- Rice: To make a Veg Dum Biryani firstly you need good quality basmati rice – preferably aged basmati rice. Biryani is not mushy and the rice grains remain perfectly separate in the dish. For this recipe I included aged basmati rice.
- Sella Basmati Rice: I also make biryani with parboiled basmati rice (known as sella basmati rice in Hindi and converted basmati rice outside India) and it works wonderfully and much better than aged basmati rice. Vegetable Dum Biryani made with sella basmati rice has restaurant style flavors as many hotels and restaurants in India use this rice for making biryani as well as other rice based dishes like Pulao, Fried Rice and Jeera Rice (cumin rice).
- Cooking of rice: The rice grains are boiled until they are ¾ cooked. They will have a slight bite to them and will be slightly undercooked. Do not cook the rice 100% as then they will become mushy by the time the biryani is dum cooked.
- Spices: The lovely fragrance and aroma in a biryani comes from using whole spices. Thus the spices need to be fresh and in good condition.
- Curd (Yogurt): The vegetable curry is made with yogurt and so it is important that the yogurt must be fresh and not sour. The curd or yogurt should also be made from whole milk. Do not use fat free yogurt or curd made from toned milk as it will split while cooking.
- Biryani gravy: The curry or gravy for the Veg Dum Biryani should have a medium to medium-thick consistency. It should not be watery like a stock or broth as this will lead to the rice becoming mushy or very soft after dum cooking.
- Vegan variation: Use almond milk yogurt or cashew milk yogurt. Replace ghee (clarified butter) with oil. You could use any vegetable oil or neutral tasting oil in this Vegetable Dum Biryani.
FAQs
What can I garnish the Dum Biryani with?
In some variations, the semi-cooked rice or curry layers are topped with fried onions (also known birista) and fragrant ingredients like rose water, pandanus extract (kewra water) and saffron infused milk, ghee (clarified butter) are also sprinkled from the top.
Herbs like coriander leaves and mint are additional garnishes that bring in a bright pop of flavor and color.
What is dum pukht biryani?
Any biryani cooked with the method of dum cooking is a dum pukht biryani. It is made by making separate layers of the par-cooked rice and gravy.
This entire assembly of the semi-cooked rice and gravy with the various toppings, garnishings are sealed tightly in a clay pot and then slow cooked on low heat.
Authentically and traditionally a biryani is always slow cooked on dum. This cooking on dum gives the biriyani its uniqueness and originality.
This is how the biryani has the beautiful medley of the aromas, flavors and tastes from the variety of ingredients added in it. This Hyderabadi Veg Dum Biryani recipe is also a vegetarian dum pukht biryani.
How is traditional biryani made?
In the Indian Cuisine, specifically in the North Indian cuisine, the traditional biryani is made with the dum pukht method of slow cooking in clay pots (also known as “handi” in India).
Of course nowadays many home cooks even bake biryani in the oven. In the step by step process shots above, I have explained both the dum cooking and oven baking methods – so that you can choose what suits you.
Step by Step Photo Guide Above

Vegetable Dum Biryani | Hyderabadi Veg Dum Biryani
Ingredients
For soaking rice
- 1.5 cups basmati rice – 300 grams, preferably aged basmati rice
- 1 cup water for soaking rice
Veggies and herbs
- 1.5 cups cauliflower florets – 150 grams
- 1 cup chopped potatoes – 100 grams or 2 medium-sized
- ½ cup chopped carrots – 100 grams or 1 medium to large carrot
- ¼ cup chopped french beans – 50 grams or 11 to 12 french beans
- 8 to 10 white button mushrooms sliced or chopped, (optional)
- ¼ to ⅓ cup chopped bell pepper – 50 grams or 1 small to medium (optional)
- ½ cup green peas – fresh or frozen
- 1 cup thinly sliced onions (heaped) – 115 grams onion or 1 large onion
- 1.5 tablespoons finely chopped ginger – 10 grams or 2 pieces of 2 inch ginger or 1 tablespoon ginger paste
- 1 tablespoon finely chopped garlic – 5 grams or 10 to 12 medium garlic cloves or ½ tablespoon garlic paste
- 2 green chilies – slit or sliced
For cooking rice
- 3 green cardamoms
- 1 black cardamom
- 3 cloves
- 1 inch cinnamon
- 1 tej patta (Indian bay leaf)
- 2 single mace strands
- 5 cups water
- 1 teaspoon salt or add as per taste
For biryani curry/gravy
- 3 tablespoons ghee (clarified butter) – use 3 tablespoons oil instead
- 1 teaspoon shahi jeera (caraway seeds)
- 1 tej patta (Indian bay leaf)
- 3 green cardamoms
- 1 black cardamon
- 1 inch cinnamon
- 1 cup curd (yogurt), whisked – 200 grams
- ½ teaspoon turmeric powder
- 1 teaspoon red chilli powder or cayenne pepper or paprika
- ½ cup water for pressure cooking and ¾ cup water for cooking in a pan
- 2 tablespoons cashews
- 1 tablespoons raisins (without seeds)
- 2 tablespoons almonds – raw or blanched, peeled and sliced
- salt as required
For assembling and layering
- ⅓ cup chopped coriander leaves (cilantro) – 20 grams
- ⅓ cup chopped mint leaves – 5 grams
- 4 to 5 tablespoons milk
- ¼ teaspoon saffron strands
- 2 teaspoons kewra water (pandanus water) or rose water
Instructions
Soaking rice
- Pick and rinse basmati rice in running water till the water runs clear of starch. Soak the rice in 1 cup of water for 30 minutes.
- After 30 minutes drain the rice and set aside.
- When the rice is soaking prep all the veggies and other ingredients. Set aside.
Cooking rice
- Take a deep bottomed pan. Add water and heat the water on a high flame.
- When the water becomes hot, add the salt and following spices: tej patta, green cardamoms, cloves, black cardamom, cinnamon, strands of mace.
- Bring the water to a boil. Then add the soaked basmati rice.
- Just gently stir with a spoon or fork, after you add the soaked rice.
- Do not reduce the flame and continue to cook the rice grains.
- The rice has to be ¾ᵗʰ cooked. The grains should have a slight bite to them when cooked. The rice should not be fully cooked.
- Drain the rice in a colander. Gently fluff and keep aside.
Making vegetable curry/gravy
- In a 2-litre pressure cooker or a pan, heat ghee. Add the following spices – shahjeera, tej patta, green cardamoms, cloves, black cardamom and cinnamon. Sauté the whole spices till they crackle.
- Now add the onions. Stir and sauté them on a low to medium flame.
- Add a pinch of salt to quicken the cooking process.
- When the onions are cooking, take 1 cup fresh curd (yogurt) in a bowl and whisk the curd with a spoon or wired whisk till it become smooth.
- Sauté the onions till they become golden brown or caramelize.
- Then add the ginger-garlic paste and sliced green chillies. You can also finely chop the ginger-garlic and add.
- Sauté till the raw aroma of ginger-garlic goes away.
- Add the turmeric and red chili powder. Stir and mix well.
- Next add the chopped veggies. Sauté for a minute or two.
- Lower the heat and add the whisked curd (yogurt). Stir and mix well as soon as you add the curd. Then add ½ cup water in the pressure cooker. For cooking in a pan, add ¾ cup water.
- Season with salt and mix again.
- Pressure cook for 1 whistle on 3 to 4 minutes on medium heat. If cooking in a pot, then cook until the vegetables are tender. Don’t over cook the vegetables.
- Warm 4 to 5 tablespoons milk in a microwave or in a small pan on the stove top. Add ¼ teaspoon of saffron strands. Stir and keep aside.
- When the pressure settles down on its own, remove the lid and check the gravy.
- If the vegetables are under cooked, then keep the cooker on the stove top and simmer the biryani gravy without the lid, till the vegetables are tender.
- If there is too much of water or stock in the gravy, then simmer until some of the water evaporates and dries up. Note that the vegetable gravy should have a medium or slightly thick consistency and should not be watery.
- Now add cashews, raisins and almonds (blanched or raw) to the vegetable gravy. Mix and stir. Set aside. Do a taste test and check the salt in the vegetable gravy. Add more if needed.
Assembling and layering
- Now in a thick bottomed pan, layer half portion of the vegetable gravy first.
- Then layer half portion of the semi-cooked rice.
- Sprinkle half of the chopped coriander leaves (cilantro), mint leaves and saffron milk.
- Layer the remaining vegetable gravy.
- Layer the last portion of the rice. Sprinkle the remaining coriander leaves, mint leaves, and saffron infused milk on the top. Sprinkle rose water or kewra water.
- You can make 2 layers or 4 layers like I have done. But do note that rice should be the top layer and the vegetable gravy should be the bottom layer.
Dum cooking
- Now seal and secure the pot with an aluminium foil. Then cover with a lid. You can also seal the pan with a moist cotton cloth and then cover with a lid.
- Take a tava/griddle/skillet and heat it on medium flame.
- When the tawa become hot, then lower the flame. Keep the sealed biryani pan on the tawa.
- Keep the flame to the lowest and cook for 30 to 35 minutes. You can dum cook Hyderabadi Vegetable Dum Biryani for the first 15 minutes on a direct low flame and then for the last 10 minutes, place the pan on the hot tawa/skillet and cook on a low heat.
- Once done using a fork or spoon check the bottom layer of the biryani. There should be no liquids at the bottom. If there are liquids, then continue to dum cook for some more time.
- After dum cooking, give a resting time of 5 to 7 minutes and later serve the Hyderabadi Veg Dum Biryani.
Serving Suggestions
- While serving, make sure you equally serve the vegetables as well as the rice.
- There are various sides that pair best with a Veg Dum Biryani. Biryani is usually accompanied with a raita (yogurt dip). You can choose to pair it with Cucumber Raita, Onion Tomato Raita and Boondi Raita, or you could enjoy biryani with any savory raita of your liking.
- You can also pair it with Kachumber Salad (onion-tomato salad), plain Curd (Yogurt), Mango Pickle, some lemon wedges or roasted papad.
- The Hyderabadi Dum Biryani is usually served with Mirchi ka Salan (Green Chilly Curry) and raita. If desired you can serve biryani with a simple soupy Shorba gravy.
- You can also enjoy biryani as it is without any sides or accompaniments.
Storage
- Store the biryani leftovers in your refrigerator for a day only. While reheating steam for 5 minutes in a pan or Instant pot. You could even lightly sauté the biryani stirring frequently in a frying pan or skillet until warm or hot.
Dassana’s Notes
- You could also preheat the oven to 180 degree Celsius/356 degrees Fahrenheit for 15 minutes and bake the dum biryani in the oven for 30 to 40 minutes.
- Remember to use an oven safe glass bowl or casserole dish like the pyrex bowl or use a dutch oven.
- You have to assemble the biryani as mentioned above in the casserole dish or your dutch oven. Seal tightly with aluminium foil or an oven safe heat resistant lid and then bake.
- Ingredients: Do try to use all the ingredients as mentioned in the recipe.
- Rice: Use a good quality basmati rice – preferably aged basmati rice. You can even use Sella Basmati Rice which is parboiled basmati rice (known as sella basmati rice in Hindi and converted basmati rice outside India). For sella basmati rice, you will need to soak the rice grains for an hour. The cooking time will also increase for this variety of basmati rice.
- Cooking of rice: Cook the rice grains till they are ¾ᵗʰ done. They will have a slight bite to them and will be slightly undercooked. Do not cook the rice all the way as they will become mushy by the time the biryani is dum cooked.
- Spices: The lovely fragrance and aroma in a biryani comes from using whole spices. Thus the spices need to be fresh and in their shelf life.
- Curd (Yogurt): Use fresh yogurt that is slightly sweet and not sour. The curd or yogurt should also be made from whole milk. Do not use fat-free yogurt or curd made from toned milk as it will split while cooking.
- Biryani gravy: The curry or gravy for the biryani should have a medium to medium-thick consistency. It should not be watery like a stock or broth as this will lead to the rice becoming mushy or very soft after dum cooking.
- Vegan variation: Use almond milk yogurt or cashew milk yogurt. Replace ghee (clarified butter) with oil. You could use any vegetable oil or neutral tasting oil.
Nutrition
Veg Dum Biryani recipe from the archives was first published on July 2010.

Hi Dassana, is it possible to do a dum style cooking in instant pot using the slow cooker function?
Hi, Pratik, yes, you can make a dum-style biryani in the Instant Pot using the Slow Cook (Low) function. Layer the rice and gravy as usual, then cook for about 40 to 45 minutes.
You can either keep the lid closed and set to Sealing to trap more steam for a dum-like effect, or use a glass lid (or keep the regular lid with the vent on and not sealed) if you prefer lighter steaming.
The texture won’t be exactly like traditional dum, but the flavors come together beautifully.
Thank you Dassana. Appreciate you always replying to every comment
Curious to know why would the texture not be the same?
You’re most welcome, Pratik. The texture won’t be exactly the same because, in traditional dum cooking, the rice and vegetable gravy cook slowly in sealed steam, so the layers absorb flavor differently. In the Instant Pot, everything cooks together more evenly, so the rice turns out a little softer and not as distinctly layered.
This is one of the best veg Hyderabadi dum biryani recipes that I’ve come across in a long time. Thank you Dassana for sharing!
Thank you so much for the kind words. I am really glad you liked the Hyderabadi Veg Dum Biryani recipe.
This is a beautiful recipe!! Thank you so much for sharing!! I made the gravy in the instant pot (3 minutes with natural release), added potatoes and chickpeas, and layer the biryani in a Dutch oven..but your spice measurements were perfect despite the additional ingredients!!! Thank you again for sharing and making my whole family lick their plates clean!
Thank you for.. amazing recipes. I have become a total fan of your recipes.
Thanks a lot.
lovely biriyani dassana – thanks a lot for the recipe
Amazing! One of the best Biryani recipe on the web. Thanks a lot.
Most welcome and thanks a lot.
Really enjoyed your recipes following your step by step is fantastic. Thanks for your guidance and support given to beginners.
Great and thanks for this wonderful feedback. Glad that the step-by-step is helpful.
Amazing Biryani! Even if it is vegetarian, we simply loved it and it tasted way better than the Chicken Biryani I made following a recipe from the internet. The flavors were spot on and as a layered, dum cooked biryani should have ideally.
I also added some canned jackfruit, coupled with the vegetables and a few cremini mushrooms. Absolutely awesome and packed with tons of flavors.
Thanks a lot for this super feedback. So glad. Thanks also for sharing the variations you made and the rating on the recipe.
perfect! was looking for that recipe
I did this veg biryani 2 times step by step according to the recipe. Well, it does take time. Not so easy to get everything right even with enough cooking experience. People love though. Will I do it again? Sure, but on a very special occasion.
This is a dish that goes with a lot of different other dishes. Very easy to make. This is what i call finger licking good.
My best biriyani rice I tried in one of the kerala restaurants, later it was closed and I tried to cook it myself but nothing was even close to that taste. And finally… Ah!!!… Finally something very very similar I found on your magic site. God blesses people who maintains this project ?❤️
Thanks a lot Atmo and glad to read your comment. Thanks also for the best wishes.
I simply love ur recipes. Have seen many food blogs. They have many yummy recipes.
But the thing which makes ur food blogs special is that with yummy taste you take care of nutrition also well. So we can use your recipes in our daily lives and it will take care of nutritional needs.
And i never imagined in my life that i can ever cook such a yummy biryani.
All thanks to you.
Thanks a lot Pooja. Yes we need to cook but also we need to take care of the nutritional aspects of the food that we eat. I am glad this info is helpful. Thanks for the review on the recipe too. Most welcome and happy cooking.
I absolutely crave for this dish almost on a monthly basis. It used to be a daunting task a while back to make this Dum Biryani. Thanks to your AMAZING recipe I can now make this almost any weekday evening. Your recipes are just so wonderful to follow and you make everything so easy by calling out the gotchas, thank you! I am a south indian but my daughter loves north indian dishes so you are my go-to these days. Absolutely love every single recipe of yours. Can never go wrong with them!
This recipe and your Katti roll recipe in particular are the absolute best.
Thanks a lot Jayanthi for the lovely feedback. I am glad that all the tips and notes I share are also helpful. Thanks again for the trust and love. Happy Cooking.
Hi Dassana,
The recent upgrade to your website is really fab and convenient! I’m an ardent fan of yours!! All the best to you and happy cooking ??
Hi Vidya, thank you so much for letting me know. We have implemented many things keeping the blog readers in mind. More changes will be updated on the recipes and blog eventually. Thanks again for your best wishes.
Hello mam ,
I tried your biriyani recipe in 2014 and since then doing it. It has been awesome everytime. Wholehearted thanks to you and your recipe ?. I have a doubt now. Due to time constraint in recent times , i am asking this – can we prepare the biriyani gravy the previous night refrigerat it and then can we cook the rice and dum process next day along with tat gravy ?
Thank you for the feedback. Yes, you can make the gravy a day before and refrigerate it and layer & dum cook the next day. If gravy looks thick after refrigeration, then just add about 2 to 3 tablespoons of water in the gravy and mix well.
I find it very useful thank u so much for sharing this.
Hi Dassana,
We tried this veg Biryani as per exact proportion per your recipe and it turned out very tasty and delicious. We used Chulha for cooking. It was too good.
Thanks for sharing such recipe.Keep it up!!
I do not find use of biryani masala in recipe. I cooked Biryani with readymade biryani masala. It was very tasty.
Hi Ram, thank you for the feedback. The smoky flavors from the chulha must have made the biryani very tasty. In this recipe biryani masala is not added, but you can add it and it will give a nice taste to the biryani. Welcome and happy cooking.
Very nice explanation.
Thank you.
Thank you so much. Since I have seen your receipe I always cook biriyani on weekends. And it turns out to be delicious. My husband’s loves it.
Thanks again for sharing this with such details.
thanks a lot samikshya. so glad to read your feedback on veg biryani. even i make biryani on weekends on occasions. my family too loves this veg biryani recipe. thanks again and happy cooking.
Delicious is the word. Can’t praise more! Awesome style of explaining the recipe that even semi-skilled cook managed to create lovely biryani! Thank you!
lovely! thanks for this awesome review on veg biryani recipe. welcome and happy cooking. thanks for the rating too.
Plz do the recipe of kodubale and nippattu, thank you
yes sure, will try to add the recipes of both kodubale and nippattu.
I am new subscriber to ur blog, but I tried most of your recipes and it’s absolutely perfect and tasty too. Thank u
thanks a lot uma for this lovely feedback. glad to read it. happy cooking.
Perfect one. I tried some of your recipes and it’s really good. Thank u
I like the site as I am North Indian I like cooking South Indian Receipe as well and the receipe in this website are so nice and ellaborate I find it interesting
you have a nice recipe..check mine
Hi
I am new to your blog but am sure will be a follower from now on.
I tried this recipe yesterday and it was amazing. It tasted better than any restaurant biryani!
but the only problem was that the curd had split when i opened the cooker after 1 whistle. It looked like scrambled egg. It didnt affect the taste though.
Could you tell me how i can may be prevent this in the future coz i m defintely going to make this again and again!
Thank you!
thank you preethi. when making any dish with curd, always use curd made from whole milk or homogenized milk. if curd made from toned milk is used, it definitely splits. a suggestion is to cook the veggies first in the cooker. just add enough water. do not add to much water. cook for 1 to 2 whistles. when you open the cooker, then add the curd and mix very well. with this method the curd won’t split. then you can layer the gravy and rice and dum cook biryani. hope this helps.
Hi dassana….i tried this recipe…though i skipped some of the ingredients..it still came out good…I read in the comments that curds can b replaced by cashew paste…can it b replaced by milk???
I thought biryani means layering but wen I saw your tomato biryani recipe m bit confused…kindly tell the difference between pulav n biryanin I tried ur oats cookies n cup cake in airfryer…it came out very well
shubha, both curd and cashew paste are thick so can be added instead of each other. so milk cannot be added as milk has a thin consistency compared to curd or cashew paste.
traditionally biryani is layered and dum cooked. but there are some versions which are not layered but are dum cooked. these biryanis are made in the yakhni or stock. the taste is very good of these yakhni biryanis. yakhni biryani can also be called as a yakhni pulao. i make a mix vegetable variation and i have already shared it on the blog. in south india there are many variations of biryani and most of them are cooked in a pot or pan. so they do come to close to a pulao. a pulao is a simple rice based dish of veggies or meat cooked with spices, onions and herbs.
Oh….thank you dassana for giving detailed information….Three Yrs back i was feeling very low..just to keep me away from negative thoughts i used to surf cooking web….n found yours…I also follow couple of blogs but most of the things I have learnt from here… cooking baking…n more over positive approach…before starting recipes trial I read all comments…it shows ur dedication to ur work….I thank u from bottom of my heart..this recipe I had seen three yrs back..n it reminded me… Stay blessed….
welcome shubha and thank you. always be positive. i know feeling low can happen, but try to have a positive frame of mind. it does help. thanks again. you too stay blessed ????
Pretty! This was an incredibly wonderful post. Thankyou for supplying this information 🙂
Welcome Saucy
Perfect!!
thanks vani
Hi, made the Veg Dum birayani yesterday as per recipe given, i must tell you, if i prepare step by step without any modification, the taste is just amazing, it’s so perfect that it’s better than any known chain restaurant Biryani.. I was content, thnk you so much for the recipe. Just amazing contribution to beginners like me. Thanks again
Welcome Chirag. Glad to know that you liked this vegetable dum biryani recipe. This is the favorite biryani recipe of many readers. Thanks for sharing your positive review.
hi Amit Dassana,
i always follow your recipes as they come out perfect everytime and yours is a blog which i find to be too genuine , honest and neat ( i dont know what i mean here…it is just a feeling about ur blog). But somehow this recipe became a blunder ..tell me where i have gone wrong! i did not chop pudina leaves ..just put it whole and the whole recipe tastes and smells horribly of uncooked pudina. to further add to the disaster are the seeds of cardamom ..black and green coming under the teeth. the taste of biriyani is just mild very mild…except the sourness of the curd i cannot taste anything else. i gave the biriyani dum by layering it in a earthen pot kept on a tawa. i had closed it with dough. also please tell me where i can get organic rice and even the salt which u use is not the regular one. i try to use sendha namak but grinding it is a big issue and i dont trust the storebought powder.pleasee help!
thanks ujala for the lovely words. now for the biryani, pudina leaves should always be chopped. do not add them whole. also do not add the stems. stems can give a bitter taste. if the pudina leaves are very small and tender, then you can keep them whole. if not, then its always better to chop them. the seeds of the black cardamom and green cardamoms do not come out. they are intact. if fried in very hot oil, then the cardamoms pods will burst and the seeds will come out. this is a medium spiced biryani. to make it spicy, you can add more green chilies or use green chilies which are pungent and hot. then even if you use 1 green chili which is hot, it will make the biryani spicy. you can also add more red chilli powder.
i buy organic basmati rice from amazon. i use organic rock salt and its already powdered. organic rock salt i buy from big baazar. there are two to three brands that sell organic rock salt. i have tried all of them and they are good.
Awesome recipes. All recipes too good. Thnku so much.
Welcome Vaishali
Hi Dassana, I enjoy cooking for my wife and this was the perfect receipe. We don’t have many options for a veggie biryani here in Canada.
Followed your steps and the biryani turned great. She took it to work the next day znd now her colleagues are coming over this long weekend for some Indian food and specially the biryani. Thank you for your efforts and the receipe.
Welcome Rishi. Glad to know that you liked the veg biryani recipe. It is one of the most popular biryani recipe.
Hi Dassana,
My previous forays to make a dum biryani have been quite unsuccessful so I was extremely apprehensive to try this recipe. I used the baking method and played around with your recipe. It was delicious. Your recipes always come to my rescue. Thanks a lot 🙂
Welcome. Glad to know that this veg biryani recipe worked for you. Thanks for sharing your positive feedback.
Hi Dassana,
I’m a big fan of your recipes ????????
I’m planning to make this biryani tomorrow. How do you suggest i cover the glass bowl when cooking it in the oven? Do i use only aluminium foil to cover it or anything else to be done? Pl suggest. Thanks.
Anuradha
thanks anuradha. you can just cover the glass bowl with aluminium foil. just make sure that the edges of the bowl are sealed well. i have also made biryani in glass bowls and i seal the edges well. i don’t do anything else.
Tried this today. Came out very well
Thank you so much
Welcome Mini
Hi, I made this at home today and was well appreciatedby all.Thank you for the amazing recipe. It came through a bit spicier than i thought as a result of using chillis in two different places (green chilli and chilli powder)
–
Nandakumar
Nandakumar, nice to know this. try to use green chillies and red chilli powder which have low to medium heat and pungency. then the food does not become spicy.
Beautiful recipe as always. Hats off to you. Have tried so many recipes of urs dassna and all of them come out beautifully with perfect taste and texture.. thank you so much.. u r s best..
Welcome Mishi. Glad to know this. Thanks for sharing positive feedback on recipes.
The recipe with step by step pictures was very helpful. The dish turned out to be exactly like in the picture and the taste was divine like the paradise biryani in Hyderabad. Thank you
Welcome Padmaja. Glad to know that you liked the hyderabadi veg biryani recipe.
Amazingly explained recipe. I really like the way you explain. I always follow your recipes wherever I want to try new dishes. Thanks.
Welcome Madhura. Glad to know this.
Hi, Your directions are thorough and your pics look lovely! I am definitely going to try this. A wonderful way to incorporate more vegetarian meals that still keep you feeling full. Thanks!
Welcome Saima. Glad to know that you like the recipe presentation.
Hi! Am planning to make this biryani for my kitty party.Have tried your tawa pulao recipes a couple of times ; everytime I make it ,it turns out more yummier and is always a hit in the parties.Just wanted to enquire how do we go about sealing the pot while cooking it in the air fryer.Wud be glad if you could suggest if this biryani can be served along with mango raita?
thanks a lot poonam. nice to read your comment. i have no idea how to seal the pot while cooking in an air fryer. usually when i cook anything in it, i keep the food open. with mango raita, this biryani won’t pair well. the sweetness of the mango will not compliment the taste and flavors of hyderabadi veg biryani. instead you can make boondi raita, onion-tomato raita, cucumber raita or mirchi ka salan. though preparing mirchi ka salan also takes time.
Hello Dassanaji,
I love to cook and have been following your site closely.I was always afraid of making any kind of biryani thinking it will never come out good.But then I tried your veg .hyderabadi biryani and it came out well.The pics.that you include are very helpful.I am a vegetarian and my husband a staunch non.veg..and very particular about food.I have to keep working on my cooking skills and I thought I had very little.I am thankful to you for giving me that confidence that veg.receipes can be equally good and I can master that skill with patience and impress others with it.Thank you so much…
so nice to read your comment shilpi. thanks. cooking is an art and in due course of time you will learn it very well. it just requires practice and patience. vegetarian recipes also taste good and there are many ways you can make a single dish. wish you all the best in your life as well as in your cooking journey.
Excellent. I usually make Aloo Biryani.(rating: 5 stars)This time as a change I chose the veg biryani receipe and everyone loved it. They have rated it as better than restaurant biryani.Thank you..?☺
Welcome Ranjini. Thanks for your positive feedback on biryani recipe. Glad to know that everyone liked the biryani.
I’ve made this biryani so many time now…and its always a winner! The only change I made is that I don’t cook it on the tava…I’ve cooked it on a low heat directly on the stove for 20 minutes and it turns out great each and every time. Dasanna you a truly a gifted cook and you’ve surely got magic hands! Much love and good wishes!
thank you much Yogita. glad to read your words. wish you also good wishes. hugs ?
Amazingly explained, awesome photos. Your biryani recipe is truely an inspiration to try it. Loved it in everyway.
Thanks Smita for your kind words.
hello from canada. thank you so much for this recipe! i had been looking high and low for a proper biryani recipe and this was definitely it! your instructions were clear and detailed and i appreciate your effort a lot, especially since this was my first attempt at indian food.
the only changes i made were using coconut oil instead of ghee and scotch bonnets instead of green chilies because i had those things on hand. it came out beautifully and i can’t wait to try another one of your recipes
welcome jessica. thanks for sharing your positive feedback on biryani. feel free to ask any query about indian cooking, if any.
tempting photos…. a quick question… do I have to seal with aluminum foil if I am baking it?
if baking, then seal pan with aluminium foil.
I have never seen a person explaining biryani recipe like this way. You didnt miss a single step and honestly , that was the only thing that inspired me to make this dish.
But i was so dissapointed.although tge measurements were just as u described here but my gravy’s colir went dark and the taste was more bitter and it felt like something was missing but i couldnt figure it out.
The only difference that i made was grinding the whole spices coz my family just doesn’t like picking out those things in their biryani although its such a necessary thing you’ll find in eveey biryani.. i m honestly afraid to follow any other recipe coz it was a disaster…sorry if it makes u feel bad but i thought i should share my bad experience . Maybe someone out there dont repeat that mistake that i did or u can point out what went wrong!!!
Thanks Aks for your encouraging words. When you powder the spices, you have to use less amount. If you don’t want spices coming in the mouth then when cooking the rice, tie the spices in a small muslin cloth and cook the biryani with this small spice bag. For the gravy, reduce the spices and grind them. Alternatively you can skip the whole spices in the gravy and add about 1/2 teaspoon garam masala powder. But the taste will change slightly. Do check this lucknowi biryani where all the spices are removed – https://www.vegrecipesofindia.com/awadhi-biryani-recipe-lucknowi-biryani/
Hi,
While cooking the rice i forget to add salt. What can be done now so that my biryani tastes good.
Looking for quick response.
Thanks.
Priyanka, now nothing can be done.
hi dassana! sorry to point it out but there seems to be typo error.the quanity of whole spices for cooking rice in the ingredient list is different than the one in the cooking method.
thanks meveera for pointing out. i will make the changes. it is a typo error. thanks again. if there is any typo error in the recipe, you can always let me know. no issues with that and please don’t feel sorry ?
Hi dassana,
A big thanks to u dear,tried n learned all new recipes from u only n they were amazing to,I really liked the method of pictures step by step given so everything goes perfect n smoothly, I tried this biryani n it was yummy…keep posting dear
thanks pritee for this lovely feedback on the biryani as well as other recipes. welcome and happy cooking.
Hey,
Wow, very nice recipe. Could you please suggest me a pan/ kadai that I should use to make Biryani, I am afraid that the veggies might get burnt.
Thanks
neha, use a steel thick and sandwiched bottom kadai or pan. also keep the pan on a tawa, so that heat is not directly transferred. cook on a low flame. the tawa is kept on the burner and the pan or kadai is kept on the tawa. doing this does not burn the biryani. you can also use a pressure cooker. just cover the pressure cooker with a moist kitchen cotton cloth and keep a lid on top of it.
Great recipe got lots of compliments
thanks zeenat and nice to know.
very yummy recipy… today i suggest my mother to make this recipy.. its become funtastic at first attempt… thanks Dasanna for beautifull & delicious recipy .
thats nice to know mohan. thanks a lot for this feedback.
hi dassana… agree that using foil is very convenient… i find that to remove the aata.. use a knife to scrape it off. also greasing the rim of the vessel n lid with little oil may help.
thanks for the word “dhungar” … i was almost tearing my hair apart thinking what it is. and please do trybit on hyderabadi biryani.. i dont think you will regret it
i use knife only to scrape it. greasing the vessel with oil is a good idea. dhungar can be used in many recipes for a smoky flavour. i will try dhungar method on hyderabadi biryani. i am sure it will taste very good. thanks divya.
Dear Dassana
Thank you very much for posting this recipe! I have made it Biryani a few times and was a hit every time! I really like the pictures of each step so there is no chance anyone can go wrong.
I don’t have dum. I bake it in a large corningware square pot in an oven at 350 degrees for 40 min.
I am going to make it soon for a family visiting us.
thanks a lot varsha for this feedback. biryani can be easily baked in an oven if not able to dum cook on stove top. even i dum cook biryani in oven at times. thanks again.
thanks kalpana.
another suggestion dassana.. dont know if you already have shown this, but may be you could add a picture or two showing ppl what the traditional dum really is. afterall most people do have some roti ka aata at hand always!!! (and i really dont think it is all that tideous!!!!)
again thanks divya. usually i use a foil or a wet cloth. but traditionally atta is used. you are right – i should show this way too. not shown this method till now as i do not use atta. when it dries, it becomes to difficult to clean the lid as well as the pan. so for the sake of ease and convenience i use foil or a wet kitchen towel. will see if i can add this method in some other biryani recipe i will post. currently i have some biryani recipes in drafts and in none of them i have used atta.
dassana.. since you are in india… try doing this as a last step…
heat ghee til melted in a small steel bowl. take a piece of charcoal/coal/koyla n heat it till red hot on the flame. put the piece of coal in the hot/warm melted ghee n place the bowl on the biryani n cover. the biryani with its lid for about 45 seconds… ( i hope you can imagine what i am.saying)… this adds a zing to the biryani. you may not be able to use the katora/bowl again but you wont regret it….
unfortunately where i am i do not have a dhobi bhaiya from whom i can borrow a small piece of coal!! plus am sure my fire alarms would go off leaving me in trouble!!!
thanks divya. i know this technique. its called as dhungar. i do it for dal makhani and dal tadka and some time some paneer or veg gravy dishes to get the restaurant type charcoal smokey flavour. i have some coal at home. had got from a local coal wholesale dealer. if you were here, i would have given you some. thanks for this suggestion. i have never tried in biryani. but will give a try. i am sure the flavour will be very good.
OMG! Such a perfect and tasty recepie. I tried it, this is sooo yummy……
thanks for this feedback anam.
Super recipe, Amit. Turned out to be PERFECT. Thank you so much.
thanks rajeev for the feedback on veg biryani recipe. welcome.
great recipe, thank you! all your recipes always turn out brilliantly, i love this site
(PS: just to mention, the green chillis aren’t included in the ingredient list at the top)
thanks a lot fionnuala. will update about the green chilies in the list. thanks for letting me know.
Awesome effort . No one can do like you . This is my first time first review for cooking . Great effort .
thanks a lot sree.
dassana ,kohinoor trophy royal or gold not available near my store .I can see kohinoor platinum extra long ,daawat super india gate super,Rozzana india gate tibar etc …suggest me few and how long I have to soak..is soaking time is same for all…
shree, most these basmati rice need to be soaked for 20 to 30 minutes only. you can follow the instuctions on the pack. i have used rozana, but i did not like it as i felt less aromatic. you can try kohinoor platinum or dawaat super. i have used kohinoor platinum before and it worked well for biryani. before using in biryani, just make steamed rice to go with some dal or curry. this will you will get an idea if the rice is good for a biryani.
dasanna how many liters of steel handi required to dum cook three hundred grams of biryani..and how to select the handi like size ,thickness ,material type of handi and handi bottom shape..thank you for sharing wonderful recipe.
i think and i am guessing here, a 4 to 5 litre handi should be fine. use a thick bottomed pan or a sandwiched bottom pan. steel is a good option. but with steel there are chances of the food getting stuck at the bottom. so you have to really buy a good quality one. it should be heavy to hold. aluminium is a safe bet as it conducts heat evenly. other than that there are cast iron pans which are also good and are also clay based handis or pans. but one has to maintain both cast iron and clay handis well. they need care and maintenance. the shape can be like a regular handi or a dekhchi.
Hi!
I made this twice and just loved it!! It is so yummy..
I wanted to make this again for a potluck but found out tat one of the friend is a vegan.. so is there any substitute I can use for curd and milk? Want to make this for Saturday, Tomorrow..
Thanks in advance!
lalita thanks for your positive views 🙂 you can substitute cashew paste instead of curd and milk. surely try and do share your feedback.
Thank u so much! How much cashew paste should I substitute for 1 cup of curd?
welcome lalita. you can use 1/2 cup cashew paste. then add water as required for the veggies to cook as cashew paste will thicken more while cooking. i forgot to mention that you can also use thick coconut milk. if using thick coconut milk, then add 1 cup.
awesome recipe ma’am… came out very well… my family members enjoyed it a lot
the instructions were crisp and clear… the photos were of immense help
thanks a lot sanjai for this lovely feedback on the veg biryani recipe. glad to know.
Tried making out this biryani and it was delicious. Thanks a lot for such a nice and tasty recipe 🙂
welcome lovi, thanks for sharing positive feedback 🙂
Best biryani recipe I have found by far. GORGEOUS flavour, and the rose water and mace add so much. Thank you.
glad to know you liked the veg biryani recipe mafflinley 🙂 thank you for your positive views. you are always welcome.
Hello, can you please explain why should at the end pot (handi) be put on hot tawa and not just on medium flame? I use electric cooker, not gas, can I just put handi (pot) on medium flame or I have to use tawa?
thats coz as the biryani may get burnt from the bottom if directly placed on flame. better to use a tawa, just to be on safer side. if the biryani get burnt, then all the flavors are ruined in it and a burnt biryani does not taste good.
I tried Hyderabadi biryani and it was too good..thank you so much
thanks aastha for this feedback.
Very nice suggestions with photos. Helpful to beginners like me
glad to know this thankyou raghava 🙂
It seems delicious…i m definitely going to try this out… thanks for sharing…
welcome ibrahim surely try and let us know how it was? thanks.
Hi.. I tried this veg biriyani.. it was superb, awesome…taste…. thanks for sharing awesome recipes…. thank you soooooo.. much
welcome roopa and thankyou.
Thank you for this recipe. I made it today and it was amazing!
thankyou alex 🙂
vry nice i’ll try it.
surely try shifa and let us know how it was thanks.
Salam Authentic recipe!!..iam from Hyderabad and this is how we do it!!..:)
thanks a lot uzma for confirming the authenticity of the recipe 🙂
Hey, this is such great recepie . My father loves dum Hyderabadi biryani and last night when I cooked it for him and not just him but everyone else loved it… thankyou for making the recepie so simple and amazing!
thankyou for your positive and kind words ashwini 🙂 and you are welcome.
Hi Dasanna. Thank you for sharing this veg biryani recipe . It is truly educational , very inspiring . I just am going to try this recipe right away. The pictures are beautiful .
thankyou anju 🙂 for your kind words, surely try the veg biryani and let us know how it was?
Hi Dasanna, i am a follower of your recipes and i have tried many of your recipes already. Want to try the Veg dum pukht biryani this weekend. Can i avoid garlic? we do not take garlic in our house. i always avoid garlic from your recipes and its not affected the taste so much, but not sure of the biryani.
Please suggest
thanks preeti. you can skip garlic. some taste will change. but no issues as overall the taste will be good.
Nice recipes
Good
Tried this recipe…came out to be fantastic..thanks a lot
Simply superb, I prepared this last night and it came out quite well, not authentic as shown in the pictures, but yeah…it tasted and smelled good. Many thanks for the post.
welcome trinath. glad to know that you liked the veg biryani recipe.
Hi mam,
H r u? Am new to cooking…ur web helps a lot and u r dng a great work.. Did I need to mix veggies and rice after steam.r
you don’t need to mix. you need to layer them. make a layer of the veg gravy and then add the rice and make an even layer of the rice.
Hi,
Made the Veg Biryani last night and it turned out awesome!!!! My husband said that this was by far the best Veg Biryani he has had. Even my kids relished it.
Thank you so much for sharing this recipe.
Arti
welcome always arti 🙂 pleased to know your husband and kids liked the veg biryani recipe. thankyou for your kind words.
I am Anand. I tried your Veg Hyderabadi Briyani receipe and it came out well. Thanks for sharing it.
welcome and thankyou so much anandan 🙂
I tried ur pressure cooker veg biriyani for the first time.usually I make normal kind of biriyanis.but this recipe in pressure cooker turned out well n it was easy within few minutes!thanx
thanks a lot soumya for this positive feedback. glad to know 🙂
Hi, very well explained with clear pictures. You have a very good way of explaining the recipes.
The recipe itself is also great. Very authentic. Since I don’t like nuts in my food, I skipped that part but the biryani came out great.
Keep it up. Great Job!!
pleased to know this anik glad you liked the biryani 🙂 thankyou for your kind words.
If i am cooking the rice on a pressure cooker, whats the water ratio n how many whistles required?
for 1.5 cups pre-soaked rice, take 2 to 2.25 cups water and pressure cook for 1 whistle. if there is any excess water in the cooker, then strain the rice in a colander.
Mam, very good recipe you have shared . exact this recipe I had learned when I was in college . once again very good !!
Thanks Ketu Dresswala for sharing your experience.
Awesome
thanks anamika.
Delicious….. My husband is very choosy for food but he loved this recipe of Biryani…
Though i had no ginger n cloves yet it worked;)
Thanks
thanks pallavi for sharing your experience. its alright to skip ginger and cloves.
Soooo awesome! Made it today and it was soooo yummy! I love the way you describe, that its soo easy to just view and cook simultaneously. Love all your recipes and I know for sure that when learn from you it cannot go wrong.. thanks a ton
thank you shilpa. glad to know.
Hello,ma’m can i skip rose water or kewra water ur recipes r superb
sweety you could skip the kewra water but the fragrance would be missing then. hope this help’s you and you are welcome.
Hi Dasanna,
I have been trying many your receipies and enjoying the way.
Thanks.
welcome always manasi and thankyou 🙂
Dear dassana i have been regularly following ur recipes n whenever i need one i directly come here…!!!..thank u for ur amazing ,simple and tasty recipes..i once had tasted authentic hyderabadi biryani brought by my frnd which tasted very tempting.I have been trying to cook authentic biryani for quite sometime in a similar manner of layering the rice but i failed to get that restaurant style taste which comes out very delicious n tempting ,also the flavour of the veggies does not enter into my rice n it feels a bit tasteless like normal rice..cud u plzz help me wid this part.thnk u.
thanks manisha. if the vegetable gravy becomes thin, then the veggies do not get the flavor of the spices and herbs. also the rice becomes mushy and tastes like normal cooked rice. i guess this must be the issue. you can try this restaurant style biryani recipe and its also a fool proof one. gives good results – https://www.vegrecipesofindia.com/restaurant-style-veg-dum-biryani-recipe/
What a lovely recepie Dear Dassana. …. made it first time today. ..nd it turned out superb nd delicious. … everybody praised me for this fabulous dish..thanks a lot?
glad to know this samreen 🙂 thankyou for trying so many cakes and you are always welcome.
Thanking u so much my daughter loved this a lot….??its so systematic steps that we can easily prepare this recipe thanqu u so much ?????
glad to know this sunit and you are welcome 🙂
Awesome blog… Explanation with pics very good idea for freshers….
thankyou so much taslima 🙂
Nice recipe. The explanation is very good.
thankyou prasanna 🙂
Hi Dassana, Thank you so much for your great blog! It’s been a great help to me after marriage. The pictures are really helpful. I really appreciate the effort that you put into your blog.
I had one doubt with this recipe. I followed the steps as you mentioned. However when I tried by covering with a damp cloth plus I used aluminum foil after 15 mins there was some steam escaping. I tried to cover it but it didn’t really work. So what is the best thing I should do in this case when in really want to make it authentically.
thanks vidya. steam should not escape if you seal the foil very well. from the damp cloth some steam will escape due to the porousness of the fabric. but when you cover it tightly with a lid or foil, the steam won’t escape. seal the foil from the edges. or what you can do is, cover the foil and seal tightly from the edges and cover the pan with its lid.
Thanks for the nice recipe
welcome shaista 🙂
Hello Dassana thanks for posting such delicious recipes. I am a great fan of your blog. To all the food lovers like me its wise to eat healthy.
thankyou so much dr anuradha 🙂
I appreciate the efforts you have taken to describe this recepie in-depth..I tried it today..n it is yummy..it is a delicious blend of spices n aroma
pleased to know this kavita you liked the veg biryani 🙂
Sir,what a fantastic taste. Keep it up.Ii was waiting for this type of recepi. Tnanks a lot.
welcome.
excellent recipe…awesome..loved it
thanks akshat
Hey made it one more time ….. last I had made it in 2013 and now again in 2015 …things got more better did tym…thanks a ton it came out as wonderful as an
original one…..I am very grateful to you God bless you Dassana ..you r really great at your recipes
welcome maddy. nice to know this. thanks for sharing your positive feedback and prayers.
Hi Dasanna,
Thanks so much for the wonderful recipe.. though I am from Hyd. I prepare mutton or chicken dum biryani. Never thought of preparing veg biryani; moreover dum veg biryani ! Thought – okei let me try… Wow ! superb ! It came out so well. When the aroma spread thru out the house, everyone at home started saying – how come biryani all of a sudden ! But when I served the food, my family was surprised and they all loved the taste. I prepared it awesome…
No, I am not blowing my trumpet. All credit goes to you… I appreciate your patience in putting up the pictures and explaining the step by step process.. Amazing talent you have. Above all, the patience and endurance to prepare, take pictures and post it… 🙂 Hatz off to you..
It is bcoz you have put your very heart and soul into the preparation that it came out sooooooo well for me.
Thank You.. my heart felt thanks to you again…
Keep going.. May the Lord bless all the works of your hand…
Just bcoz you are there, we are here trying out recipes and satisfying the palate of our families…
When you visit Bangalore, plz do visit me, I will prepare Veg Biryani for you too… lolzzz
With lots of appreciation and thanks <3
Asha
welcome asha. i am so glad and touched to read your positive feedback on hyderabadi veg biryani. credit goes to you also as it needs experience to make biryani even after following the recipe. thank a lot for your kind words, invitation and prayer. happy cooking
Hi,
Would like to first thank you for posting such wonderful recipes . Have tried quite a few and most of them turned out to be good in the first instance itself. This one turned out to be just awesome and in the first try (added a little too much of chilli powder so it was a little spicy ,but still was awesome). All your recipes are clear and easy to perceive . Looking forward to many more varied recipes from you.And as for trying new recipes ,your blog will always be my first choice .Good luck to you and appreciate your effort.
thanks shalini for sharing positive feedback on recipes. glad to know that you like the blog and the recipes posted.
Will i have to cover baking pan for making dum biryani in convection microwave?
yes. cover with an aluminium foil or a convection baking safe lid.
Thank you so much for sharing this awesome recipes. Picture directions helps mor.. Thanks again 🙂
welcome chitra. thanks for sharing positive feedback.
good and simple recipe. my wife read and ready the biryani. thanks
welcome sudipta
Dassana,
Great clear instructions, I never cook and I tried it first time and it came out great.
It taste exactly as it is in restaurant even though I made some mistakes.
Thanks for your time , you have wrote recipe with your soul in it.
Thanks,
Shailesh
welcome shailesh. glad to know this. thanks for your kind words and positive feedback.
Hubby said… “Its the best you have ever made”… my heart jumped with joy 🙂 Feeling confident to try more recipes… Thaaaank You :*
welcome vaishali. thanks for sharing your positive feedback. glad to know this.
I tried the recipe it was too yummy ♥
thanks ankita
Very nice recipes and perfect.. This blog is very helpful awsome…
thanks nitin
Hi,
Amit..thanku very much..every one enjoyed biryani..and paneer korma..bless u good health n wish everything good in ur future..
welcome vandana. glad to know this. thanks for sharing positive feedback and for your prayers.
Hi… your recipes are awesome and so accurate. Whatever I make using your recipes turns out really well. The details ate so helpful. Just love your blog.
Thanks alot.
welcome tanvir. glad to know this. thanks for sharing positive feedback.
hi can we do this with brown basmathi rice?
yes you can make. but it will take more time to cook than with white rice.
Excellent !! We had a lovely meal . Thanks to you
welcome abinaya
I will try…the procedure is good. I am very much interested in cooking
I have been trying to learn biryani for a very long time, I have tried to make biryani for quite a lot of times and it never came fine…infact it always used to be a disaster. But i followed your recipe step by step, and for the first time it came out to be wonderful. It tasted just awesome. thanks for the wonderful and a very detailed and elaborate recipes.
welcome mahashweta. thanks for sharing your positive feedback on veg biryani.
I made it, It was awesome
Gr8 taste
thanks sanjay
Awsm food and thank u…..bohat ache se elaborate karne ke liye thank u
welcome sahnaj. thanks for your positive feedback.
Hello Dassana,
This blog is a wonderful work by you. Recipes with pictures are a great help. And this recipe of yours got Hit in my family. I added marinated Paneer as you have mentioned in Paneer biriyani recipe into this veg biriyani recipe. It came out to be very good. Such a flovourful recipe. Thank you very much. God bless you.
welcome guneet. thats good to know. thanks for sharing positive feedback and for your wishes.
Very well explained- especially the Dum part. After having tried it, i though the quantity of gravy and spice was very less compared to the rice. May be this would work better for 1 cup of rice instead of 1.5 cup as recommended.
thanks vipin. the gravy as well as the biryani is not too much spiced. whenever i make this biryani, i find a balance of gravy and rice. so not sure why the gravy became less. could be that the gravy was more on the thicker side and well dum cooking, it got dried more.
Hi dassana.
Very nic recpie.this weekend i m going to make this.i lov ur blog bcoz of pictorial details and second many of ur north indian recpies are lik my mom in law used to make.thnks dear
welcome shallu. glad to know this. thanks for sharing your positive feedback on recipes.
Hi dassana…recipe seems to b amazing ….even I love cooking n I have prepared hyderabadi biryani on dum many a times.. juz a suggestion if u add everest biryani masala it will taste more better…
thanks pooja for sharing your tip.
Cooking in aluminium vessels is unhealthy & not recommended. Healthiest is the old fashioned way in any of the following: a cast iron vessel, a kalai handi, clay pot or surgical grade stainless steel vessel.
However, your recipe is just great; am trying it out today.
thanks kalpana for suggestion. i agree with you.
Firstly vry nice recipe…actually i jst want to ask u i thing. Which rice should i use??? Which is the bst
thanks madhura. basmati rice is good. use a good quality long grained basmati rice.
I have no words to explain,cheering face of my son when he take briyani. You explain step by step that is grate job.thank you very much from the core of my heart.bacche khush to mummy khush.god bless u.thanks again
welcome rama. thanks for sharing this sweet feedback. i agree with you totally.
Your Recipes are very tasty and the steps with pictures, makes our task of cooking v easy.
Small tips in between the recipes are very handy.
Thanks a lot
welcome bina. thanks for sharing positive feedback. glad to know this.
i have tried many of your recipes.. all of them have come out really well.. today i have tried this biryani… i should really thank you for putting up all these recipes.. and describing the process so well, step by step.. makes it very easy to cook
welcome priyanka. big thanks for sharing positive review on recipes. glad to read your positive words.
I followed the same steps as you mentioned. It came out really well. Thank you for the descriptive steps.
welcome usha. glad to know.
Recipe looks easy and good. Wish to learn a lot of veg cuisines. Please do keep posting recipes on my email
wow this recipe is amazing right now i’m preparing it i hope it comes well
thanks shri
Food should not only fill stomach but also heart…
Thanks buddy
welcome rahul
The recipe is written well.. all the measurements/quantities for the recipe have worked well and just right. 🙂
Thank you !
welcome lakshmi. glad to know that you liked the recipe.
it is awesome i just tried great taste.
thanks ashish
hi mam,
I tried your hyderabadi dum biryani. it was a super hit. my husband liked it the most. really thankful to you for such a lovely and detailed recipe made simple for us.
Thank u once again.
welcome roshani. thanks for sharing your experience. glad to know this.
I tried today & Biriyani came out superb…. My family loved it. Your recipe & steps explained are simply excellent. Thankyou!!!!
welcome radhika. glad to know this.
All your recipes are superb with proper quanity and illustrations, thanks, i tried several of them, very easy to follow, thanks
welcome zeenat. thanks for sharing positive feedback on recipes.
This recipe is aaawesome. All the steps are very clearly mentioned and I am going to try it for sure.
thanks padamshree
Awessommme…tried this recipe twice. Came out very well…beyond words…
thanks hina for this positive feedback.
I am tired of trying recipes for biryani…..outside hotels I don’t like them! I’m fussy! 😉 your recipe is simply fantastic!!!!! This is the 2nd time I’ve done it ..it’s super duper super!!
Zillion thanks!
welcome vasanti. thanks for sharing your positive feedback.
Nice recipe I will try to prepare as early as I can.
thanks aqsa
I used your recipe and it worked well, Biryani came out tasty the only thing is rice got overcooked and little too moist. What do u think I can do to avoid that in future….add little less water while boiling? Fully Dry the veggies before mixing? And add one a spoon of milk? Pls suggest
okay. the texture of rice is important in a biryani. usually what i do is i cook the rice in enough water and then strain the rice when they are 3/4th cooked. i use a strainer for this. for eg 1 cup of rice, i take 3 to 4 cups of water. then rinse the rice in water, so that they stop cooking. cover the rice and add when making the layers. done this way the rice gets a perfect texture by the time the biryani is dum cooked.
Hi,
Thanks for sharing this recipe. I’m going to try it out tonight for dinner. Just wanted you to clarify, how much milk do I need to warm up before adding saffron and curd? I understand that one adds spoonfuls of the saffron-milk mixture to the cooked veggies and then later on during the layering stage on the rice. But how much milk does one need to begin with? The recipe says 1 tbsp milk. How does one boil 1 tbsp milk!
welcome. you don’t need to boil 1 tbsp milk. the milk just needs to be warmed. you can also add 2 to 3 tbsp of milk and skip the yogurt. i just add the milk in a small microwave safe bowl and warm in the microwave. you can also add 2 tbsp milk along with the yogurt.
I was wondering if it will make a big difference if I don’t add Cauliflower (Gobi)? Its christmas day, mom and I decided to make this last minute and walmart is closed so its not possible to find gobi. Please let me know soon. Thank you.
Late in replying. Firstly season’greetings to you. You can skip cauliflower.
HI…..I tried your dum biryani and it was super yummy…..thanks a lot for wonderful recipe
welcome ankita. glad to know this.
This is amazing. Biriyani and that too veg. Now I can serve this to my vegetarians guests.
thanks anusia
U Means 1 tbsp milk taking from the mixture of saffron and milk….
Bcz 1 tbsp milk how to boil it..
warm the milk in a small bowl or microwave oven. you can also add 2 to 3 tbsp milk and skip the curd. or add 2 tbsp milk along with the curd.
Hi dassana ;
am little confused about quantity of milk and curd in assembling…
Help me..
and one more que.
Any other option of pudina..
sunil, take about 5-6 tbsp of curd and 1 tbsp of milk for assembling the biryani. no option for pudina, skip it or you can use dried pudina leaves.
good
Thanku dassana……I love ur site…. Till date whatever I have tried has turned out awsome… N I just love this biryani… best one dat I have ever had… N d way u write it down for us… That evn beginners can do it well…. Thanku sooo much…
welcome khushbu. glad to know this. thanks for sharing positive feedback.
Hi Dassana,
Tried your veg biryani yesterday. Same taste as restaurant’s. Loved the flavours. Just had 1 problem I am jain so I added only few vegetables(no onion, garlic, or potato). It was a bit less gravy, hence dry. So what can I do to make more gravy.
thanks pooja. you can add some more curd and may be an extra tomato. this will give some more gravy.
If i use oil instead of ghee will there be any changes in the quantity of oil used?
natasha, use same quantity of oil. no change.
Super..just awesome taste, did it exactly the way its give and came out very nice and fluffy… only one enhancement i would try next time is make layers of veggies and rice, so the masala is a little more spread allover.
thanks for the feedback sowjanya.
Hey is it ok to omit the nuts and rasins?? No one in my family likes them much.
you can omit the dry fruits.
I am very interesting in your biriyani recipes
Thanks for the great instructions. I am six months pregnant and have been craving good biryani. Would have to visit a restaurant for the same. I checked your site and found this recipe. I followed it step by step and came out with an amazing dish. And it was so easy. I couldn’t believe it. I have also tried other recipes like the kaju katli and mixed veg and the taste is always great. Please do continue posting new recipes.
welcome ami. glad to know that you cook delicious biryani at home. take care of your health. stay happy, eat healthy, listen good soothing music and read spiritual books.
Hi I tried yr recipe it’s come sooo well….my family liked very much ….. Thanks
welcome pankti
Very good
Thank you for sharing this recipe. I have always loved hyd biriyani and am going to make this over the weekend. I just have a question abt the vessel you used, I do not have a handi shaped aluminum vessel but I do have a steel one…does the vessel make any difference
Many Thanks
Lalitha
you can use the steel handi, which you have. yes it does make a difference to the final flavor of food. not only the shape but also the kind of material used. for eg food made in steel tastes different than one made in aluminium or iron or non stick pans. food made in clay pots taste totally different, then one made in steel pans.
Very nice recipe
thanks.
is it necessary to use mace….dont think i will find it in north also i wont use it for anything else so will go waste…..
skip if you don’t have mace.
Hi, This recipe look amazing.
I am going to try making it this weekend.
I have a question about mushrooms.
I saw that the photo has mushrooms in it,
but I didn’t see mushrooms listed in the ingredients.
mushrooms are optional. i will add in the post. you can add about 5 to 6 button mushrooms.
Thanks! I’m so excited to try this recipe.
welcome kanwal
Very Nice Recipe. Thanks for sharing.
I used ITC’s Vegitable Biryani masala for preparing the gravy.
The biryani comes out to be better than restaurant.
thanks for the feedback amol.
Hi i tried and was awsome with slight variation
before adding vegtables add 1 cup mint /pudina paste ,1/2 cupgreen coriander/khothimbir paste and 1/2 cup green chili paste as per taste stir for a minute and ten add vegetables and cook the veg.
thanks for sharing this tip. will help other readers too.
Hi tryed diz biriyani 2dy for diwali it came out well n thnx 4 it…
thanks for the feedback.
Thanks a lot for this awesome recipe. I tried it today and it came out awesome and my children loved it!!
welcome bindu. glad to know this.
I tried your recipe with my mom. Kudos to you for sharing this wonderful Biryani recipe with us. This one perfect recipe. No need to search here and there for other recipes. Go for it.
thats nice to know shishir. thanks for the feedback.
Hi,
I’d like to make you aware that this recipe has been copied at – rekhaaskitchen blog
Your blog’s great !
thanks a lot for letting me know. as per internet ethics the blogger should give a credit link to the original recipe. but many new bloggers are not aware of these rules… so they make this mistake unknowingly. here, the blogger is still honest to mention the blog name. many bloggers don’t even do that. let focus our time and energy on doing constructive things. happy cooking.
Really a great veg biryani recipe…
thanks amruthavalli
Dassana
Great Receipe,.Couple of things. How do I confirm that I have not overcooked the rice so that the grains are just like in your photos, separate and lovely. Also should we add water in the Tava on which we are placing the Handi.
thanks. for the rice grains, you can check their texture by tasting them. if the grains give you a slight bite, that means they are 3/4 cooked. grains cooked completely are soft on the palette and you don’t feel the bite. even pressing the rice grains will give you an idea of the texture. no need to add water on the tava.
I really love your blog. I am following your blog..the pics are so beautiful that i start doing the recipes as soon as u post them. happy to say that even I am a good cook.thanks and expecting more rare recipes from u.
thanks a lot ramya. whenever i get time, i update the recipes. so do check and happy cooking.
Hi Dassana!!
I would love to make this recipe and am looking forward to making it tmrw! Im pretty much a beginner and im so glad ive come across your website….this just may be the first of your recipes ill try!! I hav a couple questions
1. How do u kno wen the rice has been cooked 3/4 or enough for the initial part of the recipe? I am afraid ill overcook it, or even undercook it hehe. (I hav never made biryani before btw).
2. When the rice is done in that initial part, do u remove all of those spices that u put in there? Or do u add all of those spices to the handi along with the rice?
thanks ameerah.
1. for the rice grains, you can check their texture by tasting them. if the grains give you a slight bite, that means they are 3/4 cooked. grains cooked completely are soft on the palette and you don’t feel the bite. even pressing the rice grains will give you an idea of the texture.
2. i add all the spices. i don’t remove them. i layer them along with the rice.
I’ve been looking for a good Biryani recipe and I think I’ve found it! Is it possible to just you a ground garam masala powder instead of all the separate ingredients? If so, how much should I use. Thanks!
instead of garam masala powder, you can add biryani masala. this is a spice blend that consists of ground spices, which are used while preparing biryani. about 1 to 2 tsp of biryani masala would be enough, without it becoming too overpowering.
Hi,
Just the photos are drool- worthy, I am sure my kitchen will smell like heaven once I make this. I have a party upcoming and hope to serve your yummy dish. Is it possible to make the gravy w/ veggies- steps 3-14 the day prior, and work with the rice the day of party?
Would it spoil if I added the yogurt? Thx for being patient w/ my queries, Dassana. Ur the best!
thanks laxmi. yes you can make the vegetable gravy a day before and then refrigerate it. yogurt will not spoil the gravy. in fact this gravy with yogurt stays good for a day or two in the fridge.
Thank you for such a mouthwatering biryani receipe..hats off to you..felt like eating a cuisine food..thank you so much..
welcome jayanti.
My mom and I made this receipe and it came out perfect. It was amazingly delicious, restaurant level taste. Loved it. I’ve got inspired to cook! Thank you very much!
thanks a lot sneha to you and your mom 🙂 always remain inspired.
hi dassana.. just now had the dum biryani n commenting..i tried ur recepie n it was very delicious.. it was a bit dry… hope it bcz of less curds.. but it was a winner dish.. thank u so much..
repeating ur words on jamie.. that just one recepie is enough to convince that other recepies will also be good…
i am shortly will be trying ur pasta salad recepie..
thank u
thanks a lot mukthi for your feedback. the dryness could be due to less gravy in the vegetable curry. but since i make this biryani often, i agree with you on the taste factor 🙂 do try the other recipes as well. as far as jamie oliver is concerned, i have only tried one of his recipe, till date. blame it on my family’s taste of savoring only indian food.
Made a yummy biryani on sunday wth the help of this simple recipe!
really it came out well…. thnx for articulating it perfectly.
thanks pramod
this is a perfect recipe…the one i was as searching for…i made it yesterday…and so my family licking their fingers….they were all praises for the Biryani…and u surely deserve the credit…
thanks aditee for the positive feedback on veg biryani and for your appreciation.
ya its very easy i will try
it is really nice and easy recipe of Biryani .
thanks koyal
We tried this recipe today……
It was awesome. We made a it extra to make it last for the day, at two servings, but it got finished in one sitting.
thanks shibin for the positive feedback.
Thnks amit..
I tried this recipe when my mummy was not in home. I am student nd very new to cooking so I followed every step of the recipe very sincerely.. nd it was really good..
Thanks
welcome anubhav. as a beginner you had tried your hand on a difficult recipe and it came out well. so continue making few more recipes, as you might turn out to be a good cook. happy cooking.
Nice, simple explanation to an exotic dish!
Very tasty and I enjoyed making it as much as I did to gobble it!
thanks devaki
Hai Dassana,
Just now, I prepared veg.Biriyani.Wow, it turnedout tasty.As I don,t have saffron, I skipped it, but I used rose water.I dummed it for just 15mts and was done.I used only 1 cup of rice.
Thanks a lot for your recipe.
welcome sujavenkat
So glad I found this recipe! Amazing recipe and very clear and easy to make. I have used it twice now for guests who are really good cooks and went down fast!! Both times the food ran out. Thank you very much for sharing the recipe.
welcome shodhan. glad to know that you all liked the biryani recipe.
Hi Dassana,
I made this biryani a few days back . Indeed it was delicious and had amazing aroma and flavours. I had dum cooked it for 30 mins. As it camr out of the pressure cooker it still looked moist but settled to a dry state 15-20 mins after i took it out in a bowl. It was cooked nicely and rice grains were long and separate. So, is this moist stage normal?
thank pragya. it is normal due to the steam and moisture in the layers. once you open the lid, then some dryness comes over as all the steam evaporates.
Hi Dassana,
First of hats off for such a detailed and pictorial explanation. Hats off to UR effort. It took me nearly 2 hours to prepare this biriyani without pictures 🙂 so u must be really expert yar.. And I also made mirchi ka salna and served along with biriyani. Ooooo it came out toooo good, actually planned to make these when our friends came but they didn’t come but it didn’t stop me from cooking this. Me and my husband we enjoyed to the core..thank so much dassana.. Can’t explain my excitement:)
welcome vasundhara and thanks for this positive feedback on veg biryani. i feel motivated after reading such positive feedback.
Superb.Thanks for ur recipes.Can we add soya.
you can add soya.
Very nicely explained, step by step along with the pictures. Made it today for llunch and the family loved it. Thanks.
welcome ruchira
Wow…absolutely fantastic! luv your step by step presentation. Photos are just mind blowing.
thanks madavan
hi,
can i substitute the saffron with something else,since so expensive!!
Thanx
to get the yellow color in the rice, you can add a pinch of turmeric to the yogurt mixture which is used in the layering. you can also kewra water or rose water for fragrance.
Hello Dasanna! awesome taste…….. it was yummmmmm….. we doesn’t eat outside. this biryani prepared for main guest.
thanks alisha
thanks for recipe done professionally
welcome thomas
This looks lovely. Could I replace the carrot with sweet potato / yam? Also, I have seen biryani with vegetables par-boiled and marinaded in yogurt / curd, but I have not tried them. Which is traditional? Can I make / cook the vegetables the evening prior? Making this tomorrow! Looks beautiful.
i would not suggest to add sweet potato or yam. since yogurt is used in the biryani gravy, it works well with veggies like carrots, cauliflower, beans, peas. you can add some corn or baby corn or mushrooms and even aubergines. sweet potato might imbalance the dish. yam due to its texture might stand out in relation to the other vegetables. traditionally marination is done, but for meat or chicken. since we use veggies they don’t need to be marinated. generally the vegetables are not pre cooked. if you want you can blanch or half cook the veggies just to reduce the cooking time.
Awesome taste.. My mom doesn’t eat outside. We cooked it today only with aloo and matar with mirchi ka salon.. Yummmmm it was.. Thank you…
welcome pooja
Hi Dassana,
Loved the recipe .Its really osm. I tried it twice . first time the taste was good but the rice was overcooked. But the second time followed the recipe word to word , and it turned out to be so good. Really happy.
Planning to try more of your recipes. 🙂 🙂 🙂
thanks aiswarya for giving positive feedback on veg biryani. do try more recipes from the blog. keep visiting.
Thnx alt 4such an amazin recipe!! i jus loved d wy u hv explained evrythn esp wid “photos” n i tryd dis ot 2dy n t came ot rely vry wel…it din seem as if i hd prepared t 4d 1st tym! 🙂 n i wud lov t f u teach hw2 bake a cake widot an oven in d same wy 🙂
thank u so much! 🙂 🙂
n merry christmas! 🙂
thanks kalpana for the positive feedback. glad your biryani turned out well. it is possible to bake a cake without oven. its made in pressure cooker. i will add a steamed cake as well as a regular cake that can be made in a pressure cooker.
Hello Dassana,
Indeed a nice explanation of yummy taste biriyani. Intresting part is photographs of each step. Liked recipe so much. Biriyani is my favorite and i was searching for dum biriyani and that is what you explained here. thanks alot and i am gonna try it for sure 🙂
Thanks Disha. This dum biryani recipe is really good and worth trying 🙂
Really awesome and very helpful recipe by you Dassana. I would be trying it over this weekend. I was searching for such biryani recipe from long time and got this one today. Thanks for sharing!
welcome lata.
Awesome Recipe… Just enjoyed cooking and eating:)
thanks pooja
Dear Dassana, thanks for such amazing hard work where you put all the recipes with pictures. I am Russian and I have done many recipes from you. I did this ysterday, and it seemed that the rice got abit overcooked as you know Basmati rice cookes really fast. May be next time I add extra liquid to the veggies and than boil the soaked rice with the veggies without cooking it prior? Have you done this? Thanks!
thanks elena. i have done this, but the taste is more like a veg pulao/pilaf than a biryani. still you can try. just cook the rice al dente or 3/4th and you won’t have any issues with overcooked rice. use the proportion of 1:2 for rice and water respectively.
i like this recepie.thank u .
welcome viji
very cooooooooool i like cooking a lot. i luv ur biryani i will surely make it to my patner he like food.thnkq…………………………………!!!!!!!!!!!!!!!!!!!!!!!!!
welcome latha
Hello Dassana,
My question is regarding the moist cloth used to cover the pot. Should the cloth touch the rice inside the pot. I mean if the pot is not filled completely, Should I place the cloth inside the pot in such a way that it touches the rice.
Thanks
hi kritesh. the moist cloth need not touch the rice. its just to cover the pot or pan.
Your website is really amazing. I enjoy cooking with the help of your recipes and i agree with you that the pictures in your recipes really inspire me to cook.These pictures makes cooking more easy and comfortable.Thanks 🙂
thanks and welcome.
Hello,
This looks absolutely fantastic. Just about to make it but I just wanted to clarify what measure you use for a cup – app 250ml or 1/2 pint or something else? Many thanks in advance!
yup an american cup measurement- 240 ml.
this is exactly how i learnt and believe me the dum with the wheat dough does give magic alternately you could try silver foil over the lid and a heavy weight on top but the wheat dough is the best the aroma can be smelled from far away
I just made this for a party of 30 and cooked the vegetables in the masala the night before so they have marinated gorgeously. I cannot tell you how amazing this tastes! I am so excited to see what everyone has to say because I am sure they will love it. No more store bought masalas! This is beyond perfect! 😀 Thank you Dassana!!!
welcome S S. i am glad to know that u liked the veg biryani recipe… reading your comment, i am sure your friends will like it too 🙂
I had high hopes for this as the pictures looked so awesome, but mine had a very bitter taste. Spices were kind of strong, maybe 2 cardamoms of black and green were too much for the amount of rice? I wish I could figure out how mine failed. I did not have mace strands so used powdered mace. Did I use too much? Too much saffron maybe?
for the amount of rice mentioned, the number of black and green cardamoms were right. its the powdered mace that is the culprit. mace is a very strong spice. a light pinch of mace powder would have been right. also a pinch of saffron is enough. a little extra also does not spoil the dish. so i guess the bitterness is from the mace powder. all the spices are kept whole and not powdered, so there is not strong taste or them in the biryani. the bitterness can also be if the onions have been browned too much. you can try again and just add a light pinch of mace powder.
adorable
I tried it today..happy for the outcome, thanks to You! the step by step veg. recipe is helpful.
i just follow it and i got a delish veg. biryani specially its not dry, it was moist and not over cook.
It inspire me again to tried and cook and follow your recipes… : ) a million thanks!!!
thanks and welcome madel. glad to know that you made a delish veg biryani 🙂
thanks for this step by step veg. biryani recipe, it would help really a lot. specially like me when i want to cook indian food for my husband i always depend on cooking technique and recipes on website.And your’s is really easy to follow and a BIG help.Once i tried your soft idly recipe, it makes me upset because its not soft.. same i always prepared idly..then again i give a try focusing on your step by step idly recipe…AND oh my…same idly you’ve got! 🙂 i was really happy then, for the first time in my 6 years here in India i got a soft idly prepared and cook by my own hand..:) courtesy of YOU.:). thanks Madel
thanks madel. glad to know that you finally made good idlis. to get soft idlis, the fermentation has to happen in the batter. if the batter does not ferment well, the idlis won’t become soft.
I dont hav words to say thanks for such a yummy recepie..i have tried searching ds recepie many times,the best i got today..cant wait to try ds weekend
welcome anu. this is an tried and tested veg biryani. my all time favorite biryani recipe. i am sure u ll like it.
Dear Dasanna
I made the biryani following your recipe and it was yummy. My family enjoyed it & there’s coming a request to cook it again n again. Thanks for such yummy receipe.
thanks priyanka. even in my family also, we love this hyderabadi veg biryani. little time consuming to cook but really delicious.
i really loved d way presentation thnx!
i’ll try it soon..
thanks priyanka
i tried this today
it was very delicious and all my friends also liked with very much
thanks durgadevi. glad to know that you all liked the biryani.
Hi Dassana,
Loved your recipe and made Biryani for the first time.It was acc to family-“Like bought in a Hotel” 🙂 🙂 Thanks so much! I loved your visuals.They were particularly helpful.
thanks lakshmi for this awesome feedback.
Excellent effort & thanks a lot !
thanks major
I am thankful to you for this awesome recipe.
thanks vidula
Thanks for the recipe, it came out great, the screenshots really helped and my wife liked it .. 😉
Cheers!!!
thanks manjunath
really very delicious recipe. i love Hyderabad vegetable Biriyani. most of the Indian people had this recipe on traditional day or on occasions. definitely i will try it at my home.
i am trying this today… i like the step by step process
Awesome briyani mam, it taste gr8… Thanks for posting such delicious briyani
thanks twinkle
Hi Dassana,
You have done a great job by adding pics with each step which made the recipes easy to cook. Your taste is really good.
Awesome!!!
thanks.
Nice recipe the photos you have shared after adding the ingredients is simply superb am intrested alot in cooking the way you showed for cooking veg biryani is so nice and so understndable thank you………
thanks sameenaazmi
Do you know the lucknow biryani?
i do know, but not on the blog.
Hi Dasana,
Nice recipe. Thanks for sharing. If I can add a comment to the thread. To “Dum Cook” you can try other methods if you have access to oven. As mentioned, rice is half cooked and I would avoid pressure cooking rice or vegetables. It very important to maintain chewy texture of rice and vegetable, al dente, if you will.
After you have assembled your rice and veg spice mixture, layer it on a greased enamel cast iron pot with a close fitting lid ( dutch oven) and bake it at 300-325F for 20-30mins. The function of dutch oven or any enamel cat iron pot with lid, will help cook in steam and seal in the flavors! The low end enamel cast iron work as well as expensive french kind!
sure you can. thanks for your suggestions and tips. the vegetables have to be just cooked as they will be getting cooked again. in pressure cooker also, the rice and veggies can be cooked till al dente. just more experience is required with the pressure cooker 🙂 similar to you now for dum cooking, i use pyrex glass wares to make the biryani in oven. even dutch oven works fine as you mention it.
way of learning is miiiiiiiiiiiiiind blowing…..i luv to learn cooking frm u
thanks hemali
Hi,
This is the first time am cooking Dum Biryani, can you please help me to understand this
1. DO i need to cook rice twice?
Pick and clean the rice in running water. Soak the rice in water for 30 minutes.
Now you can microwave or cook or pressure cook the rice. You have to cook the rice till its 3/4th done. The rice should not be fully cooked but almost cooked.
*In a pan, pressure cooker or a microwave cooker, add the pre-soaked rice, all the spices mentioned above with some salt.
*Cook till the rice till is almost done. Fluff the rice and keep it aside.
Am li’ll confused…..
what is meant in the above lines is that the rice can be cooked in any way – pressure cooker, microwave or in a pan. the rice is cooked first with the whole spices/whole garam masala, first till its 3/4 done. then the rice is cooked again in the final stage when its layered and dum cooked.
Hi Dasana,
Thanks for this recipe. have tried yesterday and really it was very yummy… as this Ramadan is the first Ramdan after my marriage and m staying in US with my husband and this recipe makes my first Roza wonderful.. my husband liked it a lot.. and today m gonna try Falafal…. lets see how it taste….!!!!
Thanks a ton..
thanks saida for this sweet comment. i hope all the recipes turn out great for you.
Kindly let me know why do you Place a moist cloth on top?
placing the moist cloth helps to seal the moisture inside in the cooking process. the top rice layer also does not get dry. but not necessary. if you can seal the pot or cooker with a tight lid with no steam getting escaped from the sides, then no need to keep the moist cloth or towel.
I just read this is nice.after preparing I will give u the reply for taste.
sure.
What a dish..!!!!
thanks for the recipe.
Its simply awesome,
thanks abhijeet
wowwwwwwwww…………..love to cook this …….. wil cook soon ……. luv u mam…..jst luv ur way to teach 🙂
thanks mehak.
would u define what is the differences between dum pukth cooking and pressure cooking??
as in both cases u are not allowing the steam to escape…
i think u should learn how to use a pressure cooker…
for your kind information technique of a pressure is derived from ancient day’s dum pukth cooking.
in pressure cooking steam escapes from the vent weight/whistle of the pressure cooker. whereas in dum cooking the steam is not allowed to escape. i am not sure or don’t know if the technique of pressure cooking is derived from dum pukht cooking. however, i do know how what is a pressure cooker and how to use a pressure cooker. i use pressure cooker almost everyday and its been years now.
Awesome..
step by step method was really really helpful . i have cooked it twice .. and both the time it was SUPER hit..
Thanks for giving in such a detailed manner….
welcome anshu.
Delicious loved every bite of it. I made it this afternoon and going to take some for potluck. Thanks for detailed recipe! I sure am going to try more of your recipes 🙂
thanks ria and do try some other recipes from the blog as well.
Hi,
You mentioned that we can substitute turmeric for saffron. May I know how much quantity? Apologies for my question. I am just new to cooking Indian food and I am clueless with spices.
hi eiser, since we just want the color and not the flavor of turmeric, approx two to three pinches of turmeric powder is fine. at the most for a deep yellow color and some flavor, you can add 1/4 tsp of turmeric powder.
i have just made it smells yummy will taste it after its done, Thanks for the lovely recipe always prosper in life 🙂
thanks maddy and wish you the same.
Thank you! Thank you! Your pictures made it so much more easier. I visited Hyderabad a month ago and fell in love with the Biryani there. I googled you out and you made my day! It came out so well that I even got full marks from my mom, which is a rarity. This is my first time on your website and I have made an instant connect with you, what with all my favourite things here. Next in line are hummus, pita bread and dabeli!!!
thanks a ton artika for the lovely feedback. it sure has made my day today. btw hummus, pita bread and dabeli are my favorites too.
Your favorites too? High five to that! I am a Delhite and was introduced to the joys of the Dabeli in Mumbai of course! Haven’t seen one decent place that does dabeli here. So yeah, I’ll satisfy my craving by cooking it up 🙂
Have you been to Indore? You can do a food trip in that place. Two unique things I remember- Gadadu ki chaat and khopra patties! Can you do the recipes,please 🙂
🙂 in mumbai there are many places that serve good dabeli. in delhi when we were living there, i had not seen any place that served dabeli. not yet been to indore. both the snacks you mentioned are new to me… though i can still relate to khopra patties, but gadadu ki chaat is something i have heard for the first time. i shall have to research for the recipes. will see if i manage to get them.
I just love the recipe. my hubby likes biryani very much, that to chicken biryani. But i don’t eat non-veg. i prepared this veg biryani. He became fan of veg biryani now. It came out really well. :).. Thanks a lot for the recipe.
thanks sindhu and welcome
thks i loved all ur dishes but would like to have kichiri receip please thks
thanks. will post khichri recipe in some days.
OMG, this is just awesome, the recipe is great the pics are fabulous. Thanks a bunch, will try this out soon!!!
thanks pavithra
Here’s how I do it. Basically separately cook the curry and the rice until they’re done half to 2/3 and then put them in layers to cook slowly.
1. Half tsp caraway seeds, 6 cloves, 4 cardomom, and 3 one inch pieces of cinnamon are fried in 2tsp of oil, and water+cleaned rice grains+salt is added, and left to cook till half to 2/3 done. The spices are taken away then, and any extra water is drained off.
2. Bay leaves, paste of/chopped ginger+garlic, and if desired a small amount of chopped onions are fried till rawness goes away. Four varieties of vegetables, particularly potatoes 2 inch cubes, cauliflower florets, carrots 2 inch juliennes, and 1 inch pieces of beans, red chilli powder, garam masala/ biryani powder, turmeric, and salt are added and the curry is cooked. Just as it is about to be taken away from the stove, a tsp of lemon juice is mixed in. Optional: Thick yogurt is added to the curry as it is just warm, and left to cool for 15-20 mins.
3. Dum cooking is done after the following arrangements of layers: Half of the curry (optional: a little of powdered dry deep fried onions) – half of the rice – remaining curry – remaining rice – more of powdered fried onions and milk+saffron mix. With actual dum pukht cooking, the first signs of steam escaping through the wheat-flour gasket is when the heat is cut off.
4. Absolutely no nuts or cashews. No tomatoes.
thanks for writing a detailed instructions agyaat. will try your way next time.
Minor corrections(more like… pedantic details skipped over): powdered onions in (3) to ‘mildly hand-crumpled’ and not powdered in its serious sense. 😀 ; and I guess in (2) the inclusion of oil and general practices of cooking such a curry are sensibly adopted. 🙂
alright….. taken note of.
I tried your recipe today and the Veg Biryani was awesome!! Myself and my wife thoroughly enjoyed the dish for dinner. After the preparation, my perspective of Veg Biryani has changed and now I consider Veg Biryani is the “king” of all rice based dishes with the combination of vegetables, dry fruits and saffron.
Your explanation is neat and your idea of posting step by step process via “pictures” is really cool.
Thanks for posting the recipe and cooking process.
thanks a lot vikas. glad to know this. i do agree that biryani is the king of rice based dishes. however there are some other rice based dishes that one should try like the yakhni pulao, saffron pulao, vangi bath and the famous bise bele bath and some more. indian cuisine has a lot to offer when it comes to rice based dishes.
Thanks for such a nice explanation. I am going to try it today.
welcome kanti
Very much impressed with explanation
thanks.
hi,
can i add paneer to the biryani?
hi amish, yes you can add paneer to the biryani along with the vegetables. just add paneer when the veggies are done and stir.
Hi dassana, yesterday I made this biryani..It was awesome everyone loved it. Thanks a lot for such detailed explanation with pictures.. It really helped alot for cooking veg biryani Thanks
thanks tulsi. glad to know that the biryani was awesome.
GOOD RECIPE
thanks nilima.
we made the veg biryani by looking ur easy steps.it becomes yummy and spicy . ur method of cooking it by covering moist cloth ,putting plate on it and then weight is really superb idea . How u explain the entire process is deeply appreciated…..:)
Hi,
I have tried your recipe and it came out really well. I have made many dishes as cooking is my hobby but was always scared for trying biryani. The pics you have put explain the entire process very nicely.
Thanks a ton.
– Pushkar
Twitter: @pushkaraj7
thanks a lot pushkar 🙂
The recipe is nicely explained with the help of close stepwise photographs. one can easily understand by just going through the snaps. and that too easily cooked with the help of available home appliances.
Thank you.
thanks sagar.
Hi Dassana,
Can you put up mirchi ka salan or any other spicy gravy recipe which could go well with the biryani or any other pulao?
yes ashwini… mirchi ka salan has been requested by a reader before… i will also be adding masala veg stew and korma that goes well with pulao and biryani.
Thank you
I tried this recipe, it really came out fantastic. I’ve made it about 5 times till now slight variations are there but it still came out well on the whole and the entire family enjoyed it. Thank you for this easy and wonderful recipe. I also added pander to this while stir frying the veges, it did been well. I just wanted to know how to make the masala thicker and visible.
thanks dr sankara. there are slight variations possible in this recipe.
to make the masala thicker, you just need to add some more yogurt. you can also add some cream. cream will impart a slight sweet taste. also if you grind the chilies, coriander, mint, ginger, garlic and make a paste instead of adding them separately, you will have a much visible masala. hope these tips help.
I tried the above method, really resulted a authentic Dum Biriyani.
thanks giridhar 🙂
Hi Dassana,
Tried this recipe and it turned out excellent. The coriander, mint & curd combination adds a fresh flavor to this recipe. The detailed photography helped a lot while cooking. I did a small variation by adding fried onions while assembling and it turned out good.
Everyday i keep on visiting your website to see the latest post. The pics are so tempting that even a non-cooking person would get tempted to cook.
Excellent Job. Waiting for more recipes to come. 🙂
thanks deepti for your encouraging comments. sometimes for a variation even i add fried onions to the layers.
Hi dassana, yesterday I made this biryani.. It was just superb, everyone loved it. Thanks a lot for such detailed explanation with pictures.. It really helped alot… Excellent job .. Thanks
thanks asmita for trying the biryani. great to know the recipe turned out great.
Hi Dassana,
I have made this biryani yesterday in the dinner. I cant tell you, it tasted so delicious that my stomach got full but my tongue was not getting satisfied. Thank you for this step wise wonderful recipe. The way in which you have presented this recipe made me easy to cook it.
thanks shweta 🙂
It was awesome .Just tried adding mixed pickle masala to it and it was delicious .
Thanks for the detailed process .
welcome anjali.
Dear Dassana,
This veg biryani recipe is awesome.
Step wise pictoral explanation style of yours is amazingly helpful. Never seen such one before.
Regarding the biryani recipe can u pls teach me how to cook with chicken or mutton. We bengali’s prefer non-veg biryani than veg. Pls teach me. I would really like to make it at home.
Waiting for your response.
Thanks, Sudeshna
thanks sudeshna. for making chicken or mutton biryani, marinate the chicken or mutton in curd, ginger-garlic paste and all the masala powders that we have used for the veg gravy in this recipe including coriander powder. keep to marinate for about 1 hr.
then just fry the whole spices, brown the onions and add green chilies and the marinated chicken with all the curd mixture. if you want you can add more curd and some masala powders later. add salt and cook till the chicken is done. then layer the biryani and keep it to cook on dum.
Thanks for the recipes. I will try it during Durga Puja holiday.
Sudeshna Banerjee
Dear Dassana, finally i cooked the veg biryani ditto as per your method…it came out very well…and everybody liked it at home-:) One thing i wanted to know that while adding plain curd to the vegetables it turned into cottage cheese form. it was as if i had sprinkled some cottage cheese in the vegies.& not the curd…what could be the reason?
with love, meeta.
thanks meeta. i guess the yogurt was on the verge of being spoilt. this could be the reason. it should at least not look like paneer granules.
Hi ,
Thanks a ton for this recipe… Today i tried this recipe, it came awesome.. every one liked it…
Thanks for the detailed explanation it helped me a lot…Keep the good work..
🙂
Sindhu
welcome 🙂
Woahhh. U inspire me to cook. Looks soo damn delicious. I will try this tomorrow:):)
My friend Ramya and I made this biryani y’day morning.
before we could realize the pot whichcontained this biryani was POLISHED !!!!!!
Patha nahi chala kab biryani bani aur kab khatam ho gayi :):):):)
Considering that we both were making biryani for the first time we ended up patting our backs :):) and the credit goes to the very detailed, clear step by step instructions and pictures on this blog:):):)
Thank you Dassana :):)
we like this biryani a little more spiccy and would like to ask you if just adding a few more Green chillies will do or will we need to increase quantities of other spices as well .
thanks lakshmi…. i appreciate all the feedback you have been giving so far.
to make it spicy, you can increase the number of chilies along with the ginger-garlic. the rest of the spices can be same.
I would like to thank you for your recipe as I tried it for a party I hosted. The recipe is very well written and detailed which made it very easy to follow. Everyone at the party loved the biryani and wanted your recipe. Thanks again!
thats nice to know meera. thanks a lot.
Hi,
Thanks a lot for posting this. I am bachelor living away from home, so I love to spend time cooking stuff for myself. This Biryani turned out to be delicious even though I did not have any kesar. I baked the whole assembly instead of using a cooker. Like you said, in 15mins, the biryani was ready. It took me 1.5 hours to cook this and around 7 mins to lick my plate clean.
I’ll try out the other recipes you have posted too.
Thanks.
thanks vignesh. do try the other recipes as well.
hi, really awesome,,,,,,,,my husband like it very much…….thanks
thanks anita. good to know that you and your husband like the hyd veg biryani 🙂
This briyani tastes very nice…
Enjoyed a lot.
Thanks ….
thanks ahalya…. nice to know 🙂
The biryani came out very tasty.Thanks and keep up the good work.
welcome ashwini and thanks.
Just a little doubt….i see in the pictures you have used jeera/shajeera while making the vegetable gravy though it is not mentioned in the recepie.
thanks ashwini for highlighting. i have added shah jeera to the veg gravy. 1 tsp of this is enough. i will update the post as well.
Wowieeeee!!!! Awesome akka!!! Thats what my sis said…. Thanks a ton!!!!!
thanks ilakiya….
hi, thanks a lot for this awesome recipe.. yummy yummy briyani.. my hubby enjoyed it really..
al ur recipes r wonderful. i inspired by ur interest in cooking.
al the time i seek for some healthy cooking tips (grandma’s secrets) n u might b very knowledgeable abt tat i hope… i expect u to post such tips:)
thanks suthajay. it feels good when a dish you cook is liked my the family.
some tips i know but i haven’t shared them at one go in a post. here and there in my regular posts sometimes i do share some tips. i will have to compile all of them and write with some good pics. this will take some time and i hopefully plan to write a few posts on this topic.
Hi,
Tried the recepie today,came out very good…very flavoursome.Thank you.
thats great ashwini…..
Have to rate it this way….best biryani recipe.
thanks ashwini.
amma challa mast mast. . . . . . . (he is 2+years old) thank u very very……………much i think u understand my son happy is my happy.
yes i do understand kalpana. great that your son liked it.
how to make hyderabadi veg biryani – was explained perfectly and in a easily understandable way with photos. Thanks for the detailed and step by step explanation.
thanks srinivasa.
this is gonna be the weekend lunch… 🙂
this is one amazing veg biryani richa. do make the biryani, you will really like it.
I tried the recipe. The biryani came out really good. Thanks 🙂
thats great richa 🙂
Awsome recipie, and greatly explained with minute details to prepare. we really loved it.
Thanks a ton
Prasad
thanks prasad.
yummy yummy ….waiting for d next weekend to make it…..
HI
Its awsome recipe…..i tried this biryani today …I Loved it..It came beautiful as it is with out missing any taste….Thanks for posting the recipie step by step ….looking fwd for more reciepies like this…
this biryani is a really good biryani recipe. thanks for trying and taking the time out to comment. surely will be posting many such nice recipes 🙂
yaaaaaaaaa. I tried this biryani.It was awsome.
thanks,
kausar.
thanks kausar….
Hi,
Just tried your Veg Dum Biryani. It was awesome !!! 🙂
I liked the taste very much. And my wife way suprised about my skills in preparing this biryani 😉 (of course the credit goes to you)
Can I use the same receipe for chicken/mutton biryani ?
Thanks,
Sai
thanks sai. yes, you can make use this biryani recipe for chicken or mutton.
Just loved it..! it turned out to be heavenly..
Really awesome ! Parents loved it !
Waiting for Punjabi Rajma Chawal recipe from you coz ur recipes always have a unique tip and dat one unique tip adds a million dollar taste to the dish !
Keep up the good work !
Thanks !
thanks mitul. nice to know your parents loved it.
there is one punjabi rajma recipe on the blog. this is actually my mil’s recipe and this is how i have been making it. you can have a look:
rajma masala
Thanks for d rajma recipe.. gonna try it soon !
Happy Cooking !
🙂
happy cooking to you too mitul 🙂
hi, its a great recipe.i tried it and it was wonderful .looking forward to more recipes from u…..
thanks vijay
Hi Dassana,
What an awesome recipe, really turned out truly mind-blowing..!
Thanks for such a wonderful recipe..
Keep up the good work ! 🙂
thanks mitul… cheers 🙂
Thanks for this wonderful recipe. Everything was just perfect.
Thanksssss again. enjoyed every bite of it :)))
thanks anmol. glad to know that the biryani was perfect 🙂
Superbbbbb… recipe……. Thank Youuuu..
Fantastic recipe!!!! my family loved it and I keep making it again and again as it is so yummy!!!
thanks priti. it is one of the best biryani recipes along with my mom’s biryani recipe.
Hi Dassana, i think their is some telepathy… in case of falafel it happened, now i wanted to see some more pics for Biryani, i went through biryani receipe of yours so many times but couldnt put forth the courage to cook it…since i was little doubtful about the rice like how soft it should be prior…i had the fear if rice would become too soft after the whole process , so i wanted to see the pics more…tomorrow is my 4th annivarsary and i will make falafel, hummus and biryani too…wish be good luck…
love, Meeta..
yes sometimes there is telepathy meeta. congratulations on your 4th anniversary. i wish you good luck, happiness and abundance always. do let me know how all the three – that is hummus, falafel and the biryani turn out.
Hi Dassana…a bit late..i tried falafel at home..it really came out well in taste, shape…my hubby liked it very much..we had it with mint coriander chutney.. i am yet to try hummus and biryani..that day was too busy and with little kid you dont find time for yourself…Thank you so much for posting your lovely cooking experiences and the common ingredient in all which is LOVE…
I want to invest in good mixer, grinder and Oven? Can you suggest me? Like it should serve the purpose of idli dosa batter or making good batter.. & oven for purely baking purposes.. (i do not want baking to be done in microvave due to health issues). The wires of my existing grinder got burnt twice while grinding dosa/idli batter & my hubby told me that this dosa got very expensive to me…pls help me and suggest..
love, meeta.
thanks meeta for taking out the time to comment always on all the recipes you make. glad to know that the falafel were good. this falafel recipe is a basic recipe. you can always add your choice of spices or herbs when you make it. and no issues with you not able to make hummus and biryani. biryani is a leisure recipe. so whenever you have ample time you can make these.
currently i am using black and decker blender. there are only two jars. one for blending & wet grinding. the other is for making dry powders. it does become hot when grinding the idli batters. what i do is i switch if off for some minutes and then again switch it on. it is very sturdy and the blades are sharp. for grinding wet masala, it is excellent.
my suggestion is to get the idli dosa wet grinder which is exclusively for making batters like the idli and dosa. our cook was having this and she said that it very easy and convenient.
i have an ifb microwave oven in which i do all my baking in the convection mode. when baking in convection mode, there is no microwave energy that is used. for oven there are many options to choose from. consider buying an oven or an otg from a good brand.
Making Chicken Biryani today….Have posted my pic on how I set my vessels on Dum…:)
will check it anubha.
A kiss on your cheek….perfect to the T…..made it for my Hubby and he just loved it….Thankx a ton…keep posting 🙂
thanks anubha. glad to know this.
Hello Master.. !!!
Thanks for such a wonderful recipe.. Biriyani I cooked with this recipe so very tastyyy and Yumm..
You explained very well.
Thanks again.. 🙂
thanks ramya…
I have tried this receipe few times, taste is great but biryani is always little dry! 🙁 how to make it juicy?
dear madhavi, to make it have more moisture add some more curd while making the vegetable gravy.
don’t overcook the veggies or make the vegetable base dry. keep some gravy in the vegetables.
when cooking the rice, add some ghee or oil to the rice.
i recently made this biryani and it was not all dry. have to update the new pics which i will soon.
hope these tips help.
OMG!!! This turned out exactly as shown and described. I loved the texture of the rice, the flavors were awesome, you could taste the saffron, the cardamoms, the mint and the rice and veggies….nothing overpowering yet very very yummy!
Love the taste and it is very simple to make, I doubled all the portions……my only addition to this was to add a couple of pinches of green cardamom powder to the curd in the layering step, so as soon as you open the handi you get this whiff of cardamom! and it adds an extra oomph to the top layer of rice.
thats great shetal. liked your idea of adding cardamom powder to the curd.
hey that a wonderful step by step guide to make a biryani. i was just surfing for the biryani recipe & my search ended here. thanks for this lovely recipe i must make this for my nephews who hve come to saty with me… thanks
thanks beena. do make the recipe and share your feedback.
Hey i did try the biryani recipe… it turned out simply awesome.. you must check my post for the same… thanks 🙂
thanks beena. i will check your post soon.
Awesome recepie!!! Succesfully helped me to make the first Biryani of my life….and it came out to be PERFECT(which i dint expect)…I termed it ‘heavenly’ and my husband called it ‘magical’. Anyways, thanks a ton for sharing this mind-blowing recepie in such a systematic way.
welcome ekta. feels great.
dassana
Wonderful. Great recipe. You definitely deserve large share of praise heaped on me when i cooked it yesterday. Basically i am preparing for an interview where i mentioned my hobby as cooking . So i want to know the science behind dum cooking
What is the significance of pan and wet cloth in this type of cooking?
significance of weight over lid?
Is dum cooking synonymous this layered type of cooking you explained? Is there any other difference between normal and dum biryani
usually its better to cook in a handi. they say the shape of the handi helps in better cooking of the veggies and rice. but scientifically i don’t know how.
its not necessary to put a wet cloth whilst cooking on dum. it just helps to retain the moisture inside the food which is cooking.
the weight over the lid does not allow the steam to pass out from the sides of the lid.
there are many other dishes that are dum cooked like yakhni pulao, lauki mussalam, dum aloo and many awadhi dishes. only in biryani there are layers.
for me a normal biryani is a dum biryani. this is how i have seen my mother making biryani at home. if you refer to the normal biryani that they serve in restaurants then it is not dum biryani. it is just spiced and flavored rice served with a pre prepared veg gravy… this is unless the restaurant specialises in dum biryani or awadhi cuisine.
Hi,
I browsed many sites for Dum biriyani. But yours was very good. I hope my wife will do the successful experiment on me after following the reciepy details.
thanks manohar.
Nice recipe.
I like the pics of this biryani.
Can i avoid saffron in this recipe? and can i make a powder of garam masala which u have added in veg gravy?? plz reply soon as i want to make it in today’s dinner and today is my husband’s b’day..
thanks a lot for sharing this recipe..
dear priyanka, yes you can avoid saffron in the recipe. still, if you want the yellow color to the biryani, you can add turmeric to the milk-curd mixture.
you can also powder the spices used in the biryani instead of adding them to the gravy.
thanks a lot for reply..
hi…
I tried this at home and WOW…my family loved it. Thank you for sharing!
thanks for the explanation with picture…. its really very nice
Wow! As I am eating a take-out version of this; I can not imagine the luxury of eating one made of love. I am little thrown by the cooking method. Can I cook this in a sauce pan and lid it with a toewl then the lid?
yes anastasia, you can make this in a sauce pan keeping the towel and and then the lid on top. i also have cooked in a pan with this kitchen towel technique. its better if the towel is moist and not completely dry. wet the towel in water and then completely wrung the towel and then place it on top of the pan.
just make sure that the sauce pan has a thick bottom, so that the biryani does not get burnt at the base.
Looks great! Will try certainly.
Looks great! Will try and tell.
Thanks a lot Dassana. Haven’t cooked this recipe yet, but i’m sure it’l turn out to be great. Plan to cook it for my brother’s birthday tomorrow, but he’s really fond of paneer. So i wanna know, at what stage should i add paneer, Should i marinate it with curd, corriander, mint and spices after piercing it and refrigerate it for a few hours before using?? I read somewhere they marinate and refrigerate Lamb pieces before using in hyderabadi dum biryani. I’m afraid i might over cook or under cook it by not adding it at the right stage of the recipe. Thanks. It’d be great if Dassana or any of the readers could reply soon!!!
thanks kunal. to add paneer you can follow two methods:
1: marinate the paneer and than grill the paneer instead of frying it. frying the paneer can make it hard and rubbery. add the grilled paneer lastly to the cooked vegetable gravy. let it simmer for a minute in the veg gravy. then assemble the layers as mentioned in the recipe and dum cook the biryani on fire or bake in an oven.
2: this step does not require for the paneer to be marinated. when the vegetables are all cooked, then add the chopped paneer. cook the veg gravy for 2-4 minutes till the paneer pieces become soft. switch off the fire. don’t overcook the paneer. finally assemble the biryani layers and cook on dum.
Thanks a lot!!!! the marination method worked really well. Gr8 recipe. However, i’m an amatuer and realized tht the spices need to be milder in Dum Biryani. Thanks again for your timely reply!
thats great kunal… the biryani should be mildly spiced… this is how we learn from trial and error. so next time i am sure the biryani you will make will be great and perfect.
Made this for our 2011 Christmas lunch! Thanks for the recipe.
Thankyou for the wonderful receipe.
wow this was my first dish that came out very well. Everybody including my mother in law praised for making biryani so very tasty.Thank you.
thanks roopa.
its soooo gud, and easy. thanku. 1st time i cook biryani.
hi i’m going to try this one soon!..thanx
Finally i cooked Hyderabadi Veg Biriyani.It was good by considering my first attempt, taste was gr8.Atleast i cooked in proper way, not like a pulao dish.I come to know my mistakes also.Next time surely my friends will lick their fingers while having my Veg Briyani.
Thanks a lot Daasana. 🙂
Daasana, how hyderabadi chiken biriyani is different from Veg biriyani as you described here?
I know that you can not add recipe of chiken biriyani here.But you can share that where are the different steps to make non veg biriyani in above mentioned recipes.
Thanks in advance.
lalit, for the chicken biryani, you marinate the chicken with curd, ginger garlic paste and salt. if you want you can add the rest of the spice powders to the marination as well, like turmeric powder and chili powder.
the rest of the steps are same. instead of adding the veggies, you can add the marinated chicken with the entire marinated yogurt mixture. some other spice powders like dhania/coriander powder and garam masala powder can also be added while cooking the chicken. you can also add more curd if desired. and you pressure cook or cover and cook the chicken instead of the veggies.the layering steps are the same.
i hope this info is helpful to you.
Thanks Daasana, I am cooking veg biriyani first time today as per you guideline.Hope i will get gr8 result.I will let u know.
You relly described it with lot of love and care as seen by your Mom.
Loved it. Can you pls share the recipes of Mirchi Ka Salan in Hyderabadi style?
thanks lalit. i will share the hyderabadi mirchi ka salan…
I tried this hyderabadi veg biryani yesterday for the first time. It was awesome. It was very nice in taste. Thanks to you. Specially the pictures have helped me a lot while preparing this dish.
Thank u so much for explaining it so nicely. very very interesting presentation. i m going it to try tomorrow nd come back to you. u seem to be very simple and honest person. Tks once again.
I am a Hyderabadi and a Vegetarian by Choice and I can vouch for the fact that Veg Biriyani is given a Second Class treatment by the restaurants in Hyderabad which are mostly Non Vegetarian when it comes to Biriyani.
Once I ordered Veg Biriyani at the famous Paradise Restaurant where I had gone with friends and all I got was plain Biriyani Rice poured over one single whole Boiled Potato. No peas..No Caluiflower..No carrots…and the rice too was bland as I think it is the Chicken or Mutton cooked in Spices and Curd that Lend the Rice it’s real Flavor.My plain boiled Potato on the other hand was trying to absorb any spicy flavor my bland biriyani Rice had
I am proud to say that Even as I am typing this comment I am enjoying a Big Bowl of Steaming Veg Biriyani I prepared just now that beats any restaurant Biriyani I ever had both in Aroma and taste – I am afraid I am not going to have Plain Rice for quite some time.
What a wonderful Recipe and what Loving Presentation.
In your presentation there is a sincere concern that the reader does not miss or omit any step in the process of achieving the same results as you have after I dont know how many trials and errors that you are now saving many of us from.
I did not have carrots or Peas or Saffron or Black cardamom with me but I added Biriyani Flower which I had and yet I am tempted to believe that my Biriyani turned even better than yours.
Thank you So much Dassana
-Jagan
thanks for trusting and trying this long recipe. and one more thanks… for writing such a genuine comment.
its not only the presentation of the recipe which inspires people to try recipes from this blog, but the comment of every reader also makes a lot of difference.
i am sure your comment is going to inspire many people to make the vegetarian recipe of biryani at home as well as to share the recipe with their families and friends.
thanks..4 simple n perfect recipe
thanks shweta
really nice i tried it and came out well. as said above its simple and well explained, thankyou very much 🙂
mmmmmmm yummy taste i tried it it was soooooooooooooo tasty
very tasty really making tis was awesome
thnxxxxxx a lot for de recepi ….. I made it for my mom ….
THAT was a wonderful recipe,tried it today and came out very well….full of flavour and tasty .Thanks.I’m posting the recipe on my page .thanks in advance.
thanks ramkumari…
Hey Dassana,
Thank you so much for the recipe – it was simple yet detailed enough and, more importantly, it came out really well. I rarely cook; however, my attempts at making veg biryani using your recipe was very well received. What is the proof? Very satisfied customers: wife, two kids and, of course, yours truly loved it!
Warmest regards,
D
liked the way you described the recipe with the photographs surely will try d recipe
your Dum Biryani receipe was just AWESOME!!
Very simple yet Tasty…….
Thanks a Ton!!!!!!!!
welcome bhargav
The best recipe i have ever tried….. came out very well ….thank u 🙂
welcome suhas… good to know that the veg dum biryani came out very well…
thanks for the receipe!
tried your recipe today , the biryani was awesome!
thats great maddy…. welcome…
Can you please share the receipe of chicken dum biryani?
i am a vegetarian and this is a vegetarian site. so i do not add chicken or mutton recipes. i suggest you check out this website link:
for the hyderabad chicken dum biryani.
it is a very good and simple recipe
thanks shama…
I cook it first time , my husband n my son like it very much. thanks Dassana
thanks sonia and good to know that…
i like most of hydrabadi veg biryani
than you must try making the hyderabadi veg biryani….
Thank u so much for the recipe…………..
thanks so much 4 such nice explanation with photos………. 🙂
I too found your recipe wonderful….it helped me a lot and now i am confident i can also make good biryani…..i made one addition to your recipe which i found was a good ……i fried onion till they became golden brown and crispy …then i crushed them to make powder. This powder of onion i added to every layer of rice …it turned out to be awesome…:)
thanks vijeta.
adding fried onions or fried onions paste also known as birista makes the biryani too good. when making the layers one can add fried onions or crushed fried onions to the rice.
i know the flavor and taste of this as my mom would add fried onions to the layers of biryani as you have done. makes it great….
mind-blowing recipe and explained each step so clearly that no one can make mistake a lots of thanks from my side. 🙂
thanks reena for your positive comments…
thank u so much…. awesome pics n great explanation with a lot of details… i wanna try it as soon as possible 🙂
I tried this recipe. Followed all instructions and qantities as specified. Turns out very well, except that the biryani has a slight bit of bitter taste. The bitterness is not prominent, but it is quite apparent. Is there anything i am doing wrong, or, are there any ingedients that may cause the biryani to be slightly bitter ?
Any help appreciated
Cheers
TH
ideally the biryani should not turn out bitter. so i do not know whats gone wrong. i assume may be the onions were browned too much to the extent of being burnt and that can be the reason for the bitterness in the biryani. but this my assumption. it is also possible that the veggies were not fresh. i also do not know what vegetables you have added, so difficult to pinpoint the exact reason.
mind blowing recipe..thanx for helping me to prepare a wonderful meal
Your recipe is great. I hope that I can prepare it with the same delicacy with the aroma intact in it. Thank you so much for this lovely recipe. I would definitely prepare it for my husband as he is a home food maniac and he would love it.
Thanks
sure…. the recipe will turn out good….
thank u so much 4 a wonderful Indian recipe….. hyderabadi biryani is really the best biryani made in India. my mom used to tell me so….now i came to know it…..thanks again friend
I tried this recipe today, and this was my first time cooking. I just wanted to be good at one particular dish and I must say it turned out FANTASTIC. My family was pretty happy with it
I used a broader pan, so I was wondering if a layer of vegetables, then Rice and then again vegetables and the remaining rice might work better? It tasted fantastic but it still didn’t get the kind of look that Biryani ordered from outside has. The rice was not as yellow…what do you think I should increase? turmeric power or saffron+milk?
thanks surya…. for a broader pan you can have 4 layers as you have mentioned in your comment.
you know the biryani outside is so much yellow coz they use a lot of yellow and orange color. even if you see their paneer tikka or paneer tikka masala, its so red. a lot of artificial colors are added to the food made in restaurants.
for a more yellow color, i would add more of saffron dissolved into some more milk. saffron has a nice beautiful aroma and more of it will not hamper the biryani’s taste or aroma. i would not add more of turmeric powder as turmeric has its own strong aroma and more of it might destroy the delicate taste of the veg dum biryani.
Hi,
I tried the recipe yesterday and it turned out to be yummy…. Thanks a lot for such a delicious dish…. Please upload some more recipes..
thanks ms karmakar. i am glad the veg biryani turned out yummy….. more recipes are coming….
thanks a lot…. u have explaine it so well with pictures.. i will surely try it toay itself for my maa n paa 🙂
thanks vidya and rashmi…
very nice….for the first time i n my life i cooked such a nice and tasty biryani..thanks a lot
I do not have Saffron, can I cook with out adding saffron to the milk…..
you can cook the veg biryani without adding saffron too. saffron gives a nice bright yellowish color to the rice and imparts a good aroma and flavor to the biryani. but if you do not have saffron, no problem. as a substitute you could use yellow or orange food color… like they do in most restaurants. or you could add some turmeric dissolved in milk or whipped curd and add to the rice. this way you could get a nice yellow colored rice between some white rice and the vegetable gravy… the way the biryani actually looks but minus the saffron aroma and flavor.
Your recipe was awesome.. I tried making it and it came out very well. My fiancée loved it, He came to the country after a long time and I made it for him and it was a perfect treat.. Very well explained. Thanks.. Btw I’m no pro at cooking, so for a person like me this was so easy to follow. 🙂 Kudos!
thank you sai.
This is a wonderful and well presented recipe . thank you for the professionalism! and the great recipie
thank you vishal
Kudos!
You have explained it really well. Gr8 pics and details
I actually wanted to learn the true art of preparing Hyderabadi Biryani…It’s really awesome.
thanks navdeep.
Your recipe really stood out amongst the rest because of the photos along with the detailed steps such as saffron yoghurt that no other website provided. It turned absolutely delicious. I added ghee, saffron yoghurt and milk towards the end before giving it dum which helped the rice cook and brought the flavour really well. Thanks.
it makes feel good when the recipes that i have posted turn out well with the readers of my blog. thank you attiya.
adding the saffron, ghee, or milk towards the end also brings out the flavors very well. i remember in one of the biryani recipes shown by sanjeev kumar on his khana khazana show, he added the saffron dissolved in milk, ghee along with some julienned ginger towards the end.
hey..it looks soooo yummy…i cnt wait 2 try it out…. my husband likes biryani very much..wud make it and give him a lovely surprise…..thanks….
thank you nima. do give ur feedback.
Yummy!!!
Mouth watering recipe.
Our own (Hyd) Biriyani
Thanks a lot for the well explained and well illustrated recipe.
I can’t wait I am on my way to Kitchen. will come back soon
with the taste. LOL
Best regards
philip
thank you p v ariel for all your comments.
Awesome recipe, can you tell me how to dum the biryani in microwave….i mean the time. Thanks
i have never really cooked anything in microwave with a completely closed lid. all the microwave wares i have, have vents for the steam to pass thru. but i think it may take around 5-8 mins on full power.
HI,
I did a google search today morning for veg biriyani recipes. I got quite a few recipes. But yours caught by attention mostly because of the detailed steps given along with the pictures. My veggies are boiling now. My biriyani will be ready in a few minutes. Thank you so much for the wonderful recipe….
thank you sunitha and deepika
thaks a lot… bcoz i love biryani and u have made it too easy by showing it as a picture…
must say a Bingo for the easy steps as well as the pictoral depictions added for the newees…..like me 🙂
Thank you!!
I doubled your recipe, added coconut and lime, and I’m doing one version in the oven and one version on the stove with a weighted lid. Can’t wait to taste the results – this was a FUN day of cooking!!!
good to know brynn that it was a fun day of cooking for you. i hope both the versions of biryanis have turned out great…
wonderful pics they look yum Ijust cant wait for tommorrow to cook .Thanks
Hi,
THank you so much for a lovely Hyd veg biryani recipe along with the photographs. I appreciate your patience for step by step photographs. Great work. Superb.
veena
thank you veena…..
never thought veg biryani could be so cookable !!! Thanx a ton !!! My son enjoyed it..and he is seven and hates veggies!!!
thank you vinita. its nice to know that you enjoyed making the veg biryani and your son liked it.
your receipe of biryani is really very good .today i am making just like u. cross the fingers and hope it will be same or just near like yr biryani.
yes… yes… the biryani will be good.
dear maam,
thanks a ton.
🙂
Ji! Kya baat hai! Poora padh bhi na paya ki pani se bhar aya munh…. Aur ab…. bhaga bhaga dookan….khareed raha hun samagri…Pranam Pranam Devi!
expecting more recipes 4m u:)
yes i will post some new recipes very soon…
very tasty
The best biriyani recipe ever…….
Just tried and it came out really good.Rice was perfectly cooked for the first time.Thanks a lot!
I have a question the recipe is for 1 and 1/2 cup of rice, if I want to use for 5 cups of rice, is the recipe still same except for water?
just increase the rest of the ingredients proportionately……..
Hi Dude,
Hope you are doing good…
Dam good on explanation on DUM BIRYANI, let me try once for this weekend i mean to say for this new year. If you have more recipe’s please do send me the emails to poduriking@ymail.com so that it will be more helpfull to me for cooking.
Thanks in advance… have a niceday 🙂
Regards,
Pradeep Poduri
Microsoft Certified Professional (MCP)
986-616-5498
poduriking@ymail.com
pradeeppassion@gmail.com
i am unable to send any recipes by email as i do not have time. u could though browse the site for recipes. happy cooking……
Was just browsing the net for some biriyani recipe on a lazy sunday. When i saw the description with the photos really felt like trying it. Believe me i was trying biriyani for the first time. I was really excite that it came out well. The rice was perfectly cooked, everything was perfect. Thank you for the wonderful recipe.
This a wonderful way of explaining with pictures..!!! It’s really helpful to me to prepare veg dum biryani in colorful and tasteful.
While seeing pics it self i had watering in my mouth.
The recipe turned out awesome. Your instructions were so precise and easy to follow and it seemed like a snap to make such a complicated dish. I also tried out the ragda patties and they were also phenomenal. I had both dishes for dinner and the next day for lunch.
thankyou ami
It seems to be yummy. M gonna try it 2day itself
I just tried this out for my mum and dad…!! Lets wait for their comments now!!! 🙂
awsmmmm recipe and dum idea is gr8 without handi ….
thnx a ton dear…its awesome…
Hey thnx a ton… this recipe is awesome…made it…won many hearts…thnx a million…
Hmmm! going to try this recipe just now.Can’t wait.Pictures have made it lot easier to try out the yummy looking recipe.Thanks a ton!
this is truly awesome will try it out this week i need to buy some of the spices i use royal basmati rice and whenever i have tried soaking for 30 minutes i feel the rice is broken faster any suggestions please or should i use tilda?
i think for the royal basmati rice, you could just soak it for 10-15 minutes and then try. I have used Tilda and I felt its ok. I have also used the kohinoor variety of basmati rice. I have used the Kohinoor Platinum Range of Basmati Rice, but again its ok.
Personally, I would suggest you to get your hands on Kohinoor Trophy Gold Basmati Rice or Kohinoor Trophy Royale Basmati Rice. I have used both and these rice are great for making pulaos and biryanis. The grains are really long and slender. I soak these for 30 mins and then use it. Even the plain rice made with these goes well with any curry or dal.
fantastic food receipe
Thanks Prasad
i love u.u r the best chef.thank u soooooooooooo much
thanks abhilash for your encouraging words
it looks very tempting I am already hungry .You have explained it so wondefully along with useful tips cant wait to try it. keep posting more yummy recipes
Thanks for your sweet comments. Yes, I have some more yummy recipes to post like Pani Puri, Ragda Pattice, Butter Masala Dosa, Cheese Pav Bhaji, Baingan Bharta…… and more.
If you try the recipe, then do give the feedback and keep checking.
Ps- the elaborate pictures have definitely inspired me (besides making me v v hungry! 🙂
Thanks for those inspiring words. I am glad the pictures have inspired you. I am sure this hyderabad vegetable dum biryani recipe will definitely come out great with you.
This sounds absolutely yum! Can’t wait to try it out tomorrow! Thank you for the post! x
its realy yummy!!!!!!!! try today……yummmm
Thanks for an other superb Biryani Recipe. I will agree with you this is really authentic meal.
thankyou so much.