How To Make Curd | Dahi | Homemade Indian Yogurt
One of the good and easy ways to consume probiotics regularly is by including curd or dahi (yogurt) in our everyday meals. Curd has been a classic food in India for thousands of years. With this post, learn to make Indian Yogurt easily at home. This Curd recipe also mentions one of the traditional ways of preparing curd at home, by the fermentation process. There’s a list of tips in the end to deal with troubleshooting of this Dahi recipe. You can’t miss on that too.
All About Curd (Dahi)
Curd or dahi, as it is known in Hindi, is a fermented milk product having its origins in the Indian subcontinent. The word ‘dahi’ is probably derived from the Sanskrit word ‘dadhi’ which means sour milk.
It is made by mixing a friendly bacterial yogurt starter with warm milk, which is then allowed to ferment for some hours.
Once the fermentation stage is completed, what you get is a thick, wobbly and pudding-like textured product, which the flowing milk transforms itself into.
And because there’s a fermentation process which includes bacteria, the resultant curd has a tangy taste too. Have been searching for the best answers on making curd at home, this is where your search ends!
Table of Contents
Basically, with this Dahi recipe, you get a fermented milk product that is healthy, gut friendly and probiotic in nature. This dahi can be further used to makes a variety of dishes in Indian as well as western cuisines.
The Curd Recipe yields dahi, which can also be called as the Indian Yogurt. However, know that the yogurt available outside India is quite different than the curd, of Indian origin or what is made in Indian households.
I haven’t dived deep into the food science of making dahi and the fermentation process that this Curd recipe mentions. Have kept it quite basic. Understandable and doable by one and all. It also has a few tips that will help you master the art of making homemade curd.
Also, got friends who are struggling and having a tough time making fresh dahi at home? Share this post with them and make their lives easier. This Dahi recipe is quite the fool proof one that one can refer to easily.
You can also make these other dairy essentials at home, just like homemade curd:
- How to Make Paneer
- How to make Ghee
- How to make Butter
- How to Make Khoya
- How to Make Hung Curd
- How to Make Chenna
How to make Curd
Boil Milk
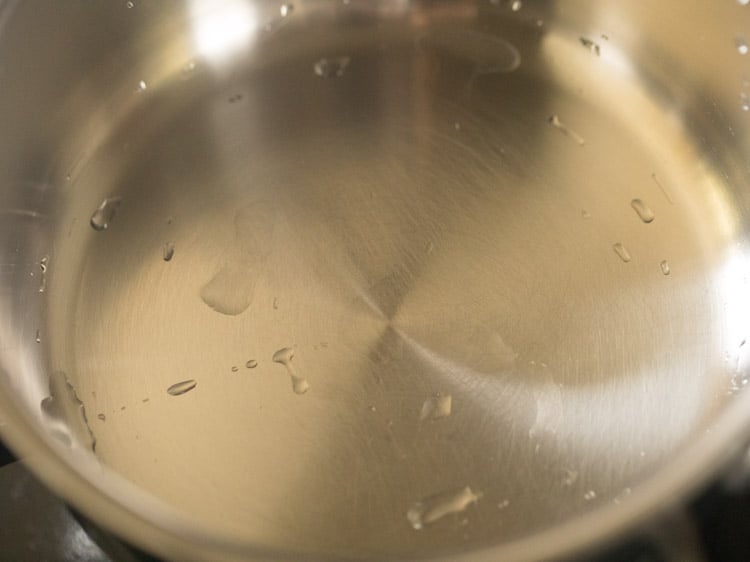
1. First step is to take a thick bottomed pan and rinse it with clean water.
2. Then, add ½ liter (about 2 cups) whole milk. Keep the pan on the stovetop and begin to heat the milk on low to medium-low heat.
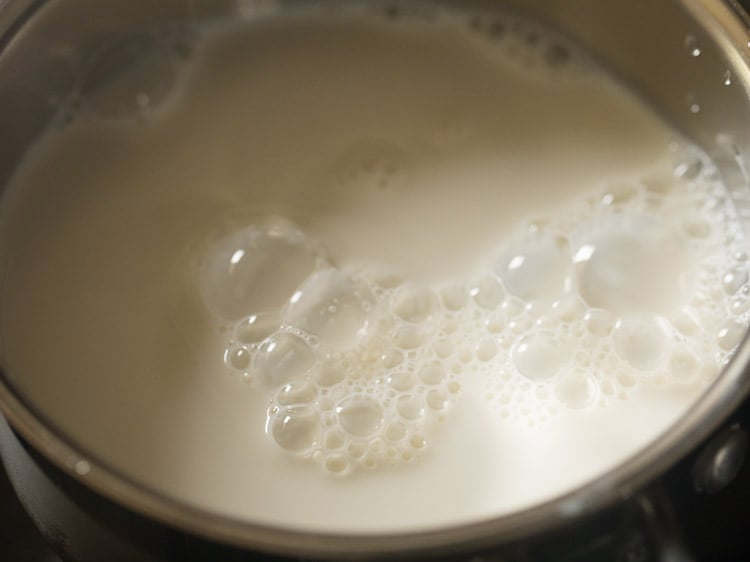
3. Stir the milk once or twice while it is heating, to avoid burning or browning from the bottom.

4. Let the milk come to a boil. Milk will froth and bubble when it comes to boil.
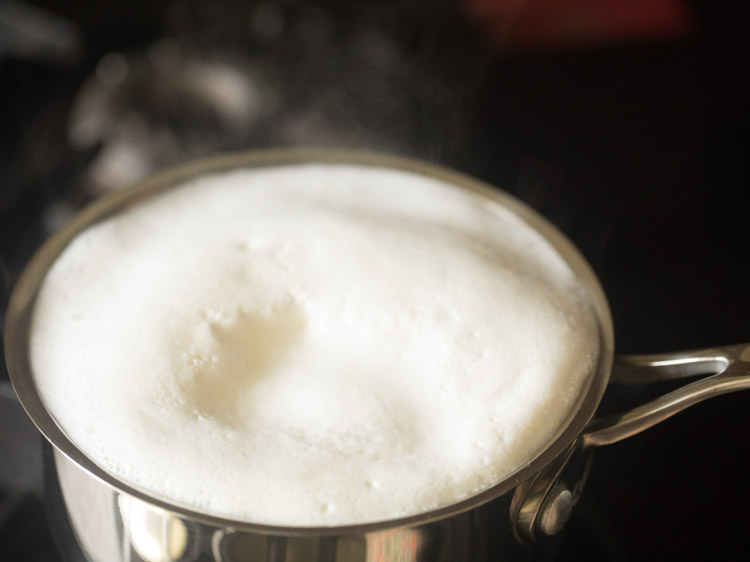
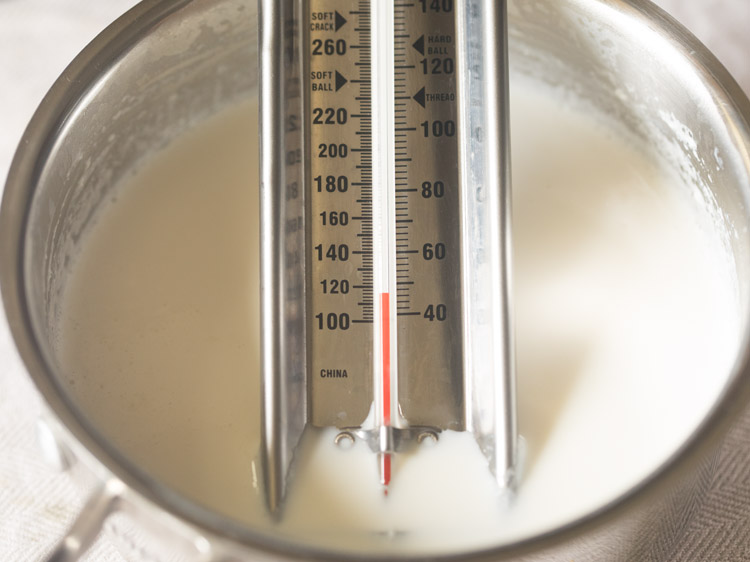
5. You can even heat milk to a temperature between 85 to 96 degrees C or 185 to 204 degrees F. If you have a food temperature scale then you can make use of it.
6. Turn off the heat. Remove the pan and keep it aside on the kitchen counter for the milk to cool to room temperature.
We only need the temperature of milk to reduce until the milk becomes warm.
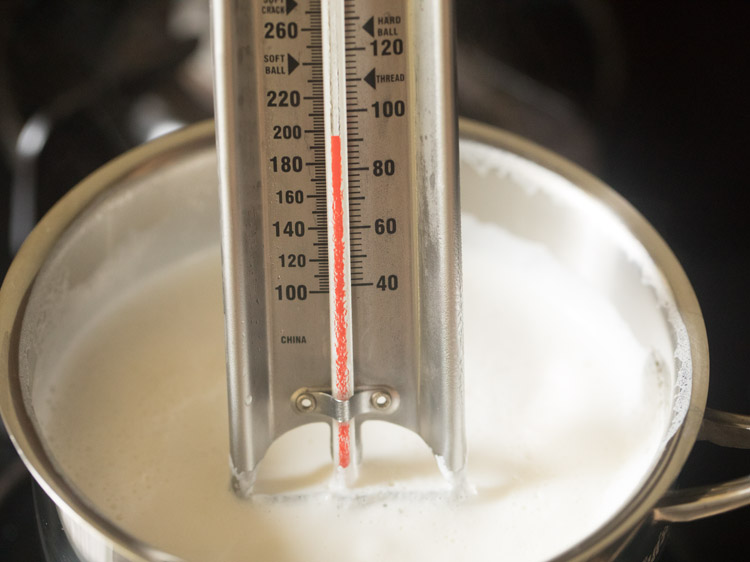
Ways to check if the milk is warm
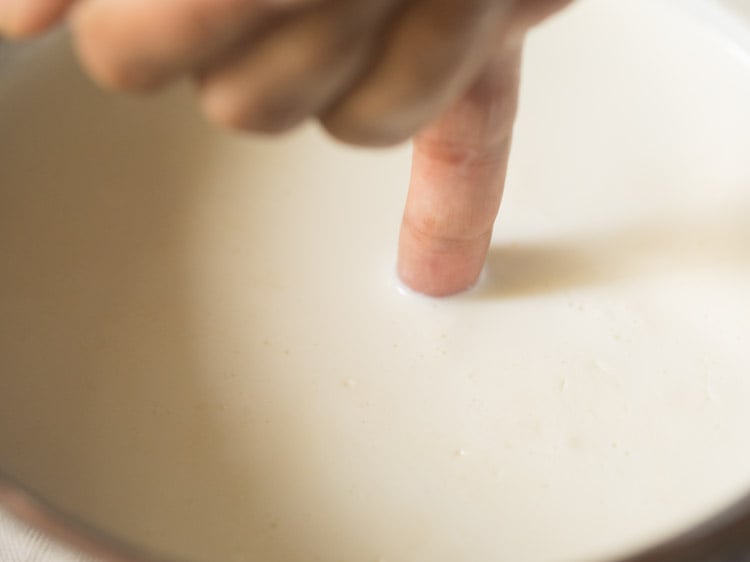
7. You can check if the milk has become warm with your fingers (touch method) or with a thermometer. Dip your little finger in the milk and you should feel warm and not hot.
Another way is to touch the pan. When you touch the pan, it should feel warm and not hot.
8. You can even use a food thermometer to check the temperature. The temperature of the warm milk should be between 39 to 44 degrees C or 102 to 111 degrees F.
Adding Starter
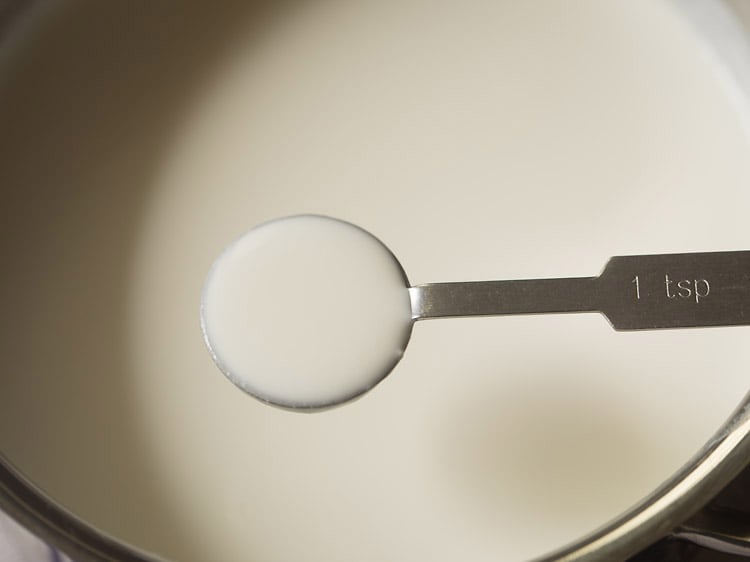
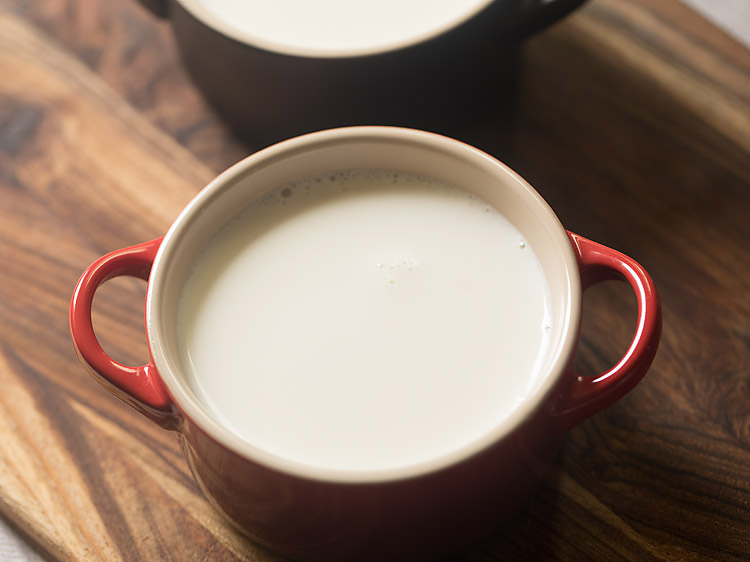
9. Now, take 1 to 2 teaspoons of the curd starter and add in the warm milk. In winters, you can add 2 teaspoons. Whereas in summers, 1 teaspoon works fine.
Here I have used a leftover curd starter. Nowadays, you also get dry starters in super markets and online stores. So you can use these package starters also.
There are many types of starters available to make different kinds of yogurt. Choose the starter for the kind of yogurt you are planning to make.
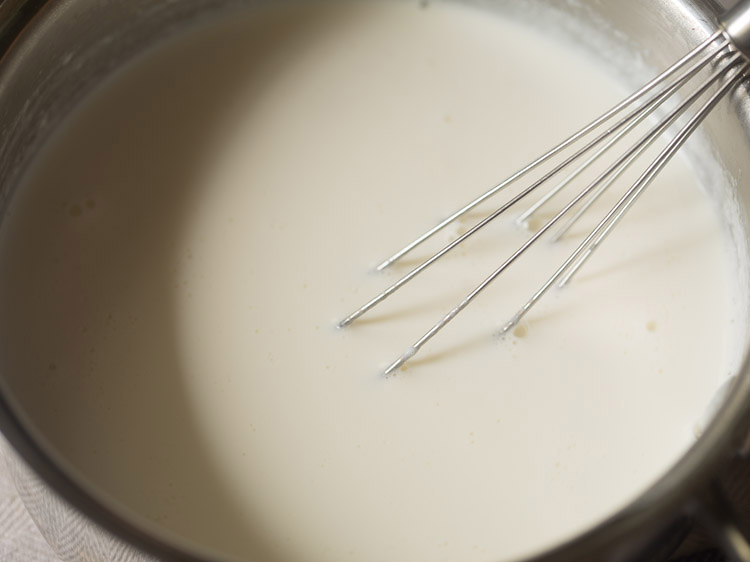
10. With a small wired whisk or a spoon mix very well. A small wired whisk makes the job of mixing the curd starter very well in the milk.
Setting Curd
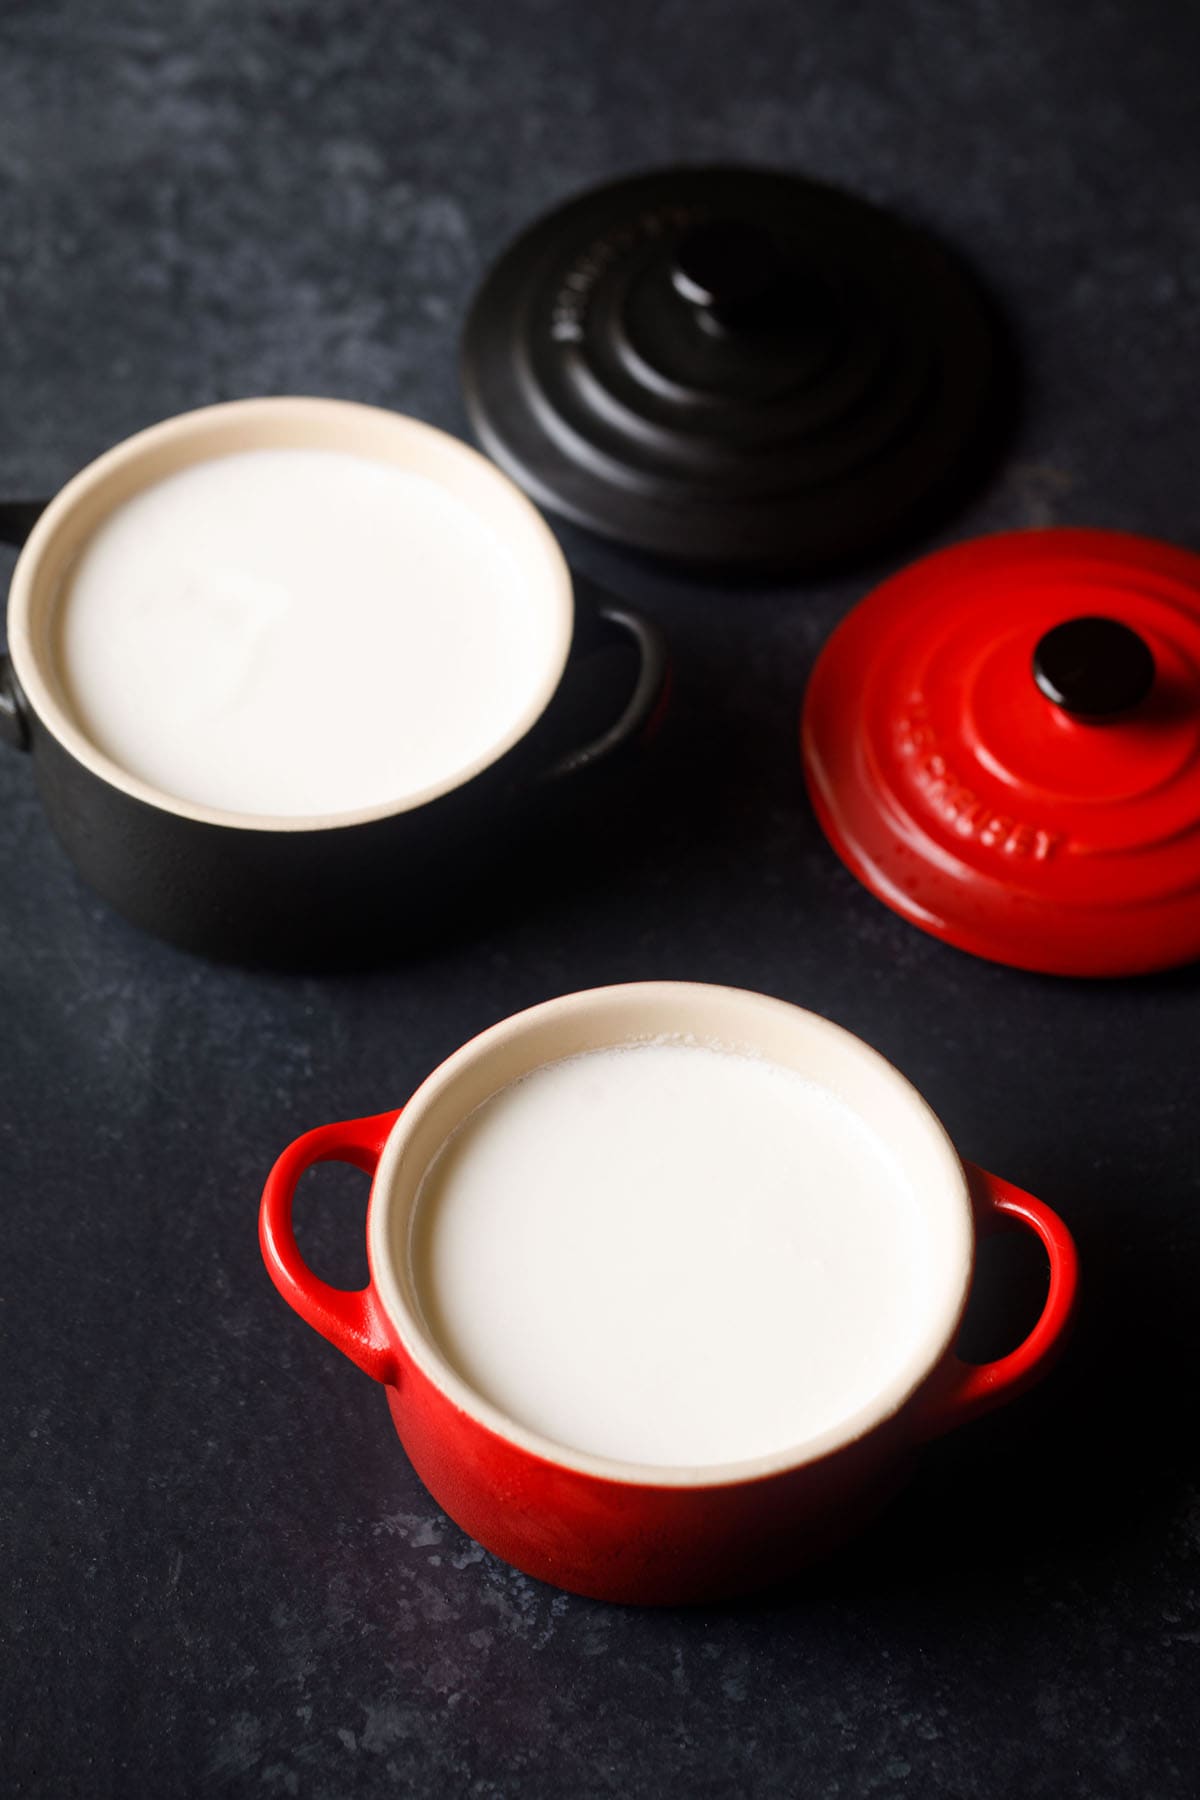
11. Then, pour this mixture in a bowl or pan.
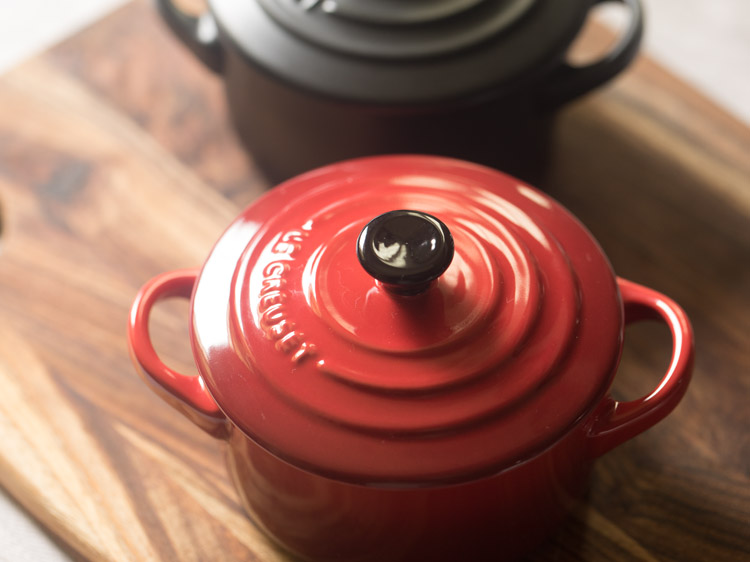
12. You can use terracotta, clay, steel, glass or ceramic bowls for setting the curd. To put less efforts, set the curd in the pan which was used to boil the milk.
13. Cover with a lid and keep the curd to set. This is at room temperature for 4 to 5 hours. You can also keep overnight also. I kept overnight.
The time that the milk takes to convert into curd depends on the temperature. In a warm, hot and humid climate, the time taken for the curd to set will be 4 to 7 hours. Whereas in a cool or cold climate, the time taken can be 8 to 12 hours.
Nowadays, I also set the curd in the Instant Pot using the yogurt function. So if you have an Instant Pot, read the instructions to set the curd in it. Using it is very helpful if you live in a place with cold climate or during winters.
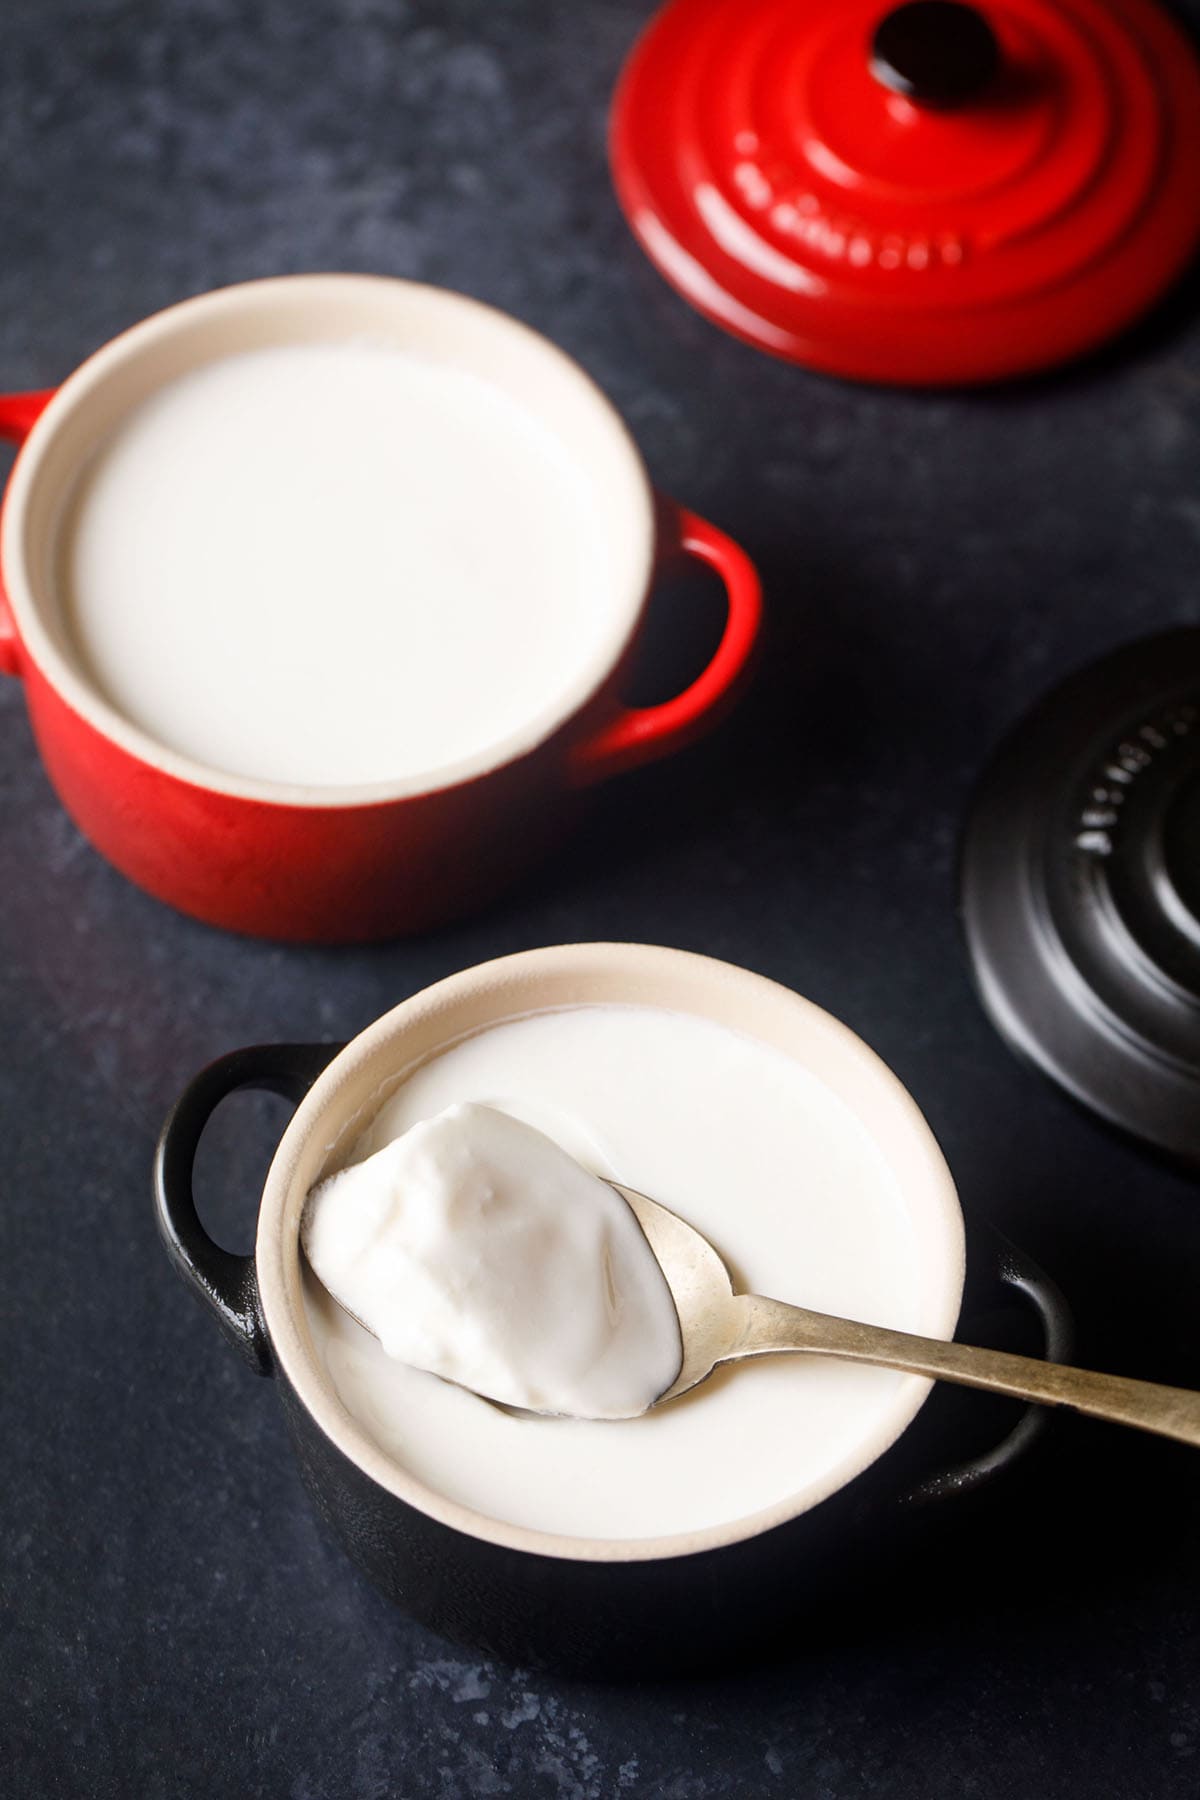
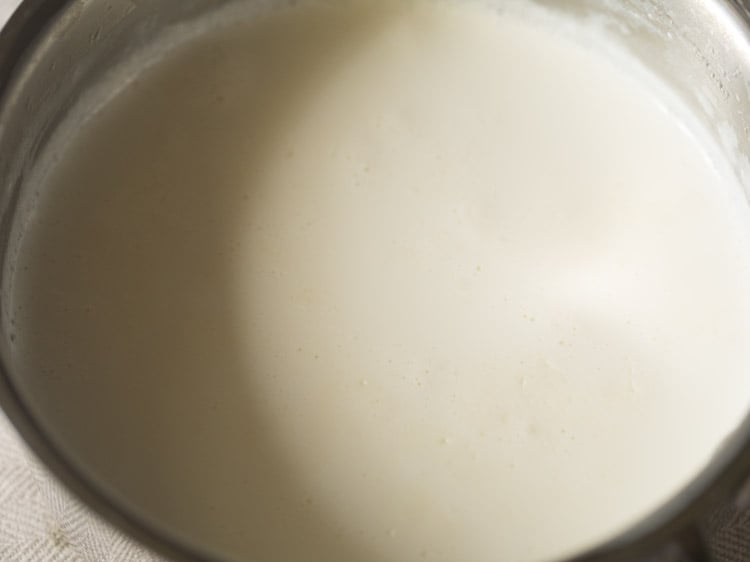
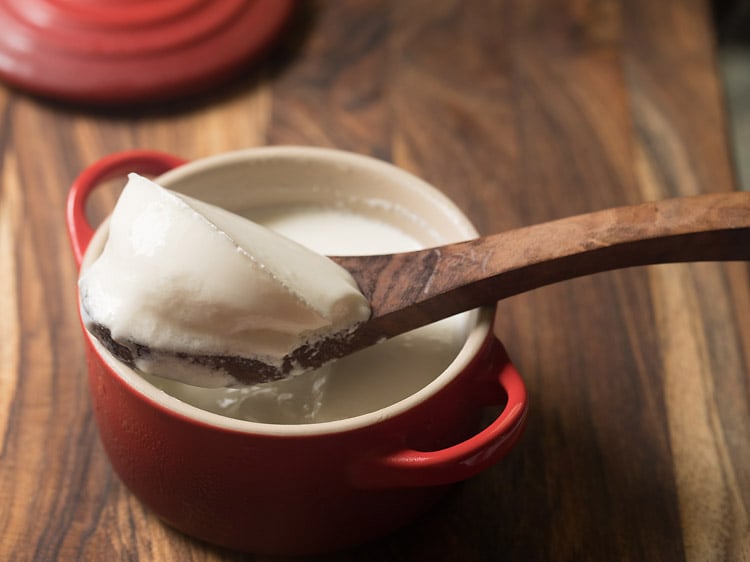
14. Next day, you will have nice well set homemade curd.
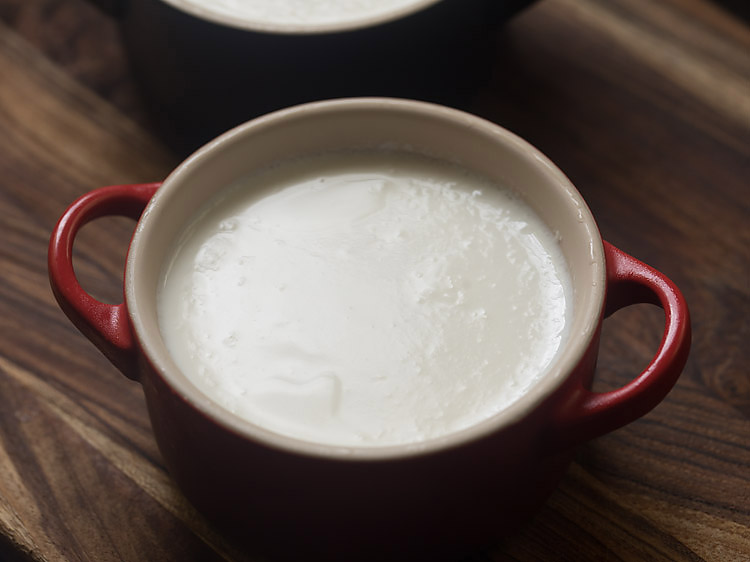
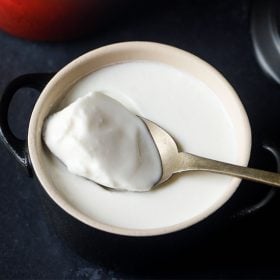
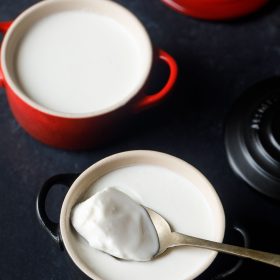
15. You can see in the below picture that its a properly set, thick and creamy curd. Usually, you see such thick curd in halwai shops (Indian sweet shops).
On fermentation, the curd will have a wobbly thick texture, pleasant fermented aroma and a slightly tangy taste. Remember to refrigerate it so that it does not get over fermented.
For any recipe, if you require sour curd, then keep it for a couple of hours more at room temperature. This will increase the sourness in the curd due to more bacterial fermentation.
Serving & Storage
Have the curd plain as is or with sugar. Use it to make desserts, beverages or any other dish. You can also have a small bowl of curd with your lunch. I have listed below the varies ways you can consume curd.
As soon as the curd is set and fermented perfectly, place it in the refrigerator. Cover the bowl or pan with lid while refrigerating. Homemade dahi keeps well in the fridge for 4 to 5 days.
Expert Tips
- Milk: To have the best results at home, use full cream or whole milk that will yield in thick, luscious, creamy curd. You could use pasteurized or homogenized milk or farm fresh raw milk. Depending on the quality of milk, you may need to add less or more of the curd starter. Note that using toned milk or low fat milk, may yield thin or watery curd.
- Heating Milk: Before beginning with the curd making process, always boil the milk. This makes sure that the milk doesn’t spoil during fermentation.
- Temperature of Milk: Don’t use very hot milk. It may coagulate and result in a grainy product. If the milk is a little hot, the curd will not be thick, is a bit runny with some whey in it. With cold milk, it will not set properly.
- Right Temperature: The milk must be just warm. Check by dipping your little finger in it. It should feel warm, and not hot.
- Mixing: Ensure that the culture is dissolved uniformly in the milk. A spoon or whisk can be used to mix well.
- Scaling: To make thick curd, use any quantity of milk. For ½ liter milk, use 1 to 2 teaspoons of culture. Increase proportionally for larger quantities.
- Storing: You must refrigerate the curd once it is set properly.
Tips to make curd in cold weather
- If you stay in a place with cold weather conditions, cover the bowl/pan of the curd mixture with a warm towel/blanket and keep in a warm place in the kitchen.
- You can also use the Instant Pot yogurt function for making curd.
- You may also place the bowl/pan in a big jar of wheat flour and cover the jar. My mother-in-law makes curd this way in the Delhi winters.
- Remember that the curd will set quicker in summers than in winters.
Uses of Curd
Generally, we have a small portion of curd with our home meals. The helpful bacteria in the curd helps to digest the food.
So, if you have indigestion issues, then you must start consuming curd in your lunch, on a regular basis. Avoid having it in dinner, as it can develop a cold in your system.
After making fresh dahi with this Curd recipe, you can use it to make a plethora of Indian snacks, mains and beverages like Chaas, Lassi, Dahi Vada, Papdi Chaat, Curd Sandwich, Curd Rice, Kadhi Pakoda and the likes.
Simple raitas can also be prepared with it and paired with your parathas, thepla, etc. With these flatbreads, you can also have plain yogurt.
This Dahi recipe will give you fresh curd which you can also use in marinades for tikka and biryani recipes. Some famous sweets that can be made with the use of Indian Yogurt are Shrikhand, Mishti Doi and Balushahi.
Step by Step Photo Guide Above
Ingredients
- ½ litre whole milk
- 1 to 2 teaspoons Curd (dahi or yogurt) to be used as a starter
Instructions
Boil Milk
- Rinse a thick bottomed pan or saucepan with clean water.
- Pour milk into it and heat it on the stovetop on a medium-low to medium heat.
- Stir a couple of times when the milk is getting heated so that the milk does not get burnt from the bottom.
- When the milk comes to a boil, it will start rising. Before it spills out of the pan, switch off the heat. Set the pan aside on the kitchen countertop.
- Let the milk become warm at room temperature.
- To check if the milk has become warm dip your little finger (touch method) into the milk and you should feel warm and not hot. Second way is to touch the sides of the pan and it should feel warm and not hot.
- The third way is to check with a food thermometer and it should have a temperature between 39 to 44 degrees Celsius or 102 to 111 degree Fahrenheit.
- Once the milk has become warm, you can use the same pan for setting curd or transfer the warm milk in another bowl.
Make Curd
- Add 1 teaspoon of curd starter to the milk and mix thoroughly with a small wired whisk.
- Cover with lid and allow the milk to ferment for 5 to 6 hours or until the curd is set
- Depending on the temperature it may take more hours. You can also use Instant pot yogurt function to set the curd.
- On fermentation the curd will have a pleasant fermented aroma and with a slight tangy taste and it will also have a wobbly thick texture.
- Once the curd is made, refrigerate it so that it does not get overfermented.
- If you need sour curd for any recipe then keep the curd for a couple of hours at room temperature. This will lead to more fermentation and the curd will become sour or very sour.
- You can eat this curd with your meals. You can also add it to variety of recipes like curd rice, buttermilk, lassi, kadhi, mor kuzhambu, dahi kabab, dahi vada, dahi bhalla, biryani, paneer tikka or make raita with it.
Storage
- As soon as the curd is set and fermented well, place it in the refrigerator covered with a lid. Use a clean dry spoon to remove the curd and place the bowl or container back in the fridge.
- Homemade yogurt or dahi keeps well in the fridge for about 4 to 5 days.
Notes
- Use whole milk as it makes for a thick creamy curd.
- In hot Indian summers, this method works for me. Use pasteurized milk or raw milk that has been boiled earlier and which is refrigerated. Remove this cold milk from the fridge, mix the starter with it. Cover the bowl and let the mixture ferment for 5 to 6 hours or as needed. This saves a bit of time as you don’t need to heat the milk. But note that this method only works in a hot or warm climate. Please don’t use this method with raw milk or milk that has not been pasteurized or boiled earlier as it may have some harmful microorganisms. These microorganisms are destroyed when the milk is boiled.
- Make sure that the milk is warm before you mix the starter. Hot milk will kill the bacteria in the starter and you won’t get a properly fermented curd.
- In winters or cold climates ensure that you are not adding curd culture to milk that has cooled down. If the milk is cold, then the curd won’t set at all in the winters.
- It is very important to dissolve the curd culture uniformly in the milk. Whisk very well with a spoon or a wired whisk.
- Once the curd is set then refrigerate for a couple of days.
- To keep the starter ongoing remove a few spoons from the curd and either refrigerate or freeze it in a small covered bowl.
- If you don’t have any starter then buy packaged starters available in health stores or online stores or supermarkets.
- The recipe can be scaled. You can make a small amount or big batch according to your needs.
Nutrition
Homemade Curd recipe from the archives was first published on May 2012.
Can I make ghee with the above curd
Yes you can.
I used Pasteurised Homogenised Cow Milk, boiled for 5 minutes, added 1tsp curd in 500ml lukewarm milk, kept in a casserole so that temperature is maintained uniformly.
Curd set perfectly, but too much whey. Please advise the reason and remedial measures for improvement.
Too much of whey can be due to getting fermented more. Reduce the hours for fermentation. Hope this helps.
Hey.
I purchase my starter from an organic dairy and the starter is really nice. I keep the same amount of starter for the milk and the quantity of milk and follow all instructions and on most days the curd sets well but on some days it doesn’t set at all even after 7-8hrs.
Can you help me out.?
I don’t want to keep wasting milk because of this.
Do you recommend adding chilli stalk to starter + milk every time to ensure that the curd will set?
Thanks in advance
Hi Nishi, curd sets well in warm temperatures. You can keep chili stalks. Even I do that on occasions and it makes the curd really thick. Keep in a warm place. In cooler climates the curd takes a long time to set. If you have an Instant Pot, you can use the yogurt option in it to set the curd. Trust me, it makes the best curd. In winters and monsoons, I use the Instant Pot to set curd. In summers I keep the curd to set at room temperature.