Paratha Recipe | Indian Flatbread (Plain Paratha)
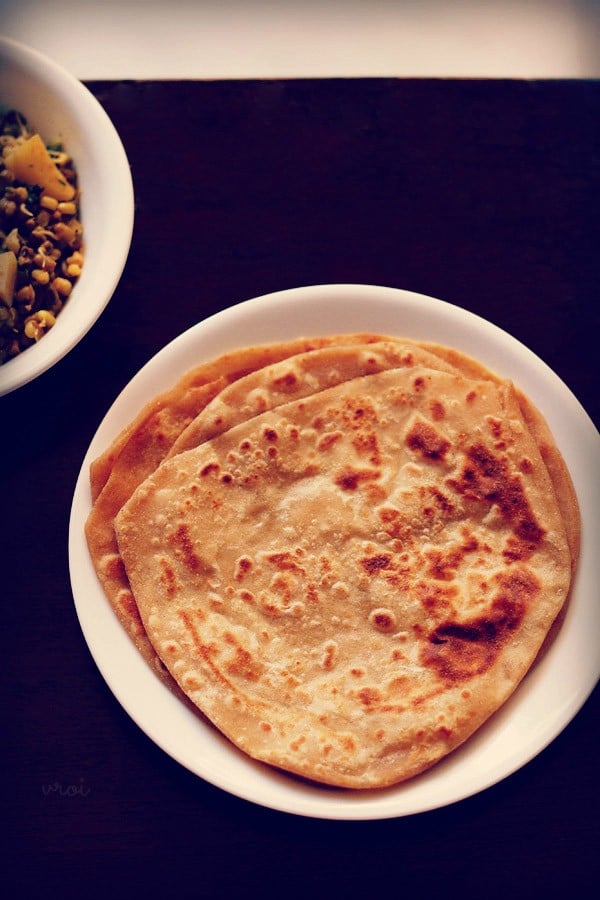
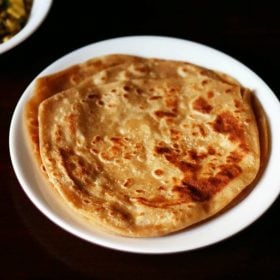
Plain Paratha, also simply called Paratha, is a popular North Indian unleavened flatbread made with whole wheat flour, water, and salt. The dough is rolled and cooked on a hot tawa or skillet with a little oil or ghee until soft inside and lightly crispy outside. Paratha is commonly served for breakfast or meals with curd, pickle, or vegetable dishes. It is a simple everyday flatbread made in many Indian homes.
About Paratha Recipe
Plain paratha is a crisp, flaky Indian flatbread that pairs well with dals and curries. This traditional unleavened bread is made with a simple whole wheat flour dough and cooked on a hot tawa until golden and crisp.
In this post, I share my classic plain paratha recipe with step-by-step photos so you can make soft yet flaky parathas at home. The dough is rolled, folded, and shaped to create distinct layers, then roasted and served hot.
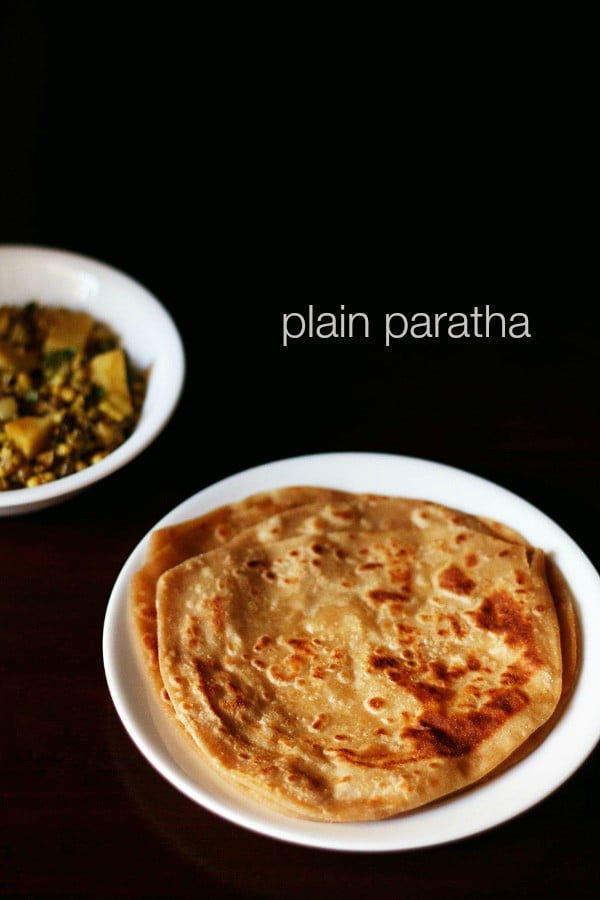
Table of Contents
Plain parathas, along with Lachha Paratha and the South Indian Parotta, are staples in Indian cuisine. They are enjoyed with various curries or gravies across regions.
There are also many stuffed parathas like Aloo Paratha, Gobi Paratha, Mooli Paratha and Paneer Paratha, which I make often. Still, this plain paratha remains my go-to side for dishes like Paneer Butter Masala or Palak Paneer.
Parathas are equally good on their own, with chai, or served with Mango Pickle or Green Chilli Pickle, or even fruit jams.
In this recipe, I show two easy ways to roll and shape paratha:
- Triangle shape
- Square shape
Choose the method you find easiest.
How to make Paratha Recipe
Knead Dough
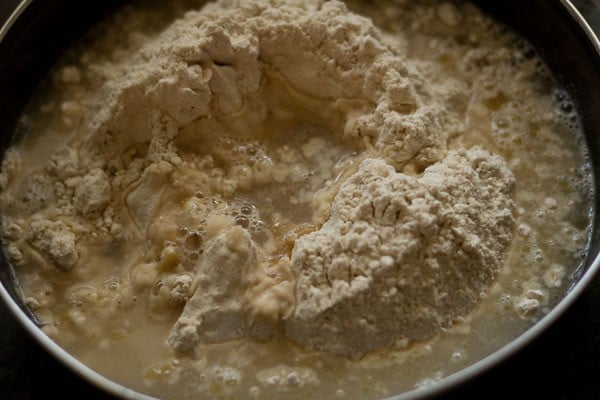
1. In a large mixing bowl add 2 cups of whole wheat flour, 1 teaspoon of oil or ghee, ½ teaspoon of salt.
Add ½ cup water in portions as you go on mixing and kneading the dough. Keep in mind not to add all of the water at once.
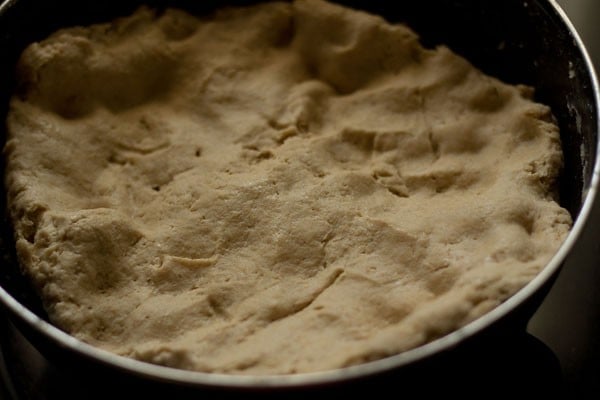
2. Mix and knead into a smooth, soft dough. Continue to add a bit more water a splash at a time if required while kneading.
Cover with a kitchen towel and set the dough aside to rest for 30 minutes.
Triangle Folded Method
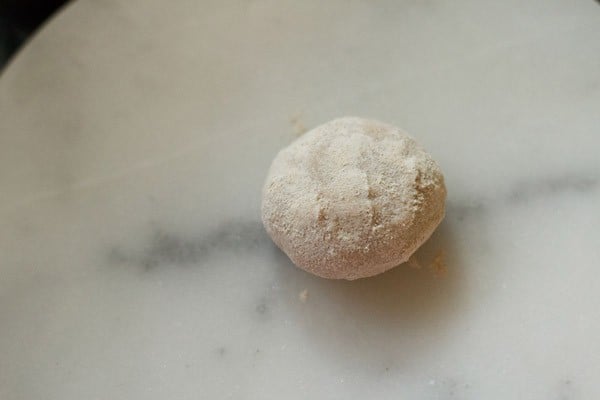
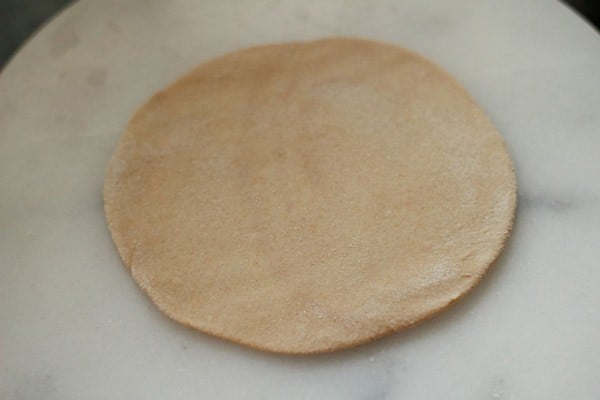
3. Pinch a medium-sized ball from the dough. Dust with flour and flatten on a clean surface that’s also dusted with a bit of flour.
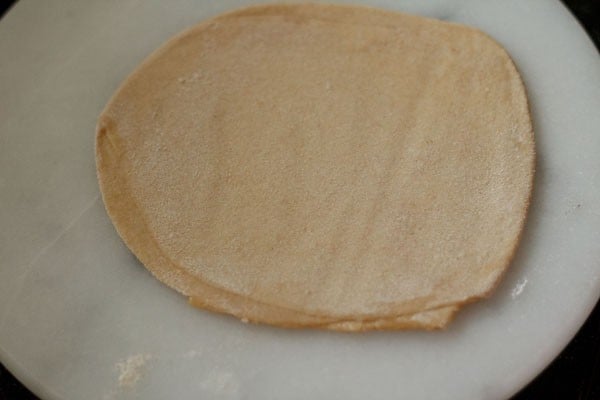
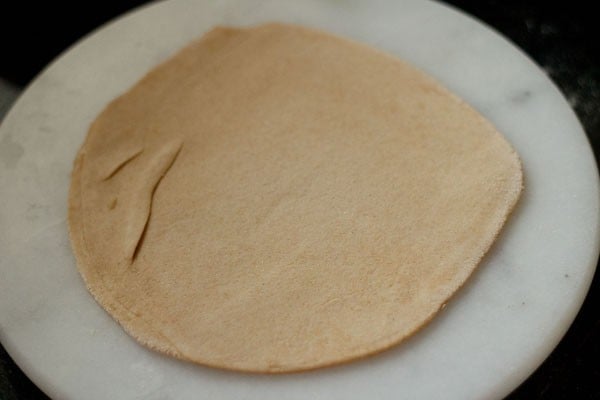
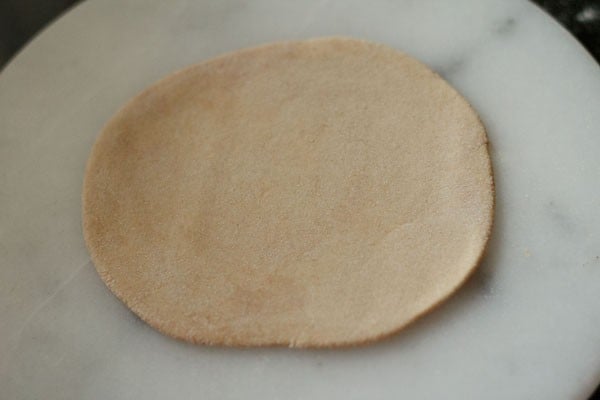
4. Use a rolling pin to roll the paratha dough into a circle that’s about 4 inches in diameter.
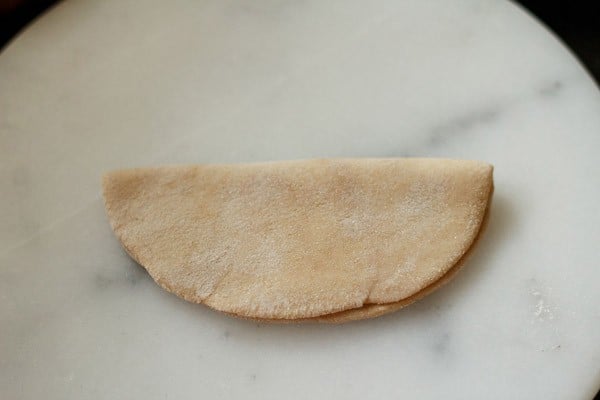
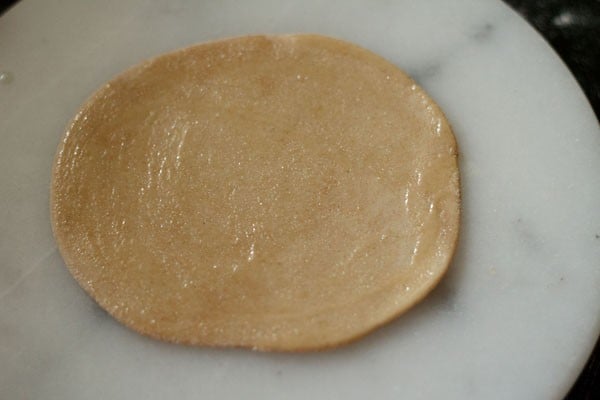
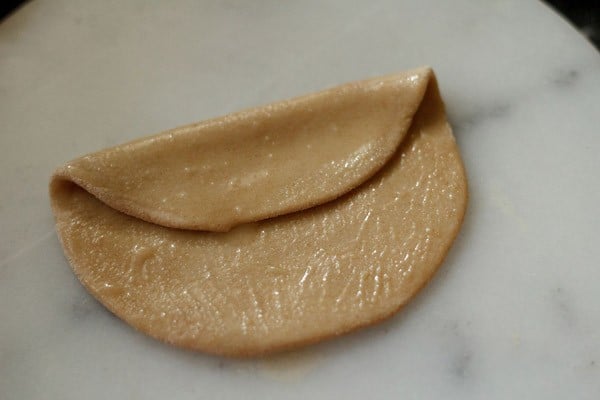
5. Next, use the back of a spoon to spread some ghee (or oil) to coat the surface of the dough circle.

6. Fold the dough circle in half with the spoon.
7. Now spread some more ghee on this folded half of dough.
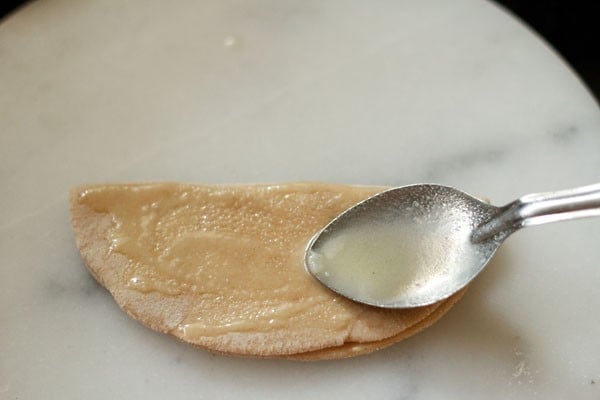
8. Fold sideways to create a triangle shape, like in the photo below.

9. Dust some flour on the folded triangle.
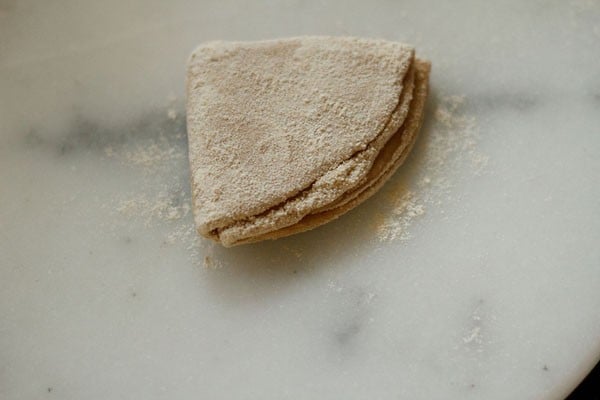
10. Roll the folded triangle back into a round disc of dough or in a triangular shape.
11. As you roll you can add some flour as needed to keep the dough from sticking. The dough should be rolled into a circle that’s about 6 to 7 inches in diameter.
Square Folded Method
This method does not change the taste of the paratha, but does create a more square-shaped flatbread.
12. To make a square version of paratha, first flatten a medium-sized ball of dough on a lightly dusted board. Roll out to form a circle of about 4 to 5 inches in diameter.
13. Use a spoon to evenly spread some ghee or oil on the rolled dough.
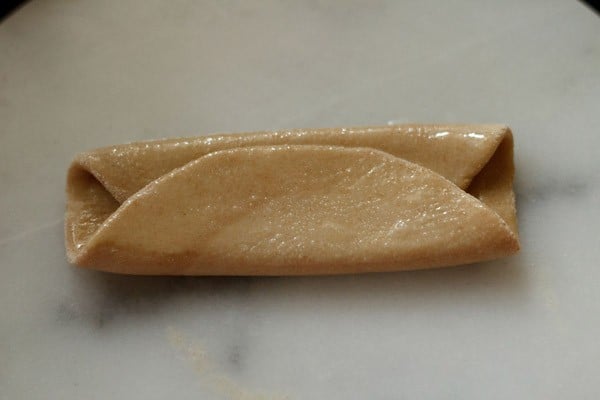
14. Bring one side of the rolled dough towards the center and press lightly. Spread more ghee on the folded part.
15. Fold the opposite side of the rolled dough on top of the folded part. Press lightly, and again spread the ghee on this second folded part.
16. Next, fold the right side of the paratha dough to bring it towards the center. Spread some ghee on this fold, too.
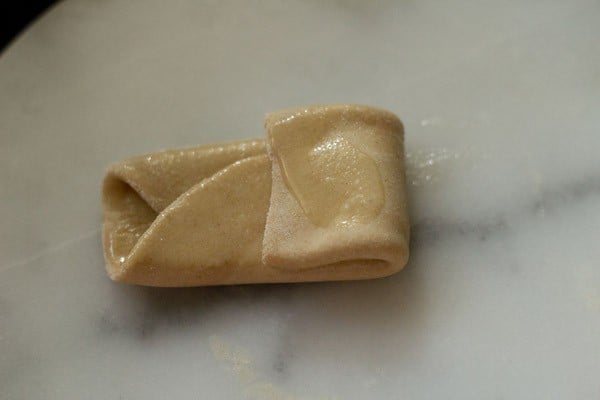
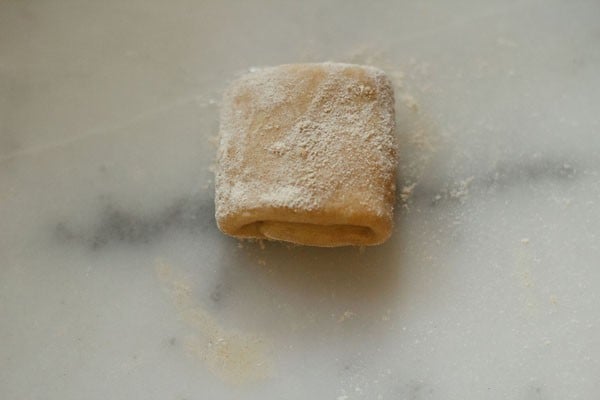
17. Lastly, fold the left side on top of the right fold. You should have a nice little bundle of dough, like in the photo below.
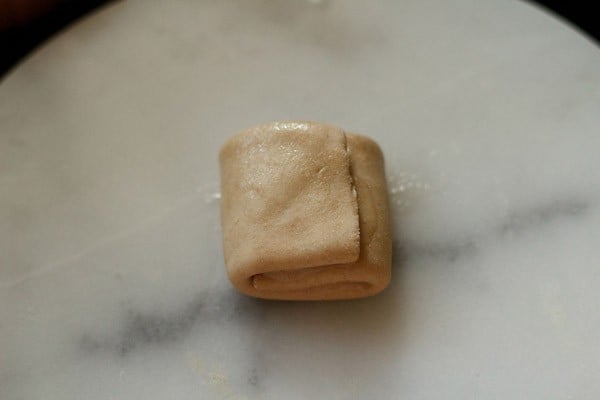
18. Sprinkle some flour on the folded paratha.
19. Begin to roll. Add some more flour if needed while rolling so that the dough doesn’t stick.
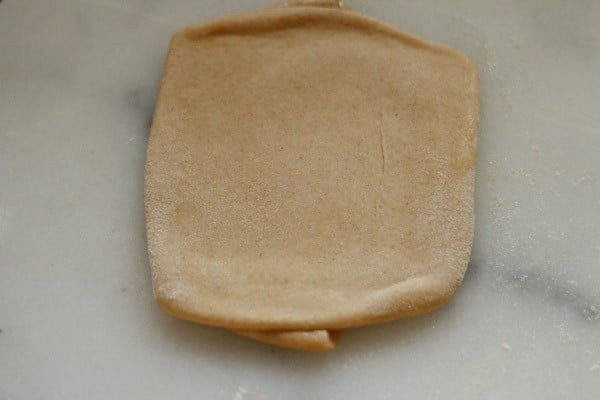
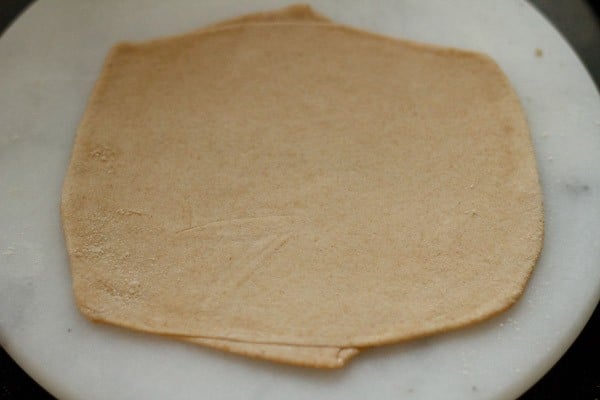
20. Roll the dough into a square shape.
Cook Plain Paratha
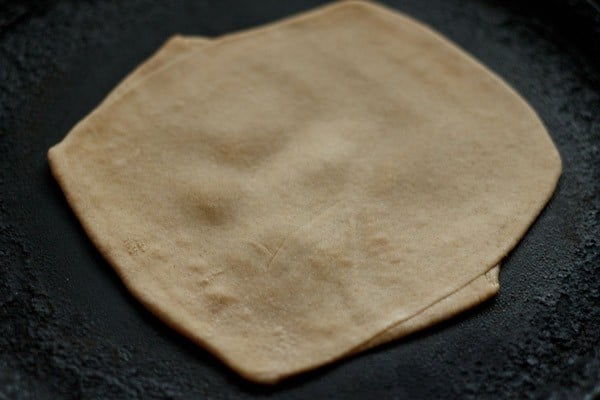
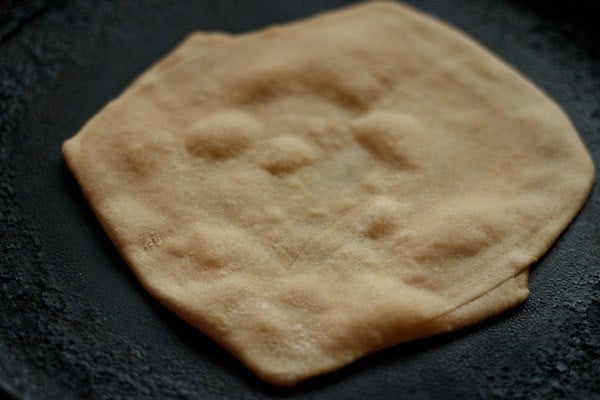
21. Once you’ve rolled out all of the paratha dough discs or square, heat a tawa (skillet) over medium heat on the stovetop. Working one at a time, place one of the paratha onto the tawa.
To test the hotness of the skillet, sprinkle a few pinches of flour in the center. if it browns in a few seconds, the tawa is hot enough to begin with the paratha roasting.
With a kitchen napkin, wipe off these browned flour particles from the skillet before you begin roasting paratha.
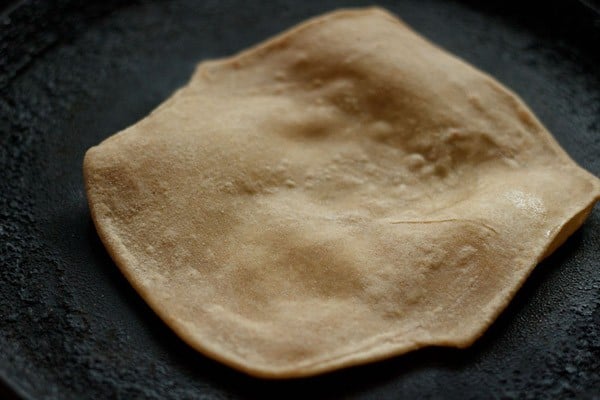
22. The paratha will begin to puff up and bubble from the heat. Roast paratha on a medium to high heat and do regulate the heat as needed.
A thin skillet or pan will need medium heat and a heavy skillet or pan will need medium-high to high heat.
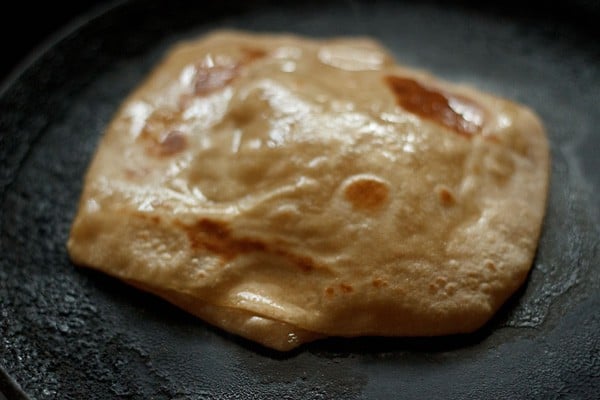
23. When the bottom of the paratha is about ¼ of the way browned (you will see the paratha having some air pockets), flip it over with a spatula.
24. Spread on some ghee.

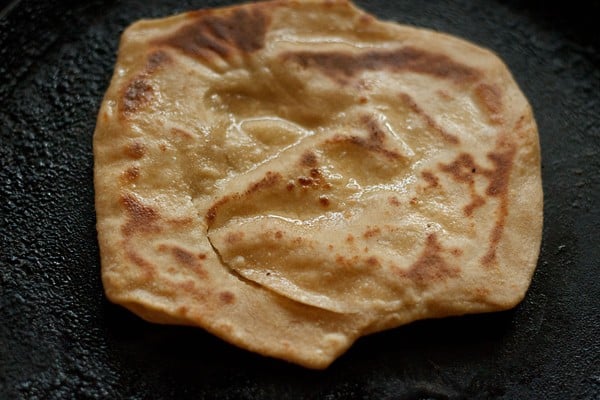
25. Flip again when the second side is about ½ way cooked. You will see brown spots now.

26. Now spread ghee on this side.
27. Flip again a couple of times until you see more brown spots and the paratha is cooked evenly.
Transfer to a holding plate or a casserole container or a roti basket/box, and repeat the process to cook all of the flatbreads.
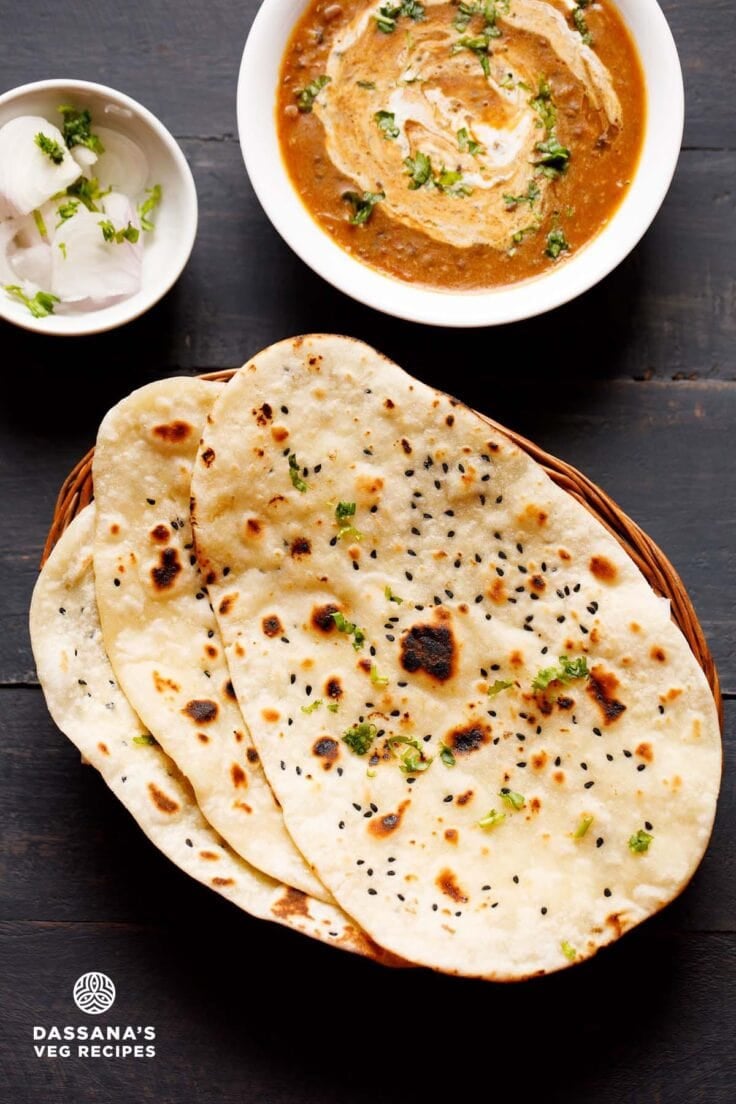
28. Serve the plain paratha right away while hot or store in a roti basket until ready to enjoy.
Paratha can be served with any Indian mains like lentils, curries, gravies and even dry sautéed or steamed vegetable dishes. You can also enjoy them with mango pickle or lemon pickle or red chili pickle.
For a more filling meal, you can pair paratha with curries like Veg Kurma or Aloo Matar or Chole Recipe or Rajma Masala.
Troubleshooting Tips
- Water for Dough: Add water gradually while kneading the dough. This helps control the texture and prevents the dough from becoming sticky.
- Dough Consistency: The dough should be soft and pliable, not stiff. If it feels dry, add a little water. If it turns sticky, dust with some flour and knead again.
- Testing Tawa Heat: Sprinkle a few pinches of flour on the tawa. If the flour browns within a few seconds, the pan is hot enough. Always wipe off the browned flour before roasting the paratha.
- Heat Level: Use medium heat when cooking on a thin pan. A heavy tawa retains heat better and works well on medium-high to high heat.
- Crispier Paratha: Cook the paratha slightly longer on each side so moisture evaporates. Press gently with a spatula and add a little oil or ghee to get more brown, crunchy spots.
- Vegan Option: For a vegan paratha, use a neutral-flavored oil instead of ghee for layering and roasting.
- Extra Flavor: Adding a small amount of carom seeds (ajwain) to the dough enhances flavor and also helps with digestion.
- Serving: Paratha tastes best when served hot. As it rests, the crisp layers soften and lose their texture.
- Scaling the Recipe: This paratha recipe can be easily doubled or tripled depending on how many parathas you want to make and serve.
Your Questions Answered
How can I make extra crispy paratha?
If you want more crisp parathas then simply fry them for a bit longer on each side to get more brown crunchy spots.
What dishes go well with paratha?
Enjoy homemade Indian flatbread warm with lentil recipes like Dal Makhani or Dal Bukhara or Langarwali Dal or mango pickle or green chilli pickle, or any Indian vegetable curry or any paneer gravy like Paneer Tikka Masala or Matar Paneer or Shahi Paneer.
How long do homemade paratha keep well?
These breads are best when enjoyed as soon as they are made. If you serve them after storing or resting for some minutes, the crispy texture is not there and they soften, but the paratha still tastes delicious. For health reasons, I recommend to eat the parathas the day they are made and not make ahead or store them for the next day.
More Paratha Recipes
Step by Step Photo Guide Above
Paratha Recipe | Indian Flatbread (Plain Paratha)
Ingredients
- 2 cups whole wheat flour (atta) – 240 grams
- 1 to 2 teaspoons oil or ghee (clarified butter)
- ½ teaspoon salt or add as required
- ½ cup water or add as required
- oil or ghee add as required, for roasting
Instructions
Kneading dough
- In a bowl take whole wheat flour, salt, oil. Add water in portions and begin to mix and knead the dough.
- Mix and then knead into a smooth, pliable, soft dough.
- Add more water if required while kneading.
- Cover and keep the dough aside for 30 minutes.
Method to make triangular folded paratha
- Pinch a medium sized ball from the dough. Flatten and dust with some flour.
- With a rolling pin, roll into a circle of about 4 inches diameter.
- Spread some ghee on the dough circle. Fold in a half.
- Now spread some ghee on this half folded dough.
- Fold sideways and this time you will get a folded triangle.
- Dust some flour on the folded triangle. Now begin to roll the folded triangle.
- Add some flour if required and roll into a circle of about 6 to 7 inches diameter.
Method to make square folded paratha
- Roll a medium sized ball on a lightly dusted board to a circle of about 4 to 5 inches in diameter.
- Spread some ghee on the rolled dough.
- Bring one side of rolled dough towards the center and press lightly.
- Now spread again some ghee on the folded part.
- Fold the opposite side of the rolled dough on top of the folded part. Press lightly.
- Again spread some ghee on this second folded part.
- Fold the right side and bring towards the center. Spread some ghee on this fold too.
- Lastly fold the left side on top of the right fold.
- Sprinkle some flour on the folded paratha.
- Begin to roll. Add some more flour if required while rolling. Roll into a square paratha.
Roasting paratha
- Heat a skillet or tawa or a frying pan and place the rolled paratha on it. The skillet should be medium hot.
- You will soon see the paratha puffing up from the base at some places and will also see some air pockets on this side.
- Flip the paratha when the base is ¼ cooked. Spread some ghee or oil.
- Flip again when the second side is about ½ cooked. You will see brown spots now.
- Spread some ghee or oil on this side now.
- Flip again a couple of times till you see more brown spots and the paratha is cooked evenly. You can press the edges of the paratha with a spatula, if needed.
- Make all parathas this way. Either serve them hot or stack them in a roti basket.
- Serve these plain paratha with any indian dal or vegetable curry or pickle.
Dassana’s Notes
- If the dough looks dry, then add some water. If the dough looks sticky and moist, then add some extra flour and knead again.
- For a vegan paratha, use any neutral flavored oil for layering and roasting paratha instead of ghee.
- To make the parathas more crispy you can fry them for a bit longer on each side so that you get more brown crunchy spots.
- The recipe can be doubled or tripled.
Nutrition
Paratha Recipe post from the archives was first published on June 2010.
I have been reading and trying your recipes for few years now. They are very accurate step by step and come out well. You are a very accomplished chef!
Thank you so much for your kind words and support. I am really happy to know the recipes have been helpful and turning out well for you. Your feedback means a lot.
Easy, crispy, flaky and so good with curries and dal. Thanks for sharing.
So glad you enjoyed the paratha. They really do pair perfectly with dal and curries. Thanks for trying and sharing your feedback.
Best plain paratha recipe ever!
Thank you.
Absolutely the most delicious and easy recipe to make! Cannot recommend it enough. Thank you so much for sharing!
Thanks so much. Really happy to hear you liked the recipe. Most welcome.
First time to make, they were delicious – thank you for taking the time to give such easy looking instructions.
Happy to know that. Thanks for sharing your feedback.
Hi.
I made paratha according to your recipe..its nice and easy.
Thanks.
Thanks for the feedback and welcome.
Everyone liked them. Thank-you!
Welcome Hope
I have made this recipe 4 or 5 times now and it is so wonderful. Thank you for the detailed steps and photos.
Welcome Traci
Hi dassana, I have never used ghee while kneading the dough.. what difference does it make?
ghee give a nice good taste in the parathas. not much of a difference as far as the texture is concerned. even with oil parathas can be soft.
🙂 Actually I meant to say that I don’t use ghee/oil while making the dough (I use it only when rolling & then frying).. So I want to know why you used it at the dough-making stage?
both ghee and oil just help in making the chapatis or parathas soft. thats the only reason.
Wanted to compliment you, good recipe. I spent the entire day making parathas and they we’re hard as a rock so I figured out finally what was wrong. This was my first time making by hand so the things I was doing wrong might help someone else that is new to making them too. First I wasn’t kneeding long enough, 10 minutes worked. Also I was rolling dough with too much flour. And I let my dough rest in the frig and then cooked while still very cold, It worked much better when I let the dough rest at room temp then cooked and finally what made the biggest difference was when rolling I didn’t flip I rolled only one side then put that side directly on the pan until it rose turning round and round and pressing lightly then flipped to other side for a few seconds then put directly on flame and it puffed up beautiful. I didn’t have atta only all purpose so that probably had a lot to do with it too. But I hope my mistakes help someone else. Thanks again for the wonderful recipe.
thanks you melmel. also thanks for sharing the suggestions from the mistakes that have happened. in india, we are so used to making parathas, that it never occurs to us that there can be mistakes too. i am sure your detailed comment will help readers who are trying to make parathas for the the first time.
Thanks! This was great feedback. I was making the same mistakes. This is by far the best recipe – the directions and proportion on ingredients is on point. I used the dough blade on my food processor just because I didn’t want to kneed the dough and the parathas came out soft and fluffy. I also used a non-stick frying pan instead of a tava.
Welcome Nudrat. Glad to know that you liked the paratha recipe. Thanks for sharing your inputs.
Wow, Dassana, I must thank you again. Today I made parathas for the first time. Until now, I only used to do rotis. Don t know why, I thought parathas are too complicated…I was wrong, with your recipe they turned out perfect (well, their SHAPE was not perfect at all, but no one complained :).
welcome always alexandra 🙂 pleased to know this and thank you for your positive and kind words.
Hi,
Great detailed recipe with clear pictures. Quick question does it matter if you use a tava or a non stick frying pan for making the parathas.
I have been using anon stick frying pan since I don’t have a tava and the parathas never come out soft or flaky 🙁
you have a great way to show to cook the Indian recipes , specially for NON-indian ppl. I will try to do the Paratha and I am sure I will enjoy it 🙂
thanks dima for your kind words.
Which is best 4 buffet
Hi there. I’m planning to make these for dinner tomorrow, is there any way of keeping the first ones warm while I make the rest?
toby, keep the paratha in a casserole and cover with a lid. you can also keep them covered with cloth napkin. they taste best when they are hot.
I made them for dinner today. It was just way I wanted them to be. Thank you Dassana, your blog is becoming my key to wonderful Indian recipes!
welcome samudri. glad to know this.
Hi dassana
Here is a big problem that i face while making paranthas..just dont know what goes wrong..whenever i make plain paranthas they dont buldge…i mean they get so hard and it gets difficult to eat it..what to do to make soft paranthas ..pls help..i am getting crazy over it..
hi swati, the parathas have to be cooked on a hot tava on a high flame. if roasted on a low flame, then they become hard. as when roasting on a low flame, it takes more time to brown the parathas and then they become hard. so they have to roasted on a high flame.
I have tried to make flatbreads before and have only had success with man’oushe, but this recipe turned out amazingly for me! Flaky, brown, beautiful parathas. Thank you for the recipe!
welcome cait. glad to know that you liked the flatbread recipe
Beautiful clicks, i love seeing the detail with the nice paratha. I made this today, and it came out very nice; been wanting to make paratha for a while. Had it with your aloo palak recipe. Yummm! [:
Thank you thank you thank you for your wonderful direction and recipe
I am going to practice and practice to get the triangular one now 🙂
welcome lisa. thanks for sharing positive feedback on paratha and aloo palak. for triangular paratha you don’t need to practice. its very easy. even if you don’t get the shape, its alright.
I want to make simple paratha. Your descriptive method seems to be easy & to the point. Thanks
welcome john
I have tried & hv come out well. I have seen some demonstrations where they have been using milk or Yoghurt or Curd to mix or make th Dough. is it necessary? as we like th parathas to be soft.& light.
Thnx. for all th info gvn
M.W
generally parathas are only kneaded with water and some ghee or oil. but there are some variations of flat breads where yogurt or milk are added. both yogurt and milk will make the dough soft. but its not necessary to add them. since, if the dough is kneaded well, then the parathas become soft.
How on earth did you start with a triangular dough and end up with a nice round paratha…
I may need a few years or a lot of atta to practice 🙂
supriya, it needs practice. you can make traingular paratha also. people who eats roti or paratha everyday gets lot of practice.
thankss a lot very nice reciept
welcome vipul
The Recipe’s you explain with the the images it really helps out a lot…
Thanks for the info in details…
Hi Dassana
9Maharshtrian Brahminsame way but role it out in a traigular shape. We call it a ‘POLI’, lovely three layers. My favourit is the middle soft layer. VJ
Thanks for the info Vijaya. I did not know about this fact. It is nice of you to share this info.