Vada Pav Recipe (Mumbai Style)
Vada Pav is one of Mumbai’s most loved street food snacks and a daily staple. It consists of a spiced potato fritter coated in gram flour batter, deep fried until crisp, and served inside soft pav with chutneys. For readers unfamiliar with Indian food, it is often described as India’s vegetarian answer to a burger, made with a spiced potato filling. Originally created as an affordable and filling snack, it soon became popular across all sections of society.
About Vada Pav
Vada Pav is a popular Indian street food made with batata vada and pav. Batata vada is a spiced mashed potato mixture shaped into balls, coated in gram flour batter and deep fried.
Pav is a soft Indian bread roll, similar to dinner rolls. When combined with chutneys and the fried vada, it becomes vada pav.
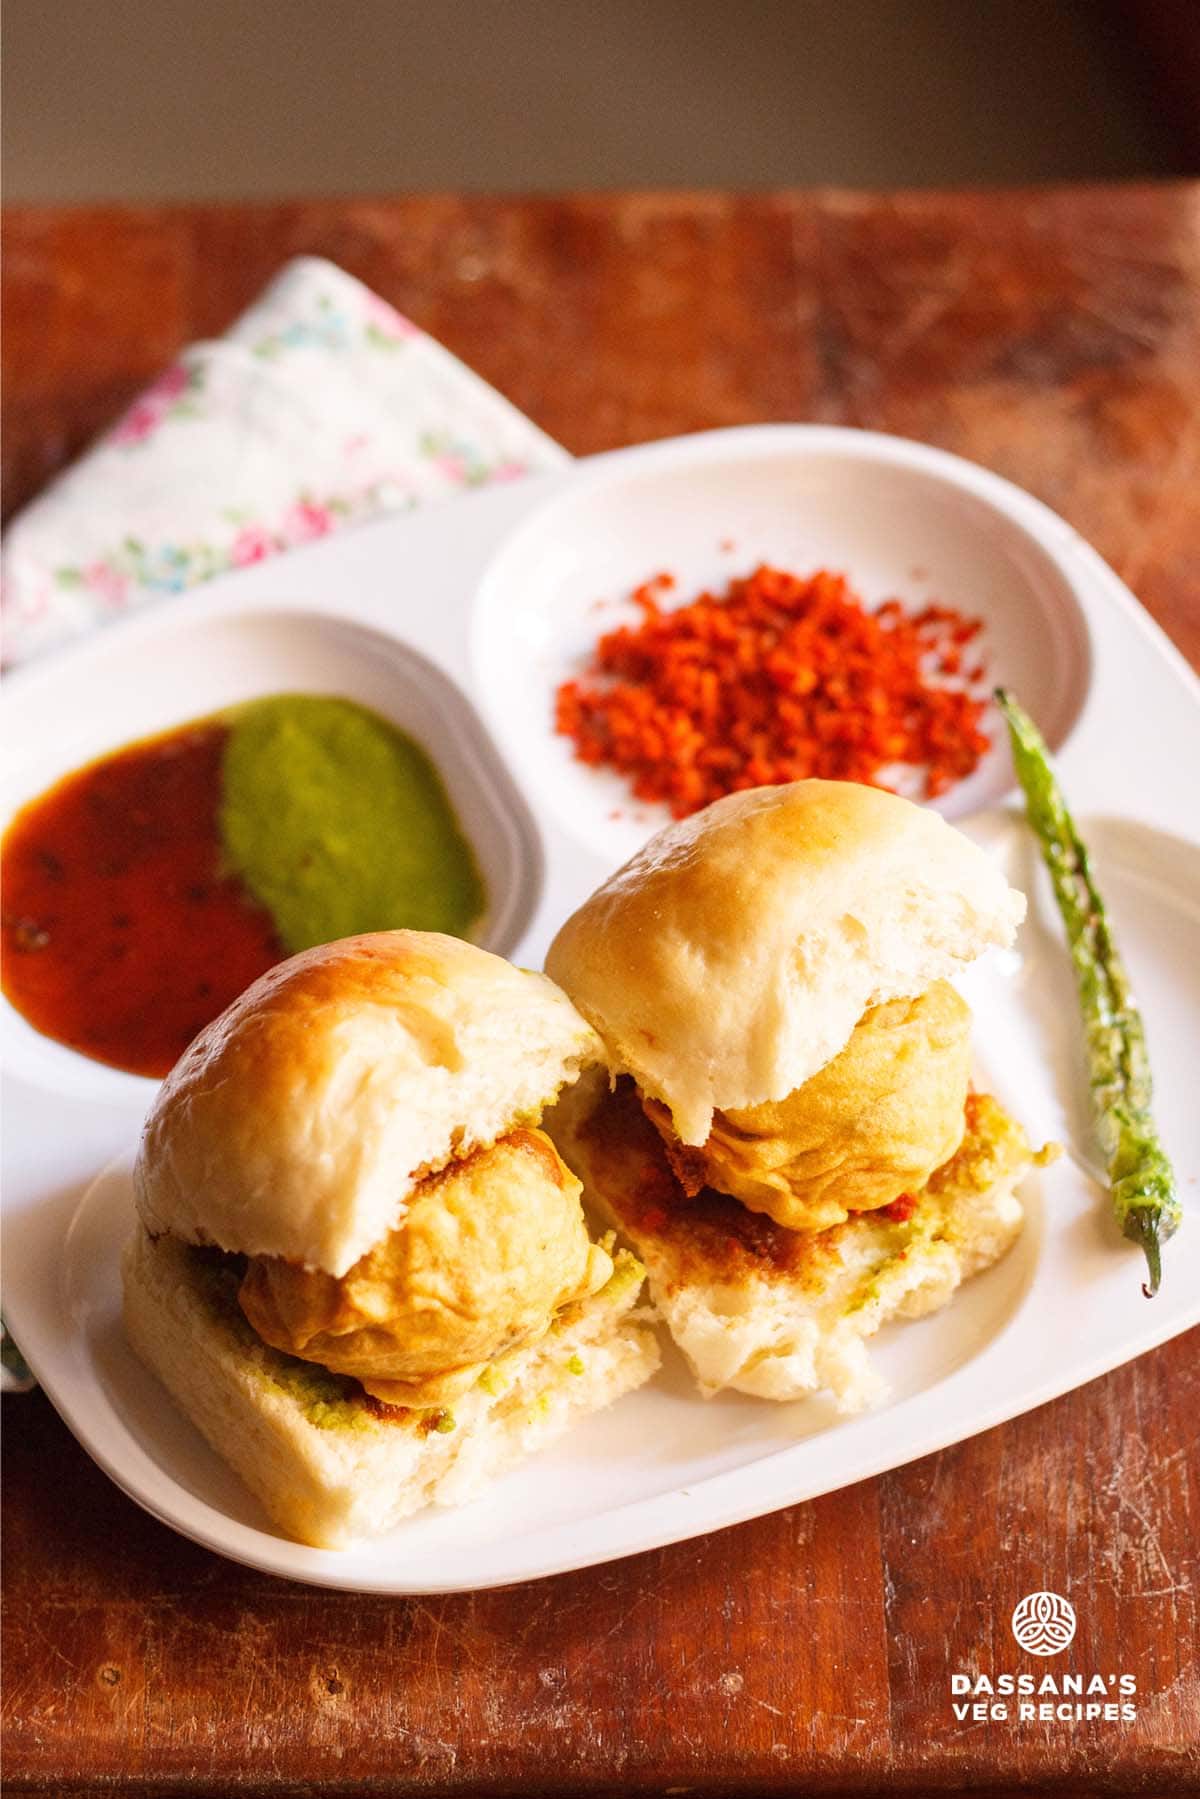
Table of Contents
The word batata means potato in Marathi. The filling is made with boiled potatoes, green chillies, garlic, mustard seeds, asafoetida, curry leaves and coriander leaves. It is savory, lightly spiced and comforting.
The outer coating is made with gram flour (besan), which gives a crisp texture and a slightly nutty taste. A good vada has a lightly crisp exterior and soft potato center.
The pav is slit but kept intact. It can be served plain or lightly toasted. The bread absorbs the chutneys and balances the spiciness of the vada.
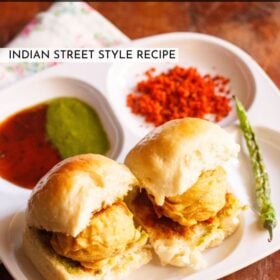
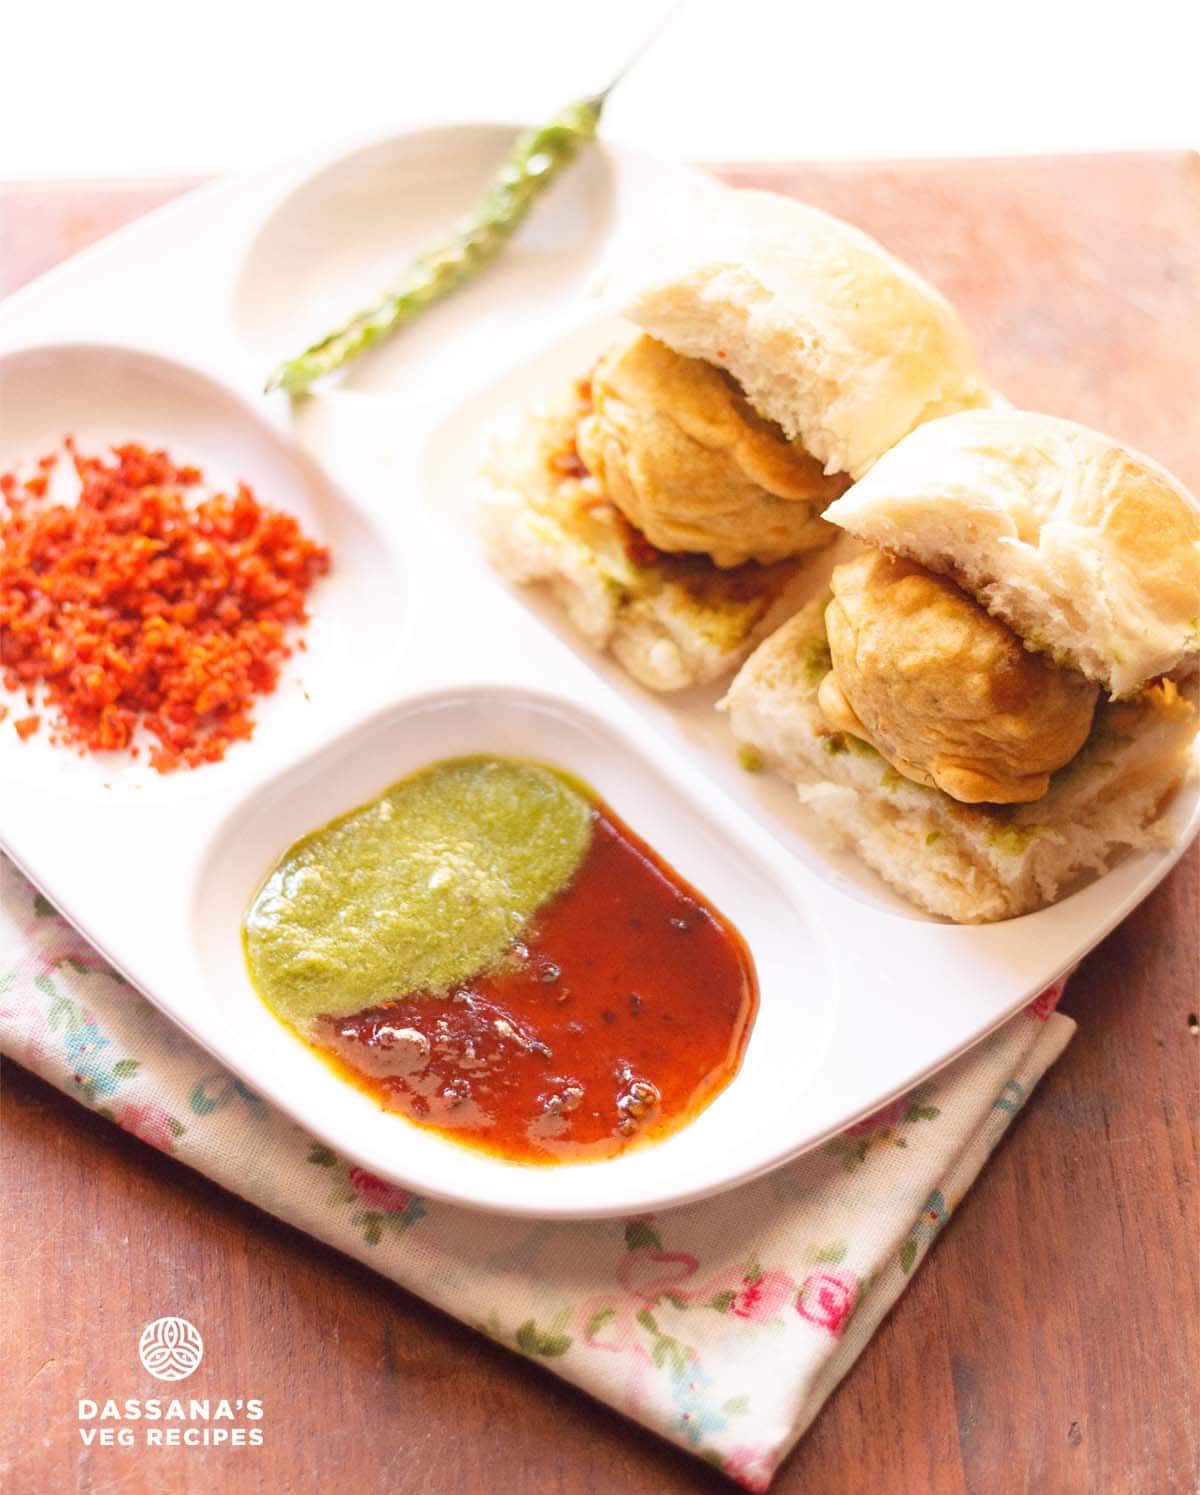
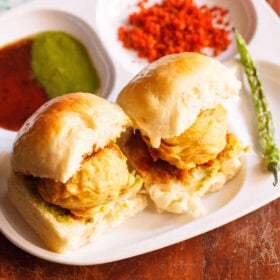
A typical vada pav includes five elements: Pav, Batata Vada, Green Chutney, Tamarind Chutney, and dry Garlic Chutney.
I have shared the chutney recipes separately. You can make them at home or use ready-made ones. Pav can also be homemade or sourced from a good bakery.
Although strongly associated with Mumbai, vada pav originated in the 1960s as a quick, filling snack for mill workers. Today, it is one of the city’s most recognisable foods.
Many variations are now available, including spinach vada, paneer vada, cheese vada and mixed vegetable vada. Despite these changes, the basic recipe remains the same.
Vada pav is often called the “poor man’s burger” because it is affordable and filling, though it is enjoyed by everyone.
It can be eaten at any time of day. It works well for breakfast, brunch or as an evening snack, especially with chai.
I have eaten vada pav at many places in Mumbai over the years. Even now, I always make sure to have it when I visit.
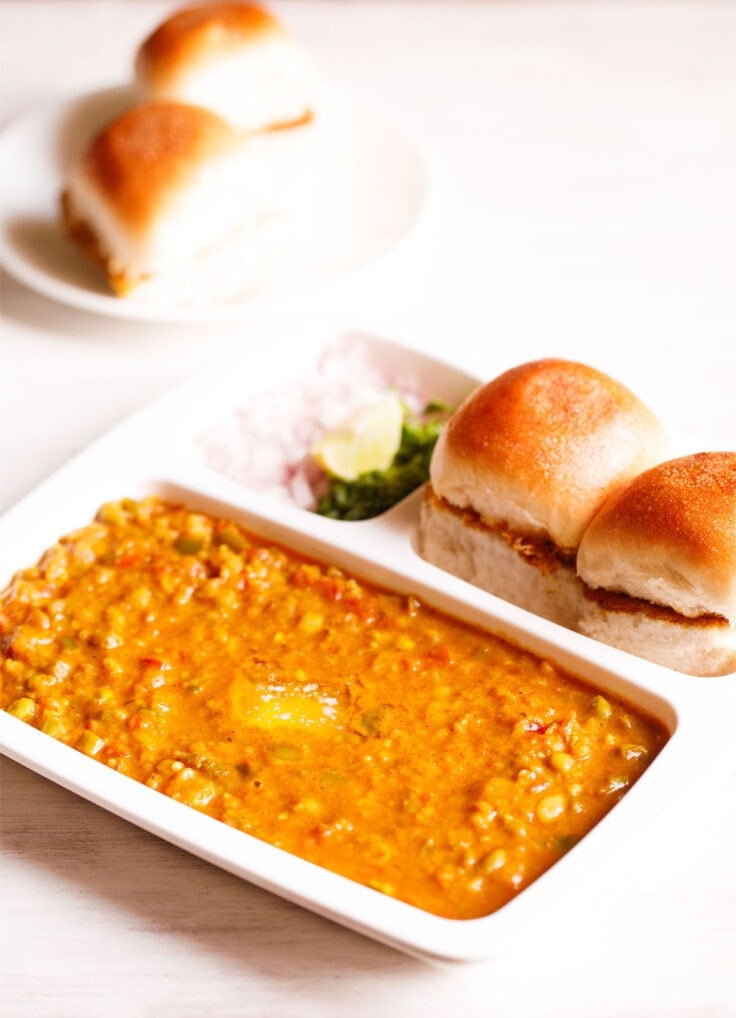
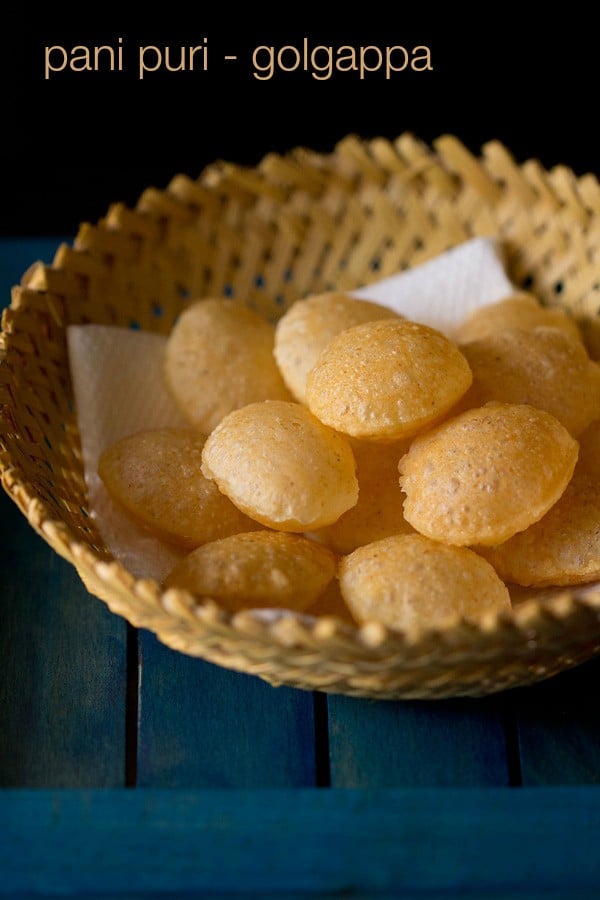
At home, I recreate it along with other Mumbai favorites like Pav Bhaji, Pani Puri, Bhel Puri, and Ragda Patties.
Over time, vendors have also added ingredients like cheese, paneer or Schezwan Sauce to suit different tastes.
If you enjoy Indian or Mumbai Street Food, you may also like:
How to make Vada Pav (Step-by-Step)
Make tasty vada pav with my step-by-step guide. I share how to make the potato vada in detail, while the green chutney and tamarind chutney recipes are included in the recipe card below.
Make Potato Stuffing
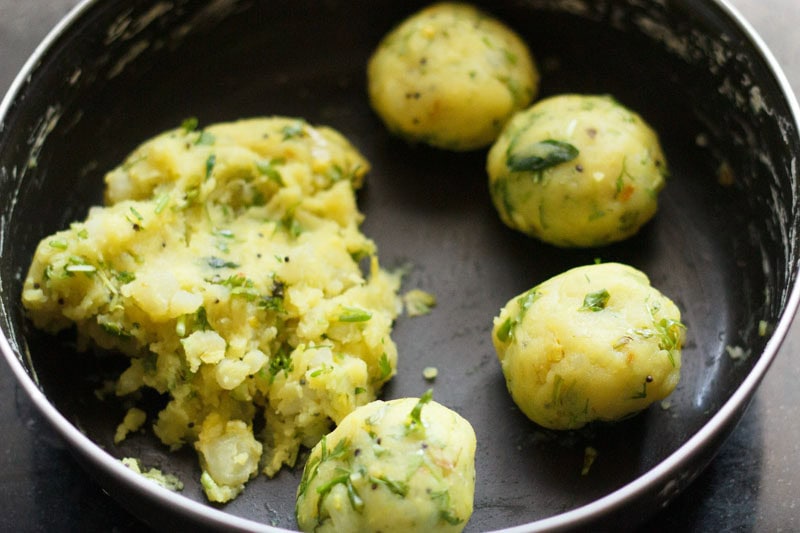
1. Boil 2 large potatoes that weigh about 350 grams. Peel and mash them with a fork in a bowl.
You can boil or steam the potatoes in a pan, Instant Pot or stovetop pressure cooker, adding water as required.
Remember to drain the water very well from the boiled potatoes before you mash them. Keep the potatoes aside to cool. When they become warm, peel and mash them with a fork or a potato masher.
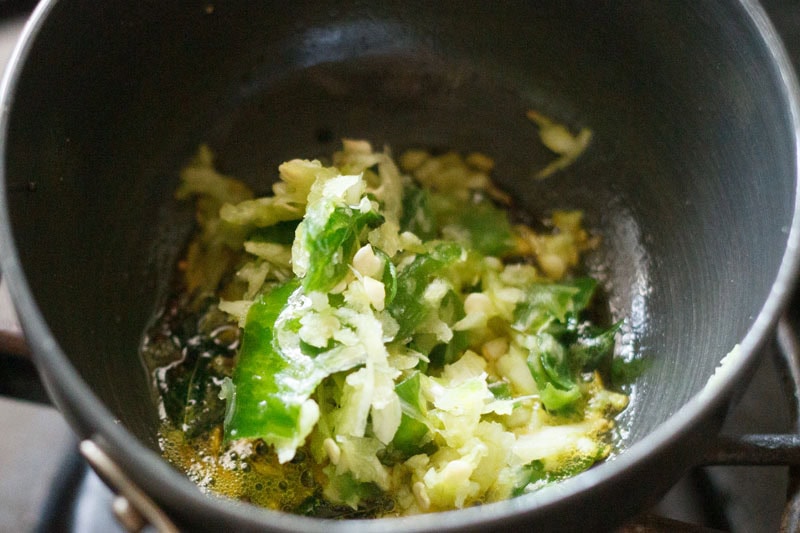
Also, crush 6 to 7 small or medium garlic cloves and 1 to 2 green chillies in a mortar pestle.
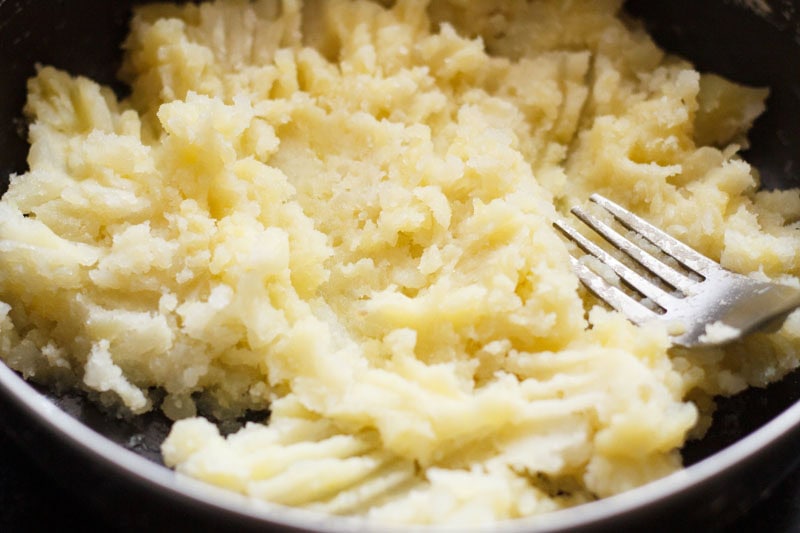
2. Heat 2 to 3 teaspoons oil in a small pan. Add ½ teaspoon mustard seeds and let them crackle.
Then, add 7 to 8 curry leaves and a pinch of asafoetida (hing). Stir and sauté on low heat for about 5 seconds.
3. Add crushed garlic cloves and green chillies mixture to the pan. Add ⅛ teaspoon turmeric powder (about 2 to 3 pinches).
4. Stir on low heat for some seconds or until the raw aroma of garlic goes away.
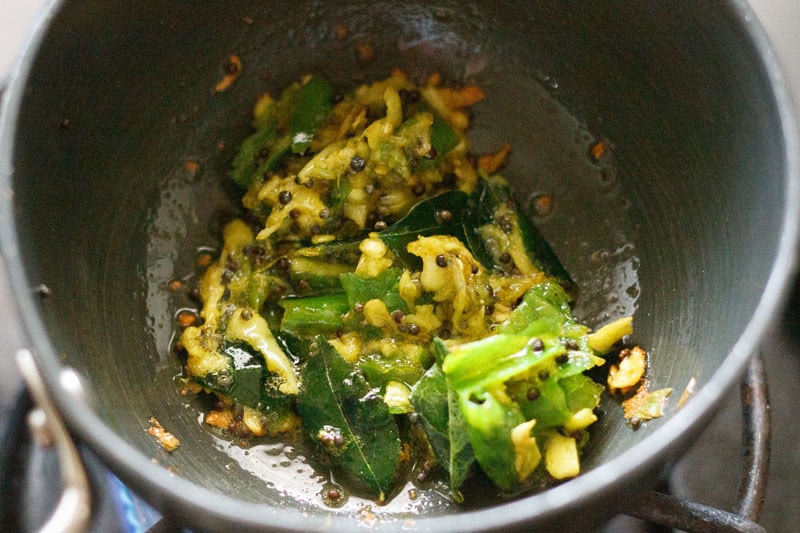
5. Pour this tempering mixture together with the oil on the mashed potatoes.
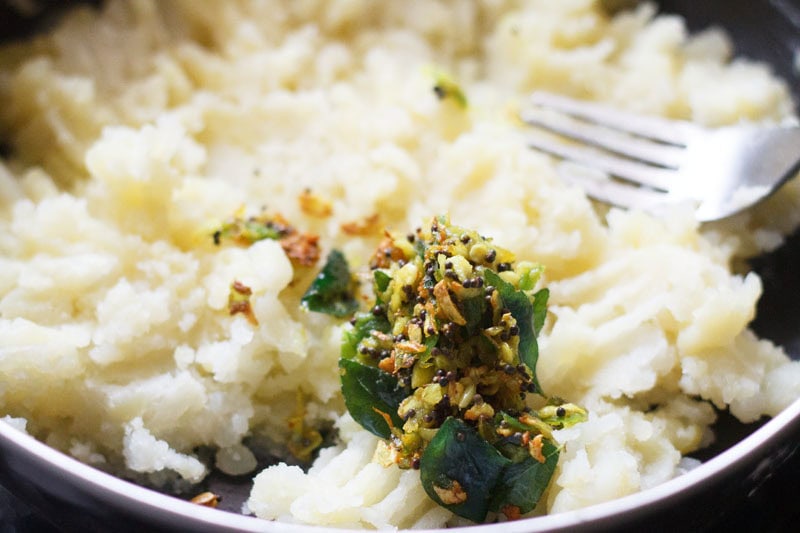
6. Add 1 to 2 tablespoons chopped coriander leaves and salt as required.
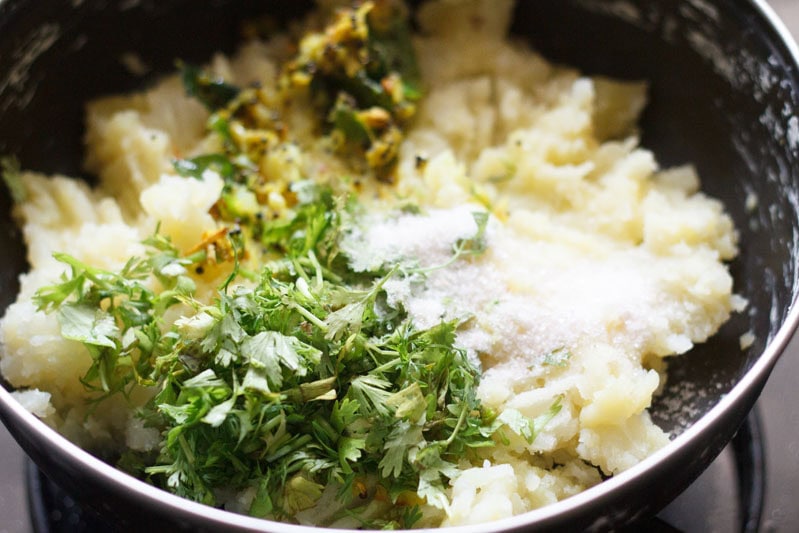
7. Mix everything well with a spoon. Do a taste test and if required, add more salt.
Then, make small to medium balls from the mashed potato mixture. Flatten these balls a bit. Cover and keep aside.
Make Gram Flour Batter
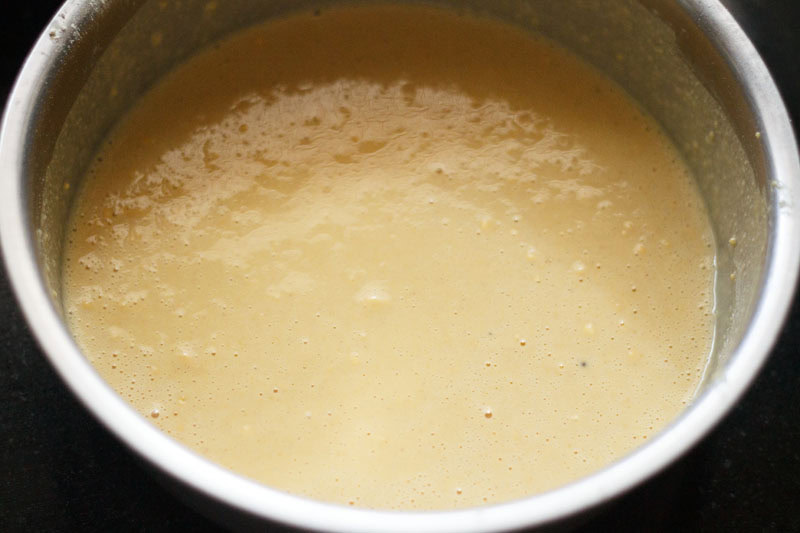
8. In another bowl, make a smooth batter from 1 to 1.25 cups gram flour (besan), ⅛ teaspoon turmeric powder (about 2 to 3 pinches), a pinch of asafoetida (hing), a pinch of baking soda (optional), salt according to taste and ½ cup water or as required.
The batter should have a medium-thick flowing consistency. It should not be too thick or thin.
Tip: If the batter becomes thin, add 1 or 2 tablespoons of gram flour. If the batter becomes thick, add 1 or 2 tablespoons water.
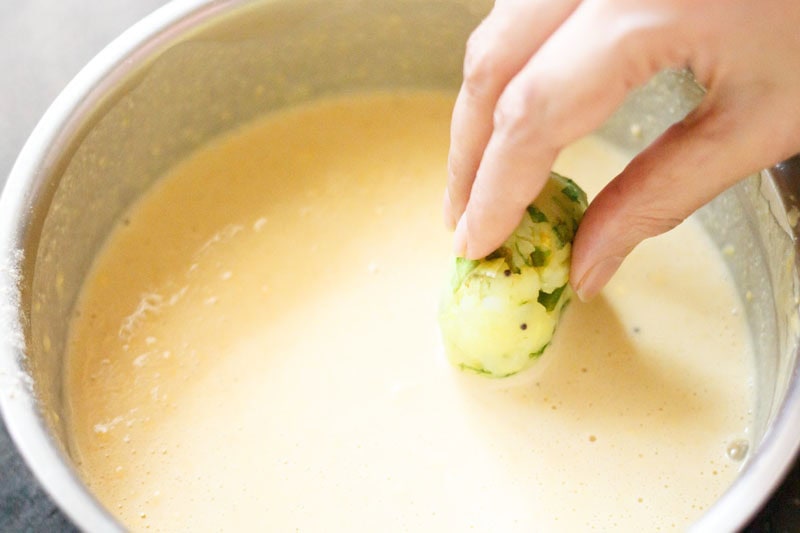
9. Dip the slightly flattened potato balls in the batter and coat them evenly with the batter.
Fry Vada
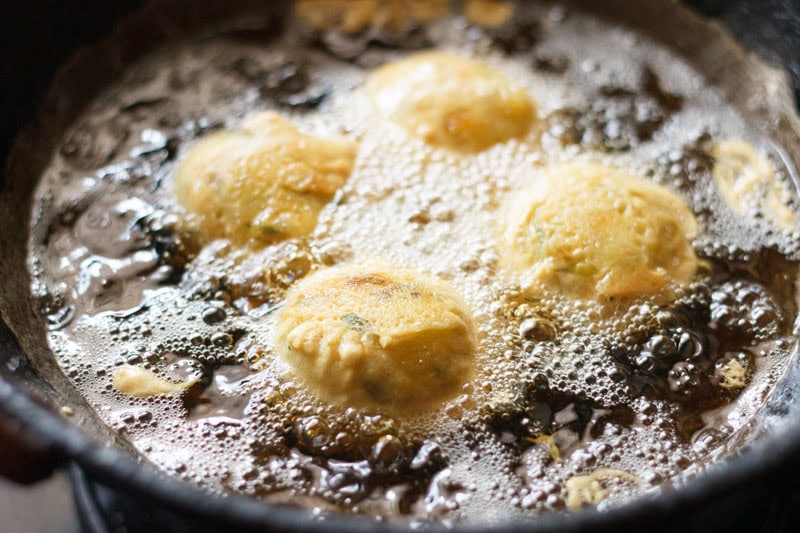
10. Before you dip the potato balls in the batter, heat oil in a pan or wok (kadai). When the oil becomes hot, dip the potato ball in the batter to coat as shown in the above step.
Carefully and gently drop these batter coated potato balls in medium hot oil.
Note: You can read more details on the frying temperature in the ‘My Recipe Notes’ section below.
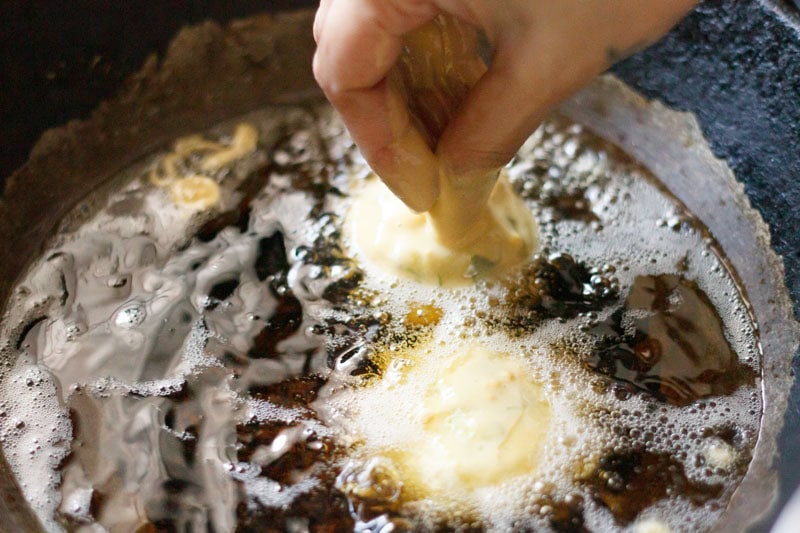
11. Depending on the size of the kadai or pan, you can add more or less of the vada while frying. But don’t overcrowd the pan
While frying the vadas, you can also fry green chillies if you like. Slit the chillies lengthwise before frying, as whole chillies can burst in hot oil.
If you prefer less heat, remove the seeds before frying. Use kitchen gloves while doing this, as the chilli pith and seeds can irritate the skin.
Fry the chillies until lightly blistered and golden, then toss with a little salt and set aside.

12. When one side firms up, becomes slightly crisp and golden, then only turn over gently with a slotted spoon.
Fry the second side. This way deep fry them till golden, turning over a couple of times as needed.
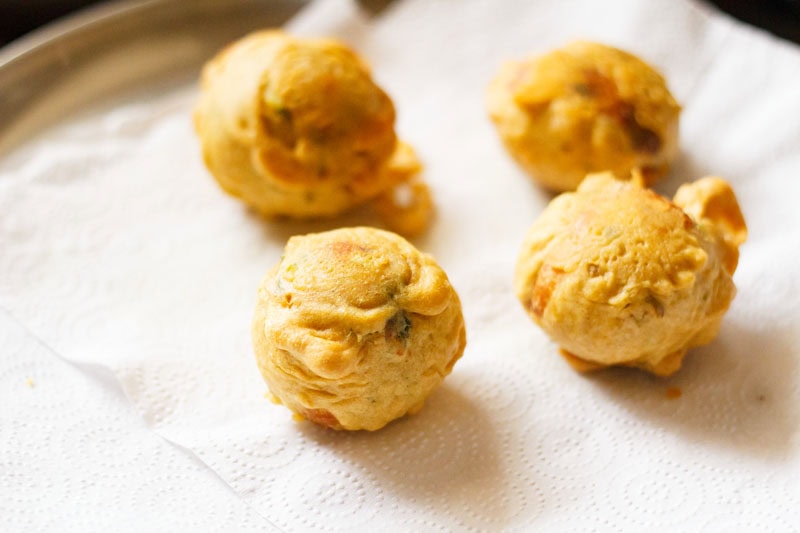
13. Place them on kitchen paper towels to absorb extra oil. Make all vadas this way in batches and set them aside.
If required, regulate the stovetop heat when frying the vadas.
Assemble & Make Vada Pav
14. Serve them when they are still hot or warm. Place all the chutneys and pav on your work surface. Slice each pav from the center without breaking it and set aside.
If you don’t have tamarind chutney, make the Vada Pav with green chutney. The green chutney and sweet chutney recipes are mentioned in the recipe card below.
You can make these two chutney recipes some hours ahead or a day before and refrigerate.
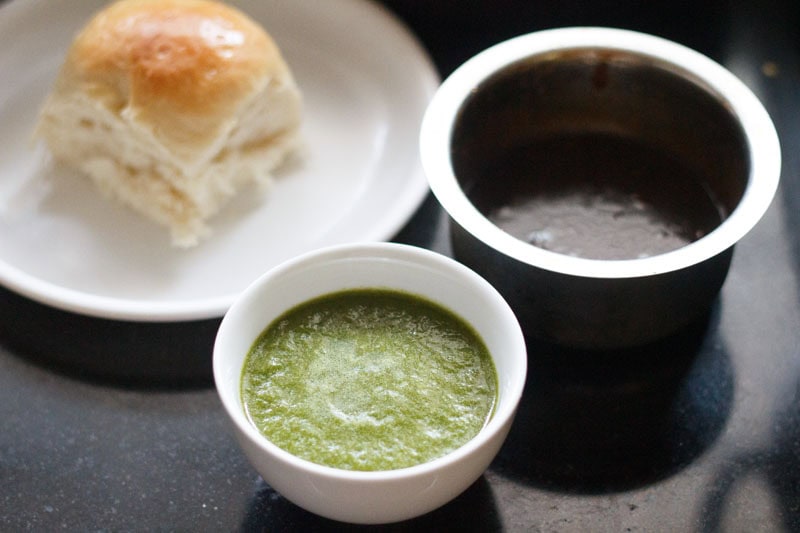
15. Spread both the green chutney and sweet chutney on the sliced pav. You can also spread green chutney on one side and sweet chutney on the other side.
16. Sprinkle the dry garlic chutney on the pav. This step is optional and you can skip it, if you don’t have garlic chutney.

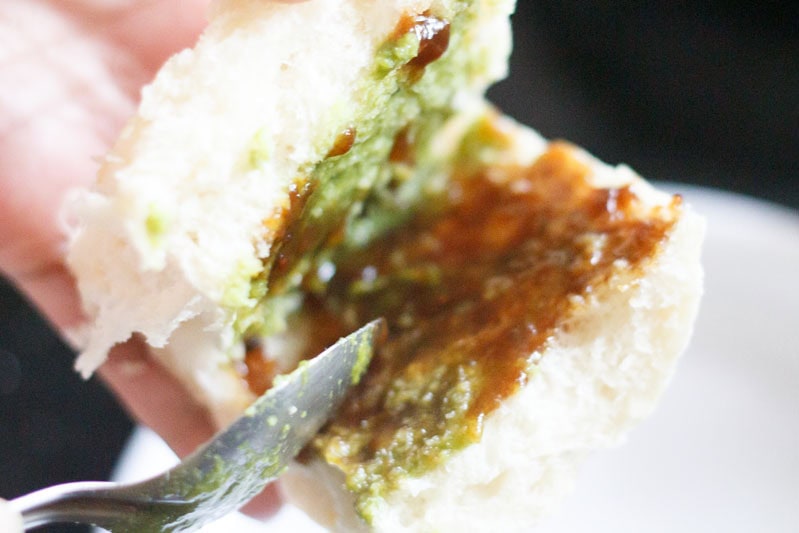
17. Place the hot vada between the pav slices.
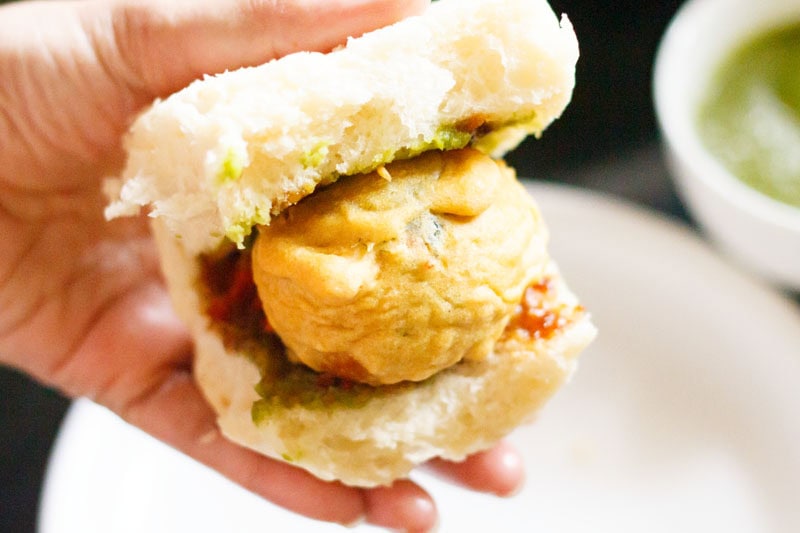
18. Serve vada pav immediately or else the pav becomes soggy. It makes for a good filling evening snack, high on carbs.
Serving Suggestions
Serve vada pav hot with green chutney, tamarind chutney, and dry garlic chutney.
Fried salted green chillies and Masala Chai are classic accompaniments. Lemon wedges can be added for extra freshness.
You can also pair vada pav with Irani Chai, Ginger Chai or Cutting Chai. In some parts of Maharashtra, it is served with a spicy Coconut Chutney.
Storage
Only the potato vada can be refrigerated for up to 1 day and reheated before assembling. Pav should always be used fresh. Chutneys can be stored separately in the refrigerator for 2 to 3 days.
My Recipe Notes
- Adjust the spice level: The heat in vada pav comes mainly from green chillies and garlic chutney. Mumbai-style vada pav is usually moderately spiced, while some regions prefer it hotter. This recipe keeps the spice balanced. Increase the green chillies or garlic chutney if you like more heat.
- Use the right oil temperature: Fry the vadas in moderately hot oil at 180 to 190°C (360 to 375°F). Oil that is too hot will brown the vada quickly while leaving it undercooked inside. Oil that is too cool will make the vadas greasy.
- Test oil before frying: If you do not have a thermometer, drop a small amount of batter into the oil. It should rise gradually and start bubbling. If it sinks and rises slowly, the oil is too cool. If it rises immediately and browns fast, the oil is too hot.
- Do not overcrowd the pan: Fry the vadas in small batches. Overcrowding lowers the oil temperature and leads to uneven frying. This is especially important for beginners.
- Consistency of batter matters: The gram flour batter should be smooth and medium-thick. A very thin batter will not coat the potato properly, while a thick batter will result in a heavy outer layer. The batter should coat the back of a spoon without dripping too quickly.
- Mash potatoes while warm: Always mash the potatoes when they are still warm. This helps avoid lumps and gives a smoother filling, making it easier to shape the vadas.
- Assemble just before serving: Vada pav tastes best when assembled fresh. If kept for too long after assembly, the pav absorbs moisture from the chutneys and becomes soggy.
- Healthier alternative: For a lighter version, you can bake or air-fry the vada instead of deep frying. While the texture will be different from the street-style version, the flavors still work well.
Reader Questions
Who invented Vada Pav?
Vada Pav is believed to have been invented in 1966 by Ashok Vaidya at a stall outside Dadar railway station in Mumbai.
Can I find Vada Pav outside Mumbai?
Yes, Vada Pav is now popular across India and is also available in Indian restaurants in the UK, US, and other countries.
Is Vada Pav gluten-free?
No, Vada Pav is not gluten-free as pav is made with wheat flour. Gluten-free bread can be used as an alternative.
What goes well with Vada Pav?
Dry garlic chutney, green chutney, sweet tamarind chutney, fried green chillies, and masala chai pair best.
Step by Step Photo Guide Above
Vada Pav Recipe (Mumbai Style)
Ingredients
For Potato Filling
- 350 grams or 2 medium to large potatoes
- 6 to 7 cloves of garlic – small to medium-sized
- 1 to 2 green chillies
- ½ teaspoon mustard seeds
- 1 pinch asafoetida (hing)
- ⅛ teaspoon turmeric powder
- 7 to 8 curry leaves
- 1 to 2 tablespoons coriander leaves – chopped (cilantro leaves)
- salt as required
For Besan Batter
- 1 to 1.25 cups gram flour (besan)
- 1 pinch asafoetida (hing)
- ⅛ teaspoon turmeric powder (ground turmeric)
- 1 pinch baking soda – optional
- ½ cup water or add as required
- salt as required
For Green Chutney
- 1 cup chopped coriander leaves
- 1 to 2 cloves of garlic – small to medium-sized, chopped
- 2 to 3 drops lemon juice
- 2 to 3 green chillies – chopped
- salt as required
For Tamarind Chutney
- ½ cup tamarind – tightly packed & seedless
- 1¾ cups water or add as required
- ½ teaspoon cumin seeds
- ½ teaspoon ginger powder (ground ginger)
- 1 pinch asafoetida (hing)
- ¼ teaspoon red chilli powder
- 7 to 8 tablespoons jaggery powder – add as required adjusting to your taste, can swap with sugar
- 1 teaspoon oil
- salt or black salt, add as required
Other Ingredients
- oil as required – for deep frying
- 2 tablespoons dry garlic chutney – optional
- 8 pav or dinner rolls
- 3 to 4 fried green chillies – mixed with some salt, optional
Instructions
Making Green Chutney
- Grind all the green chutney ingredients with little water till smooth. Avoid making a watery chutney.
Making Tamarind Chutney
- Soak tamarind in hot water for 30 to 40 minutes.
- With your hands, squeeze the pulp from the tamarind in the same bowl or pan. Strain the pulp and keep aside.
- Heat oil in a small pan. Lower the heat. Add cumin seeds and let them crackle.
- Add ginger powder, red chilli powder and asafoetida. Stir and add the strained tamarind pulp. Cook for 2 to 3 minutes.
- Add the jaggery (or sugar) and salt. Cook for 4 to 5 mins or more until the consistency thickens. Let the chutney mixture cool.
- When cooled, store the tamarind chutney in an air-tight dry jar or container.
- Refrigerate and serve the sweet chutney whenever required with chaat or snacks.
Making Potato Filling
- Boil or steam potatoes in an Instant pot, pressure cooker or pan until they are completely cooked and fork tender. Peel and then mash them with a fork in a bowl.
- Crush garlic and green chillies to a semi-fine paste in a mortar-pestle.
- Heat oil in a small pan. Add mustard seeds and crackle them. Then add curry leaves and asafoetida. Stir and fry for about 5 seconds.
- Then add crushed garlic and green chillies paste, which have been crushed in a mortar-pestle. Add turmeric powder.Stir for some seconds until the raw aroma of garlic goes away. Do not brown garlic.
- Pour this tempering in the mashed potatoes.
- Add chopped coriander leaves and salt.
- Mix everything well and then make small to medium balls from the mashed potato mixture. Flatten these balls slightly. Cover and set aside.
Making Besan Batter
- In another bowl, make a smooth and thick yet flowing batter from the gram flour, turmeric powder, asafoetida, a pinch of baking soda (optional), salt and water.
- The batter should not be very thick or thin. Tip: If the batter becomes thin, add 1 or 2 tablespoons of gram flour. If the batter becomes thick, add 1 or 2 tablespoons water.
- Set the prepared batter aside.
Frying Potato Vada
- In a kadai or pan, heat oil for deep frying.
- When the oil becomes medium hot, then dip the slightly flattened potato balls in the batter and coat it evenly with the batter.
- Gently and carefully, add these batter coated potato balls in medium hot oil.
- Depending on the size of the kadai or pan, you can add more or less of the vadas while frying. Don't overcrowd the pan while frying.
- When one side becomes crisp, lightly golden and firms up then gently turn it over with a slotted spoon and fry the second side. Turn over when the second side is fried.
- This way turning a couple of times fry the vada till they are evenly golden on all sides.
- Drain them on kitchen paper towels. Batter coat and fry all vadas this way in batches and set aside.
- While frying the vadas, you can also fry green chillies if you like. Slit the chillies before frying, as whole chillies can burst in hot oil. Fry them until lightly blistered and golden. Toss the fried chillies with a little salt and set aside.
- When they are still hot or warm, you need to serve them. Take all the chutneys and pav on your work surface.
Assembling & Making Vada Pav
- Slice the pav or dinner rolls without breaking it into two and keep aside. If you don't have sweet chutney, then just make the vada pav with green chutney.
- Spread both the green chutney and sweet chutney on the sliced pav. You can also spread green chutney on one side and sweet chutney on the other side.
- Sprinkle the dry garlic chutney. This is optional and if you don’t have you can skip it.
- Place the hot vada sandwiched between the pav or dinner rolls.
Serving Suggestions
- Serve vada pav immediately or else the pav becomes soggy. You can also serve some fried salted green chillies and both the chutney along with it.
- You can also serve them as an evening snack with a side of masala chai or coffee.
Dassana’s Notes
- You can always adjust the amount of chutneys you spread in the pav according to your taste and liking.
- The oil has to be medium hot when you fry the vada. If the oil is very hot then the outside batter will get browned and leaving the inside portion of the batter uncooked. On the other hand, if the oil is not hot enough then the vada will absorb a lot of oil making it soggy and loaded with oil.
- To make a spicy vada pav, increase the number of chillies in the potato stuffing. Or you can add more chillies in the green chutney that you make.
- This recipe can be scaled to make a big batch for a party or get togethers.
Nutrition
Vada Pav recipe from the blog archives was first published on August 2009.

P. S. Do you do cooking classes. In Mumbai or maybe I could organise for you to come to Perth Australia and do some classes here. 😉. Can’t wait to cook my dinner tonight. Thank you. Linda
Thank you, Linda. That’s very kind of you.
At the moment, I don’t conduct cooking classes, but I truly appreciate the offer and your thoughtfulness. Hope you enjoyed cooking your dinner. Happy cooking!
Thank you Dassana. Do you have these recipes in a book? I have masses of recipe books but I reckon I can make room for one more. Best wishes. Linda
Thank you, Linda. That’s so kind of you.
I have an upcoming eBook on Indian vegetarian recipes, and this vada pav recipe will be included in it. I really appreciate your interest.
Best wishes to you too.
I am a fan of your recipes; they are as you showcase them and the results are fabulous. I have made a many of them but Dal Makhani with dhungar is all time favorite and Vada Pav of course. Love you Dassana Amit.
Thanks a lot Dr Namita. Glad that you like both these recipes. They are a favorite with us too.
Came out yumm!
Love all your recipes, always a hit once you make them, love the way you show it in easy steps. Made vada pav, all loved it. God bless you.
Thanks a lot and glad to read your lovely feedback.
Good!
Awesome recipe, so simple to follow. I just have one doubt. If I prepare the vada few hours before serving then how do I reheat it?
Thank you. The vada taste best when it is hot. I would recommend to make them when you plan to serve them. On cooling the texture and the taste will change slightly. Of course you can reheat in an oven, but a piping hot vada in a pav with the assorted chutneys is an experience to relish.
I like your all recipes, it really amazing, mouth watering !!
Thanks a lot Vijeta.
Love your recipes
Thanks Sheetal
thanks
welcome kuldeep
hello amit
i hv been following your recipes since a few months..and i must tell u that i feel really happy when they turn out well..the detailed images help us to understand the textures and to what extent a particular ingredient should be cooked..it is very helpful ..it would be great if you can tell me the ingredients (in grams measurements) vada paav for 12 servings ..
thanks in advance ..
Thanks Shobhita. Glad to know this. You can easily triple this vada pav recipe.
U r simply awesome, too good!!! I have tried many of ur recipe n it has turned out really well, thank u so much, now anybody name any recipe n I have it all ready to make ???? n it’s really good no confusion at all, step by step, photo by photo, it’s all there, u just have to try, n really speaking I was so so dam bad at cooking ???? bcoz nothing encouraged me so much, now with this app I just go on n on making n trying different recipes ???? all thanks to u yaar, u really made my life ????
thanks a lot akanksha. nice to read your comment and it does motivate me to add more recipes. thanks again and happy cooking.
Ma’am do you have the recipe of goli wada pav? I have been searching it but can’t find on any of the blog and i don’t want to go for any other blog because i like your recipes a lot. Please let me know if you have the recipe of goli wada pav. Thank you.
Welcome Ashwarya. Nice to know that you like the recipes from this blog. I don’t have the recipe of goli wada pav.
Okay ma’m its alright no worries. Thanks for replying.
welcome ashwarya.
I have been following your blog for more than a year now but never commented or left a review. But it’s high time i thank you for all your recipes. Almost all recipes that I tried from your blog were a success. I learned how to bake paav from your blog only and since then not buying paav from outside. Also this vada has an authentic maharashtrian taste which I love. Thank u and pls keep posting such awesome recipes ?
Welcome Radina. Thanks for your appreciation and positive feedback on vada pav recipe.
This is the real Kandivali/Andheri Vada Pav. Many thanks for posting this. It came out awesome. On a side note, if you have ever passed thru Johannesburg airport, please let me know. I have a recipe question.
thanks prashant 🙂 for the positive feedback. we have never gone near johannesburg airport but you could still send a recipe request.
There is a restaurant called the ‘Raj Indian Cuisine’ at Johannesburg airport. I believe it is part of a chain of restaurants. They serve a veggie wrap which is awesome and unique. In all my travels I have not come across this flavor ever before. I’m hoping someone knows how to make it.
fine. there are so many ways a veggie wrap is made. you can ask them on how they make it. most of the times the chefs tell you the recipe or method. i have got requests for a veggie wrap, but more like the mc donald type. so will try to add this recipe. not sure if i am able to make mc donald type but will be a good veggie wrap recipe.
My latest fav snack.. Vadaaaa paaoo..
ours too dayitva and thankyou.
Thanku a lot for sharing delicious receipes . I realy enjoy ur receipes . Wonderful 🙂
thankyou deepak 🙂 glad to know this.
Very useful
Hi… it looks awesome the way u provide procedure and details.. it’s very useful and trying most of the dishes.. excellent outcome..!
tks a lot!!!!
thankyou so much sangeetha 🙂 and you are welcome.
My favourites is vada pav
Just a great recipe. After leaving Mumbai got the real taste today. Thanks for the recipe.
welcome kumar
Hi Dassana,
Please tell me how to make dry garlic chutney. Looks so good:-) Somehow I never tried to make this.
thanks aparna. i will add the recipe.
Thanks. I will look forward:-)
Hi again!!! It’s been ling since I tried anything new. But since it’s the minsoons and a little risky eating out so thought of making vada pao at home and turned to my favourite site for easy recipes which are so easy to follow.
Hoping they turn out well.
Just a question how to make the green chillies to go with it.?
Thanks
welcome minakshi. just fry the green chillies in oil till slightly crisp. remove them and sprinkle some salt on them. slid the chilies before you fry. hope you enjoy them.
I always love ur recipes simple n tasty..
I made vada pav today n it came awesome..
Thanks for simple steps …
welcome ravika. glad to know this. thanks for sharing positive review on recipes.
Love your web site. All the recipes are illustrated very well and taste yum 🙂 that I can easily impress my husband and in-laws.
Can you post a recipe for paper dosa (kind of struggle to bring out the crispiness in the dosa).
Thanks!!!
Monica.
welcome monica. thanks for sharing positive feedback on recipes. i will add soon. its in draft.
First Of All Thanks For Such Simple Recipe.
Last Sunday I Tried This Recipe.It Was My Son Demand.
I Got My Answer About Taste By Just Looking In His Eyes.He Asked For Repeated Hot Vada’s During Serving.
Thanks A Lot For Your Simple And Tasty Recipes.
welcome vivek. thanks for this awesome feedback. glad to know that your son liked it very much.
Is there a recipe for dry garlic chutney used here in vada pav recipe??
nidhi, i will add dry garlic chutney recipe soon.
Hi dasanna, thanks to u i can able to make any veg recipe with yum…taste in it….thx a lot fr making this blog with easy cooking n step by step illustrations , can easily understood by any one.
welcome purvi and thanks for this positive feedback.
LOVE ur website….I am always looking for easy veg recipes and ur website is just fantastic! Thanks for putting up step by step pics and the easy viewing format…I ve just moved to Colombo and we get lotus stems very easily here…can u tell me some recipes with it?? Thanks again for posting such great recipes!!
thanks aarthi. lotus stems can be used in various ways. you can make stir fries or sabzis with it. you can even make fries with them. i don’t have any lotus stem recipe on the blog as i don’t get them easily here. on google search you will get plenty of recipes with lotus stem.
It’s easy to prepar… I will make this today itself…