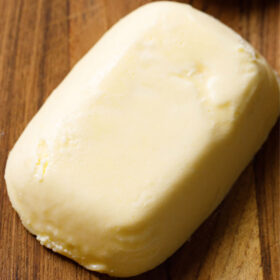
How to Make Butter (Homemade White Butter)
Butter is a dairy product made by churning cream until the fat separates from the liquid buttermilk. It can be made at home as fresh white butter, also known as makhan, or as cultured butter. Homemade butter recipe is prepared using cream without any additives, coloring agents or preservatives. The process involves churning, rinsing and shaping the butter.
About Homemade Butter Recipe
Butter is a dairy product made by churning cream, which causes the fat to separate from the liquid buttermilk. At home, it can be made as fresh white butter or cultured butter.
I know that making butter at home sounds difficult, but I promise you it is quite simple. Thanks to electronic mixers or food processors, you can whip it up in just 5 minutes!
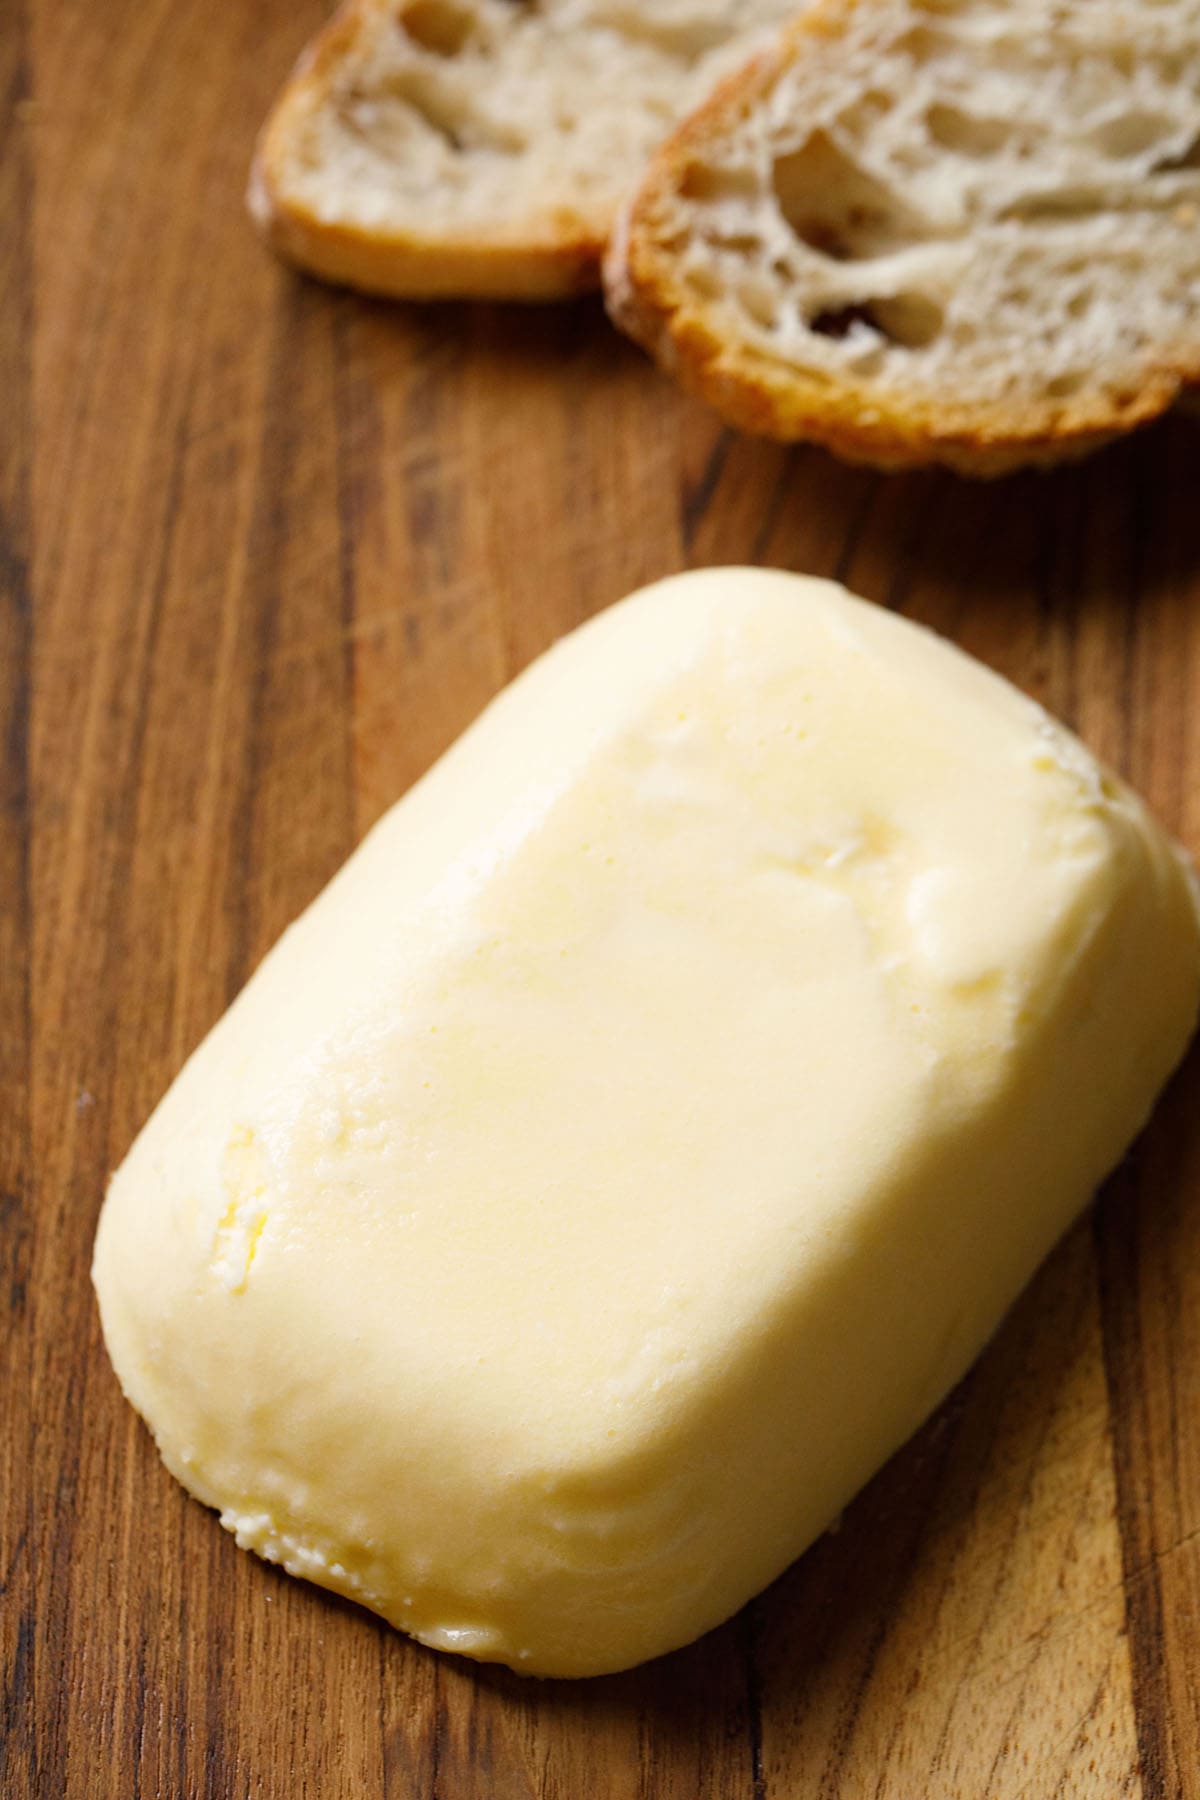
Table of Contents
Many North Indian families make butter at home because it tastes better than the butter you can buy at the store.
Butter making is something I was exposed to at a young age. My Mom used to make butter in order to make Homemade Ghee, but you can also do as my Mother-in-Law and keep the butter whole for everyday cooking.
Early in my life, when we still lived with my mother-in-law, we would always have homemade white butter in the fridge. It was delicious served on piping hot parathas of all sorts, like Aloo Paratha, gobi paratha or paneer paratha.
She also used the homemade butter liberally when serving the famous combination of makki di roti (corn meal flatbread) with sarson ka saag (mustard greens).
My mom-in-law makes butter from the malai (cream) floating atop whole, un-homogenized milk. She collects the malai in a bowl she keeps in the freezer.
When there is a good amount to churn, she removes it from the fridge and lets it thaw a bit. She then adds a bit of yogurt to culture the cream before churning it into butter.
While some people make butter from curd, I have always made both butter and ghee (clarified butter) from whole milk cream.
I should also note that unlike my Mother-in-Law, I use store-bought heavy cream. I simply don’t have the time or patience to collect layers of malai in a bowl.
When using packaged cream, it is very important to use heavy cream with at least 35% to 50% milkfat.
Please do not use low-fat cream, cooking cream or light cream that has less than 35% milkfat; you won’t get butter no matter how much you whip these because there just isn’t enough fat.
Also, make sure to use heavy cream that doesn’t have any additives or stabilizers, as they will prevent the fat and whey from separating.
The only trouble with making butter at home are the greasy tools and utensils you’ll end up with. Even if you wash your dishes by hand, I promise that this is a small price to pay for the luxury of having delicious homemade butter on hand!
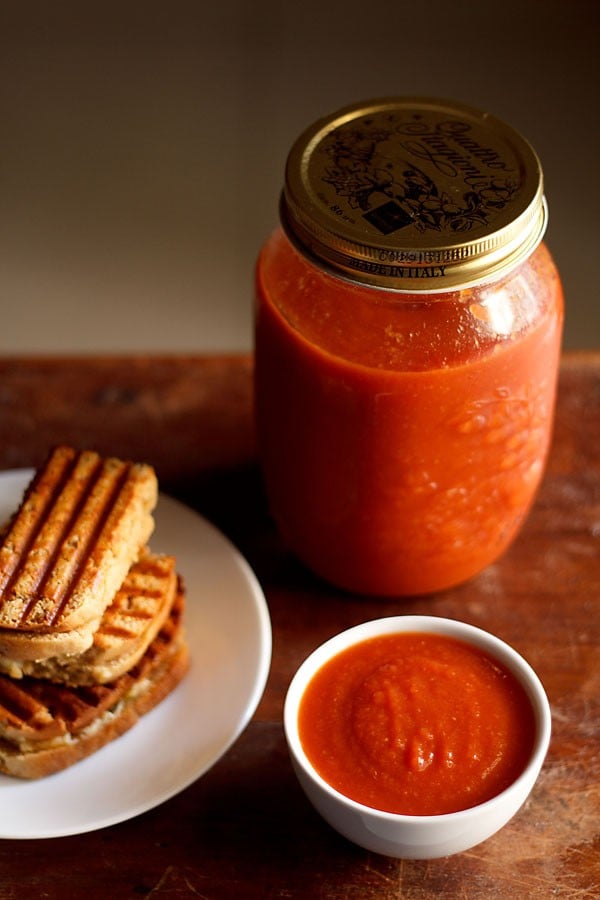
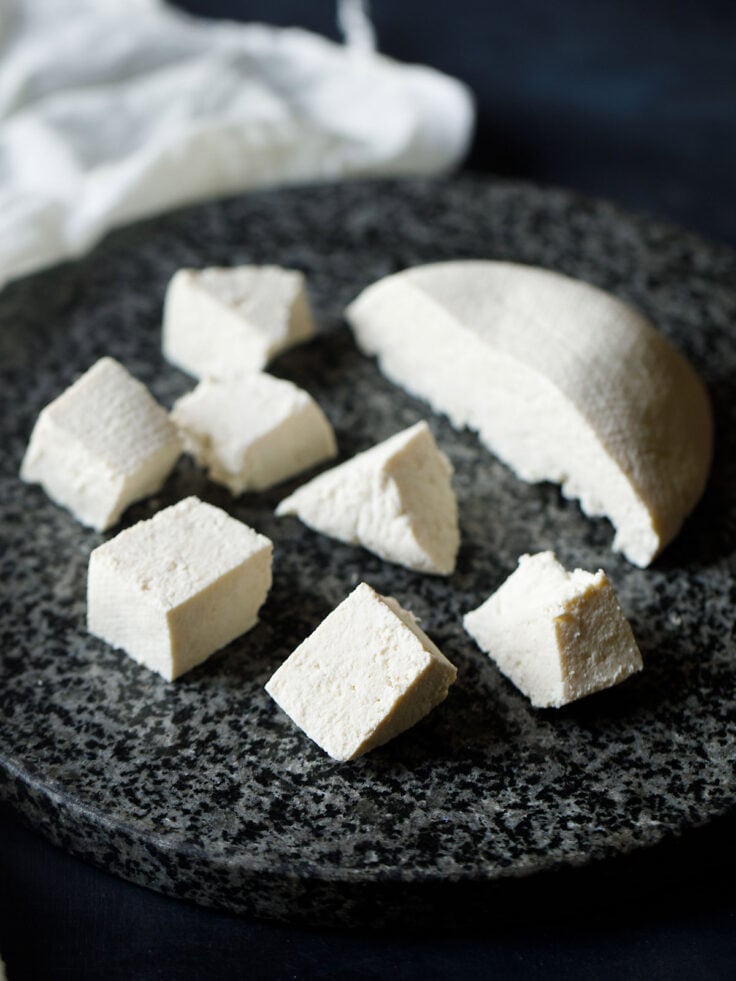
Along with butter, here are a few more homemade basics you can try making at home:
How To Make Butter (Step-By-Step)
Please note that while I have gone into great detail below, the process of making butter at home is quite simple. Once you have successfully made white butter once, you’ll see just how easy it really is!
Prep Equipment & Ingredients
1. Gather all your equipments and tools before you begin. You will need a few bowls; a silicon spatula; a wooden spoon or spatula; cheesecloth or muslin; a mesh strainer; a few kitchen towels; and an electric blender, stand mixer or food processor.
I highly recommend you use a silicon spatula – it makes the work of scraping the butter from the bowls, cheesecloth and the whipping blades easier.
Make sure all your equipment and tools are clean and dry so that you do not run the risk of any contamination.
To make butter at home, you’ll need at least 2 to 3 cups of cream or more. The cream can be pasteurized but avoid homogenized one. You can do as I do and buy ready-made full cream from the grocery store. Otherwise, you can use cream from the (non-homogenized) milk you use every day.
Please note that fresh malai has to be collected every day for 10 days to a month in order to get enough for churning. Remember to store this collected cream in the freezer, defrosting it prior to churning.
2. Add the cream to the base of the stand mixer, food processor or blender. If using a hand mixer, add the cream to a large mixing bowl that you set atop a damp kitchen towel.

Whip Cream
3. Begin to whip the cream on a low speed.
NOTE: I like to place a kitchen towel over the entire work surface prior to starting; this helps keep the counters nice and clean.

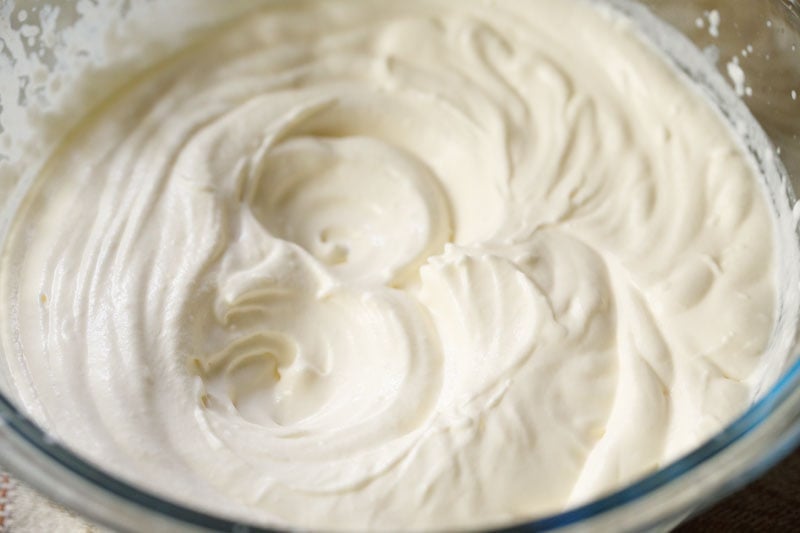
4. Initially, the cream will start to thicken and you will get whipped cream with smooth peaks that will give way to stiff peaks.
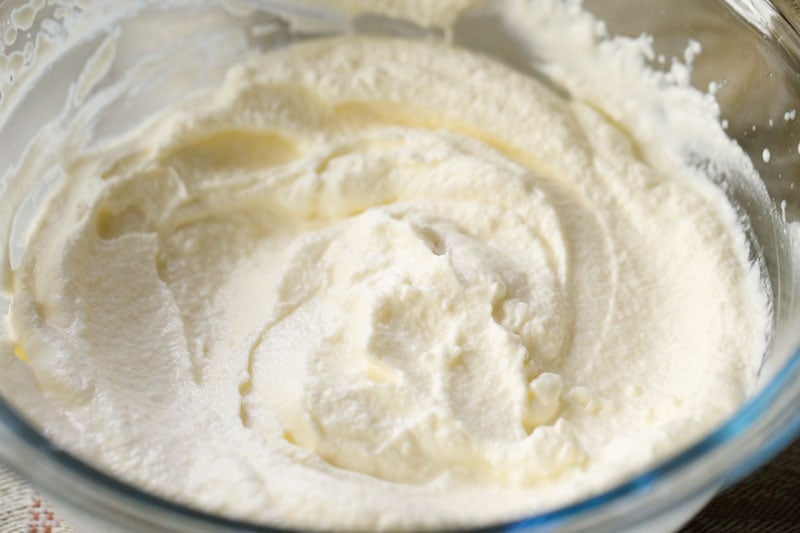
5. Continue to whip. The mixture should start to become grainy.
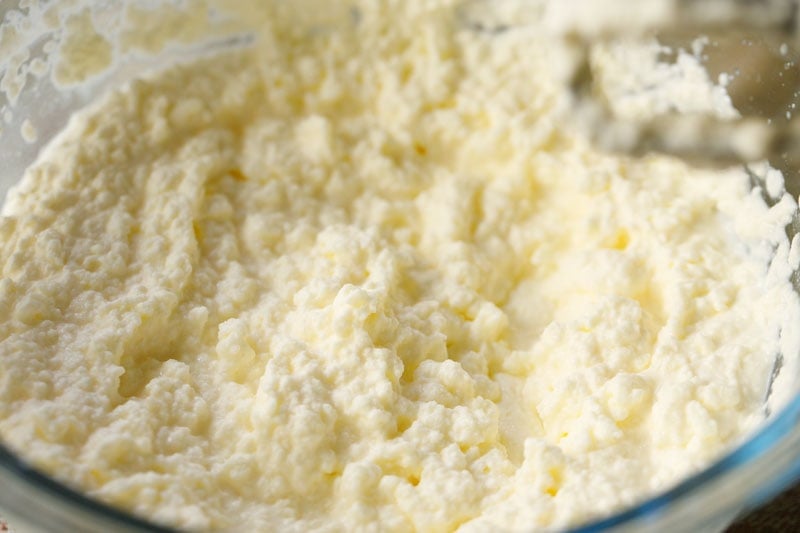
6. Keep whipping – it will look curdled and you’ll see some buttermilk beginning to separate. At this point, the buttermilk will begin to splash all around. I recommend you cover the bowl and your hand mixer with a kitchen napkin to avoid a messy countertop.
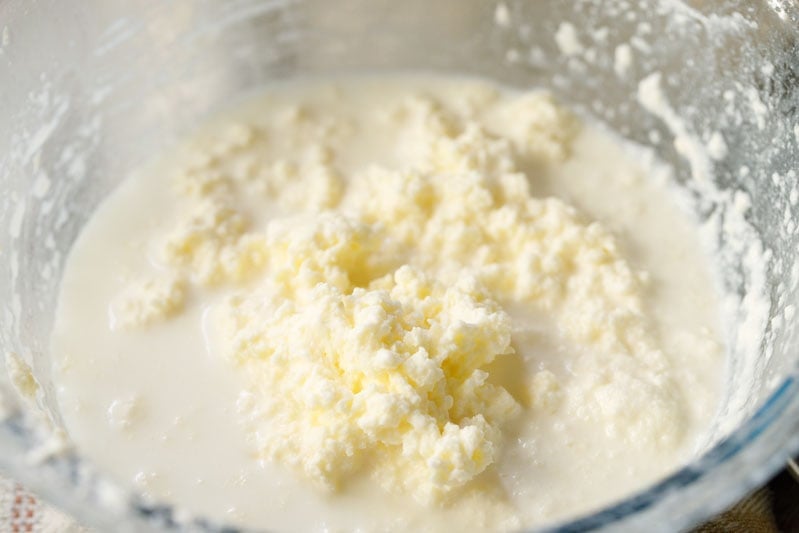
Butter Separated
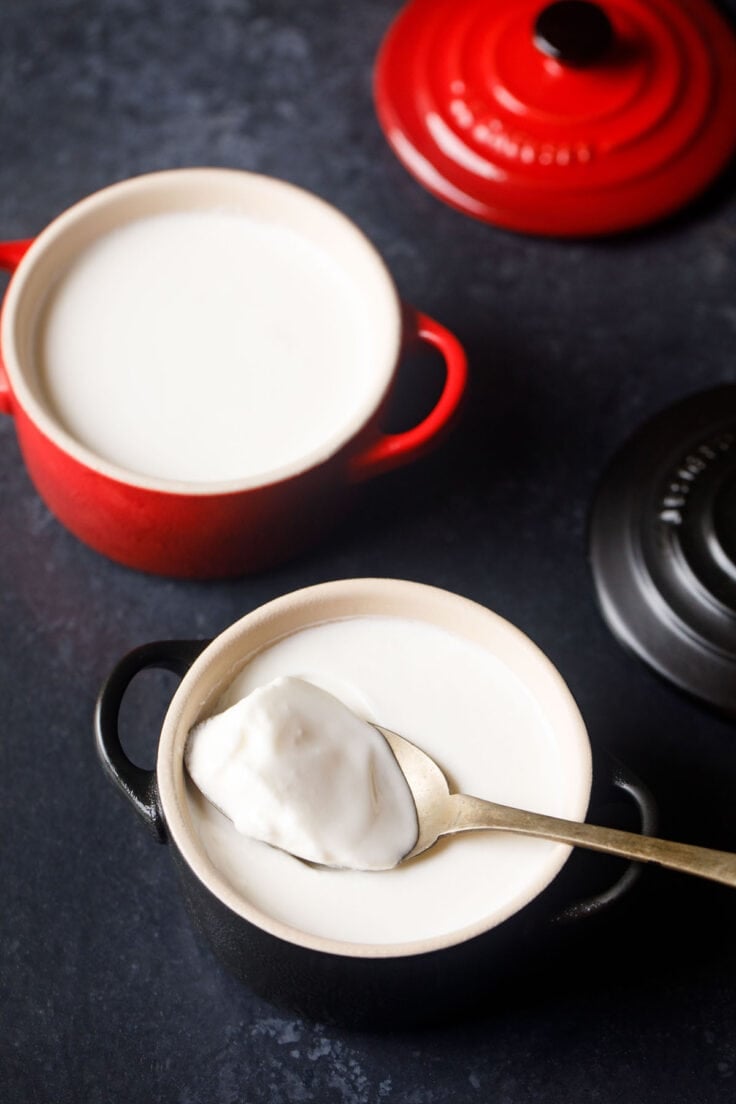
7. Continue to beat until the butter is clearly separated. You should see distinctive lumps of white butter floating in a white liquid. The liquid is buttermilk (also known as whey), and can be used in cooking. Your beautiful, homemade white butter is ready.
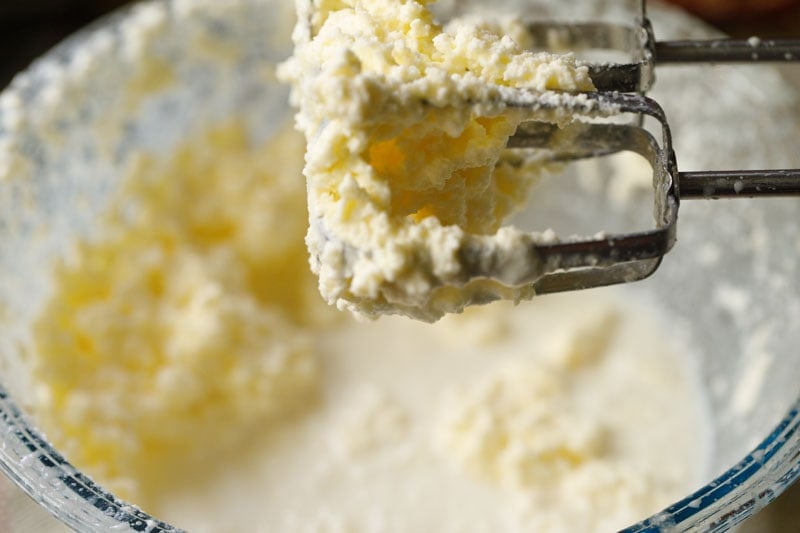
8. The butter will also be stuck on the whipping blades, so be sure to scrape the whipping blades with a spatula and add the solids back to the bowl.
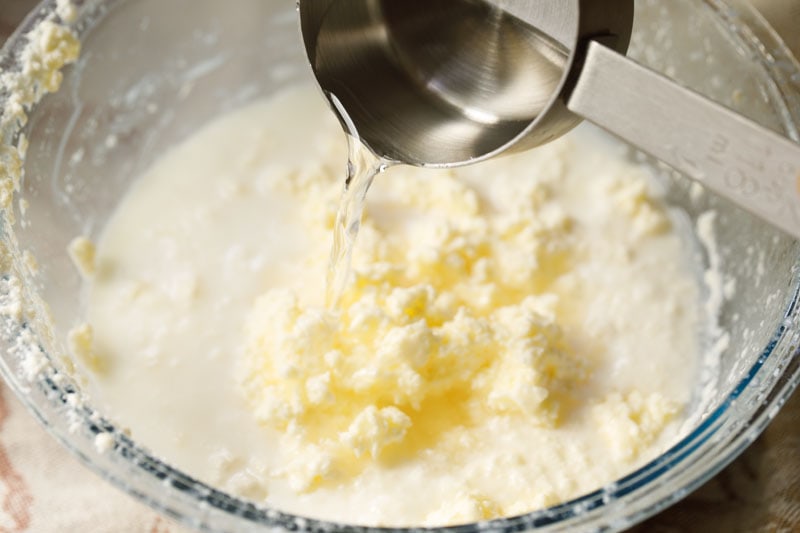
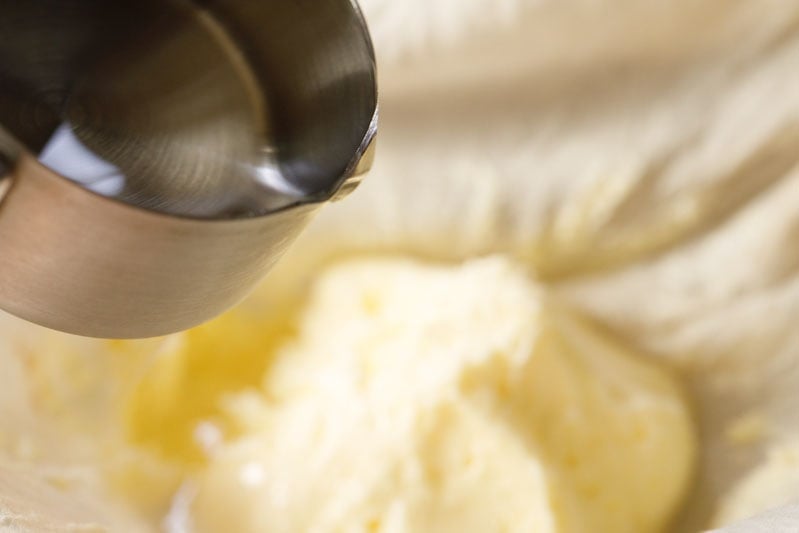
9. Now add ½ cup of cold icy water all over the butter in the bowl. This will solidify the butter and firm it up.
Note that adding water will dilute the buttermilk. If you do not want your buttermilk to be diluted with some water, then add cold water after collecting the white butter as shown below.
Collect & Strain Butter
10. Line a mesh strainer with cheesecloth or muslin and place it on top of a bowl. Pour the buttermilk and butter from the bowl into the cheesecloth. Scrape the white butter at the sides of the bowl with a spatula and transfer it onto the cheesecloth.
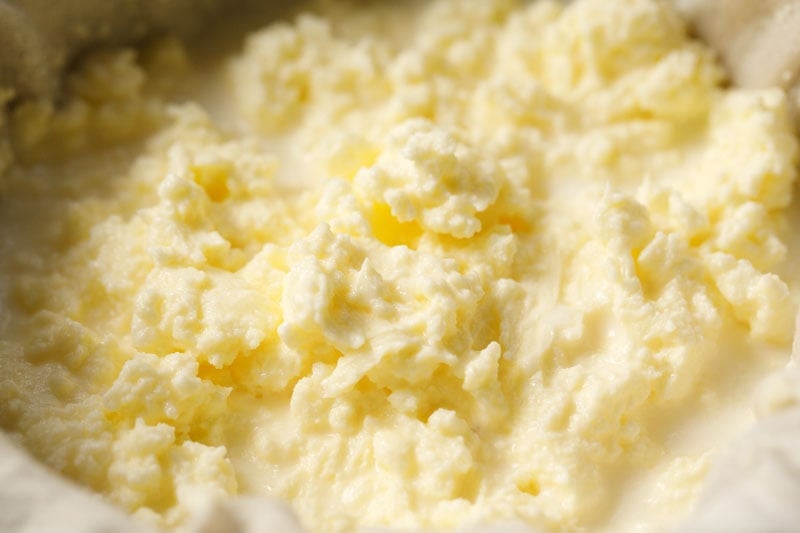
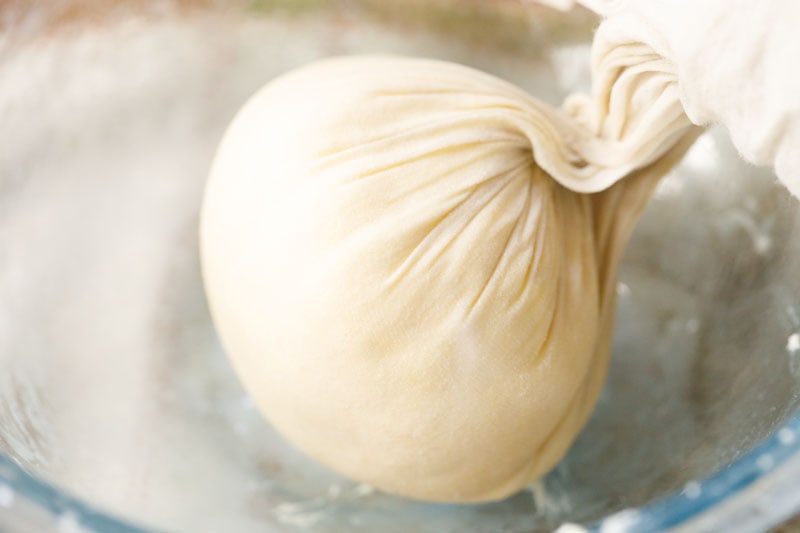
11. Collect the edges and form a bundle, gently pressing off the extra whey or buttermilk from the butter.
Open the cheesecloth and you will see a nice lump of soft homemade butter.

Save Your Buttermilk
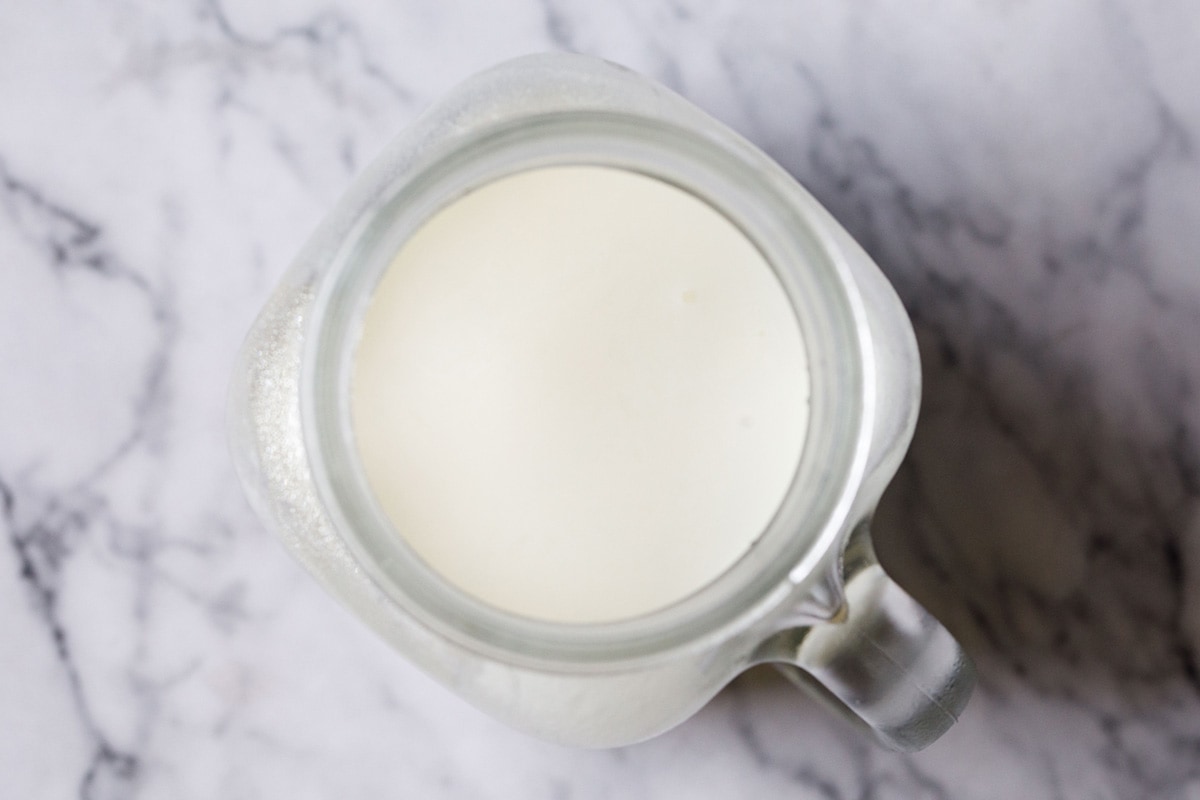
12. After you have collected the butter, you will see buttermilk collected in the bottom of the bowl. Do not discard it! This is a lovely ingredient that is a bonus from making butter. Use buttermilk as needed in any recipes.
Note that this buttermilk will have a sweet taste unlike the buttermilk made from cultured cream which will have a sour or tangy taste.
A simple way to use the excess buttermilk would be to season with salt, cumin powder, finely chopped ginger, some mint and coriander leaves. Mix and drink it like a chaas or spiced Buttermilk. Read on below for more ideas to use up the buttermilk.

Rinse Homemade Butter
Now place the cheesecloth with the butter on the mesh strainer and keep on the same bowl in which you whipped the cream. We will be rinsing the butter with ice cold water so that more of the buttermilk is extracted from it.
Gently pour ½ cup cold water all over. This will help chill the butter, helping it to solidify. Press the butter with a wooden spoon or spatula so that more of the buttermilk is removed from it.
Repeat – pour ½ cup cold water all over, press the white butter to extract the buttermilk. Discard the water.
Pour ½ cup cold water over the butter for a third time and press again to remove any extra buttermilk. While rinsing, you will see that the milky white color of the water will become more faint.
Repeat this process of rinsing a few more times until the water becomes mostly clear.
You can also strain the butter through a super-fine strainer. Some people use their hands to rinse the butter and remove the buttermilk. I do not prefer to use my hands as I find it messy and untidy.
Bring the edges of the cheesecloth together and press gently to extract as much buttermilk from the butter as possible.
The more the buttermilk that is removed, the longer shelf life your butter will have.
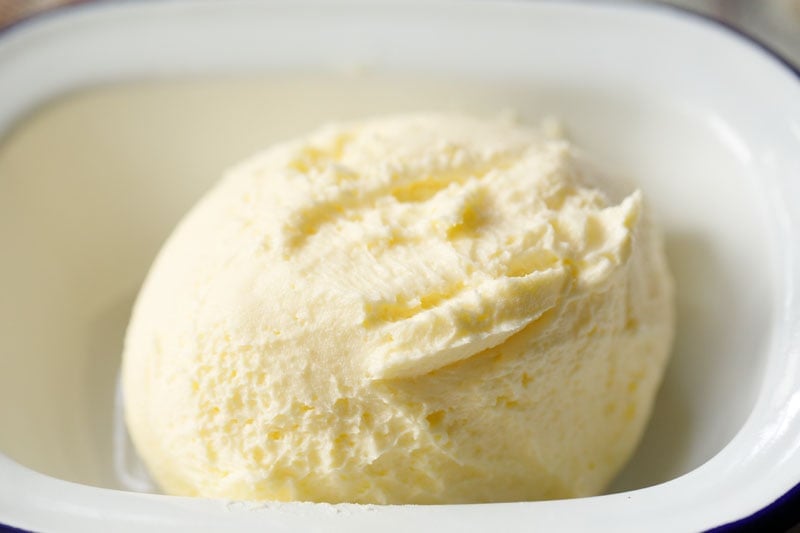
Remove the white butter from the cheesecloth and place it in an airtight container. Scrape any butter clinging on the cheesecloth with spatula and transfer to the container.
Feel free to line the container with parchment paper. I prefer to store the butter unsalted in the refrigerator.
At this point, you can take the butter in a bowl and turn it into a compound butter by adding salt, spices or herbs, or even fruit that you like. Mix very well. There are many variations of butter that you could possibly make, like garlic butter, herbed butter, or strawberry butter.
With a spatula, smooth the top and the edges making the butter even from all sides. Cover with an airtight lid and let the butter set in the refrigerator until you are ready to use it.

Uses for White Butter
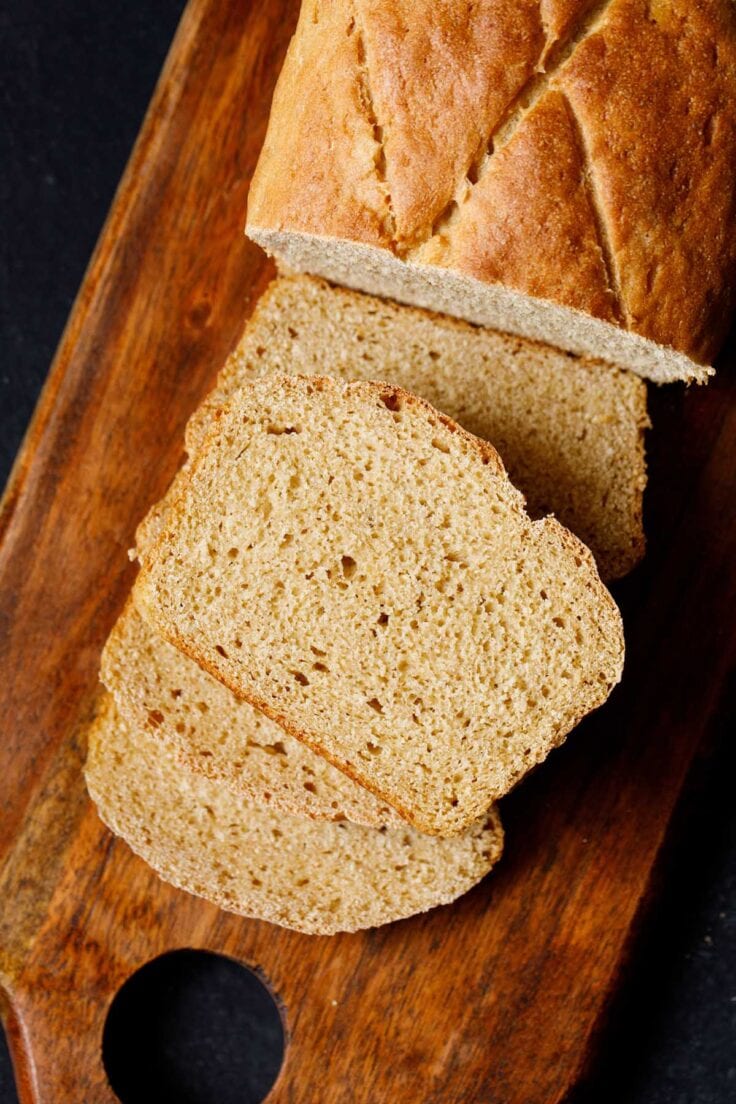
This white butter – also called Makhan in India – can be used on breads, rotis, parathas, or sandwiches. Homemade butter can also be used for baking biscuits and cakes.
If you are not worried about counting calories, then you can also use the butter in dals, vegetables etc or make the popular Indian street food Pav Bhaji. You could also use this fresh butter to make ghee (clarified butter) at home.
In short, you can use this homemade butter anywhere you would use normal, store bought butter. That said, I suggest you try my favorite, simple, beautiful breakfast of fresh butter on a slice of fresh bread with a cup of tea or coffee. You won’t believe how delicious it is!

How long does homemade butter last
You can keep the homemade butter at room temperature for 1 to 2 days if you live in a cool place. If you live in a hot humid place, it is better to refrigerate. At room temperature butter can go rancid very easily.
If your butter has more of the buttermilk in it, it will have a shorter shelf life. A well made butter will last for a couple of weeks in the refrigerator and for a month in the freezer.
How to Make Cultured Butter
To make cultured butter, the process is slightly different. You’ll need to make cultured cream first. You can use homemade cream as I have explained in step 1 or use packaged cream to culture it.
Make Cultured Cream
Take 2 cups of heavy cream. The cream can be cold or at room temperature. Mix in ¼ cup of yogurt or Curd until uniform. Cover and let the cream set for 8 to 9 hours. You can also use the Instant Pot yogurt setting to make this sour cream.
When the cream is perfectly cultured, it will be wobbly and thickened. Place the cultured cream in the fridge and let it cool completely before churning.
Whip Cultured Cream
Then follow the step as mentioned above to whip the cultured cream until the cultured butter gets separated. You can whip it in a blender, stand-mixer or with a hand-held electric blender.
Collect the butter in a muslin draining all the buttermilk. Rinse the butter in ice cold water and remove as much buttermilk from it as you can.
Transfer completed butter to an air-tight box and refrigerate or freeze it. You can use this cultured butter to make cultured ghee.
Note that both cultured butter and the buttermilk extracted from the cultured cream is far healthier due to the presence of the gut friendly bacteria and also has a better flavor than the buttermilk from uncultured cream.
How to Use Buttermilk
As I mentioned above, you should definitely keep the buttermilk that is extracted during the butter-making process. It is a delightful (and basically free) ingredient that can be used in a wide array of applications. Here are some ideas for what to do with your whey:
- Buttermilk Pancakes
- Cakes
- Breads
- Spiced Savory Drinks
- Cornbread
- Cheese Biscuits
- Kadhi Pakora – Use cultured buttermilk here; the sour taste is superior.
- Indian Buttermilk – For this popular, cooling Indian drink, I recommend using cultured buttermilk; the tang is much welcomed.
- Ragi Dosa
- Cheese Naan
Pro Tips
- Use heavy cream or whipping cream with 35% fat or more. Cream with lower fat content will whip but will not turn into butter.
- You can make butter using pasteurized cream. Avoid cream that contains added stabilizers or preservatives, as they affect proper separation.
- Non-homogenized cream churns faster and gives better yield. Homogenized cream can be used, but it may take longer and result in softer butter.
- Make sure the cream is well chilled before churning. Cold cream helps the fat globules clump together more easily.
- After the butter separates, remove as much buttermilk as possible. This improves texture and helps the butter stay fresh for longer.
- Always rinse the butter in cold water and gently press it to remove any remaining buttermilk before storing.
Frequently Asked Questions
Why is my cream not turning to butter?
If you have used cream with a low fat content, it won’t whip into butter. The cream should have fat above 35%; anything lesser than that won’t work.
What should I do if the butter is not coming out of cream?
If you have used heavy cream with 35% fat or above and the butter is not separating, then follow these steps:
1. Add ½ cup of ice cold water or 5 to 6 ice cubes to the cream. Continue to whip the cream.
2. If the butter has not separated after using ice water or ice cubes, then place the bowl in the fridge for an hour. Remove and begin to churn or beat again until butter separates.
3. Sometimes, melted butter will be dispersed in the cream and won’t separate. This happens if you churn butter in a hot or humid climate. Refrigerate the bowl with its contents for an hour or so. Upon refrigerating, you should see layers of butter floating on the buttermilk as the melted butterfat solidifies.
How long does it take to make butter from heavy cream?
It takes about 5 to 10 minutes depending on the quality of cream, speed of your beater or mixer and the temperature of the cream. It is best to use cream that has been refrigerated for a day before you make butter from it.
Do I need to rinse the butter?
Yes, you do. It not only helps to get rid of that milky taste and gives a smooth looking texture, it also helps the butter to last longer without spoiling.
Step by Step Photo Guide Above
How to Make Butter (White Butter)
Equipment
- Bowls
- Stand Mixer or Electric Hand Mixer or Blender or Food Processor
- Mesh strainer
- Silicon spatula
- Wooden spoon or spatula
- Cheesecloth or Muslin
- Kitchen towels
Ingredients
- 2 cups heavy cream or heavy whipping cream, with 35% fat and above
- 2 cup cold water or as needed
- salt or ground black pepper as required – optional
Instructions
Collecting Cream From Milk
- If you are collecting fresh cream or malai at home from milk then store this collected cream in the freezer. This cream is collected everyday and stored in a container in the freezer.
- After you have collected 2 or 3 cups of cream, then you can easily convert it into butter. Defrost the cream. You can defrost it in microwave or keep it on the countertop till it comes to room temperature.
- To culture this cream add ¼ cup yogurt (curd) to 2 cups of cream. The cream can be cold when you add the yogurt.
- Mix well and set aside for 7 to 8 hours until the cream gets cultured. After fermentation, the cream will thicken, be wobbly and set nicely.
- Keep this cultured cream in the refrigerate for a few hours until it becomes cold.
Whipping Cream
- Later in a blender, or in a food processor or in a bowl add the cream or the cultured cream. Turn on the blender or food processor or use an electric blender to whip the cream in a bowl.
- While whipping, initially, the cream will begin to smoothen and you will get whipped cream with soft peaks first and later with stiff peaks.
- Continue until you see buttermilk and the thick butter getting separated. You will see lumps of butter floating in the buttermilk.
- The butter will also be stuck on the whipping blades, so ensure to scrape the whipping blades with a spatula and add the butter solids back to the bowl.
- Now add ½ cup of cold icy water all over the butter in the bowl. This will solidify the butter and firm it up.Note that adding water will dilute the buttermilk. If you do not want your buttermilk to be diluted with some water, then add cold water after collecting the white butter in a cheese cloth or muslin.
Making Homemade Butter
- Line a mesh strainer with cheesecloth or muslin and place it on top of a bowl. Pour the buttermilk and butter from the bowl into the cheesecloth. Scrape the butter at the sides of the bowl with a spatula and transfer it onto the cheesecloth.
- Collect the edges and form a bundle, gently pressing off the extra whey or buttermilk from the butter. Open the cheesecloth and you will see a nice lump of soft homemade white butter.
- After you have collected the butter, you will see buttermilk collected in the bottom of the bowl. Use buttermilk as needed in any recipes.
- Now place the cheesecloth with the butter on the mesh strainer. Keep the mesh strainer on top of the same bowl in which you whipped the cream. We will be rinsing the butter with ice cold water so that more of the buttermilk is extracted from it.
- Gently pour ½ cup cold water all over the butter. This will help chill the butter, helping it to solidify. Press the butter with a wooden spoon or spatula so that more of the buttermilk is removed from it.
- Repeat – pour ½ cup cold water all over, press the butter to extract the buttermilk. Discard the water.
- Pour ½ cup cold water over the butter for a third time and press again to remove any extra buttermilk. While rinsing, you will see that the milky white color of the water will become more faint.
- You could also strain the butter from the buttermilk through a superfine strainer. Some people use their hands to rinse the butter and remove the buttermilk. I do not prefer to use my hands as I find it messy.
- Bring the edges of the cheesecloth together and press gently to extract as much buttermilk from the butter as possible. The more the buttermilk that is removed, the longer will the shelf life of your homemade butter.
- Remove the butter from the cheesecloth and place it in an airtight container. With a spoon or spatula collect any white butter clinging on the cheesecloth and transfer to the container.
- Feel free to line the container with parchment paper. I prefer to store the butter unsalted in the refrigerator.
- At this point, as a variation, you could also add salt or ground pepper or your choice of dried herbs to the butter and mix very well.
Storing Butter
- With a spatula, smooth the top and the edges making the butter even from all sides.
- Cover with an airtight lid and let the butter set in the refrigerator until you are ready to use it.
- Butter stays good in the refrigerator for a couple of weeks. If you have drained the buttermilk very well, then the butter will keep for about a month. You can also freeze this homemade white butter.
Making Cultured Butter
- To culture cream you can use homemade cream as I have explained above or use packaged cream to culture it.
- To culture packaged cream, take 2 cups of heavy cream. The cream can be cold or at room temperature. Add ¼ cup of yogurt or curd to the cream and mix well.
- Cover and let the cream set for 8 to 9 hours. You can also use the Instant Pot yogurt setting to make this sour cultured cream.
- When the cream is perfectly cultured, it will be wobbly and thickened. Place the cultured cream in the fridge and let it cool completely before churning.
- Then follow the steps as mentioned above to whip the cultured cream until the cultured butter gets separated. You can choose to whip the cultured cream in a blender, stand-mixer or with a hand-held electric blender.
- Collect the cultured butter in a muslin draining all the buttermilk. Rinse the butter in ice cold water and remove as much buttermilk from it as you can.
- Transfer completed cultured butter to an air-tight box and refrigerate or freeze it. You can use this cultured butter to make cultured ghee.
Dassana’s Notes
- Make sure to use cream with 35% fat content and above. If you have used cream with less fat content, it will not work.
- You can flavor homemade butter with seasonings like salt, black pepper and even a mix of herbs and spices like garlic, basil, mint, oregano, cayenne, red chili flakes, green chilies, thyme, parsley etc.
- To whip the cream, use an electric beater or a stand-mixer with the whisk attachment.
Nutrition
Homemade Butter recipe from the blog archives was first published on July 2009.
Hi. I have been making ghee all these years. I store malai in a glass jar for around 10 – 12 days, which is fine I guess. But the malai always becomes bitter?. Why so?
Try reducing the temperature of the fridge. Looks like the malai is getting rancid. Alternatively you can freeze it in a steel bowl. Hope this helps.
I love the recipe❤♥
I made it. It came out superb. But how long can we store it in fridge? Because already the cream is 15days old. If we prepare ghee then its boiling but for butter we are just churning the cream and that’s it
thanks urmi. keep in the freezer and not in the fridge.
So, I tried making butter from malai using whipping blade of my food processor. I don’t see the butter floating on buttermilk. Instead it’s very fine and mixes up and then getting it out is very very difficult and time consuming. I had a similar problem with hand blender too. What am I doing wrong?
did you add water. try to add some warm water. should work.
Hi… is the wet blade grinder useful for this task? Or will I have to buy a specific blade for making butter?
don’t use wet blade. use the whipping blade or flat blade that is used to churn curd or whip cream.
Hai ….from my experience….there is an easy way to remove water from home made. butter. Just keep it in refrigerator ( not freezer) for a few minutes . After it becomes a bit hard, tilt the bowl and water will flow out.
Thanks Jolly for the suggestion. I am sure it will help the readers.
Who is using full fat milk he can collect cream (sai) from that milk and keep in refrigerator adding one spoon of curd in it so that taste and quality not disturbs. After 10 to 15 days depending upon quantity of cream you can blend it in food processor with plastic blade. You have to add some ice or cold water while churning so that makhan solids become separated easily. After removing makhan you can freeze it max 2-3 days After that you have to heat it in the kadai till the Color changes to slightly red. Then remove from the gas and add one leaf of betel leaf or 2 to 3 cloves in it.
thank for this detailed info. what is the purpose of heating makhan after 2 to 3 days. we generally don’t do it and use the makhan from the fridge.
ही अमित
व्हाट्स थे दिफर्न्स बेटविन अमूल बटर अँड ठिस होमेमेद बटर?
amul butter is salted and has preservatives, additives in it. the homemade butter is not salted and without preservatives. moreover it more soft than amul butter.
Hi just came across this recipe. Thanks for the detailed post. I somehow unknowingly kept the collected cream from milk in my refrigerator department rather than keeping in freezer. It’s been around six days since I collected the cream from milk. So now will I be able to use the cream or is it spoilt and of no use now? Kindly. Help… Thanks in advance
if the cream does not smell bad, then you can use. i guess you can use this cream. it won’t get spoiled.
I do use the malai kept for 7-8 days in the fridge not freezer, going with the above procedure, my white butter turns out completely fine. It takes less then 5 mins to make butter after putting the water and malai in the bowl and using hand blender to get the yummy deliciousness home made butter.
I use this butter on my kids’ paranthas, for the lovely bread and butter breakfast and also for cooking. Instead of making ghee, I simply use this white butter for frying the onions to make tadka for the ghee dishes.
thanks for sharing your suggestions. it will definitely help the readers. i liked the idea of using white butter for tadka instead of making ghee. simply superb.
For how long the home made white butter can be stored in fridge?
Richa, It stays good for a month.
I tried to make ghee out the malai that was churned in the mixi. It turned out to be like lassie inspite of using the mixi long time. So I.put the whole lssi thing in Kadai. It turned out to be like khava and not ghee, not sure what is wrong. Kindly suggest.
Peace, when you blend always use the whipper blade. if you use the dry grinding or wet grinding blade the malai/cream will not turn into butter. the butter was not formed and hence after heating it ghee could not be made.
Hi Dassana,
Hope you are doing well. I have lost my whipping blade. If I plan to buy something new, I need a hand blender or mixer for churning butter? If I buy a mixer, can it be used for making bread too?
bhavana, hand blender will be difficult and take a lot of time. better to buy a mixer. you can even buy a stand mixer. i have a kitchen aid stand mixer and i use it to make chapati dough as well as bread dough. even butter can be made in it using the whisk attachment. you can buy even other stand mixers by reading reviews online.
Hi .while i was boiling milk ,it got slightly burnt.now its cream also has burnt odor .can i make butter from this cream or it will also smell bad?
the butter will have a burnt odour, if you make from this cream.
Can i make butter from curd and what is the recipe to make it. With malai it didn’t turned out correct. Kindly help
huzefa, you can make butter from curd. here you will need to whip the curd in a blender or mixer with some water, till you see butter floating on top. add water as required. water can be at room temp or cold. make sure the curd is chilled before you blend.
Hi
Today I tried and make butter,but it not thick.looks like creamy, I blend it with my mixies juice jar, I keep the frozen cream out with one day, please tell me if any suggestions?
Please tell me the uses of butter milk?
looks like the butter has not got churned. when using a mixer jar, always use the whipped blade. its a flat blade only meant for whipping cream or butter. if you use the dry grinding or wet grinding blade, no butter will get churned. the frozen cream can be kept outside for a day or for some hours.
I tried and could make the makhan successfully. However it is not white. How does one get that.
Kanwal, cow’s milk will give yellow butter and buffalo milk will give white butter.
you said white butter but it turned out yellow. i like yellow butter which milk you had used for it. is it cow’s milk? please suggest i always make butter at home it’s always white butter.
harqulis, cow’s milk will give yellow butter and buffalo milk will give white butter. i had used cow’s milk.
I like the recipe too much
Hi, i was trying to make butter from cream as you suggested, but it turned into ghee. What should i do?
butter when heated turns into ghee. did your mixer or grinder get heated up too much while blending. if actually some of the butter has turned into ghee, then what you can do is pour everything in a heavy kadai. then heat it on a lowest flame. some of the butter will melt and slowly turn into ghee. then strain and use the ghee.
I hv tried today for the first time really thanks a lot
welcome richa 🙂
Hi.. my mil mixes a spoon of curd too with the cream and keeps it fr 5-6 hours before churning it. I guess she does it for extracting butter milk..
yes we also do this at times. this gives fermented butter which tastes very good and different from what i have shared here.
Hii there. I have one question. I stay away from home and have limited sources. I do not have a blender. I have a normal mixer grinder with just one blade type. Is it ok to use that?
the normal mixer grinder with one blade will be a multipurpose wet grinding & dry grinding blade. avoid using. as you will keep on mixing and the cream won’t turn to butter. if you have a hand held electronic beater, then you can use that.
Have been blending the milk cream for more than half an hour & mixer heating up tremendously but butter not forming-what to do?
which blade you used while blending cream. the whipper blade needs to be used. if not the blade, then this issue could also be due to the quality of cream.
Hi
I tried making butter but every time I did, butter didn’t come. It was very smooth like a batter. Can you please tell where I went wrong? Did I ever churn the cream. Waiting for the reply.
when churning or blending, you have to do it a high speed till you see the butter separating from the cream. first the malai will become smooth, but you have to continue further till butter can be seen. it also depends on the quality of malai/cream.
Can we store butter in fridge ,as it tastes bitter the next day,after storing in the fridge also…
i always store in the fridge. never had any issues with regards to taste.
Wow it was super quick n easy! Thank u so much 🙂
welcome and thankyou so much shivani 🙂
Hi,
I am a very regular reader of your site.
I have a quick question,
I have 300 ml of thickened cream lying in my fridge.
can I use that to make this white butter?
is white butter same as loni?
or is it just same like Amul butter which is yellow in color?
I am a bit confused, as Loni is different from butter which we spread on bread slices.
amruta, you can use the cream which you have to make butter. amul butter is different from loni. loni is white butter. you can make butter from this cream.
Hi D,
As a single man forced into the kitchen I had nowhere to go but the internet and look up recipes. I came across your blog and started following it… and what a relief it was. I like how precise you are and reasoning behind using certain ingredients or methods when cooking. My aunts always praise my cooking (haven’t told them the secret though) and both mom and dad love the food too. You’ve made my life in the kitchen much easier… bless you and thank you 🙂
welcome girish. thanks a lot for your best wishes as well as for this positive feedback. knowing that the recipes are helping people in cooking good food at home, motivate us to keep on sharing more recipes. wish you all the best in your cooking journey.
I used the grinder in my mixie for this. Alternately I used the chopper. I couldn’t make it. Pls tell about the time taken – roughly how long does it take before butter separates from the cream. Really need help 🙂
for blending, always use the whipper blade. with a chopper blade, it becomes difficult to get the butter. with a whipper blade it does take 8 to 10 minutes on high speed. you can run the blender at intervals also.
Hello Dassana,
Both me and my husband are your fans. Whenever I try new dishes his quickest query would be if its from your blog. Haha and when I say ‘yes’ he’s the happiest person on the table. I have a 1 year old baby. I wanted to make her home made groundnut chikki. Please make her happy too by posting the recipe. With love and prayers Shai.
we are quite pleased to know this shai 🙂 surely would take your request for groundnut chikki on our file thankyou and god bless you all.
Hi am your fan for your recipes…Am following U a lot….
One doubt is there any chance I can use mixer for taking the butter. Plz relieve my doubt.
Thank u
yes you can use mixer. thanks.
Dear Dassana..
U have become my mentor.. as i am quite helpless in the kitchen.. n i look for ur recipes n they have always helped me immensely.
Thanks a tonn
glad to know this sumi 🙂 our blog’s goal was to help people learn cooking and make them enjoyable. thankyou for your kind words.
Thank you for such simple nice and easy steps…I made ghee..n it turns perfectly well..
welcome utkarsha
Hi..can we use packaged milk which we get in the market or only fresh cow milk shud be used? Please reply.. Thankyou
welcome yani. you can use but you have to heat it. once the milk cools then collect the cream from the top.
Hi Dassana,
I had a small question, as you mentioned that you store the collected malai in a container in the freezer, should the container be closed with a tight fitted lid as in the case of a tiffin box any steel tiffin box or should the container be covered by a small plate…. why i am asking this is ice crystasl tend to seep inside our steel containers….
Or should i store the malai for 10 days in a air tight plastic container? which would be better according to you.
and should i add a bit of yogurt on the first day of collecting malai itself ?? or i should add the yogurt culture the previous night before making the butter…
and lastly after adding the yogurt if on the last night? should the container be kept overnight in the fridge or outside??
Please answer these questions as I am not able to get responses to them.
kirti
yes the container has to be closed with a tight fitting lid. i store in a freezer safe plastic box. so i do not get any ice crystals in the box. i would suggest to add the yogurt when defrosting. what i do at times, is that i add the yogurt when defrosting the malai overnight. i keep the container at room temperature and covered.
hello mam,
everytime I google about any kitchen query I end up here in ur blog only 🙂
.one stop solution for all
can we use this butter instead in all the cake recipes where u mentioned oil ???
thank you neha. yes you can this white butter in all cake recipes.
Its great to have homemade fresh butter at hand and the solution to the problem of having greasy utensils after making butter is to pour hot water over them. The hot water melts the greasiness away. In this way they get cleaned very easily.
thanks hina for sharing this handy tip and suggestion. one tip from me is to add vinegar also to the hot water, which helps in getting rid of the grease.
Hi Dassana & Amit,
I have been taking out the butter for past few weeks. I just have a couple of doubts which no one has answers to.
1) Why is my butter pure white in colour while i have always eaten yellowish butter.
2) How to I remove the traces of buttermilk from butter before melting it to make ghee which I use on chapatis.
3) Any suggestion to improve the quality of the buttermilk.
1. white butter is due to buffalo’s milk and yellow butter is due to cow’s milk.
2. remove the floating butter with your hands and let the whey drop from the gaps between your fingers.
3. try culturing the butter. this gives a good buttermilk and a healthy cultured one. just add 1 ladle of curd when you keep the cream to defrost.
This is my suggestion _ before heating butter wash it with plenty of water. Do this for 2 to 3 times or till the contents of buttermilk totally remove d. This helps to remove smell & taste of buttermilk.
thanks ajita for your suggestion.
I have a cow at home and have been collecting cream from the milk for last few days. Last night we kept the frozen cream in kitchen overnight and added some home made curd to it. This morning we tried to make butter by adding water to the cream and spinning it using handy mixer for quite some time but no butter came up att all till the mixi become very hot due to prolonged use… Can you pls guide me what can be the readon and where was I wrong. What to next to get good result… shall v go for old system of wooden Madhani to spin the cream…. pls do reply.
next time i would suggest to not add water and just whip the cream directly. if a mixer cannot do this then wooden madhani will also not be able to do. i think that when curd is added, then there is no need to add water. if curd is not added, then some water is added. possibly could be as there would be some fermentation happening due to the friendly bacteria and could be some water is a by product of this reaction. so i think water need not be added when curd is added to milk.
Thanks for your reply. Your comments noted. We will try again next week n let you know the result…
best regards.
welcome nadeem. yes do share the feedback.
Hi Nadeem,
This happened to me too. My mom suggested me to add some hot water since the temperature was really low in December.
This helped and i got the butter
i am from Kerala. I like ur all veg Recipes. I visit ur website every time. I like North Indian food style. Thakn u
welcome divya. glad to know this.
Hi,
Do you add a spoon of curd to the cream that you collect while freezing once in a while?
when you say cream , is it just the film that forms on top of the milk or is it some thick milks as well?
Thanks in advance
Ram
when freezing curd is not added. its just the malai that is collected on top of the milk. before making the butter we keep the collected cream overnight at room temperature in the kitchen. this time we add curd and mix very well with the cream. then next day we make butter or ghee from this cultured cream. when making butter we usually don’t use this step of adding curd. but when making ghee we do add curd.
i know this becuase i have made both. both are diff. butter from fresh cream is yellow and butter from yogurt is white. which is makkhan butter that i used to eat in india at my grandma’s farm. what you have above is sweet cream butter ( yellow) and it can be rinsed with cold water to remove the additional buttermilk and therefore there is no need to press with hands. all you need is a good spatula. Mine turned out perfect
thank you for sharing the info. back home we call this butter as makhan. butter can be made both from cream and yogurt. at home we make from cream.
Great site Dassana… Receipes looks amazing. I tried your whole wheat pizza. Kids loved it. Thank you
welcome sujatha. glad to know this.
I visited your website first when i was searching for paneer butter masala recipe. After that became a reguler visitr. I am married to a marwadi family so i am vegetarian now. Whenever i need a veg recipe i always find it on your website. Thanks a lot dassana. My mom-in law does nt whip the malai she directly heat the malai up in our ghee-kadai. It comes out nice. But i will try your recipe too. Love you!
thanks rumi for sharing your experience and also for letting me know of this method. we always follow the method as shown here. but i will try the way you have also mentioned.
in winter it is difficult to separate butter from the curd after adding boiling water also.any tip to make it easy . thanks in advance 🙂 🙂
welcome paddy. before you start blending or churning, bring the cream to room temperature by keeping it outside.
Superb Idea. ‘am collecting the cream and will make the butter once I have collected enough Cream.
thanks vijay
I Also Make Butter With The Same Process, But Sometimes Its Very Difficult To Derive Butter Even After Churning. I Have A Cows At My House. We Always Make Our Own Ghee. But It Is Always Few Time In A Month We Don’t Get Butter From Curd Even After Vigorous Churning. Please Advice.
I Also Want To Know That Once We Get Butter From Curd Is There Any Other Dairy Product We Can Derive From That? If Yes Than Please Advice If It Is Strictly Vegetarian.
Hare Krishna.
you are lucky to have cows at your home 🙂 till now i have not had a problem when churning. do you churn the butter manually? an electric equipment like a mixer or a food processor does the churning faster. if there is lots of butter, then i make ghee from the butter. thats the only product that i make once the butter is obtained. very simple. on a low flame, in a kadai, melt the butter and simmer till you see golden colored ghee on top. keep on stirring at intervals. the bottoms may get browned and have honey comb like solids. then filter the ghee and store in a jar.
Hello from Australia!
Thank you for creating an exceptional website full of delicious recipes! This is my first time making butter. I followed the instructions and it looks like the pictures with the separation of the buttermilk, though the butter tastes slightly sweet. Is this because I didn’t whip/process for a long enough time, 2-3 mins? I purchased full cream. I will still use it and try again next time, I guess!
the butter made this way taste a bit sweet. it also depends on the quality of cream or milk. it not due to the time taken for whipping.
Hey dassana i am from Goa and I am a big fan of yours I try all your recipes. Love it all. Now I tried to make butter but the colour of the butter turned white instead of yellow, please help. Thanks Dassana
the color depends on the type and quality of milk. yellow color is due to cow’s milk and white is due to buffalo’s milk. no need to worry about the color. its fine.
Do you use warm water or room temperature water?
water at room temperature.
Thanks
welcome shubhra
Hi
When I make makhan I add yoghurt to some cream, and leave it overnight. Next morning just put it in food processor like you do. I feel as though this method imparts a nice flavor which reminds me so much of what I ate back home in india.
thanks purnima for sharing your tip. i know some people use this technique.
Can you please mention the food processor / attachment shown/used by you in the picture for point no. 2. In a mixer jar, or in a food processor add the cream. Add 1/2 to 1 cup of water. Turn on the mixer or food processor.
I am having a hard time in India to identify the most appropriate appliance to whip the butter/makhan from malai.
Thanks in advance.
in the pics its a food processor with a whipper attachment. but you can also make butter in a mixer or blender. i have made butter both in a food processor and mixer-grinder.
I live in the US. I collected cream for two weeks at home and kept it in the fridge. I added some yogurt to it. My buttermilk which was left tasted bitter. Why is it so?
Thanks
i think, the cream or the yogurt, one of them has got spoiled and hence the bitter taste. otherwise the butter does not taste bitter at all.
Can we make fresh cream from malai..I mean cream that can be use for.decorating cakes…if so pls do tell the method as I have lots of freezed malai and we don’t eat butter.
Pls do reply
Thnx
use chilled malai. in a blender or food processor with whipping blade, add the chilled cream along with icing sugar. beat till the cream gets stiff peaks. them use it for frosting the cake. i have made this way and you will get very good cream for icing.
FYI
I visit India each year ( from USA) and have been making butter as you described. I have also saved the malai in the freezer and was worried that was not the proper thing to do.
I use a blender. Has anyone tried an electric wand. Would that work?
You should add the next step of making ghee from the butter to your presentation. That is also, easy to,do, yuumy and cost effective.
p.s.
I do my own cleanup and indeed that is problematic, especially with no hot water.
I may try boiling some water to use in the cleanup process
Thank You Again
thanks suzanne. i have not tried with electric wand. but i think a blender or food processor is faster. i know i should have added ghee to. but will update it in future. you can just heat the water on a stove top and then clean the jars.
Hi …
1. Use blender instead of mixer, less messy and more suitable, they have a special round blade for butter churning only.
2. The color is defined by
Yellow – for cow’s milk
White – buffalo’s milk
blender also works well. even food processors have this blade. thanks for the bit on the colors.
Give a concise ways of making youghurt, ice cream and butter.
Thanks Ben
Hi there,
Thank you soooo much for this recipe! I tried it this morning, and it came out beautifully! Going to make some brownies with my homemade butter, methinks! I was wondering, how many days would this butter last in the refrigerator?
it will last for more than a month in the refrigerator.
Namaste Dassana
I am Robert from Australia. Thank you for your food blog. I am the cook in our house and have much to learn about the vegetarian cusine of South Asia. Your recipes help.
Butter (makhan) is a beautiful natural food best made at home. So I write to share a makhan making tip I learned from my Dad, who worked as a cheesemaker. An easy way to remove the water from the makhan (and keep the hands clean) is to press a few spoonfulls between two flat pieces of wood (like small bats) over a bowl – flat kitchen spatulars would do for a small quantity. Just keep working the makhan until it glistens.
Thank you for the care you take in preparing and posting so many inspiring recipes. Thank you also for the effort you make to write in English language. I trust my tip is helpful.
best wishes,
Robert
thanks robert. also thanks for sharing the tip that you have learned from your dad. your suggestion is surely helpful.
Useful receips. Thankyou.
hi, i made it today. but it is in white color. where as urs is in lite yellow? how can i get dat color?
hi priya. its the quality of milk that imparts the color. does not matter. when i used to make, sometimes i would get white color and sometimes light yellow.
In te US, I don’t get malai on milk ( the full cream one).. I tried from full cream curd also, but nothing. Then , I used the market cream but it is not as good. Can you tell how to make it out of curd or which milk you use to get malai if you are in the states
hi neha. i don’t live in the states. you need to have a full cream or milk or atleast 80% fat cream or milk to get butter. for making out of curd, also you need a full fat curd. you can even use whipping cream to make butter.
for making butter from curd – add some water just to help the curd blend. blend the curd in a mixer or blender till you see the butter milk separating and the butter also separating. collect the butter in a bowl or container.
Dear Dassana,
Landed on your page (courtesy: google) as my mum wanted to dish out homemade butter for us. I loved the way you have given the step by step uncomplicated instructions to prepare gharka delicious makkhan in minutes. Gr8 going Dassana!!
Thank You.
Regards,
Shilpa
thanks shilpa 🙂
Dassana,
A Google search for how to make homemade butter brought me here. Followed your instructions and now i have a katori of beautiful golden homemade ghee in front of me.
Thank you for the lucid instructions and step by step photos. I found them extremely helpful.
thanks pavithra…. its been long i hv made butter or ghee at home…. your comment reminds me i hv some requests to post how to make ghee.
even when i visit other blogs i find step by step photos very helpful…..
hi,
by using mixie, it didnot turn up well. the cream becomes smooth in texture, i keep on turning mixie, but it does not turn into butter, pls help me, where i went wrong. (i had collected cream at home daily and kept in freezer)
just add some warm water to the cream – malai and keep on churning it in the mixie. the butter will separate…. keep on churning churning churning the butter till the whey separates out.
the cream first softens and becomes smooth but continue to whip it in the mixie and you will get butter. patience and more patience is what one needs even while cooking and preparing butter at home 🙂
this usually happens in cold temperatures hence we need to add some warm water to the frozen malai. its always better to completely bring down the temperature of the cream to room temperature and then churn it in the mixie.
hi, thanks for your reply, will try again.i have a doubt does blade in the mixie makes some difference, what type of blade are u using in your processor?(is it a whipping blade?) can u show me your blade of your food processor used here.
approximately how much time will it take for soothing cream to turn into butter?
thanks in advance.
blades in the mixie won’t make much difference. or how could the ladies in the past make butter in the matkas without any modern equipments like mixers or food processors.
i have made butter both in the food processor and in the mixer grinder.
for the food processor i used a whipping blade.
for the mixer grinder its the wet grinding blade.
i had this problem you faced only once in the cold winters of delhi. i was churning the butter on and on and on and on in a mixer grinder and all i could get was soft soft peaks of cream…. no butter in sight.
i asked my mil about the issue and she told me it usually happens in the cold seasons. she asked me to add some water to the cream and then churn it.
i did and then i could see the butter getting separated from the cream…..
the time depends upon the quantity of cream you have added in the food processor or wet grinder. for 2 cups of cream with 1/2 cup water approx 5 minutes would be enough unless the cream is still cold and not at room temperature.
thank you so much for helping me out. will try and feedback the results
you are welcome priya… do let me know…
Hey,
First of all the pictures are mouth-watering! Who would not love home-made butter and the left-over butter-milk(smelling of butter) after the butter has been extracted? I think I might as well try this – this weekend. Thanks!
I strongly believe that home-made stuff is better than store-bought because of the lack of preservatives. However, I make only ghee at home from store bought butter because I usually don’t have enough cream(malai) to get enough home-made butter that would eventually give out enough home-made ghee.
But thanks for the idea of using store-bought cream. And also, the idea of storing/accumulating cream from milk everyday in the freezer for one month( that should give me sufficient quantity). and thanks for showing me via pictures that this can be done in a food processor.. Can I use a mixi with similar results?
thank you navya. yes… homemade products are much better than buying outside. yes u could use your mixie with the same results.