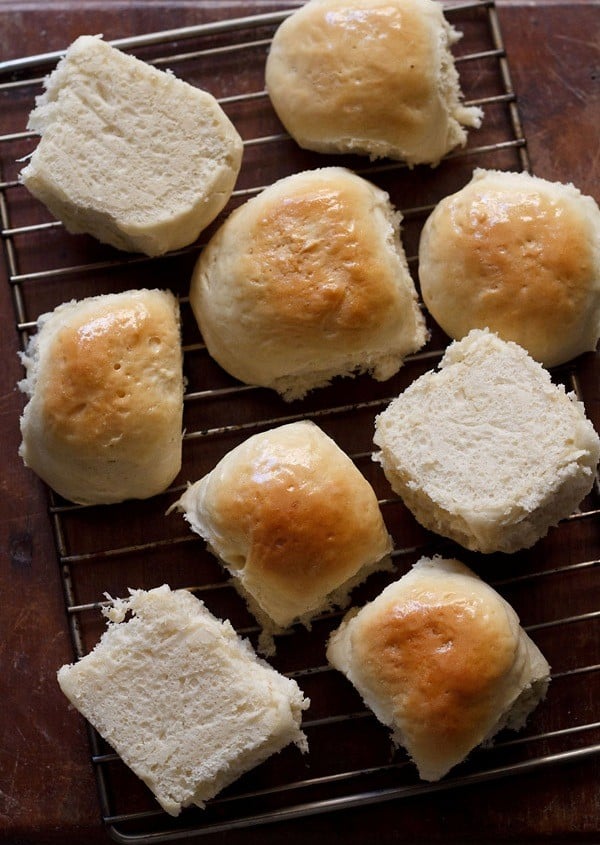
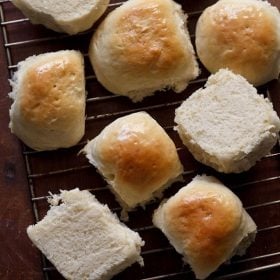
Pav Recipe | Ladi Pav | Pav Bread
There’s so much more to breads in Indian cuisine, than just the well-known flatbreads. For instance, take this Pav, which is also popular under the sobriquet Ladi Pav and is a specialty from the ‘city of dreams,’ Mumbai in Maharashtra. While there’s more to read about this Mumbai style bun in the post, I’m also sharing a step-by-step Pav Recipe for you to easily follow and make this soft, fluffy and light bread at home. The ingredients are not much but the procedure is quite long. So, make sure to follow the recipe well to get the best result.
About Pav Recipe
Pav is basically a small loaf of bread, introduced by the Portuguese in India. Thus, also referred to as ‘pao,’ going by the Portuguese food traditions.
In Hindi, the word Pav refers to ‘quarter or ¼ᵗʰ .’ Sometimes you get the Ladi Pav in a set of 4. It is also said that since the bakers kneaded the dough with their feet at that time, the name is Pav which means ‘feet’ in Hindi.
Commercially, Pav is always made with maida or all-purpose flour. However, at home, we can make these small bread rolls with whole wheat flour (atta) or other flours. I also make a Pav Recipe with 100% whole wheat flour.
You could opt to make Pav with equal portions of both all-purpose flour and whole wheat flour. Pav made this way using an equal mix of both the flours also yields a soft and light texture.
The recipe of Mumbai Ladi Pav in this post is made with 100% all-purpose flour (maida). I make these light bread rolls once in a while or on demand, when the regular Whole Wheat Bread or chapatis get monotonous for the family.
I have developed this Pav Recipe over a period of time to get the best result. The recipe method makes use of the sponge or ‘poolish’ method for leavening, resulting in super soft and spongy Pav.
I have added instant yeast in the recipe. However, fresh yeast or dry active yeast can also be used. To get the aroma and taste like that of the Ladi Pav made in the bakeries, it is advisable to use fresh yeast. The proportions of all 3 are mentioned in the recipe card below.
Usually, I make these Mumbai style buns or dinner rolls to be served with Pav Bhaji, Misal Pav, Masala Pav, Vada Pav, samosa pav or pav sandwich. I never buy Pav from outside as this recipe really yields in excellent homemade bread rolls.
How to make Pav
Make Dough
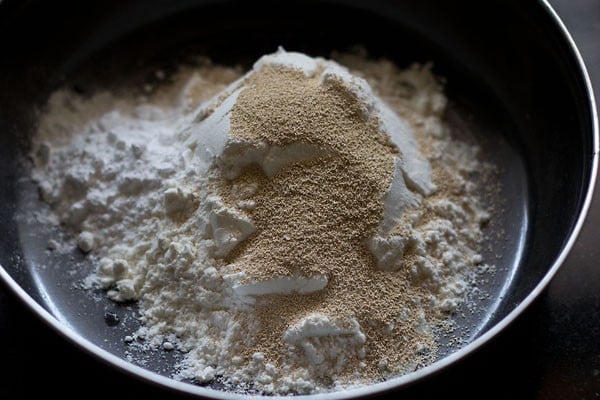
1. In a bowl take, 1 cup all-purpose flour, 1 teaspoon instant yeast (rapid rise yeast) and 2 teaspoons sugar.
Make sure the water is lukewarm. If not then all your efforts will go waste. The water should not be hot.
Note: If using active dry yeast or fresh yeast, then ensure the water is neither hot nor cool. Hot water will destroy the yeast and less warm water or cool water won’t help in activating the yeast.
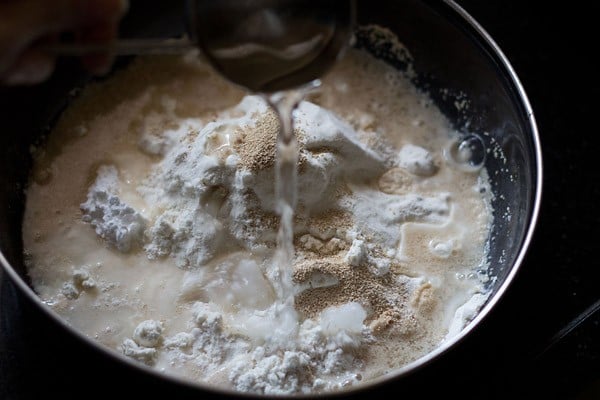
2. Add 1 cup lukewarm water.
3. Stir or whisk to make a smooth and thick batter without any lumps.
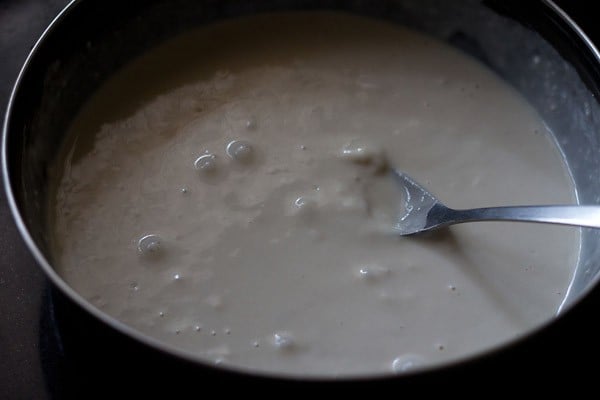
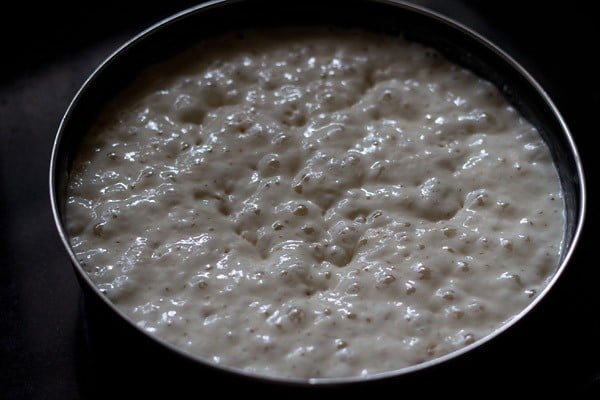
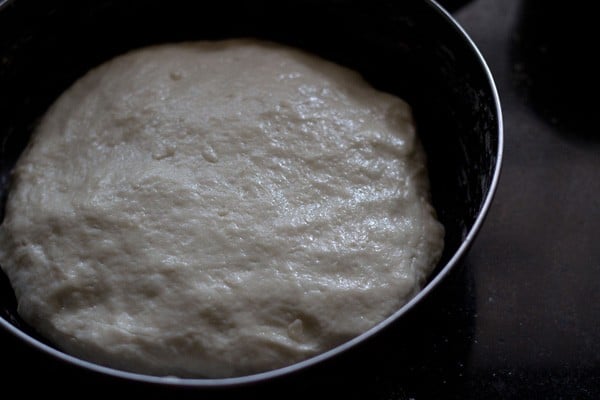
4. Cover and keep the bowl for 30 to 40 minutes or till you see a bubbly and frothy mixture. The batter would also have risen.
The picture below shows the consistency. This is the sponge starter.
5. Add 2 tablespoons oil, 1 teaspoon salt and 1 cup all-purpose flour.
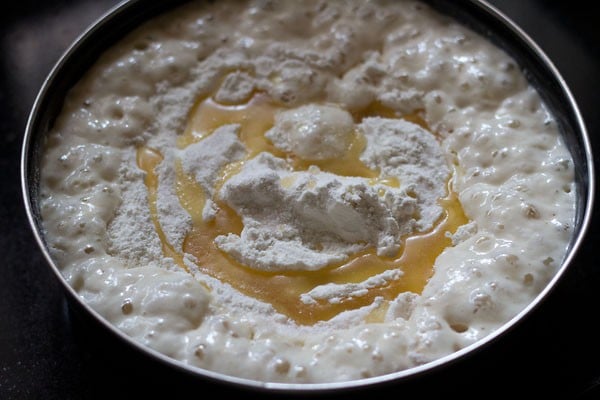
6. Mix with a spoon or spatula.
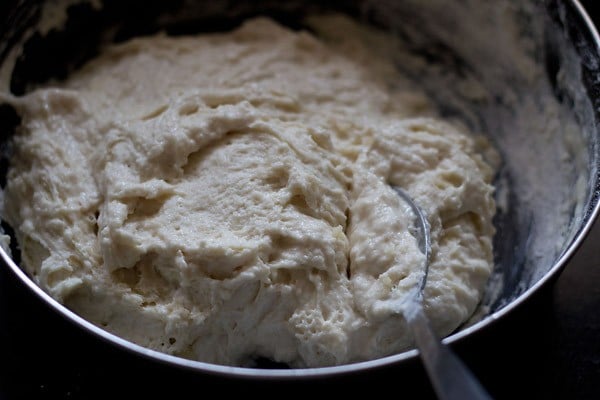
7. Add 1.25 cups of all-purpose flour.
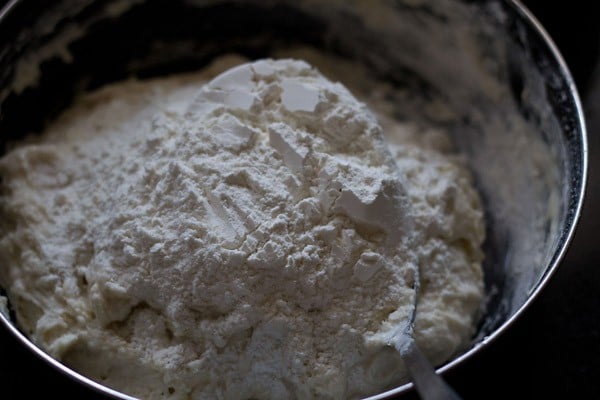
8. Mix and then begin to knead for about 10 to 12 minutes. If the dough appears sticky, then you can add about ¼ to ½ cup flour.
The proportion of water to be added depends on the quality of the flour. Overall, I added 3.25 cups flour and 1 cup water.
You can also knead the dough using a stand-mixer bowl attached to a dough hook.
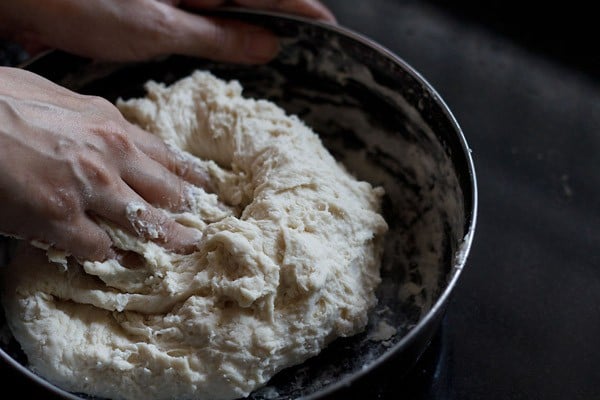
9. Knead to a smooth, pliable, soft and elastic dough. The dough on stretching should not break or tear.
Leaven Dough
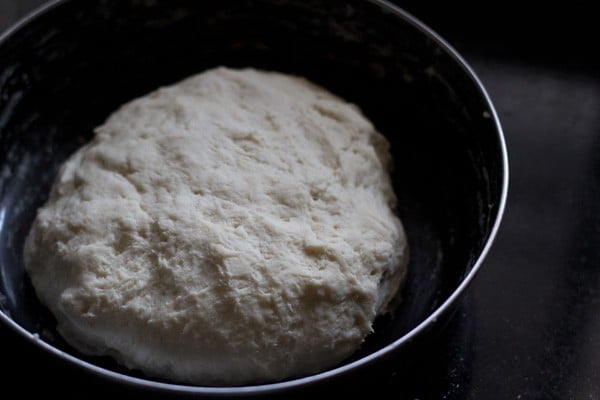
10. Spread oil or butter all over the dough. Cover the bowl with a kitchen cotton napkin or a lid and keep the bread to leaven for 20 to 25 minutes.
The leavening time depends on the type of yeast used and the temperature conditions.
- For instant yeast, 20 to 25 minutes of the first rise is enough.
- For dry active yeast or fresh yeast, you will have to keep for about 45 minutes to 1 hour or more.
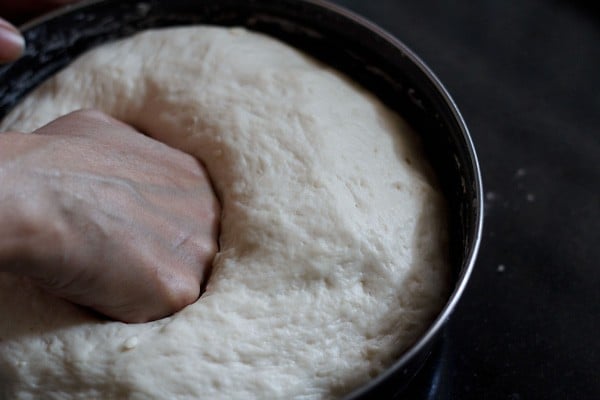
11. The risen and doubled dough for Pav.
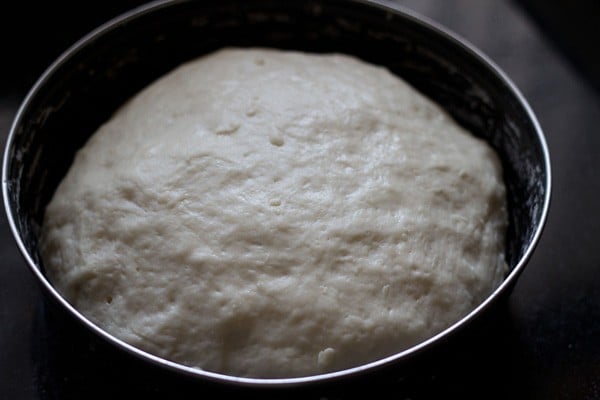
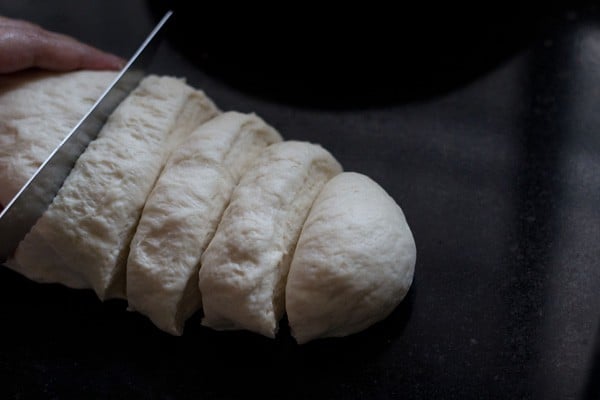
12. Gently punch and deflate the dough and form a log.
13. Slice the log into equal portions.
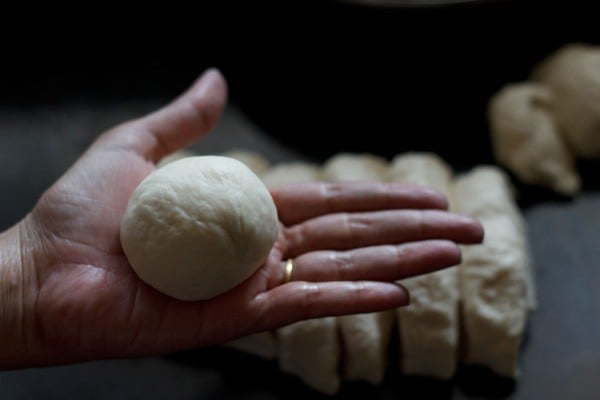
14. Take each portion and roll between your palms to get a smooth round roll.
Bake Pav
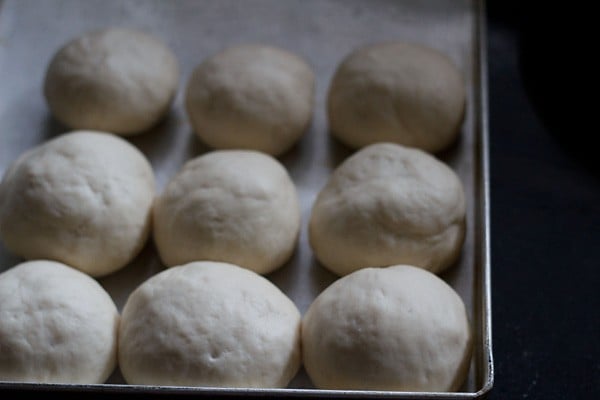
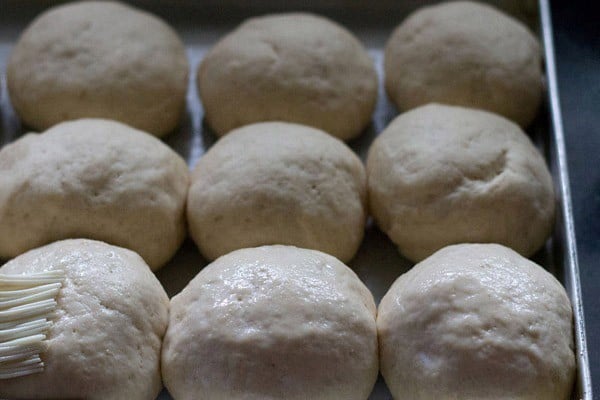
15. Make rolls this way and place them in a greased baking tray keeping 1 inch space between each. Cover and keep for 25 to 30 minutes for the second rise. The small buns would increase in size.
16. Then, brush the rolls with some milk. This gives a golden color to the Ladi Pav.
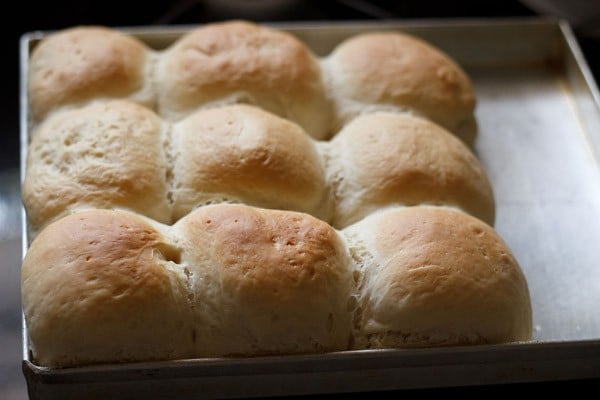
17. Place the baking tray in a preheated oven at 200° C/ 390° F for 25 to 30 minutes or till the tops turn golden and the rolls sound hollow on tapping.
Before baking, remember to preheat oven at for 200° C/ 390° F 15 minutes.
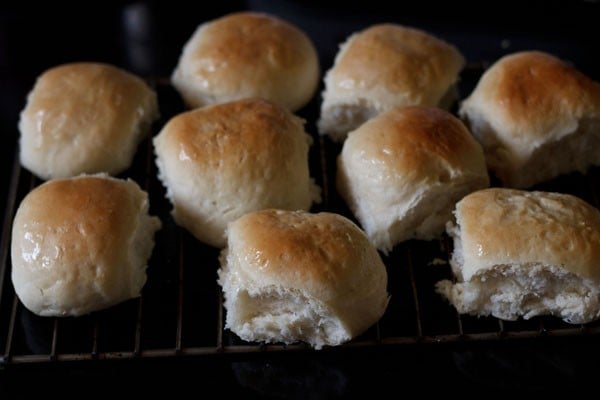
18. Remove the baked rolls from the tray (with a spatula) and place on a wired rack or wired tray, so that they don’t become softened and moist from the bottom due to heat condensation.
Brush melted butter or spread softened butter on top of the Pav for a glaze. This is an optional step.
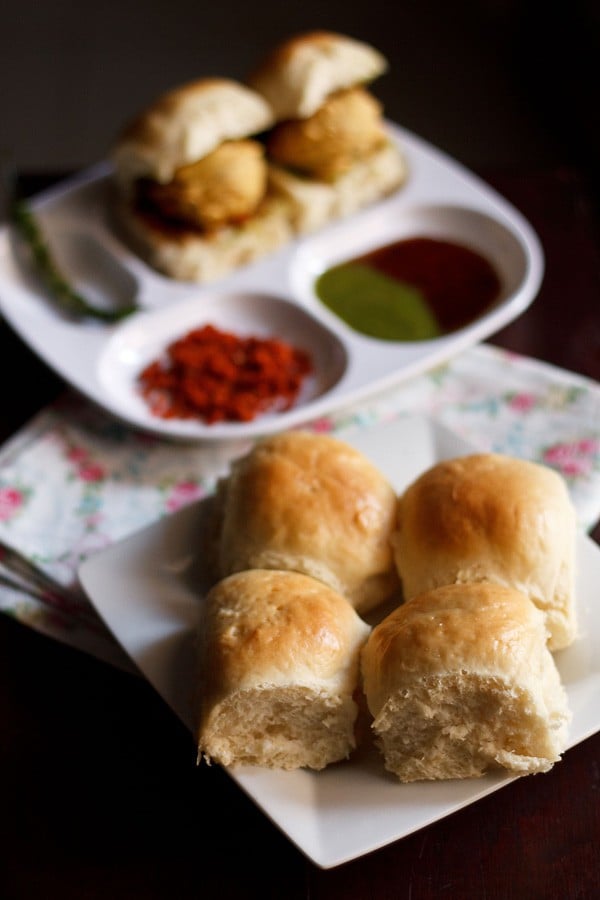
19. Serve Pav warm or at room temperature with any curry like Usal, a vegetable dish or just as plain Bun Maska (buttered rolls) with Masala Chai or Cutting Chai.
You can also use them to make Mumbai street food snacks like pav bhaji, Samosa Pav, misal pav, vada pav or Kacchi Dabeli or Paneer Pav Bhaji or Khada Pav Bhaji.
Leftover Pav keeps well for about a week in the fridge and a few weeks in the freezer.
Expert Tips
- If you can source, then try making pav with unbleached all-purpose flour. You can also make these fluffy dinner rolls with bread flour.
- The quantity of water to be added depends on the quality of flour. If the dough become sticky, then add some flour and if the dough looks dry, then add some water.
- Instead of kneading with hands, you can also knead the dough in a food processor or in an electric mixer with a dough hook.
- If the top surface of the buns browns quickly, then place aluminium foil or parchment paper on the top. This will avoid further browning.
- The leavening time depends on the type of yeast used and the temperature conditions. For instant and fresh yeast, keep for 20 to 25 minutes for the first rise. For dry active yeast, you will have to keep for about 45 minutes to 1 hour or more.
- Brushing the pav bread rolls with some milk gives a nice golden color to them on baking. You can brush the baked buns with melted butter too for a glaze.
- Once the Ladi Pav bread is baked, remove them from the tray and place on a wired rack so that they don’t soften or moisten from the bottom due to heat condensation.
Step by Step Photo Guide Above
Ingredients
- 3.25 to 3.5 cups all-purpose flour (maida) – I added 3.25 cups flour
- 2 tablespoons oil or softened butter, use any neutral flavored oil
- 1 teaspoon instant yeast or 1.5 teaspoon dry active yeast or 1 tablespoon fresh yeast
- 2 teaspoons sugar
- 1 teaspoon salt or add as required
- 1 cup water – lukewarm, do add water if needed later
- 1 to 2 tablespoons milk – for brushing, optional
- 1 to 2 tablespoons butter – melted, for brushing on pav bread
Instructions
Making dough
- In a bowl take 1 cup of all-purpose flour, instant yeast and sugar.
- Add 1 cup lukewarm water. Stir or whisk to make a smooth thick batter without any lumps.
- Cover and keep the bowl for 30 to 40 minutes till you see a bubbly and frothy layer on the top. The batter would also have risen.
- Add oil, salt and 1 cup flour. Mix with a spoon or spatula.
- Next add 1.25 cup flour. Mix again and then begin to knead for about 10 to 12 minutes.
- If the dough appears sticky then you can about ¼ cup flour more or as needed. The proportion of water to be added, depends on the quality of the flour. I added 3.25 cups flour for 1 cup of lukewarm water.
- Knead very well to a smooth, soft, supple and elastic dough.
- Place dough in a bowl. Spread oil or softened butter all over the dough.
Leavening pav dough
- Cover the bowl with a lid or a kitchen cotton napkin and keep the bread to leaven for 20 to 25 minutes.
- Once the pav dough has risen and doubled, then gently punch and deflate the dough and form a neat log.
- Cut the log into equal sizes. Take each portion and roll between your palms to get a smooth round roll.
- Make rolls this way and place them in a greased tray keeping 1 inch space between all of them.
- Cover and allow the second rise for 25 to 30 minutes. The small buns would increase in size.
Baking ladi pav
- Just before 15 minutes you bake the pav, preheat the oven at 200° C/ 390° F.For a regular oven, heat both the top and bottom elements. For a microwave oven with convection mode, preheat for 15 minutes at 180° C/356° F.
- Then brush the pav buns with some milk. This gives a golden color to laadi pav.
- Place the baking tray in the center rack in a preheated oven at 200° C/ 390° F for 25 to 30 mins or till the tops turn golden and the pavs sound hollow on tapping. For baking in the microwave oven at convection mode, bake at 180° C/356° F.
- Remove them from the tray (with a spatula) and place on a wired rack or wired tray, so that they don't become softened and moist from the bottom due to heat condensation.
- Brush melted butter or spread softened butter on top of the pavs. This is an optional step.
- Serve the Pav warm or at room temperature with any curry, vegetable dish or just as plain bun maska (buttered rolls) served with masala chai.
- Pav can be stored in the refrigerator for about a week. Keep them in air-tight a container or a bread box.
Dassana’s Notes
- If the dough become sticky then add some flour and if the dough looks dry, then add some water.
- If the top surface of the bread browns quickly than place aluminum foil or parchement paper on the top. This will avoid further browning.
- Instead of kneading with hands, you can also knead the dough in a food processor or in an stand mixer with a dough hook.
- The leavening time depends on the type of yeast used. For instant and fresh yeast, 20 to 25 minutes of the first rise is enough. For dry active yeast, you will have to keep for about 45 minutes to 1 hour or more.
- If possible use unbleached all-purpose flour. You can also make pav with bread flour.
- Pav recipe can be easily halved, doubled or tripled.
Nutrition
This Pav Recipe from the archives first published in October 2014 has been updated and republished on January 2023.
Can I half the recipe
Yes you can.
Fabulous. Made these pavs following the recipe to a T. Got the best Mumbai pav – fluffy, light and so good. Thanks a lot for sharing a foolproof ladi pav recipe.
Great and thanks for the super feedback. Thanks for the rating too.
All recipes are simple and easy. I tried many recipes. Thanks for sharing your recipes
Glad to know and thanks a lot.
Hi Dasana
Thanks for sharing d recipe. Planning to try out just wanted to know if I can use the sourdough starter here also keeping it outside to proof wil it not develop a sour taste esp during summers?
Thanks
Shruti
welcome shruti. you can use a sourdough starter for the pav recipe. with the sourdough starter, there will be some sourness in the dough during these hot summers. otherwise, keep the dough for 30 to 45 minutes at room temperature for the first rise. then keep in the fridge overnight or for a day. then you can bring the dough to room temperature and make the rolls. let the rolls rise and then bake.
Hi dassana,
You mentioned that for bakery-like Pav one may use fresh yeast.. how do we make this fresh yeast?
Ruchi, fresh yeast you have to buy from outside. you will get it in any bakery or super store. it is commercially made.
Tried today, however the outer crust too hard and pav not fluffy and light as mumbai pav
Any specific brand of maida to use in usa ?
you can use bread flour which is easily available in usa. its not a brand but a type of flour used for making breads which has more gluten. but even all purpose flour which we call as maida works very well for making pav recipe. i think here its not the pav, but the yeast that is the problem. could be the quality and freshness or brand or the yeast has not got activated and proofed properly. if you have used dry active yeast or fresh yeast, then lukewarm water water is absolutely essential for the yeast to get activated. if the water is on the cooler side, the yeast won’t get activated. if the water is even slightly hotter, the yeast die. if the yeast has not got proofed well, the bread or pav won’t become fluffy and light.
Hi Dasana, I love your recipes and while I’m not much of a cook your recipes always turn out great. Just wanted to know if I doubled the flour how much yeast would have to be used. Thanks a lot.
Welcome Elaine. Glad to know this. You can double the instant yeast e.g. 3 to 4 teaspoon instant yeast.
hi, i love all your recipes. this one is wonderful and I tried today. everything went well. but the outer part became hard. how can I get soft pav. Fyi, I have used active dry yeast and followed your recipe. The 2 proofs were just perfect.please advice.
looks like the top has got baked too much and hence the hardness. you can bake for less time. since oven temperatures vary, baking can take less or more time.
Hi Dassana
I made pao using your recipe
They turned out perfect!
I started following your recipes and cooking when I relocated alone to another state for job …and none of the recipes have failed
Thank you!!!
Hi Preeti, Nice to know and thanks for sharing.
Hi. Just tried this in USA. I have a stupid question since I never did baking in my life. Are youR temperature units in Celcius or Farenhights?
AMD its alright. the temperature units are in Celsius.
Hi, wanted to get in touch with you for a super opportunity. Is there a way i can get in touch? Manas.
Manas, you can write at this email id: vegrecipesofindia@gmail.com
hi dassana! there seems a typo error.salt isn’t mentioned in” how to make recipe”
thanks meveera. i will update it.
Thank you so much for this recipe. Just tried it and it came out very well. Except since I was following the instructions before the pictorial step-by-step, I missed out the salt. My bad! :p
Welcome Sowmya. Glad to know that you liked the pav recipe.
How make this in microwave?
sneha, this recipe won’t work in the microwave.
Thank u dear ????????
welcome snehal.
you are plain genius Dassana! I made these pavs and they turned out so amazing. It was unbelievable that home made pavs could turn out so good and that too in my first try :). Thank you sooo much. Only the whole process took very long. I hadn’t seen that we have to add warm water. I guess that was the reason and may be the cold weather too. Thanks again Dassana.
thanks a lot ritu. homemade pav are too good.i bake them when i have to make any dish like pav bhaji or vada pav or misal pav. during winters, leavening does take time. an option is to keep the dough covered with a lid in sunlight. i do that at times. for instant yeast, warm water is not essential. but if using dry active yeast or fresh yeast, then warm water is mandatory or else the yeast does not activate.
Hi Dassana,
Would like to know if the temperature of water has to be lukewarm throughout ? Meaning does it have to be lukewarm even when we think that the dough is dry and need to add some more water at that point ?
one for yeast proofing the water has to be lukewarm. when adding water later if the dough is dry, then the water can be at room temperature. but should not be cold.
Thank you so much. Will try the recipe soon.Shall let you know how it turned out.
welcome ritu.
If I need to bake it in batches, then how should I store the dough for the second batch when the first one is baking?
keep in the fridge. keep the pan covered with lid or foil or a cotton napkin.
Hi,
I will be trying the recipe soon.. can I double the recipe.. will the outcome be same?
Thanks,
Priya
you can double the recipe. in case the dough looks dry, then you can always add more water. if you knead well and the yeast gets proofed well, the the result is always good.
Hi,
I tried this recipe for the second time yesterday. The first time, the yeast did not cooperate and resulted in a hard ball. But with fresh packet of instant yeast, the pav was fabulous, nice and soft with the exact shade as in the picture. Only difference was that since I did not make all the balls of equal size, some were a little bit bigger than others, but all baked perfectly. Made pav bhaji and now there are no more pavs left 🙂 Thank you.
ranjani, thanks for the feedback. most of the times the texture of the bread largely depends on how well the yeast has proofed. with instant yeast, its easier and better as there are less chances of things going wrong. glad that recipe came out good for you.
Hi mam,
Today i have tried the bombay pav recipe. Till step 15 everything came as u mentioned but after baking it was hard on top. Mine is microwave and i used the convection mode at 200 degree for 15 minutes. Where the mistake would be?
Subhashini, looks like the pav has got baked too much. Oven timing varies from oven to oven. So it helps to keep a check. next time bake for little less time.
Hi!
I tried ur recipe of pav today. And it was so soft and spongy. Simply perfect. My family just loved it. Thanks a lot dear!
welcome naz 🙂 thanks for positive views.
Hi ..!
I tried pav today.. unfortunately it did not come out properly. I baked it for 30 mins may be because of dat outr ws hard.. even after 30mins it did not even turn a bit brown.. bakef at
outside was hard or the inner texture was hard. let me know.
I prepared ladi pav with u r receipee followed all the steps but my outer layer crust became hard what would be the reason I baked pav 20 minutes on lower Heat and 5 minutes both side what went wrong
the outer crust got hard due to over baking or too much heat coming from the top heating element in the oven. also oven temperatures vary with the size, model and capacity. so the time can be more or less.
Tried your Bombay Pav recipe last night, AMAZING!! Definitely a keeper this recipe. Thank you, thank you, Thank you.
thanks a lot michelle for this positive review 🙂
Hi dear,this is first time that i failed one recipe of ur blog 🙁 it didn’t come so well,to make top brown i bake for some extra time but then the outer layer was very hard…plz advice. Taste was good as like market but d overall appearance i guess i did many things wrong.
while baking and especially for the first time or during the beginning, things can go wrong. looks like the top crust got baked too much. just a even golden color is fine on the top. if the bread or rolls are kept for too long in the oven, the top will become hard. so next time you can bake till you see the top becoming golden.
Can you use bread flour for this?
you can use bread flour.
Today m making ur wheat bread recipe n pauv recipe…. I have tried ur many dishes I really like ur recipes …. Whenever I want to cook something I see ur blog first thank u
quite pleased to know this heena thankyou for your kind and positive words. surely try wheat bread and keep us posted how it was? and you are welcome.
Super spongy!!! Just tat the top portion of pav was not that Golden… Rest it tastes really good 🙂
thank you. if you bake for some more minutes, the top will become golden.
Hi Dassana,
I am a huge fan of your website and have been following your recipes on a daily basis from dals to veggies to pulao. for everything i refer your blog once.
i want advice from you on some great bread baking books.
i am trying my hands on baking and would like to refer to some books as well in this regard.
thanks and keep up the good work.
you are an inspiration to a lot of women
thank you urvashi. peter reinhart’s books are good on bread baking. then there is also the bread bible which is a good book. i have artisan breads everyday by peter reinhart and its a really good book.
Hi Dassana,
I tried the Pav today. The crust was a bit hard. Where did I go wrong???
Thank you for the recipe. ?
the crust becomes hard, when the baking time is more or if the heating is too much in the oven. if you use OTG, then keep the tray in the center of the oven and keep both the top and bottom heating elements on.
Thanks
Will prepare pav. Recipe seems to be perfect.
What it means ‘yr comment is waiting moderation’
means that the comment is manually approved.
surely Fatima do try the pav recipe and let us know and thankyou 🙂
I don hav 250ml cup. Mine is 240ml cup. Can i use it?
yes you can use 240 ml cup.
These look so delicious! Love your recipes! The orange is our fav :)) I had one question though- how many days do they stay well? I m planning to make these for a party so wanted to know if they could be made ahead of time!
Thanks for the wonderful recipes!
welcome manasi. they stay good for 3-4 days in fridge.
hi dassana,
I can’t thank you enough for this amazing recipe. After years of failing at trying out a perfect pav recipe, my loaf finally turned out to be perfect. My family loved it!
I followed your instructions to the T, except that i added half a tsp of baking powder. Also i use a convection oven so i preheated the oven to 200 degrees and baked the pavs for 10 mins. After that i raised the temperature to 250 degrees and baked for another 15 mins to get a brown surface.That’s it. It came out amazingly perfect. I am gonna note down this recipe forever. Thank you so very much! 🙂 🙂
welcome harshree. glad to know that the recipe worked perfectly for you. thanks for sharing your experience.
thanks a lot harshree for this positive feedback. co incidentally i also made pav today with both atta/whole wheat flour and some maida, but in pressure cooker. thanks also for sharing the oven tips you have mentioned. will help readers too.
Hi harshsree,
Why did you add baking powder? Does it help in making the paavs more soft?
Regards
Hi dassana,
How can I substitute yeast in any recipe.
What will be tthe proportion.
yeast can be substituted but the recipe will change completely.
Hi sir
I regularly follow your recipes. They r really good. thanks for the pictorial representation.
bake recipes – shall we bake in a non electric oven, pls let me know.
thanks. what is a non electric oven. do you mean gas oven?
Hi I tried your pav recipe which came out well texture and look wise but I felt it was little hard not as soft as we get outside.what mistake I would have done please tell do that next time I can make it better.
most often denseness or hardness is due to the incorrect proofing of yeast or not a good quality of yeast. try to use a good quality of yeast. also knead the dough very well.
Hi Dassana,I followed the pav recipe as closely as I could..but I guess I went wrong somewhere. The pav cracked on all sides..was a bit dense and smelled n tasted of yeast.your kind advise on this.
hi tanvi. i thinks its due to the quality of yeast and also that the yeast has not proofed properly. that why the denseness and cracking.
I firstly want to say that your receips are the best I always keep trying your receips and get good appreciation. I had also tried this receipe and came out very gud I just wanted to ask that my pav had that yeasty smell. I liked it ,but my kids have problem can you help me out by stating a remedy for reducing his yeasty smell in my pav. Thank you
thanks. yeasty smell could be due to the quality of yeast. you can reduce the yeast by 1/4 or 1/2 tsp in the recipe.
Hi Dassana,
pls tell me if I want to make this pav with 100% wheat flour then i hv to follow same method n amt of ingredient ?
asha, it will become dense. check this recipe where 50-50 of maida and atta is added – https://www.vegrecipesofindia.com/pav-recipe-indian-pav/
my Pav turn out excellent,thanks a lot. Pls share multigrain bread recipes.
thats great asha. i will share multigrain bread recipe.
I tried this recipe today, the pavs came up very well, but not that soft. I want to ask, should I bake with both top and bottom rods on or only the bottom rods
softeness depends on the yeast proofing as well as the kneading of dough. keep both the top and bottom heating rods on.
Hello! I am not clear on when to add the one cup milk. Please help.
pri, in this recipe we are not adding milk. we are just brushing pav with milk.
Hi, I attempted making these pavs..never done any baking in my life before..i used freash yeast ..till the time I popped them in the oven, I was so excited..perfect rising and the balls too became huge on the tray..God knows what went wrong after that..The oven was well preheated at 200, popped in the tray, the pav refused to turn golden for around 30 mts..so I decided to leave for some more time, finally removed after another 10 mins..the inside is very very soft, but the top is soooooo hard, It’s become like the French bread !!!! Please advise…
which oven you used, meaning microwave or an OTG and which rack you kept the pav. top is hard as its got over baked and hence become too crusty. also could be due to high temperatures in the oven.
Hi Dassana! i gv it a try again turned out excellent… thks! Request for jalebis pls…
thanks mohini. glad to know this. i have noted down the recipe request.
Hi thanks for awesome recipes. I have never baked in my life. It will be my first attempt. Instead of yeast and all of that can I use self raising flour. I wanna havePav bhaji today and we don’t get good ladi pav here 🙁
Thank you in advance
Cheers
Shraddha
thanks shraddha. for a good loaf or bread, yeast is recommended. there are recipes which do not use yeast, but i have never tried them. so cannot say if this recipe will work with self raising flour. i would suggest you to buy some good quality yeast to make pav or bread at home.
Lovely reciepe…just made it now…. I used 50:50 whole wheat : all purpose flour
thanks bernice. good to know this.
Thks Dassana, may be u are right will gv it a try once more.
welcome mohini
Hey dassana tried this pav today but it did’nt came out very well…it was very dense n top was hard too…i followed ur steps very carefully but i don’t know where i went wrong….plz advice dear…..
whenever bread becomes dense, then one of the main reason is always yeast. either the yeast is not of a good quality or the yeast is not in its shelf life or the yeast proofing did not happen correctly. so it can be any one of these reasons.
Hi Dassana tryd this pav today since ws mkg pav bhaji, but i dont knw why the pav didnt brown on top it was white on top, inside was soft, even base got baked properly(overall ws bit hard compared to other bread recipes,had baked this pav for 15min). followed recipe but dont knw where i went wrong. just one thing i noticed that after dough had leavened i punched and md equal balls and placed in greased tray but it had not leavened after 30min so i had kept it for more thn a hour to leaven. all other recipes like white bread, half and half bread and wheat bread top browned well. Thks!
welcome mohini. you could have baked for some more time to get the brown top. another reason could be it took a lot of time for second rise. some issue with the kneading of the dough. these are very soft pavs.
Hi Dassana..tried this receipe today came out well.but I have an issue seems like same for baking.i cook in convection microwave .but whenever I do baking my top of bread or cake gets brown n even hard .its not whn I cook for longer time also when it’s just 15 20 min.i tried putting aluminium foil but no effect ..what can be the reason. N if I took bread early its undone..kindly suggest
hi avita, in convection baking the heating is from the top. as a result the top of breads or cakes get browned faster. i used to experience this in my microwave oven. so when baking in a microwave reduce the temperature to -10 to -20 degrees for any recipe that has been baked in a regular oven or OTG. also cover after 10 minutes. when baking bread and cakes both, i used to cover the tops with aluminium foil after 10 to 15 minutes of baking.
Dassana the yeast i used for all my recipes is (brand angels) dry instant yeast, so am a bit confused with what kind of yeast it is (instant yeast, dry active yeast, it looks like kuskus). All this while i took the proportion of dry active yeast mentioned in recipes. Please guide me Dassana. Thks!
hi mohini, instant yeast need not be activated in warm water. they are added directly to the dough. whereas dry active yeast needs to be activated. fresh yeast is what is used in bakeries. fresh yeast also needs to be activated in warm water.
when switching dry active yeast for instant yeast, the amount becomes a bit more for dry active yeast. eg 1 tsp instant yeast = 1.5 tsp of active dry yeast. for small amount like 1 tsp it does not make much difference, but for more amounts of yeast, it better to convert and then add. you can use this conversion table while switching – http://www.traditionaloven.com/conversions_of_measures/yeast_converter.html
This differentiation is very helpful. You are a food-wiki!
Thanks Uday
hi,The recipe was good as well as pictorial demonstrations. My outer crust was hard as compared to inside of pav. Do I’ve to knead the dough for 5-7 minutes ( when the dough is risen and doubled) or do I’ve to reduce the baking time to 20 min. because in 20 min. my buns started to brown. And one more request could you please share the recipe of multigrain bread.
the pav got baked for a some more time. oven temperatures differ in various makes and models. so the timing will be different for each oven. you just have to knead the dough lightly after the second rise. just for a minute. yes please reduce the time to 20 minutes. the test is that when tapped, the pav buns should sound hollow. this means that they are done. also keep both the heating elements on if you are using OTG. and do not keep the pav tray/pan close to the top heating rod. then the crust will get too browned and hard.
thank you for the valueable advice .you advised me to keep both the heating elements on in the case of otg. I’m using 35l of Bajaj Majesty otg (newly bought) and I’m getting grill, warm, toast, bake, roti options in that otg .I’m doing breads and cakes on bake mode where only bottom heating rod is on. shall I use toast option.
if your oven refers to toast option as heating both the top and bottom heating elements on, then yes, use the toast option. in my oven i do not have so many options. just the bake and grill mode.
Can you double the recipe if you want to make more pav’s in the same ratio?
yes you can
Hi I don’t have oven at my home can I try this in cooker placing sand at bottom also I don’t have active yeast I just have dry yeast in powder can I use the same?? If yes then what would be the ratio??
abha, you can try making in pressure cooker. you can use ½ to ¾ tbsp dry active yeast.
Hi mam today i tried tis pav inside of pav is soft but outside of the bun is hard and white im using otg
the outside crust has got over baked. the temperature in your oven must be on the higher side. also if the tray is kept close to the top heating rod, the pav crust will get over done and become crusty.
After baking, how long will these pav’s be good for? Would I be able to make ahead and use 3-5 days later?
Thank you!
yes you can. but keep them in a box or jar in the fridge.
i jus love ur recipes…. Awesom work by u…. I tried many of ur recipes n they turn out really well… I get lot of appreciation on my cooking… All credit to u… Thanks a ton… Is their any substitute of yeast… Thank again… Stay blessed… N may u have a great year ahead.
welcome any. thanks for the positive feedback and your best wishes. there is a way, a flour mixture is leavened which is called as khameer in ‘hindi’. this method does not used yeast. but i have never tried making any bread with this method. wishing you and your family a very happy new year.
Hi..
Can you make this paav gluten free ..
meghana, i have not tried with gluten free flours.
Hello Dassana, this is a great recipe. In my oven I have the following options- Bake, Broil, Toast, Keep warm and Rotisserie. Which mode should I use? I used the Bake mode for your white bread recipe and the crust got too hard yet the texture was good. Thank you 🙂
its the bake mode. the crust can get hard due to over baking too. it also depends on the kind of oven. convection ovens brown the surfaces faster than regular ovens. since oven temperatures vary, its always better to be attentive during baking.
I have been dreaming of laadi pav lately, and had so far been unsuccessful at making them until I found your recipe. I am by no means a novice baker, but it had never occured to me to use a pâte fermentée for this pav! Now I can make some great pav bhaji. We all know it doesn’t matter how great your bhaji is if the pav isn’t perfect the whole thing is a flop.
thanks bonnie. agree with what you say. pav has to be soft and light with the bhaji. do try the recipe 🙂
My my dassana I wish like kissing u rite know… I made this ladi pav n they came out so very perfect.. I just fell in love with them n of course u darling… Thank u so much for the recipe now I vl never buy pav from bakery yuppie…:*
thanks sweta for the sweet comment 🙂
nice I like wat I saw
Very detailed recipe. Tried it today. The crusts turned out very hard. Could u tell me why?
could be due to the pav getting baked more. i don’t see any other reason.
Yum! I ate pav bhaji for the first and only time when I was visiting India and would love to recreate it at home. Thanks for the detailed recipe, they look so fluffy and light. Will definitely try at some point – I’ve cooked a lot of your stuff and it always comes out great!
thanks carrie for your feedback. yes, they were fluffy and light. you can easily try making both the pav and bhaji at home.
i dont have microwave so can i make this bombay pav in batti cooker ??….
you can try.
Spongy pav buns there.wonderful tutorial
thanks ramya
Can’t we use enough soda in place of yeast
no.
Love your pavs, looks so soft and pillowy!
All your recipes are good. Thank you,
welcome ananthyashankar
Nice detailed recipe..
But my bread becomes like baatis instead..though i bake it with top and bottom rod on..at 200..
Can u pls tell me the good yeast brand name..???
And how to knead the dough after 1st rise..??? Pls help.
when the bread comes out like baati, the quality of yeast or the yeast activation is at fault. i use mauripan/gloripan brand of yeast and its a good one. never had any problem with any bread recipe with this yeast. just lightly punch and gently the knead the dough after the second rise. not too much.