Ice Cream Recipe – No Churn, No Ice Cream Maker
If you’ve been wanting to try your hand at making homemade ice cream but don’t know where to start, you’ve come to the right place. This creamy and delicious 3-ingredient, no-churn ice cream recipe is the perfect base for making a whole world of your own frozen confections.
About This Ice Cream Recipe
This quick and easy ice cream recipe is a basic ice cream base made with just three (3!!!) ingredients. This soft, smooth and velvety ice cream recipe comes together in almost no time and doesn’t require any special equipment to make.
If you, like me, make ice cream mostly during the warmer months, you’ll also be thrilled to hear that there is no cooking involved for this easy recipe!
Many ice cream recipes call for making a custard, which means heating milk, tempering eggs, and then cooking on the stovetop. Not so with this magical, no-fail recipe.
In addition, this recipe requires zero churning, meaning you don’t have to have an ice cream maker or a bunch of ice and salt to make it happen.
The entire active process takes just 15 minutes to assemble, and then all you have to do is wait for the freezer to do its modern day magic.
I found out about these few ingredient ice cream recipes from TheKitchn.com awhile back. Let me tell you – this method of making ice cream is a snap! It has become my go-to recipe for making my favorite summer treat.
This quick, no-churn, no-cook ice cream exceeded my expectations the first time I gave it a try. It is soft, smooth, creamy and delectable – everything you could want from ice cream!
And since only whipping cream and condensed milk is used, there is no possibility of the dreaded ice crystals forming.
Is there anything worse than digging into a fresh pint of ice cream and finding that it is freezer burned and crystalized? Of course there is, but the disappointment is very real.
So now that you’ve read my ode to this magnificently simple ice cream recipe, let’s get down to making it, shall we?
How to Make Homemade Ice Cream
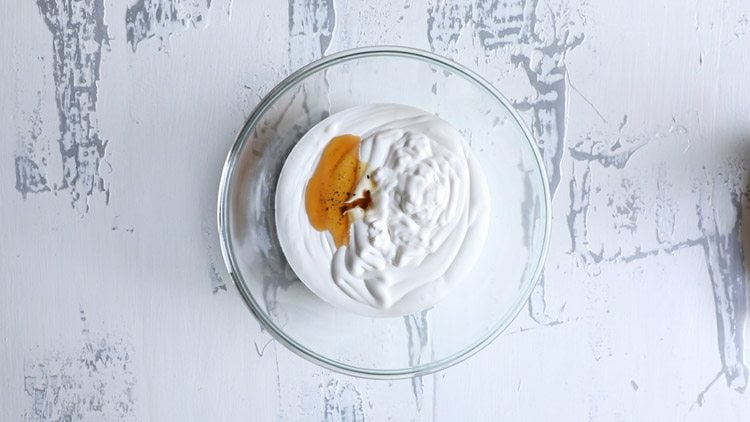
1. In a large bowl, take 2.5 to 2.75 cups of chilled whipping cream (30% to 50% fat). Add 2 teaspoons vanilla extract.
Note: If using vanilla essence, then add just 1 teaspoon.
2. With an electric beater at full speed, begin to whip the cream. Timing will vary depending on the fat content in the cream. Both for amul fresh cream and amul whipping cream, it takes about 8 to 10 minutes to achieve the right consistency.
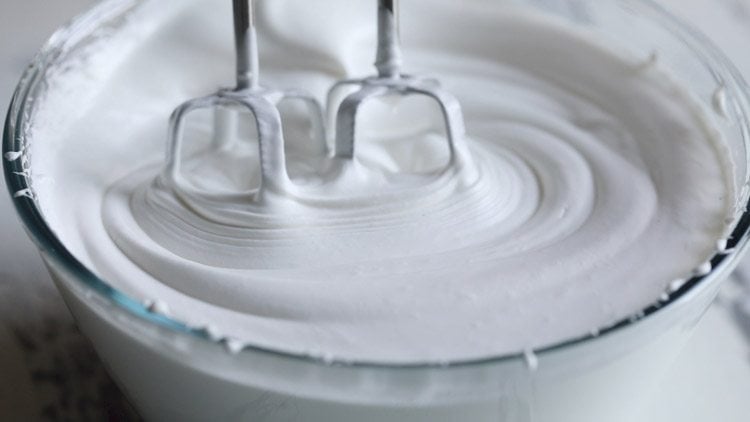
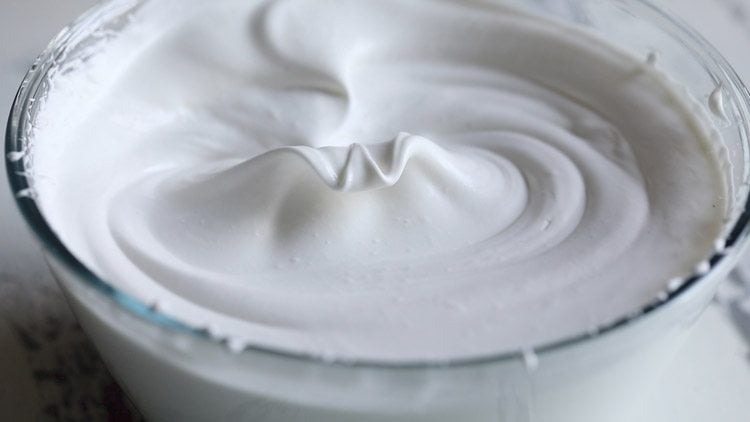
3. Whip till stiff peaks are formed.
Tip: While it might seem silly, I generally recommend that you use a hand mixer for this process so that you are present for the entire whipping process. Be sure to watch the cream carefully and stop whipping when it achieves firm peaks – any further and you run the risk of turning it into butter!
4. Now add 400 grams of chilled sweetened condensed milk (400 ml or about 1.6 cups).
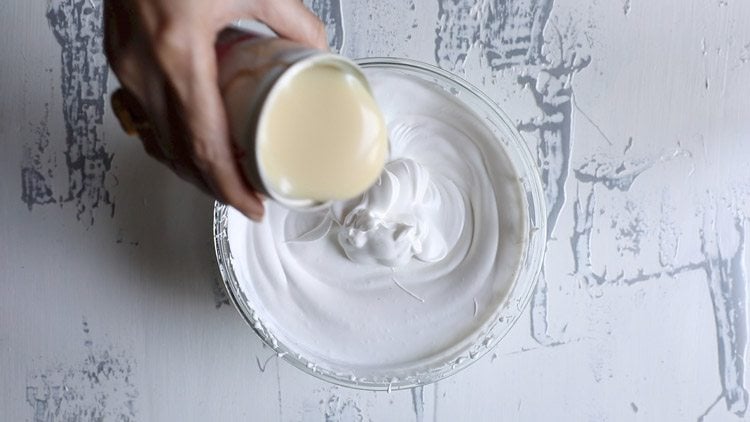
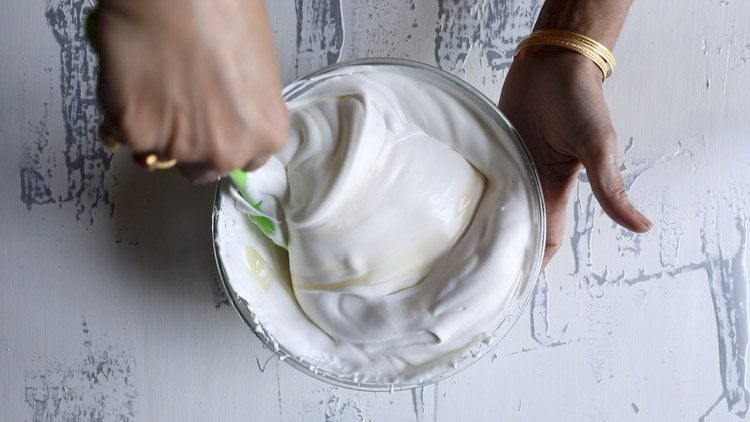
5. Fold gently but very well, until the mixture is *just* uniform. Remember not to overfold, as then the ice cream mixture can fall flat.
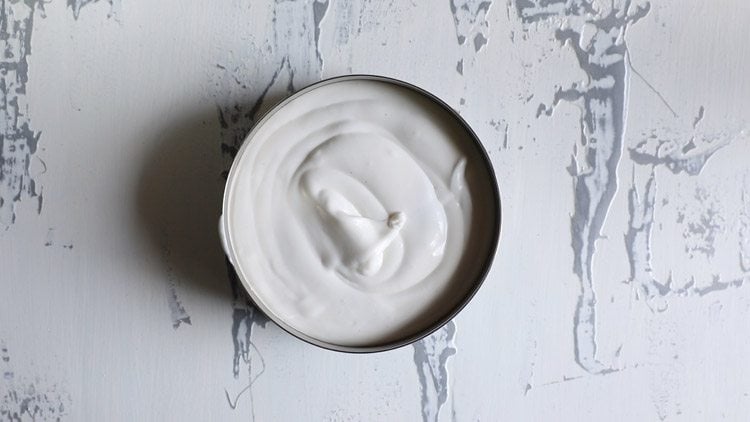
6. Place the completed homemade ice cream mixture in a freezer safe container or box. You can also cover the same bowl you made it in if it is freezer safe.
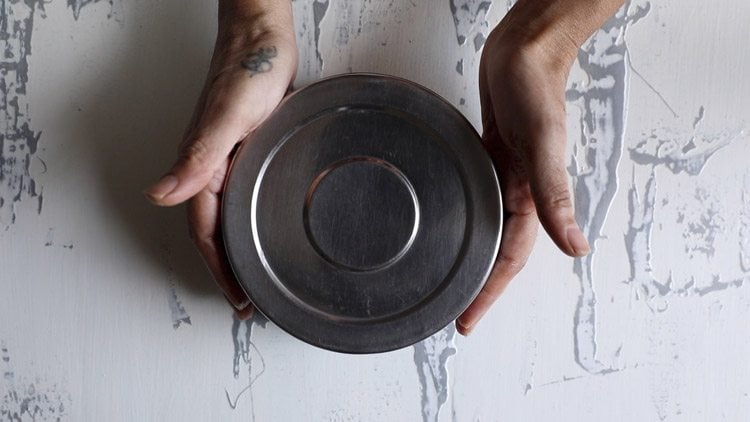
7. Cover with a tight fitting lid. Freeze for 7 to 8 hours or preferably overnight till the homemade ice cream is frozen, firm and set.
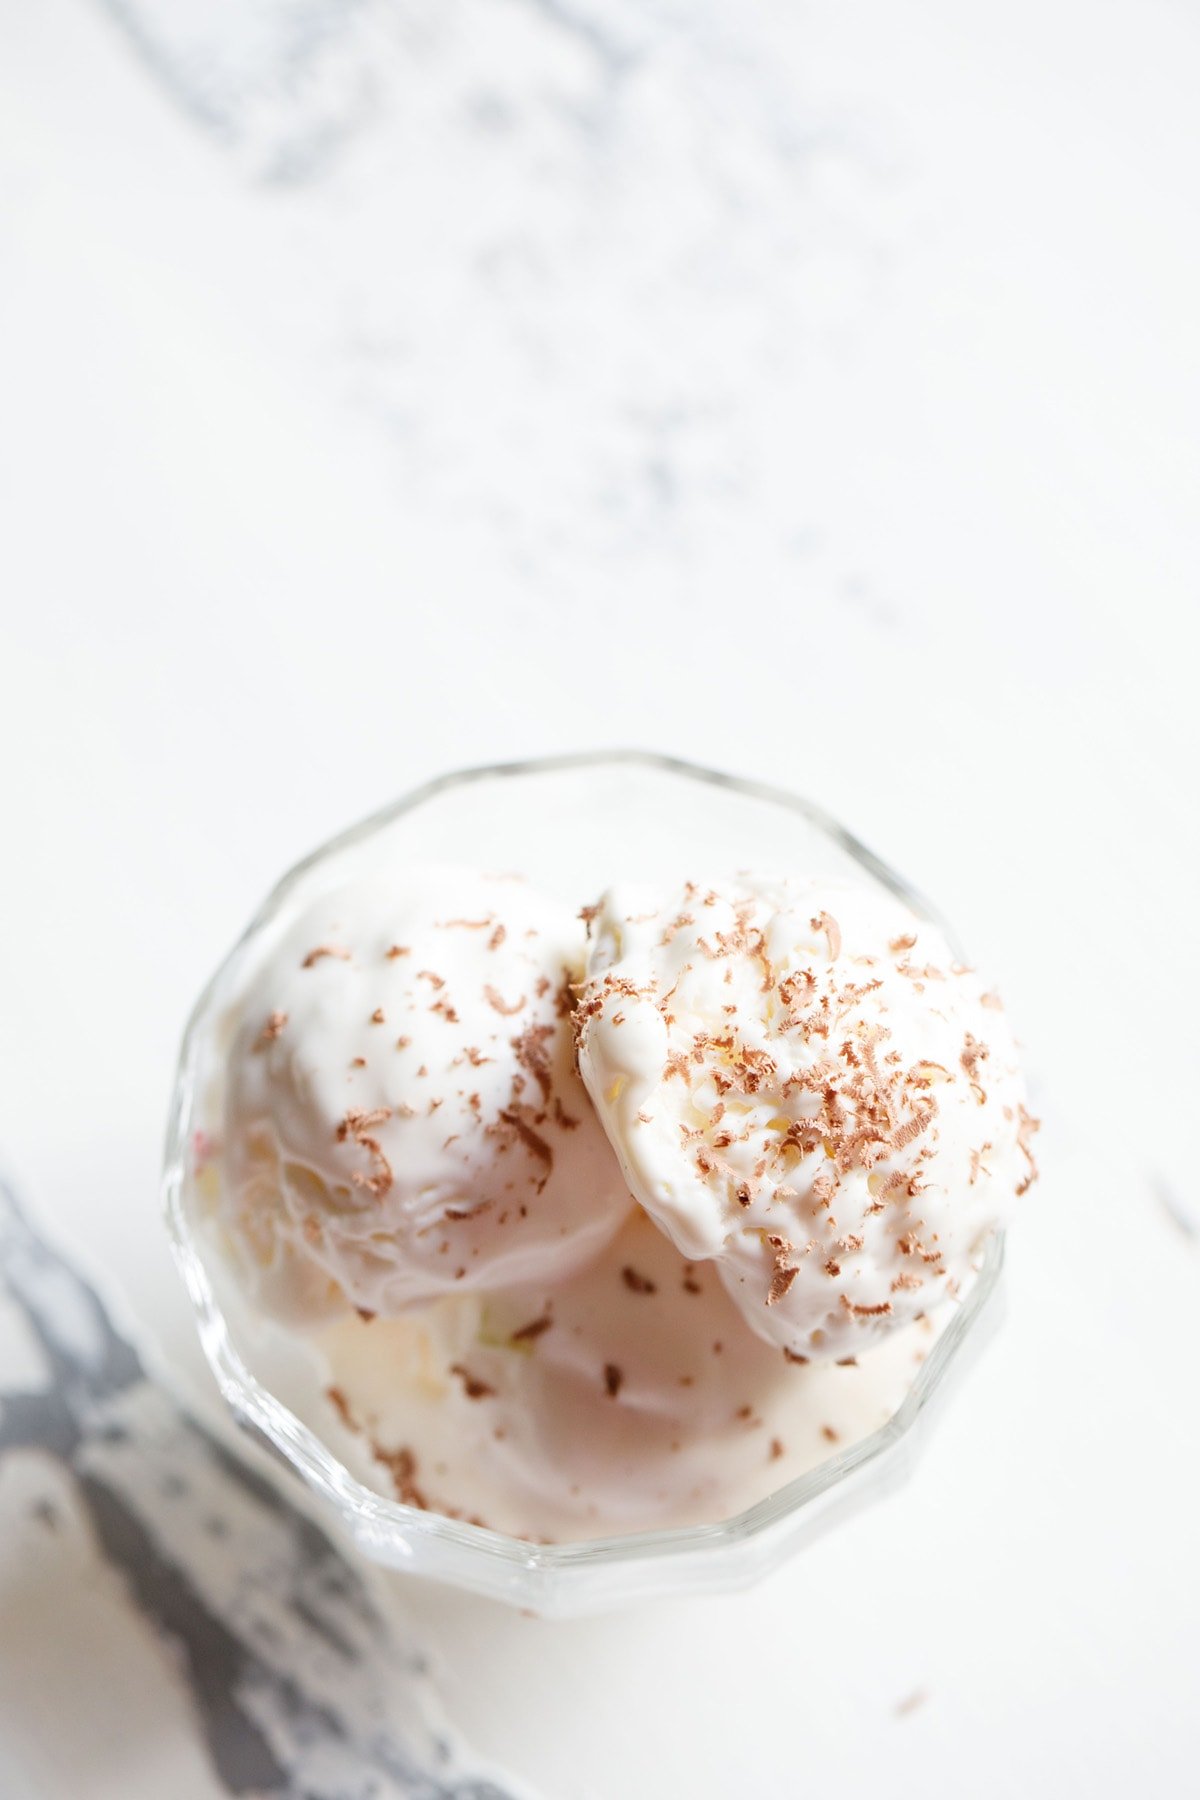
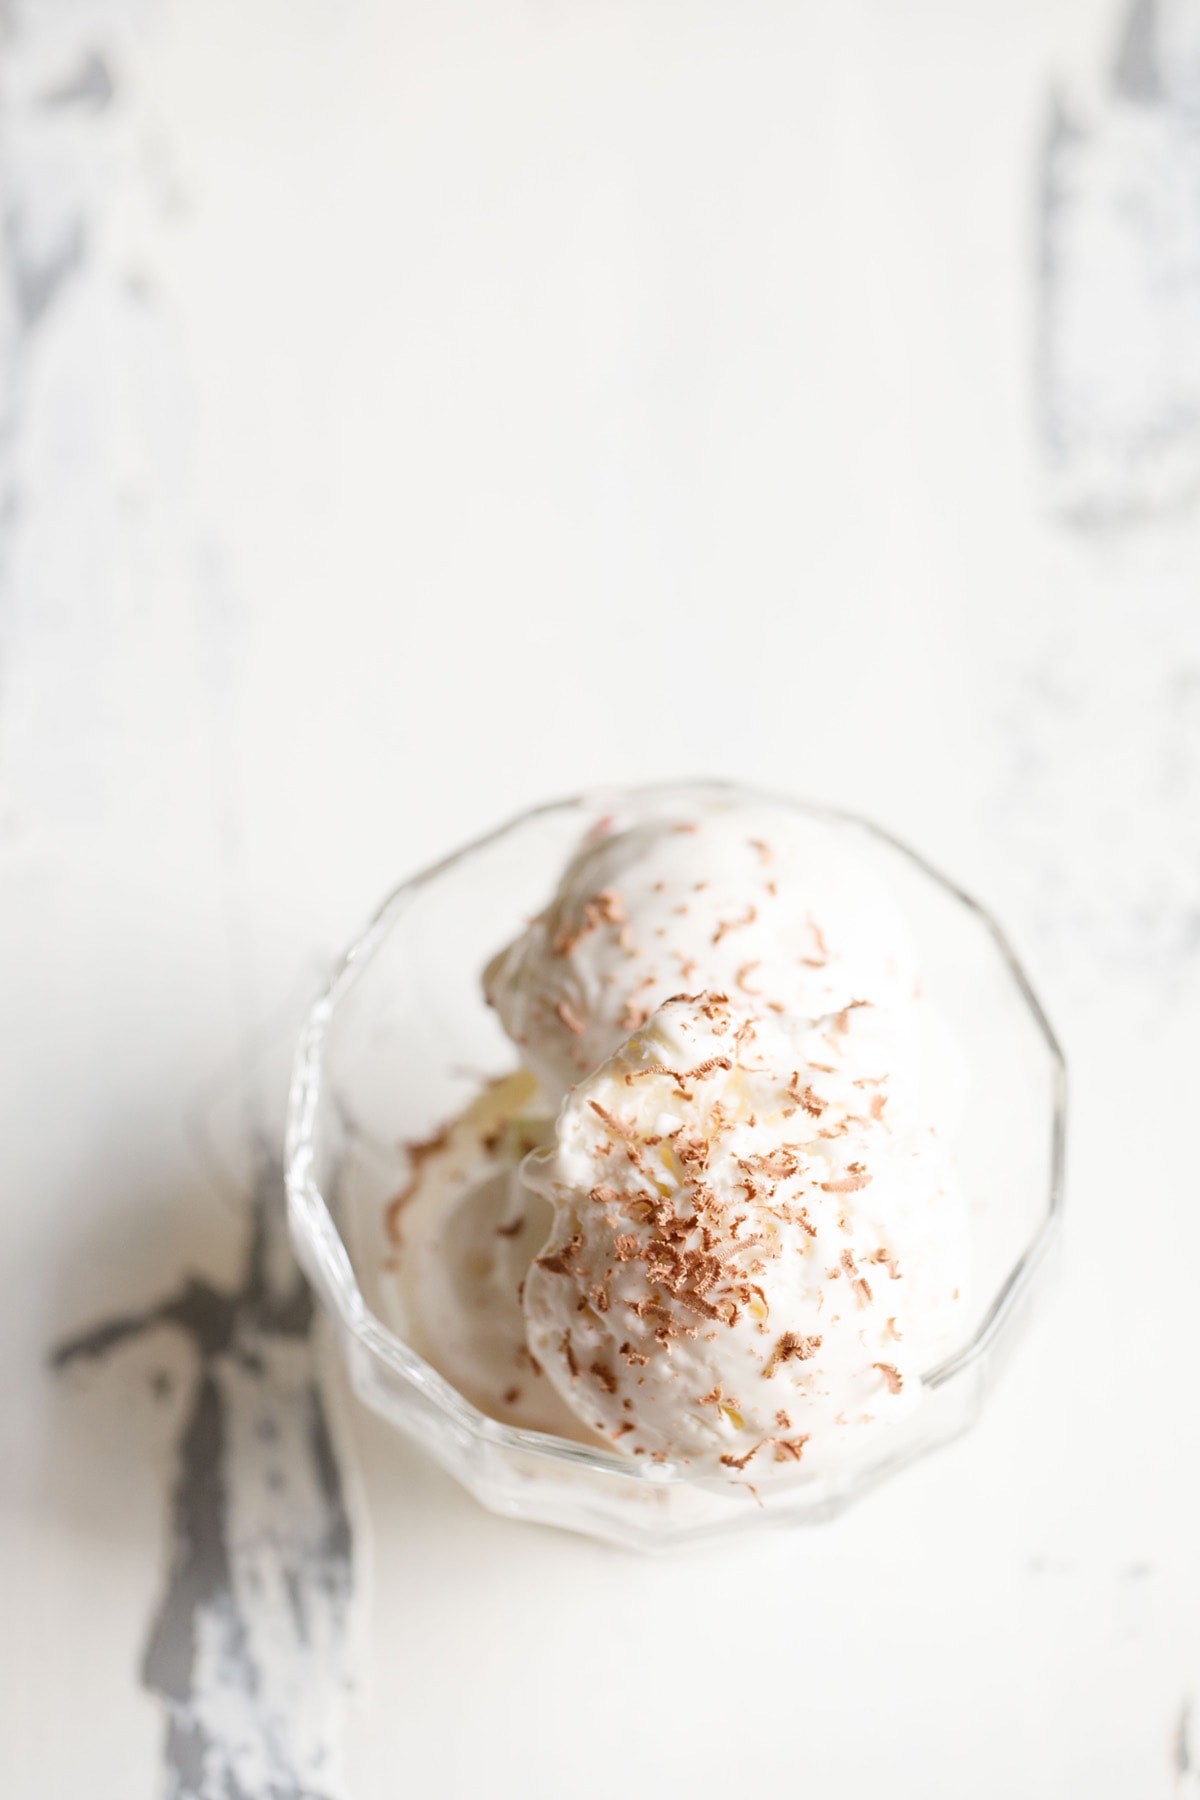
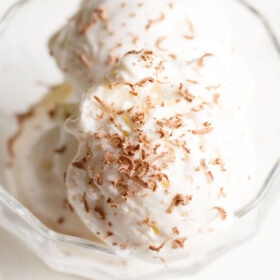
8. Before serving, set the homemade ice cream on the counter for about 5 minutes to soften slightly for scooping. Serve homemade ice cream immediately.
It is delicious plain, but you can also drizzle it with chocolate sauce, caramel, or fruit preserves, or sprinkle with chocolate chips, rainbow sprinkles or fresh fruit.
You can also enjoy it as an Affogato, a simple Italian dessert made with espresso or strong coffee poured over the ice cream.
Possible Flavor Variations
In this basic ice cream recipe, I used vanilla extract to make it vanilla ice cream. Now that you have the basics down, feel free to experiment.
This recipe is very adaptable and you can have nearly any flavor of ice cream that you like by adding various flavoring ingredients. Here are a few ideas to get you started:
- Chocolate Ice Cream – whisk together 2 to 3 tablespoons cocoa powder or drinking chocolate in a little bit of warm milk until well combined. Fold in along with the condensed milk.
- Rose ice cream – simply add 2 to 3 tablespoons of rose syrup to the cream before whipping.
- Butterscotch Ice Cream – fold in ½ cup of crushed praline or butterscotch chips.
- Lemon ice cream – add 1 to 2 tablespoons of lemon juice and ½ teaspoon of lemon zest to the condensed milk and stir thoroughly to combine. Fold the flavored condensed milk into the whipped cream.
- Mango Ice Cream – fold in 1 cup mango pulp or purée.
- Tutti Frutti Ice Cream – add ½ cup of tutti frutti (candied fruit peels).
- Dry fruit ice cream – about ½ cup of chopped dry fruits can be folded in. If you’d like, you can plump up your dried fruit by soaking it in flavored syrup beforehand.
- Pistachio Ice Cream – fold in ½ cup chopped or coarsely crushed pistachios.
This list is only just the beginning of what is possible with this deliciously easy ice cream recipe. Feel free to get creative! Try using up the crumbs at the bottom of your cookie or pretzel bag, or swap mashed banana for the mango. Chop up your favorite candy bars and fold them in.
The sky is the limit with what yummy flavors you can make. If you come up with a winning combination, be sure to let me know in the comments below or tag me on Instagram so I can see!
Tips and Tricks
- Make sure your cream is intended for whipping, meaning it has 35% to 50% fat content. In terms of ratios, I always add 2.75 to 3 cups of cream for 1 can or tin of sweetened condensed milk.
- If you prefer a sweeter ice cream, adjust the ratio! For the ice cream to be more sweet, you can add 2.25 to 2.5 cups cream per can.
- Use good quality vanilla extract or use real vanilla powder. I usually make vanilla extract at home. I add the vanilla extract to various dessert or baking recipes. You can also use 1 vanilla bean to make this into a French Vanilla ice cream with those lovely black vanilla seeds throughout.
- No vanilla? No problem! This ice cream recipe is simply a base for you to play with. Instead of vanilla, try adding ½ teaspoon cardamom powder, some soaked saffron strands in a bit of warm milk or any fruit or plant-based extract.
- Fold GENTLY! Since this is a no-churn ice cream recipe, you only get one shot at incorporating enough air to make it light and spoonable, the way ice cream should be. Don’t knock all of the loft out of your whipped cream by working too quickly.
FAQs
How does no-churn ice cream work? Won’t it be dense?
The magic of this simple ice cream recipe comes from whipping the cream. All of the air that you incorporate into the whipped cream does the job of making the ice cream light and spoonable.
The alternative is making a more traditional custard base and then using an ice cream maker to churn the air in afterwards. If you’d like to experiment and taste them side by side, try my old fashioned Vanilla Ice Cream.
Can I make different flavors of no-churn ice cream?
Absolutely! Feel free to use this recipe as a base for all of your creative ideas. I have listed many possible flavor variations earlier in the post including chocolate, rose, tutti frutti and pistachios.
Do I need an ice cream maker to make homemade ice cream?
Not with this recipe, you don’t! If you are making a custard based ice cream (which is more traditional), then you may require an ice cream maker.
However, this recipe uses whipped cream and condensed milk, so the air is already incorporated prior to freezing. How cool is that?
Can I use this recipe to make ice cream bars instead?
Sure! Feel free to use a popsicle mold if you don’t want to scoop the ice cream. You can also turn this ice cream recipe into ice cream sandwiches by letting it freeze first, then adding a scoop between two cookies, graham crackers or brownies. Yum!
Step by Step Photo Guide Above
Ice Cream Recipe – No Churn, No Ice Cream Maker
Ingredients
- 1 can sweetened condensed milk – 400 grams, about 1.6 cups, cold or chilled
- 2.5 to 2.75 cups whipping cream – 35% to 50% fat, cold
- 2 teaspoons vanilla extract or 1 teaspoon vanilla essence or 1 vanilla bean or 1 teaspoon vanilla powder
- 2 tablespoons grated chocolate for garnish, optional
Instructions
- In a large bowl, take the cold whipping cream. Add 2 teaspoons vanilla extract. If using vanilla essence, then add 1 teaspoon of it.
- With an electric beater at full speed, begin to whip the cream. Timing will vary depending on the fat content in the cream.
- Also be careful while whipping and do not whip too much, as then the cream can get churned into butter.
- Whip until stiff peaks are formed. You can also whip till soft peaks. If using 25% fat cream, then you can whip till soft peaks.
- Now add the cold sweetened condensed milk.
- Fold gently but very well. Also remember not to overfold as then the ice cream mixture can fall flat.
- Remove the ice cream mixture in a container or box and then cover it tightly. Or you can cover the same bowl in which you whipped the cream (if its freezer safe) with a tight fitting lid or aluminium foil.
- Freeze for 7 to 8 hours or more until the ice cream is frozen, firm and set. Before serving, keep the ice cream box or bowl for some minutes at room temperature. Then using a scoop, remove the ice cream.
- Serve homemade ice cream. You can sprinkle some chocolate chips or grated chocolate or candied fruits or chopped nuts or even tutti frutti if you like.
Video
Dassana’s Notes
- Try to make this homemade ice cream recipe with a whipping cream that has 35% to 50% milk fat. Lesser than 30% won’t give you stiff peaks while whipping but soft peaks.
- The recipe can be scaled to make a smaller or a larger serving of the ice cream.
- Choose to garnish the ice cream with your favorite toppings.
Nutrition
This Ice Cream Recipe post from the archives first published in June 2017 has been updated and republished on April 2023.
I don’t have electric beater.. what can I use instead??
chinmayee, you can use a mixer-grinder but use the blade that is meant for whipping curd or cream. it is a flat round blade. don’t use wet grinding or dry grinding blades. also just whip till stiff peaks are formed. do not overdo as then cream can curdle.
Hi..did this recipe today and it’s a big hit..I made different flavours like you said..chocolate and Oreo ice cream..and fruit and nut one..one of the best ice cream we had. Thanks for taking so much time and giving us such wonderful recipes.
glad to know chinmayee. thanks for commenting back and giving the feedback. yes many flavors of ice cream can be made with this basic ice cream recipe. thanks again.
Hi can I use vanilla essence instead of vanilla extract
yes sweta, you can use 1 teaspoon vanilla essence. i have mentioned the amount already in the recipe card as well in the step by step pics.
I have got milky mist fresh cream forty % fat will it work?
shilpa, it will work.
can we use amul fresh cream?
shilpa, you can use amul fresh cream. i prepare ice cream many times with amul fresh cream.
Hi can you please share which whipping cream you have used here.
Thanks,
Sushma
Welcome Sushma. I have used Amul whipping cream.