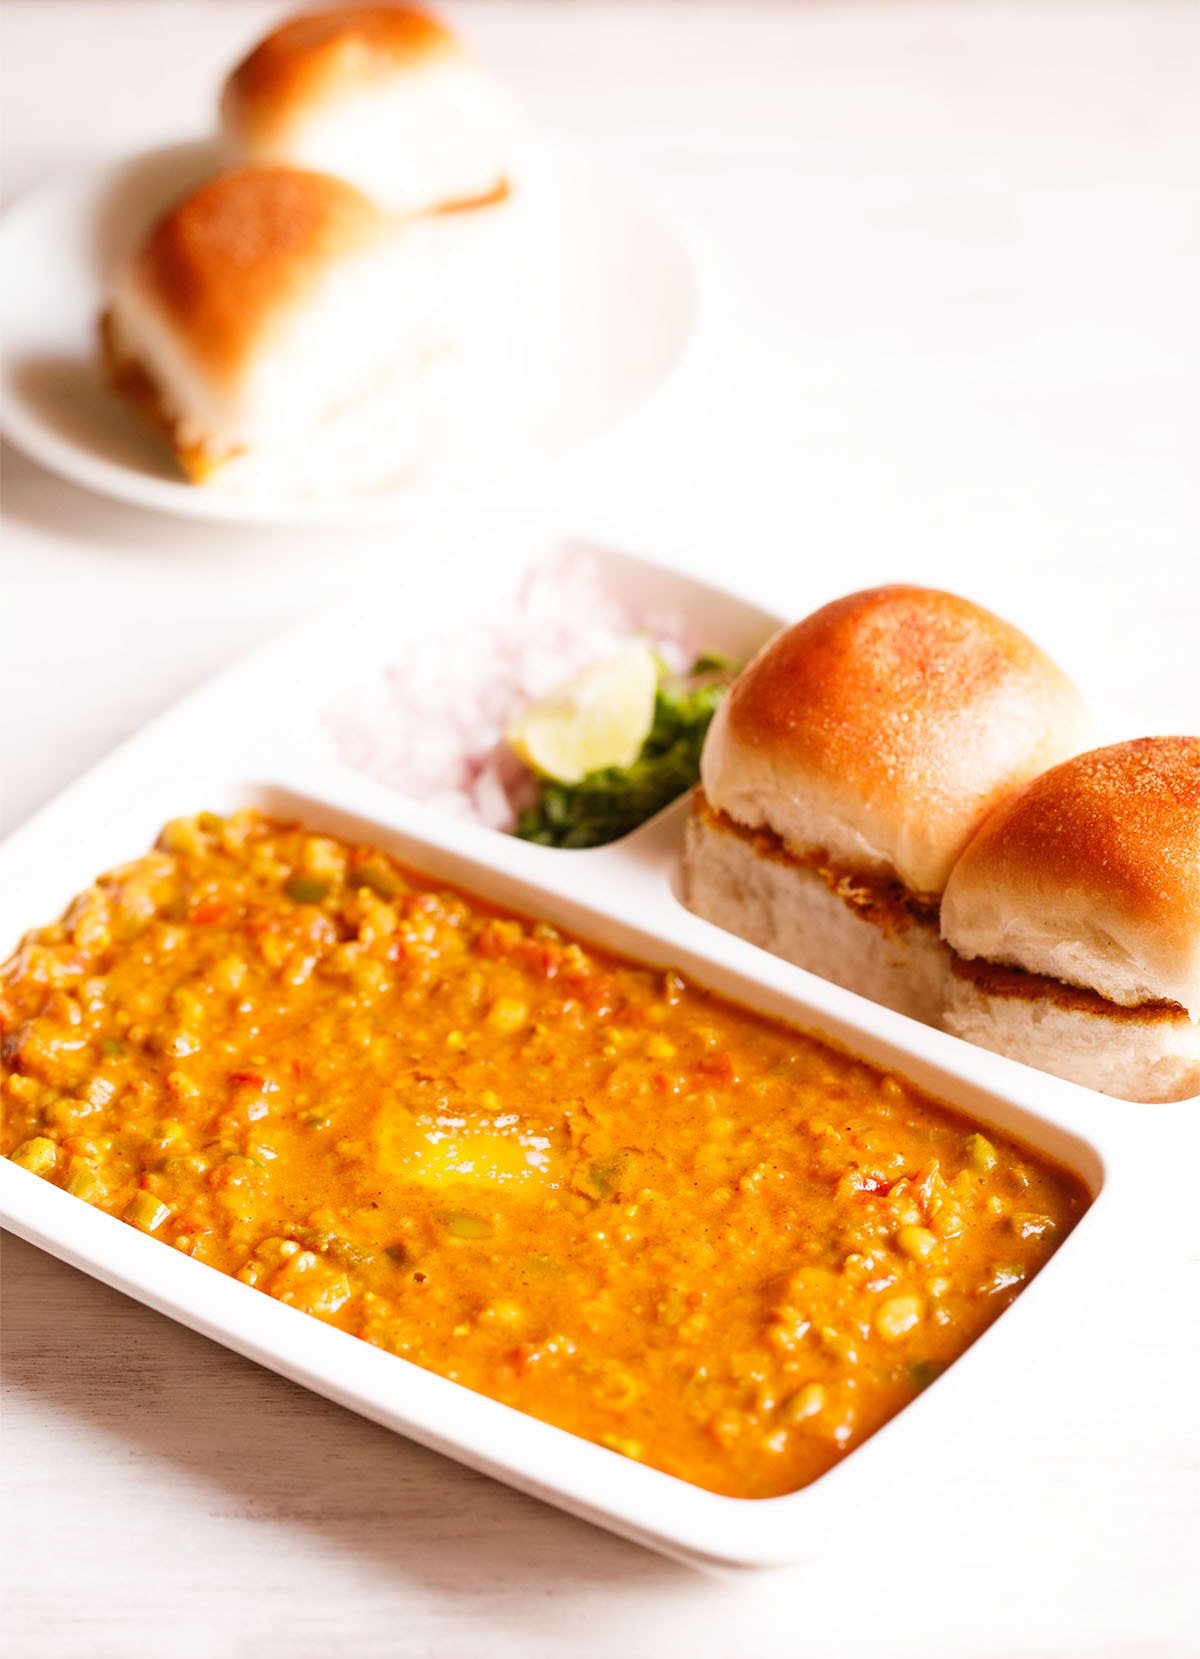
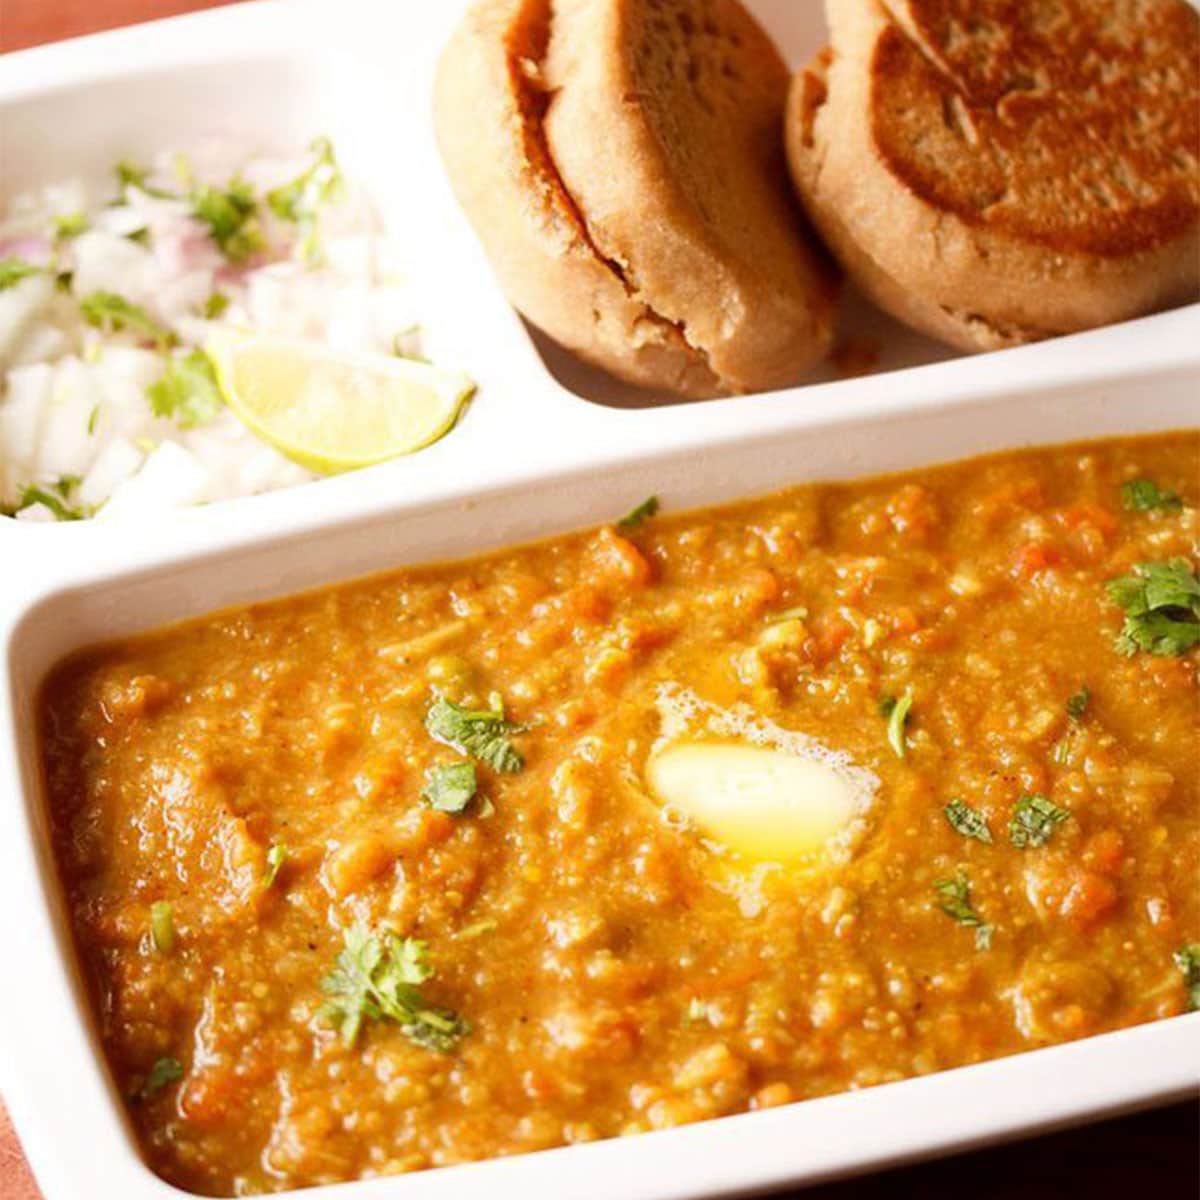
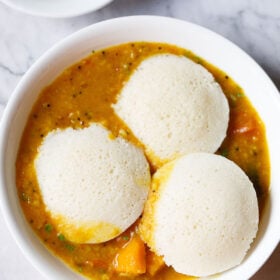
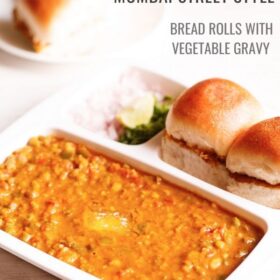
Want a meal that’s hearty, satisfying and delightful too? Here’s it – mashed spiced vegetables; served with a side of cotton-like soft, buttery dinner rolls, crunchy onions, herby fresh coriander and tangy lemon. To sum up, the Pav Bhaji – a famous street food from the ‘city of dreams,’ Mumbai. This Pav Bhaji Recipe is going to be create fireworks on your palate! Check out my step-by-step picture guide and video of making this delicious street style dish in 2 ways – one, traditionally and two, as a quick Instant Pot recipe.
What is Pav Bhaji
Pav bhaji is an iconic dish from Mumbai, which is also hugely popular as street food all over India. It first came into picture in Mumbai as a quick lunch option for textile mill workers.
Gradually, over the years, the dish became widespread. Today, you can find it as a common street food and a special in restaurants in Mumbai and the rest of India.
Just to give you the literal meaning: in Marathi, ‘pav’ means bread rolls and ‘bhaji’ refers to vegetables or a dry/gravy style mixed veggie dish. Since this particular combination has both these being served together, the dish is well-known under the sobriquet Pav Bhaji.
Table of Contents
So, you must be thinking as to what really brings in the uniqueness in the bhaji or the mix of tangy, spiced vegetables in the Pav Bhaji Recipe? It is the special spice blend called the Pav Bhaji Masala that makes the difference.
It is a typical Maharashtrian spice powder which is easily available in Indian stores and online. But, with the above linked recipe, it can be easily made at home.
This masala powder is an absolutely essential ingredient in the Pav Bhaji Recipe as you can only achieve the most authentic and perfect flavor by using the pav bhaji masala in it.
I highly recommend to include your favorite brand while making this dish. Even better, if you have a batch of homemade pav bhaji masala with you.
Not to forget, just like me, if you too are a total fan of the Pav Bhaji, then you must try this savory, spiced combination called the Masala Pav – another popular street food preparation in Mumbai.
About My Recipe
Memories of my Pav Bhaji Recipe go back to the times when I was a teenager. At home, I would often make this lovely dish for my family, especially my sister who absolutely loved to have this meal.
It was also a ritual for us to gorge on this delicious snack whenever we planned an outing to Juhu Beach in Mumbai.
The most typical way to have it was to order plates of it, with a generous quantity of bhaji and 2 pavs at a time. And then to finish the bhaji, we would keep on ordering for more pavs until there was no more bhaji left!
While I was growing up, it was almost a celebratory occasion to savor Pav Bhaji and other Mumbai style street dishes especially at the Juhu Beach. That time with the most delectable food, wind in our hair and the sound of the gushing waves – I can never forget these!
More so, because it was the place from where I have picked up the fine tips, tricks and nuances of making this yummy recipe with a lineage of its own!
To make my version of the Pav Bhaji Recipe, specifically the bhaji, I sauté the onion, tomatoes and ginger-garlic paste in butter first. Later, I add the boiled and mashed vegetables to it, which is followed by the pav bhaji masala. Then, I simmer this gravy for some minutes and serve it steaming hot with pav, lightly toasted in butter.
The street vendors and restaurant cooks use a large, flat tawa (skillet) to make the Pav Bhaji Recipe. But when making at home, you can use a kadai (wok), skillet or a frying pan to make it.
Ingredient List
- Mixed Vegetables: I use vegetables like potatoes, capsicum, carrot, cauliflower, green peas. The street side versions do not have carrots and may also add less/no cauliflower. However, I add to make the bhaji more nutritious and homely.
- Green Peas: I mostly use fresh or frozen green peas, whereas dried green or white peas are used in the street side bhajis. These are cooked and mashed. This also results in a different taste and consistency of the bhaji. You can also make it with dried green peas.
- Pav Bhaji Masala: This dish will lose its essence if there is no pav bhaji masala in it. So, you can use a good branded readymade pav bhaji masala or use your homemade one.
- Butter: For the bhaji, my preference has always been the Indian brand of Amul butter. But you can even use any other trusted brand or homemade butter.
- Pav: You can either buy fluffy pav or dinner rolls from a noted bakery or make a batch at home. Whenever I decide to make Pav Bhaji or Misal Pav, I usually make the Pav a day before. To make it healthier, you can choose to make whole wheat dinner rolls.
How to make Pav Bhaji
Cook Vegetables
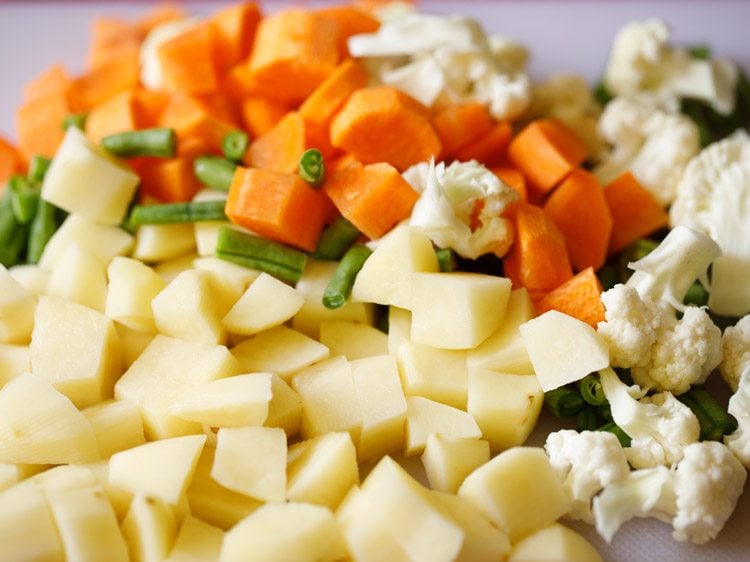
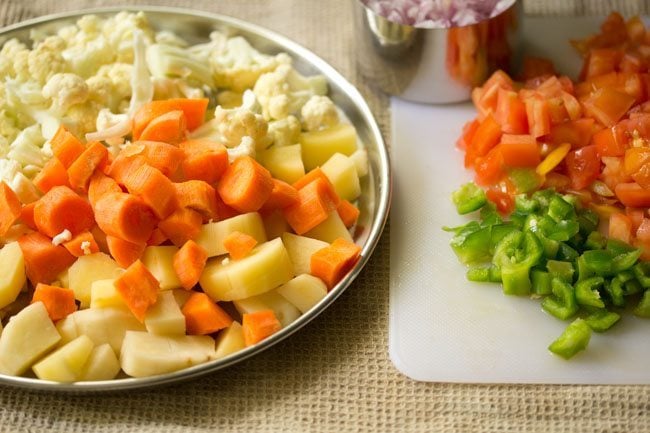
1. Rinse, peel and chop the veggies. You will need 1 cup chopped cauliflower, 1 cup chopped carrot, 3 medium sized potatoes (chopped) and ⅓ cup chopped french beans.
Note: You can also add veggies that you like, but do not add okra, eggplants, pumpkin, radish, corn, yam or green leafy vegetables.
Cabbage, broccoli, zucchini, pumpkin are some unique options that you can consider to add, but the traditional version does not include these veggies.
2. Add all the above chopped veggies in a 3 litre stovetop pressure cooker. Also add 1 cup green peas (fresh or frozen).
I have cooked the veggies in a pressure cooker. You can boil or steam them using a pan or in the Instant pot adding water as needed.

3. Add 2.25 to 2.5 cups water.
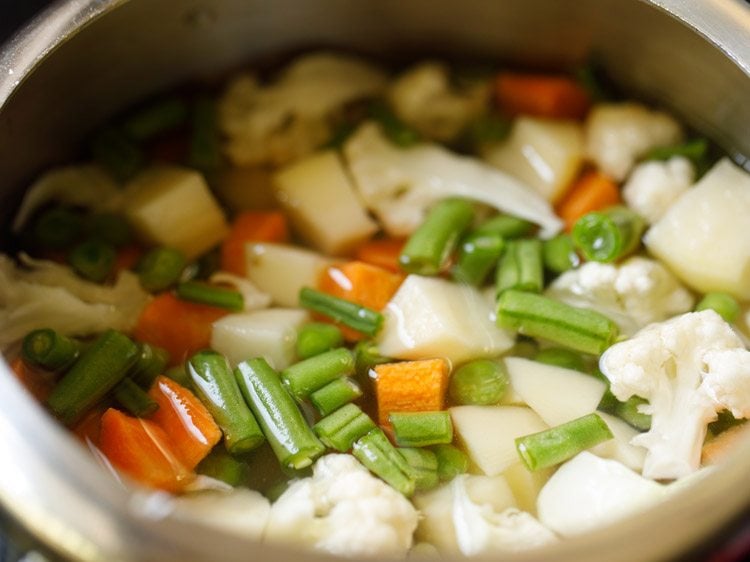
4. Pressure cook the veggies for 5 to 6 whistles or for about 12 minutes on medium heat.

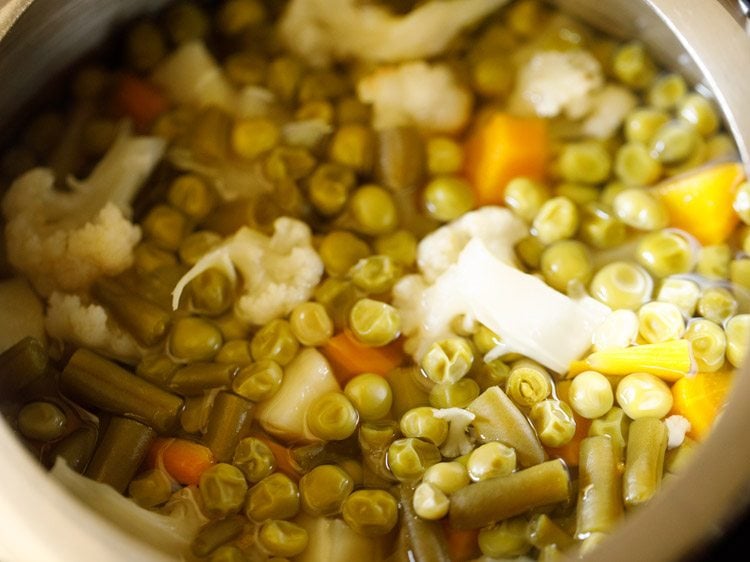
5. When the pressure settles down on its own, open the cooker and check if the veggies are fork tender, softened and cooked well.
You can even steam or cook the veggies in a pan or pot. The vegetables have be to cooked completely and should not be al dente or just about cooked.
Set aside the vegetables with the cooked water (broth/stock) in the cooker itself.
Make Onion Tomato Masala
6. Heat a frying pan or kadai (wok). You can also use a large tawa or a skillet. Add 2 to 3 tablespoons butter. You can use amul butter or any brand of butter. The butter can be salted or unsalted.
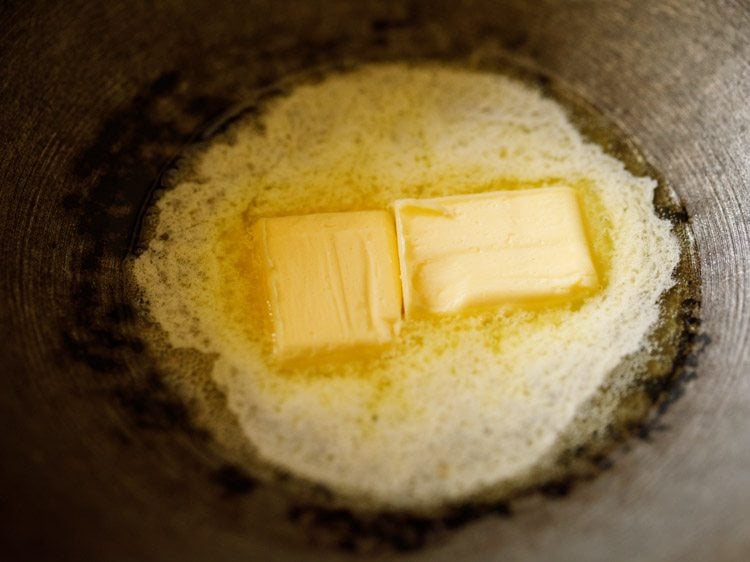
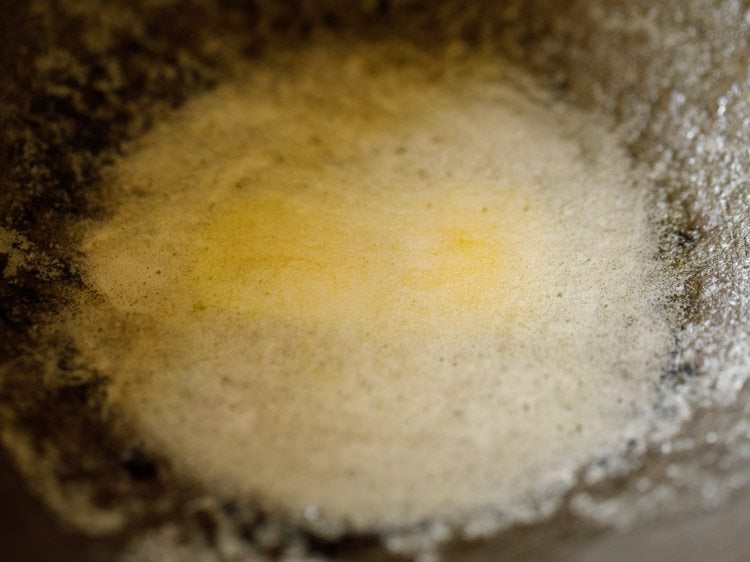
7. Let the butter melt.
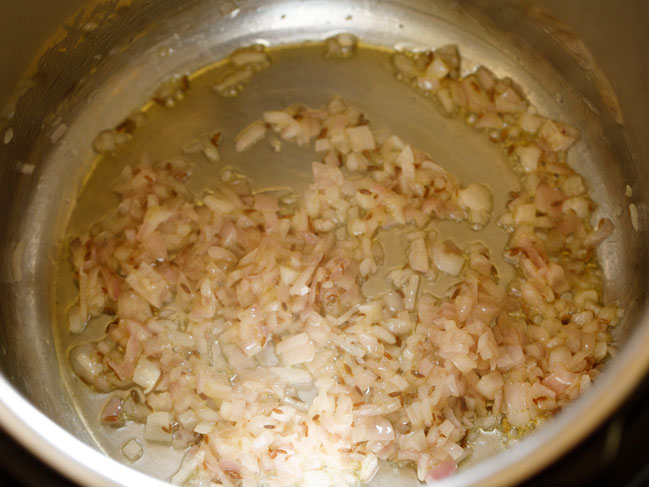
8. As soon as the butter melts, add 1 teaspoon cumin seeds.
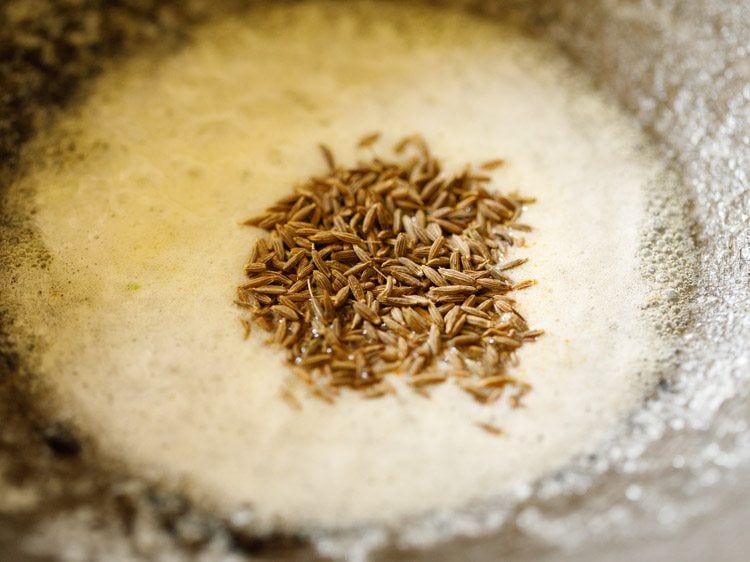
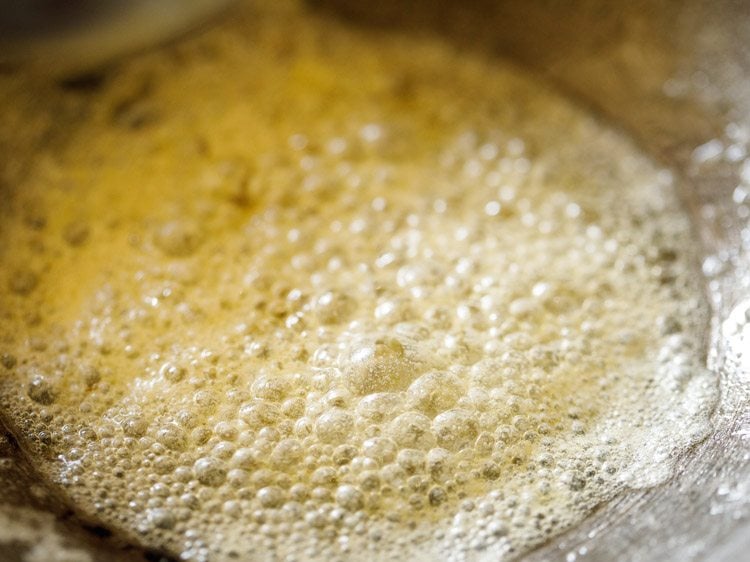
9. Let the cumin seeds crackle and change their color.
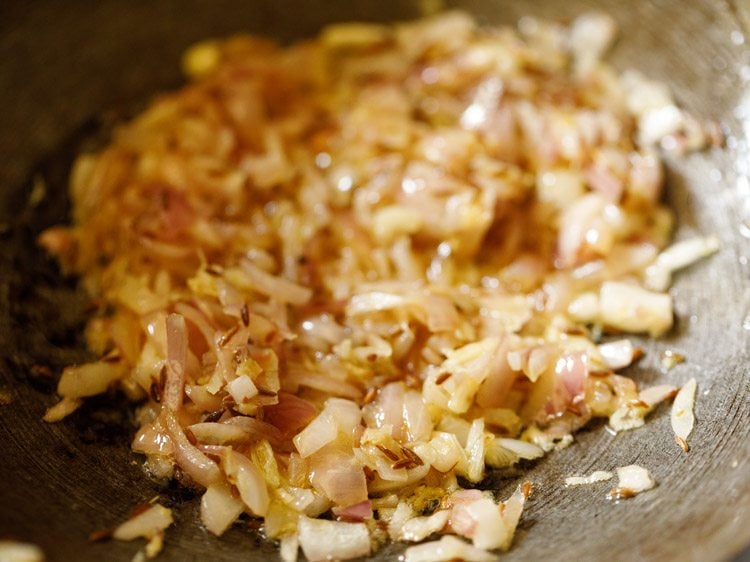
10. Then add ½ cup chopped onions.
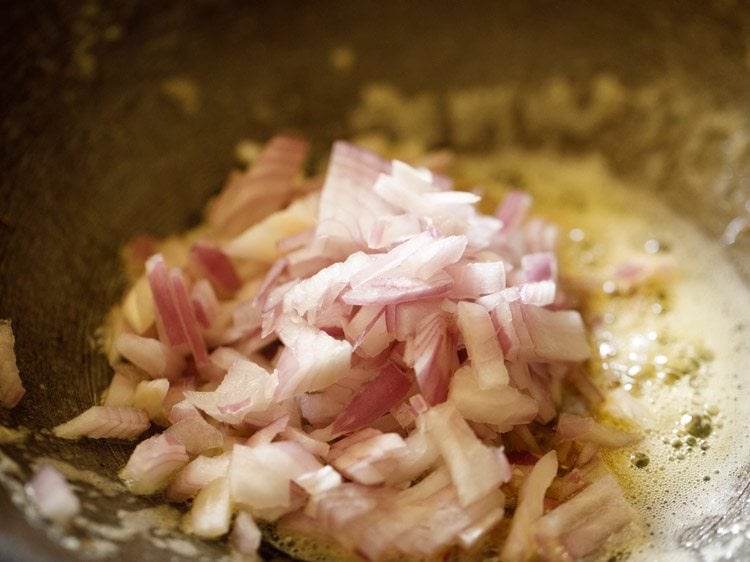
11. Mix onions with the butter and sauté on a low to medium heat.
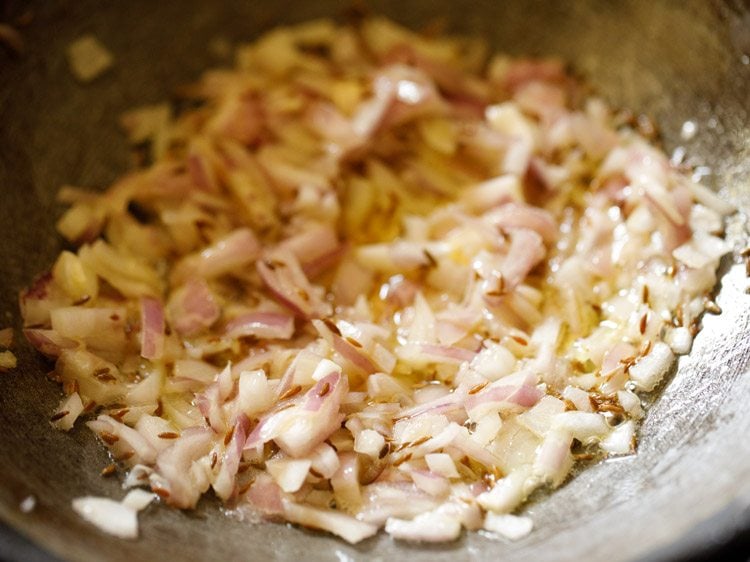
12. Sauté until the onions turn translucent.
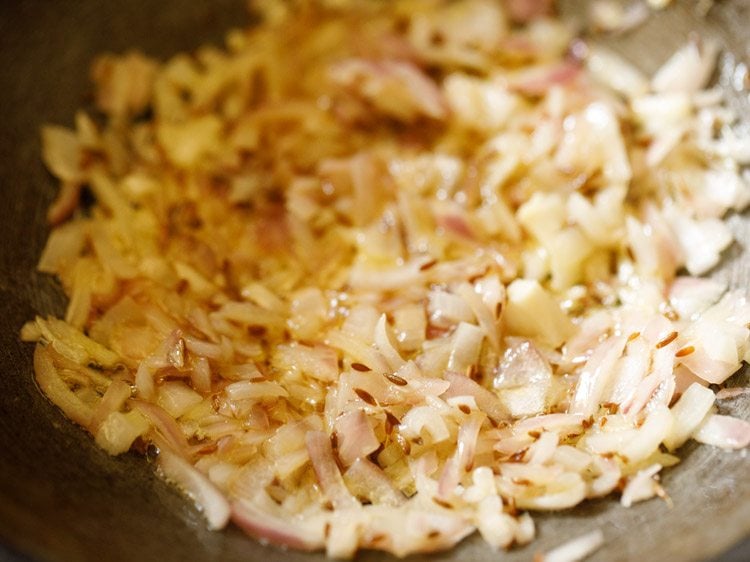
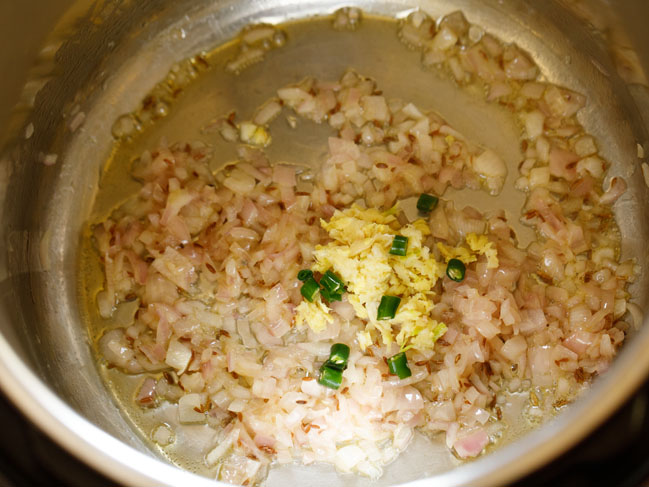
13. Add 2 teaspoons ginger-garlic paste. You can crush 1.5 inch ginger and 5 to 6 medium garlic cloves, in a mortar-pestle.
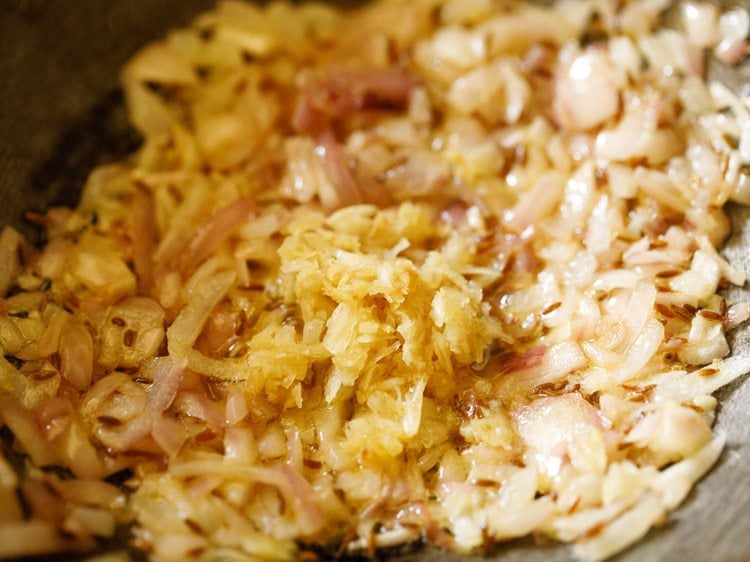
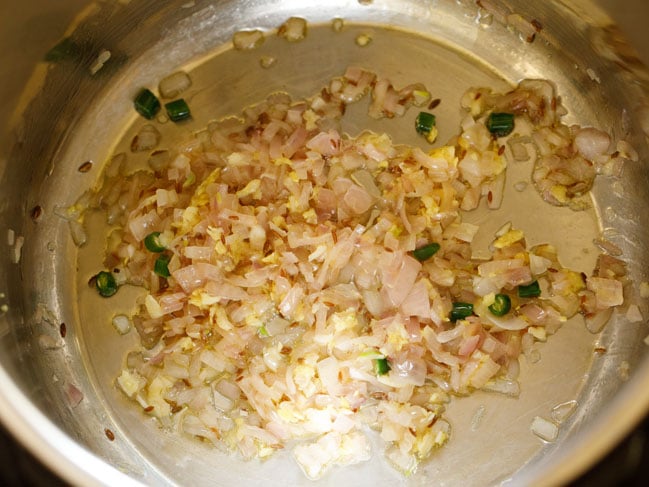
14. Mix and sauté for some seconds until the raw aroma of both ginger and garlic goes away.
15. Then add 1 to 2 green chilies (chopped), about 1 teaspoon chopped green chillies.
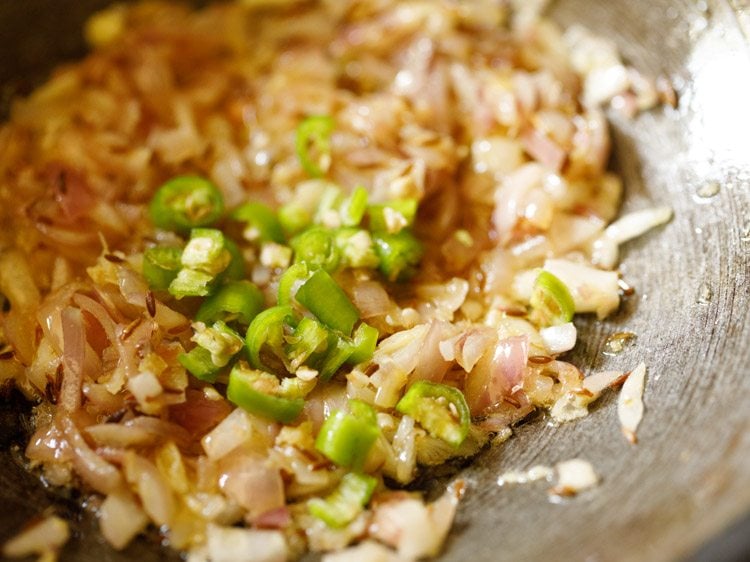
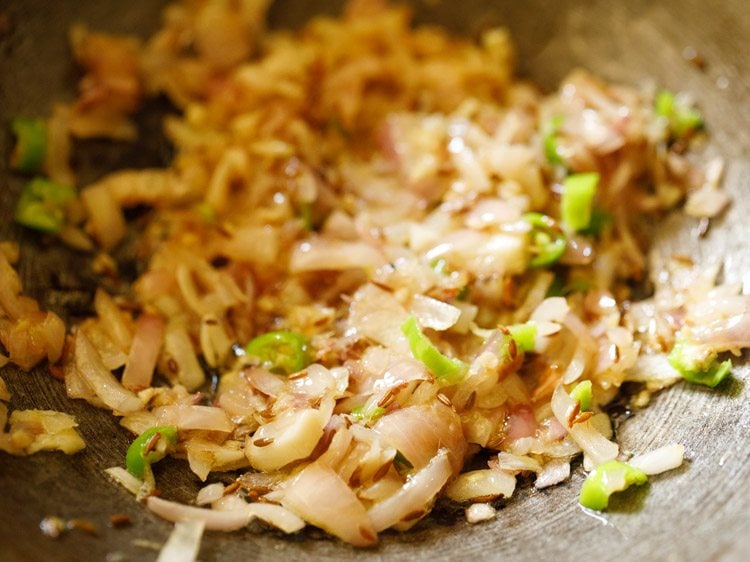
16. Mix well.
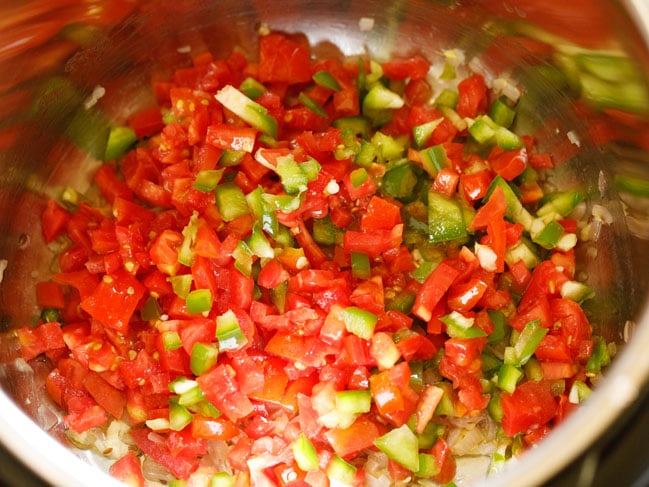
17. Add 2 cups finely chopped tomatoes. Swap canned tomatoes if you do not have fresh tomatoes.
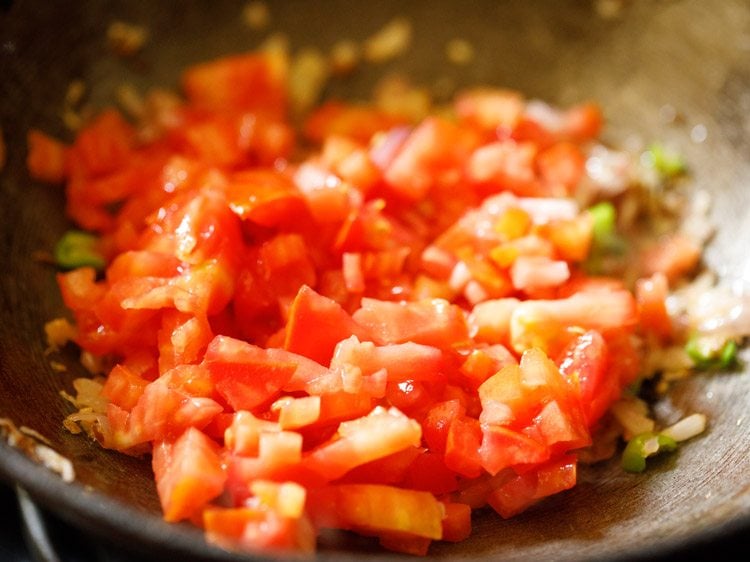
18. Mix very well.
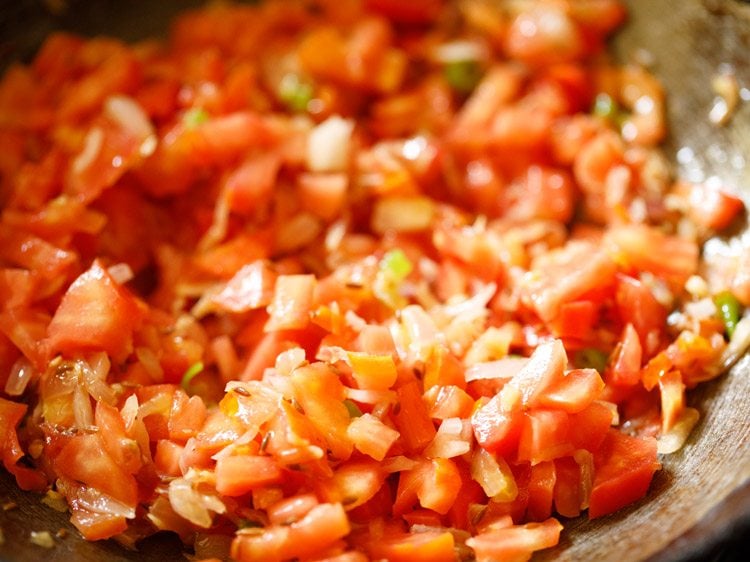
19. Then begin to sauté tomatoes on a low to medium heat.
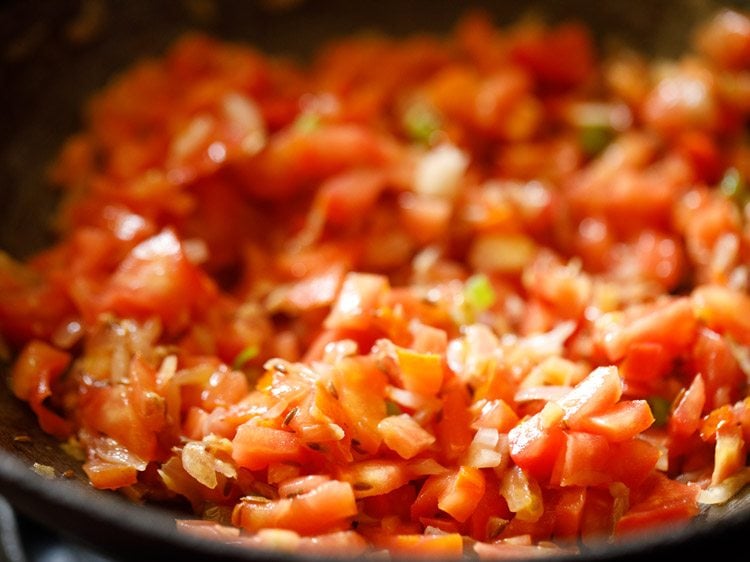
20. Sauté until the tomatoes become soft, mushy and you see butter releasing from the sides. This takes about 6 to 7 minutes on a low to medium heat.
Tip: If the tomatoes start sticking to the pan, then sprinkle some water. Mix well and deglaze the pan.
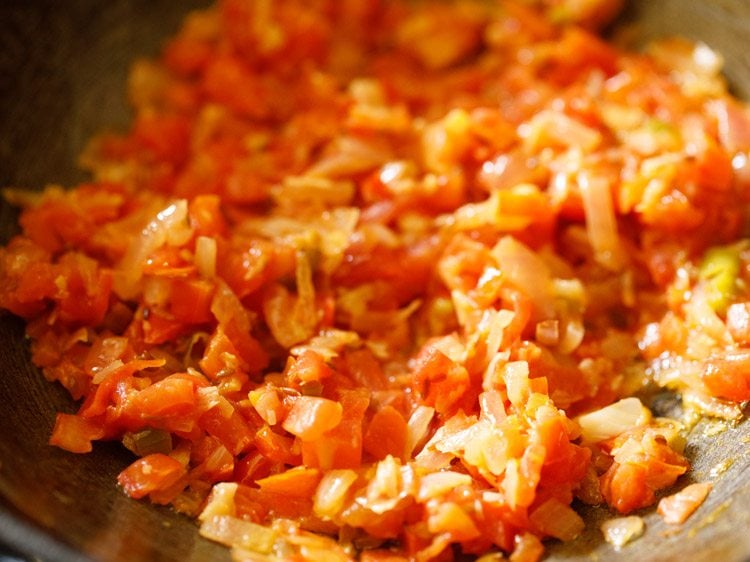
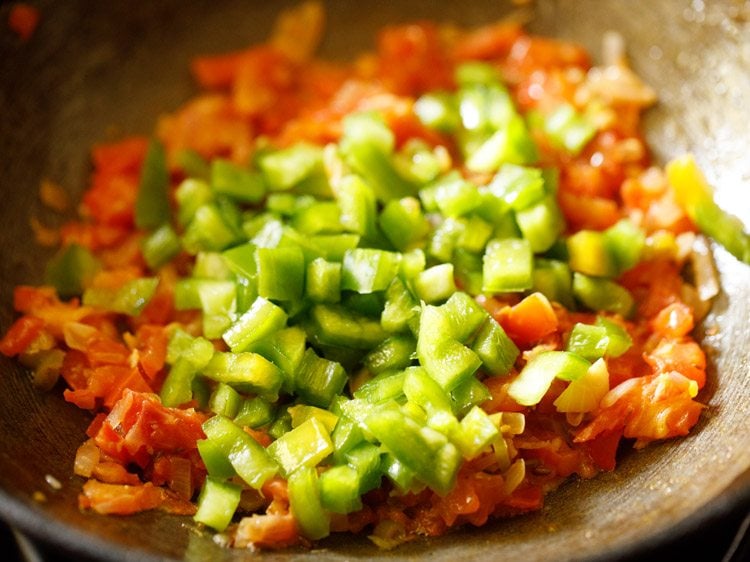
21. When the tomatoes have softened, add ½ cup finely chopped capsicum (green bell pepper). Sauté for 2 to 3 minutes.
Tip: If the mixture starts sticking to the pan, then add some splashes of water. You don’t need to cook the capsicum until very soft. A little crunch is fine in the capsicum.
22. Add 1 teaspoon turmeric powder and 1 teaspoon Kashmiri red chilli powder.
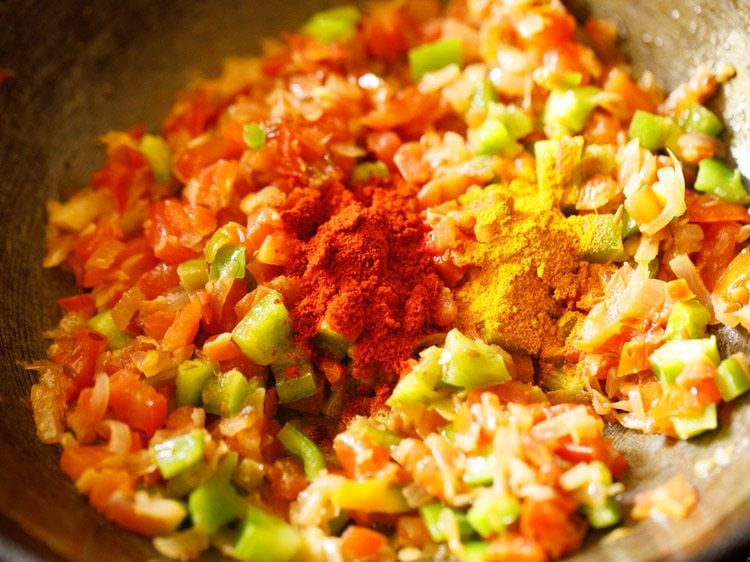
Make Vegetable Bhaji
23. Add 2 to 3 tablespoons Pav bhaji Masala Powder. Depending on how instense is the aroma and flavor of pav bhaji masala, you can add it in less or more proportions.
Add 2 tablespoons if the pav bhaji masala is strong, intense and flavorful. For a more robust and spiced bhaji add 3 tablespoons of it.
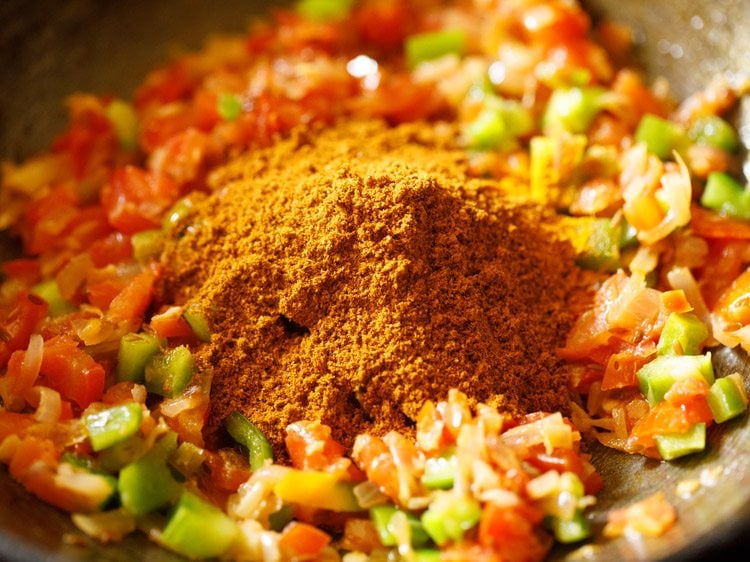
24. Mix very well.
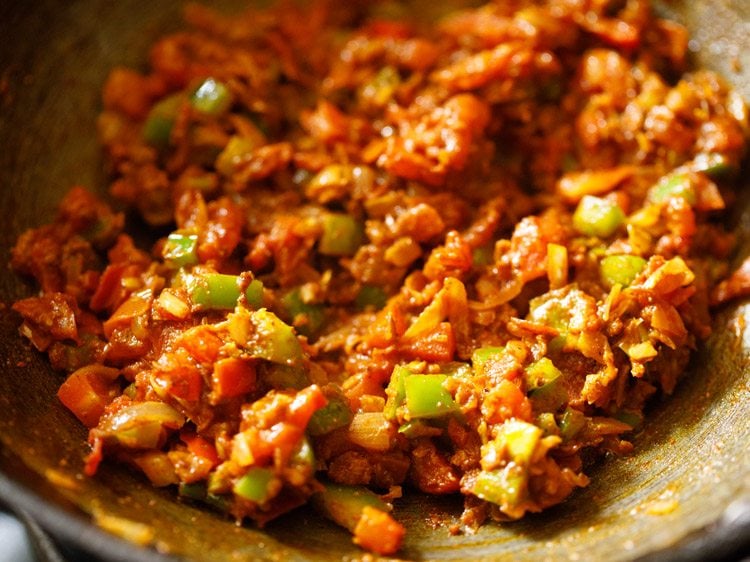
25. Add the cooked veggies. You can choose to mash the veggies before you add them in the pan or skillet.
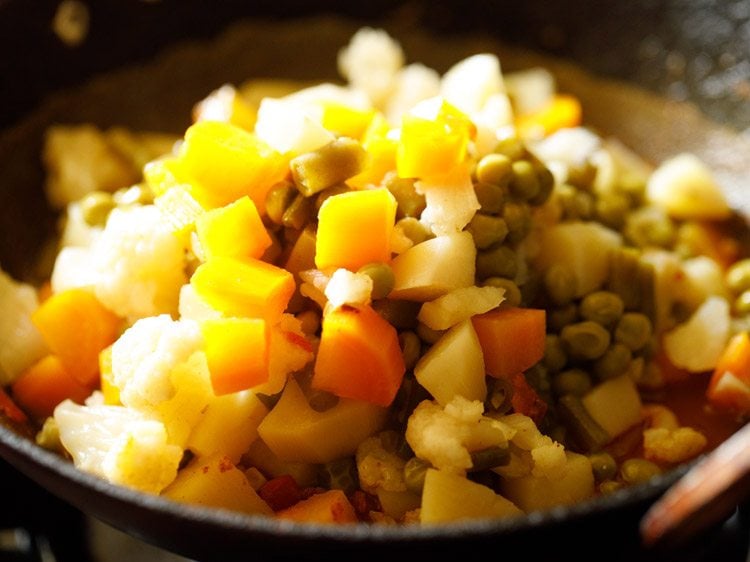
26. Mix thoroughly.
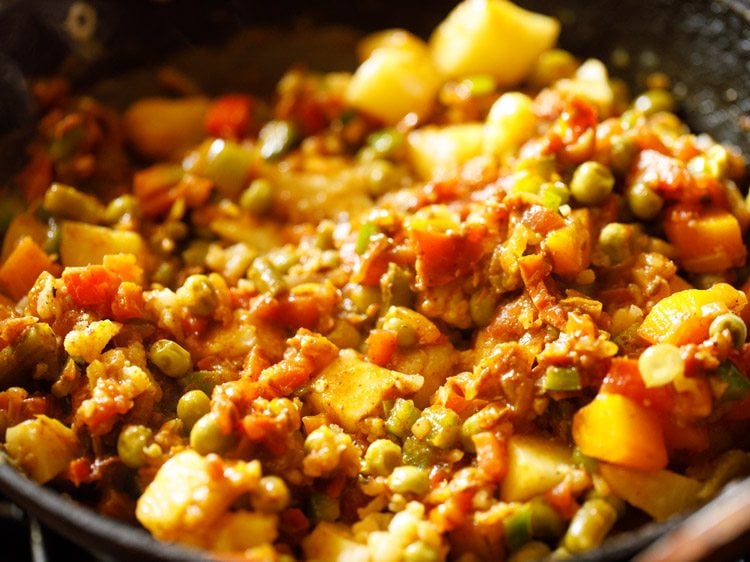
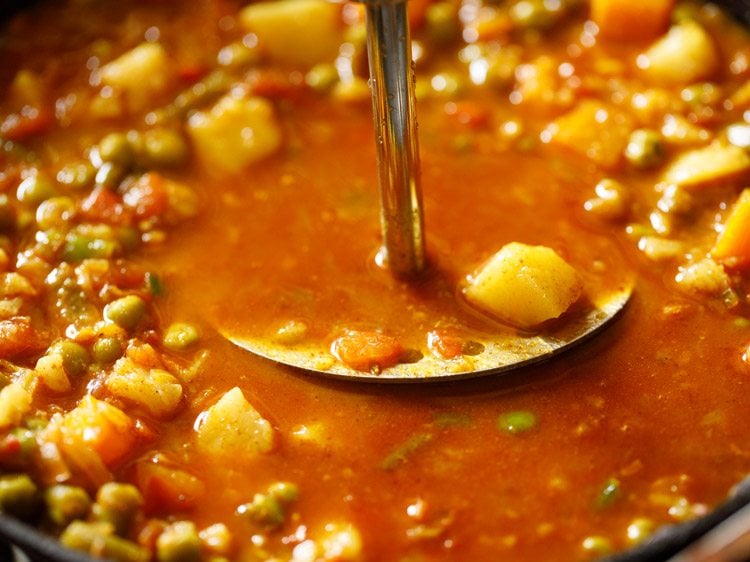
27. Add all of the stock or water from the pressure cooker in which the veggies were cooked.
28. Combine and mix thoroughly.
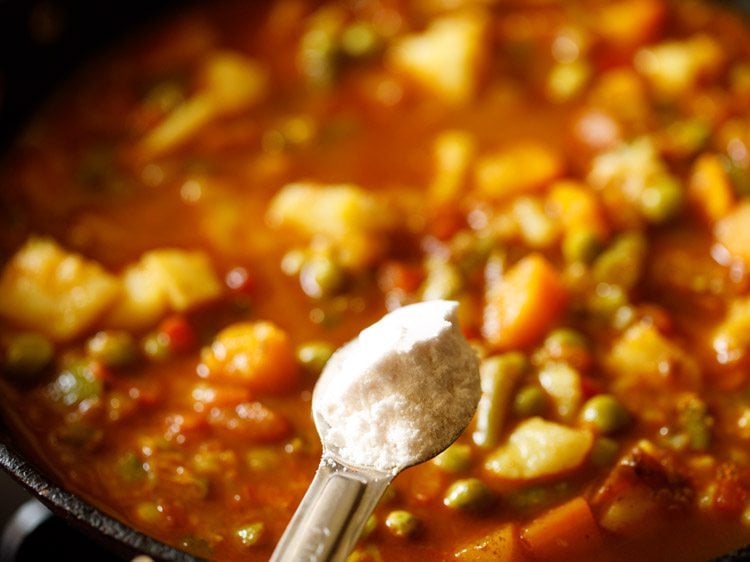
29. Season with salt according to your taste preferences and give a mix.
30. With a potato masher, begin to carefully mash the veggies directly in the pan.
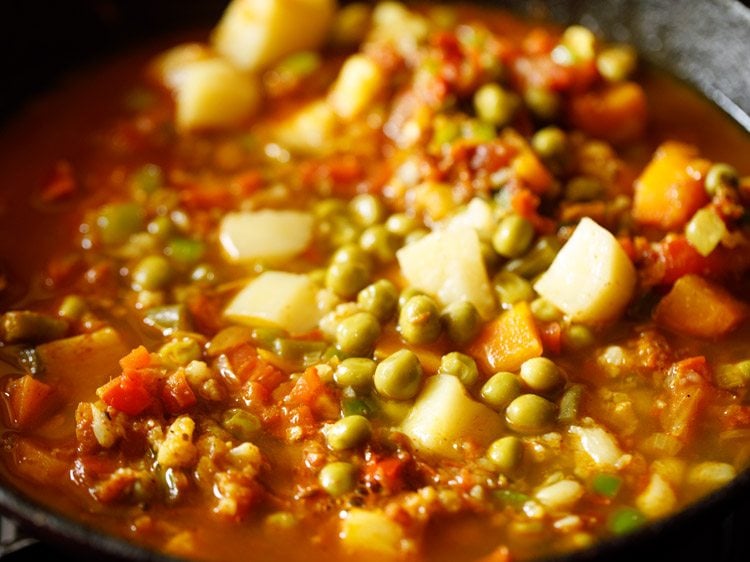
31. You can mash the veggies less or more according to the consistency you want in the bhaji.
For a smooth mixture mash more. For a chunky bhaji, mash less. Add more water if the bhaji looks thick.
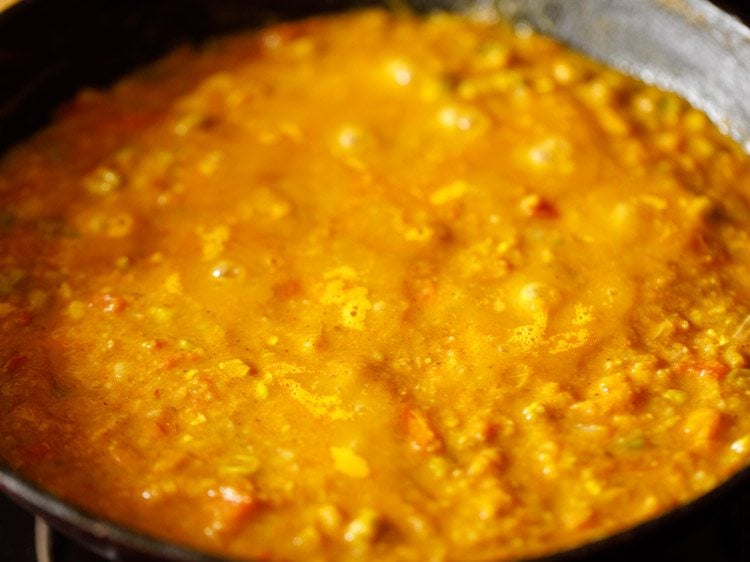
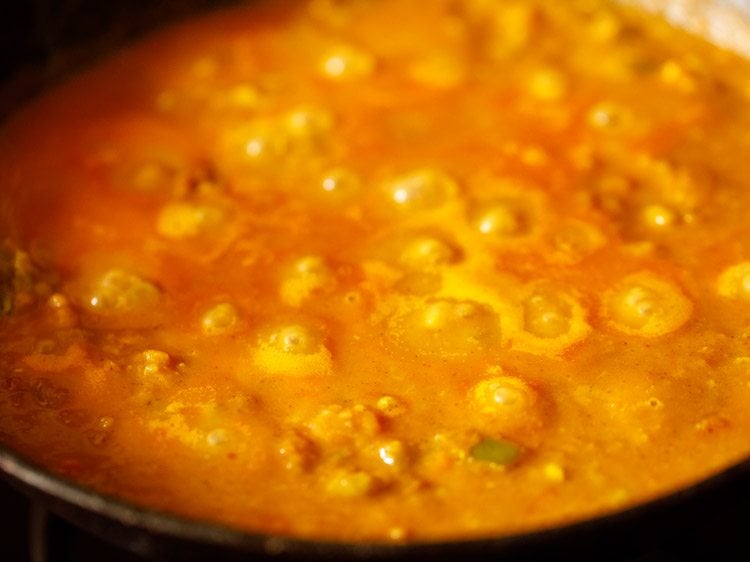
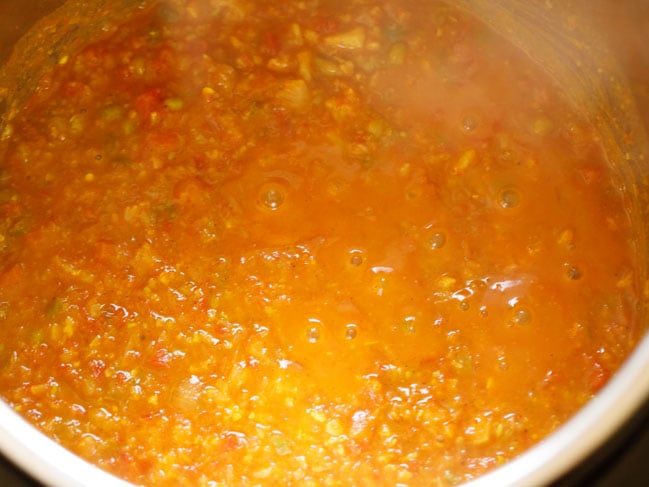
32. Keep on stirring occasionally and let the mashed vegetable gravy simmer for 8 to 10 minutes on a low heat.
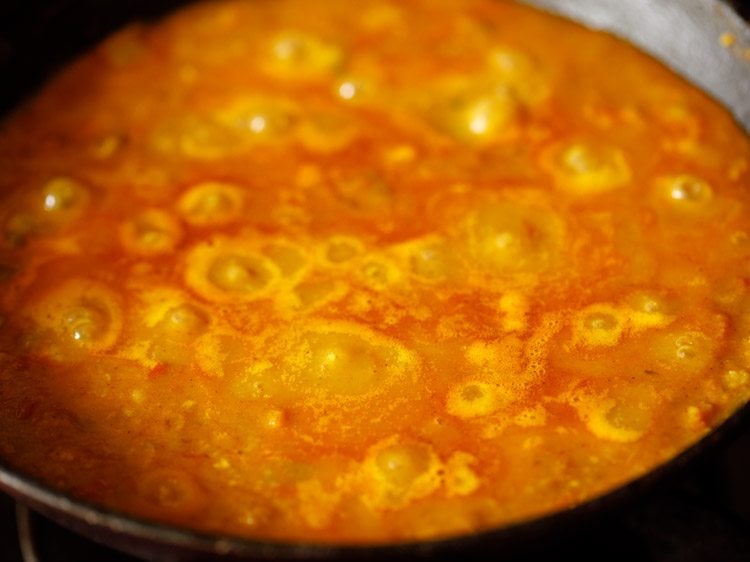
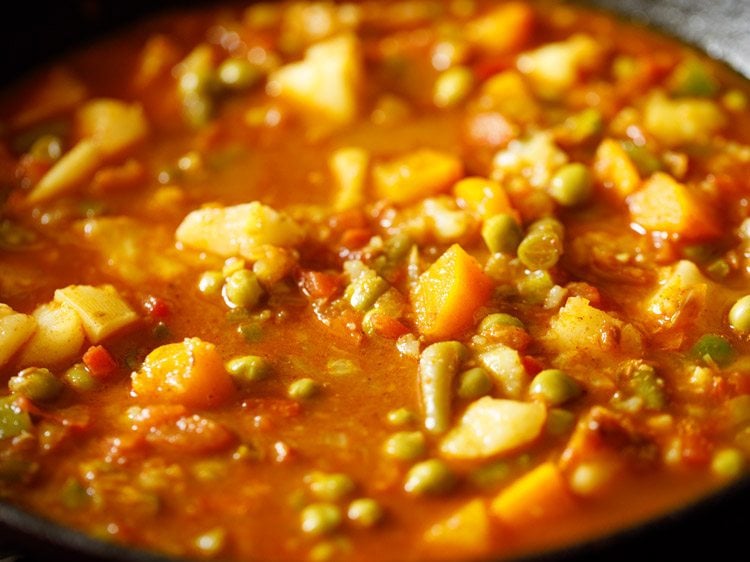
33. If the bhaji looks dry and then add some water. The consistency is neither very thick nor thin.
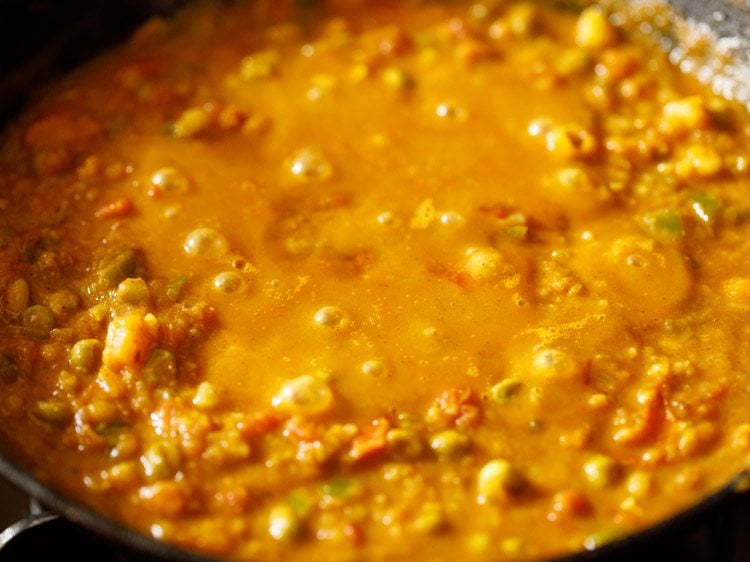
34. Do stir often so that the bhaji does not stick to the pan. When the bhaji simmers to the desired consistency, check the taste.
Add salt, pav bhaji masala, red chili powder or butter if needed.
Pan Fry Pav
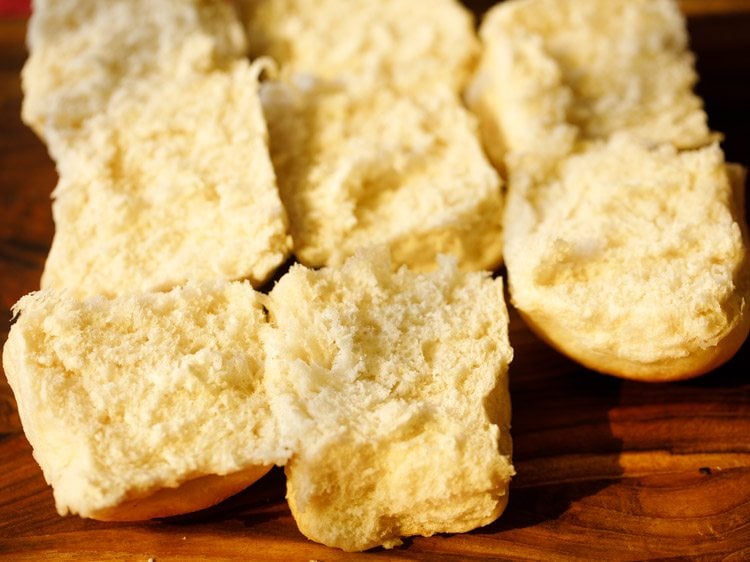
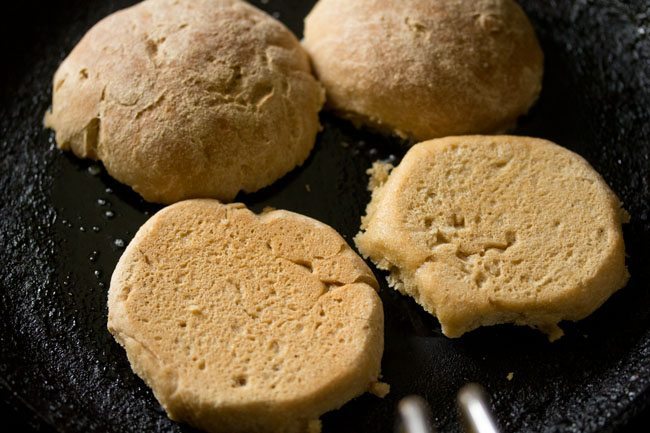
35. When the bhaji is simmering, you can pan fry the bread rolls so that you serve the pav with steaming hot bhaji. Cut through the bread roll from the center so that you get two equal halves.
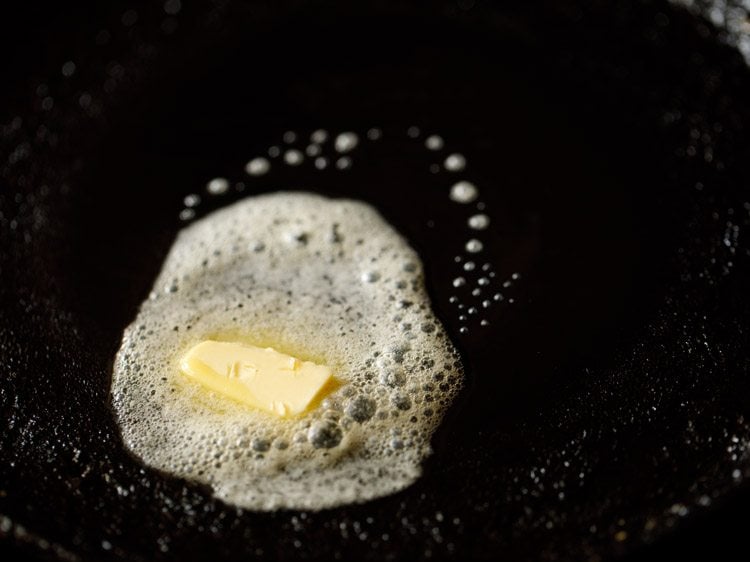
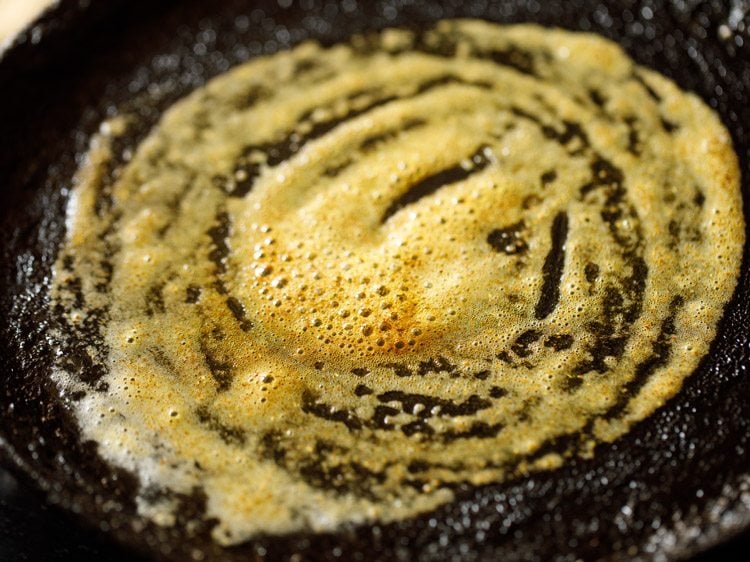
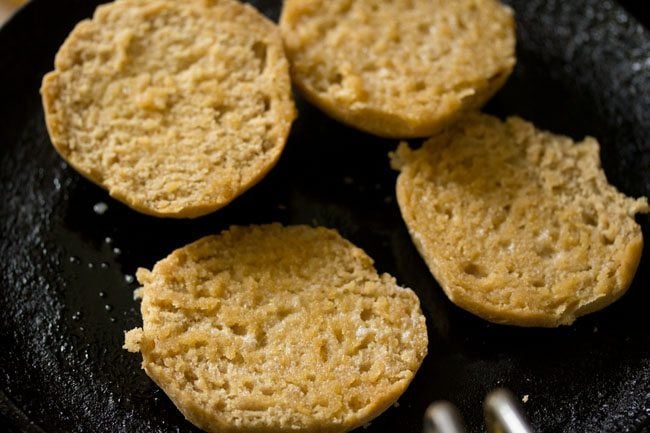
36. Heat a tawa or skillet or a shallow frying pan. Keep the heat to a low and then add 1 to 2 tablespoons butter or more if you like.
37. When the butter begins to melt, add 1 teaspoon of pav bhaji masala (for 2 to 3 pav). You can skip pav bhaji masala if you prefer.
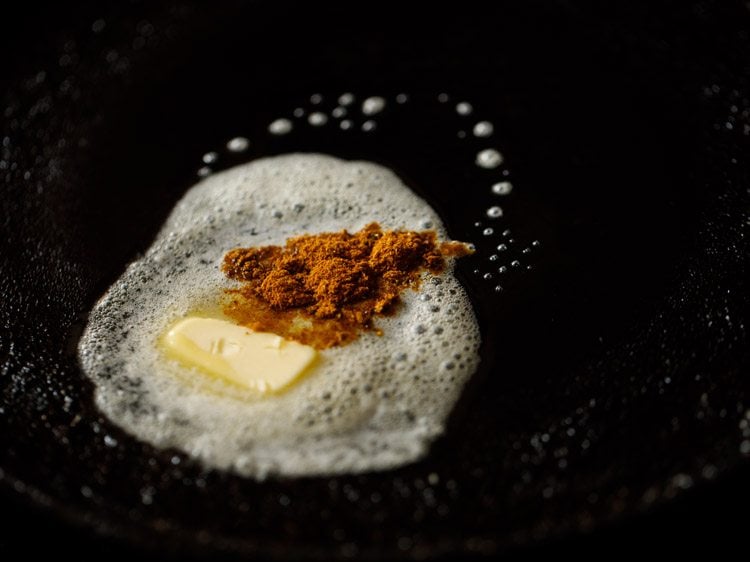
38. Mix the pav bhaji masala very well with a spoon or spatula.
39. Then place the pav on the butter.
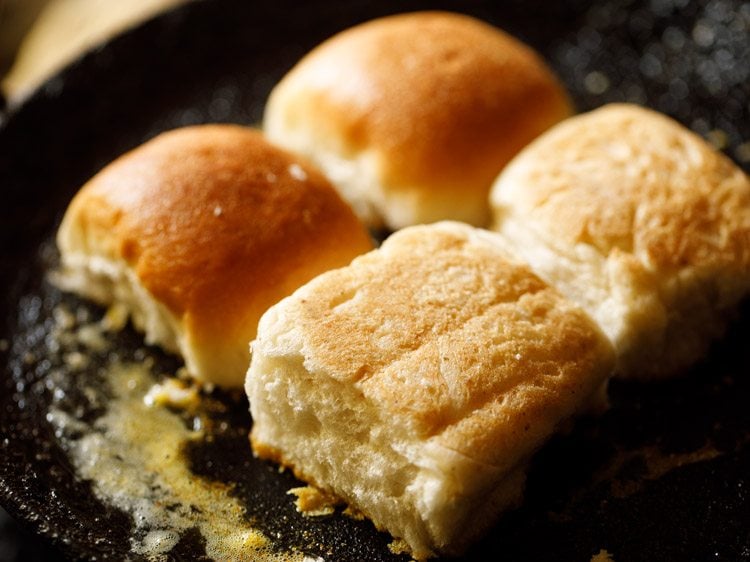
40. Press with a spatula and rotate the pav all over the melted butter so that the pav absorbs the butter together with the ground spices.

41. Now turn over the pav. Press gently with a spatula and rotate them on the tawa so that the second side absorbs the butter.
Add more butter if needed. You can turn over and toast them more if required. Then transfer the lightly pan fried bread rolls in a plate and set aside. This way fry the rolls in two to three batches.

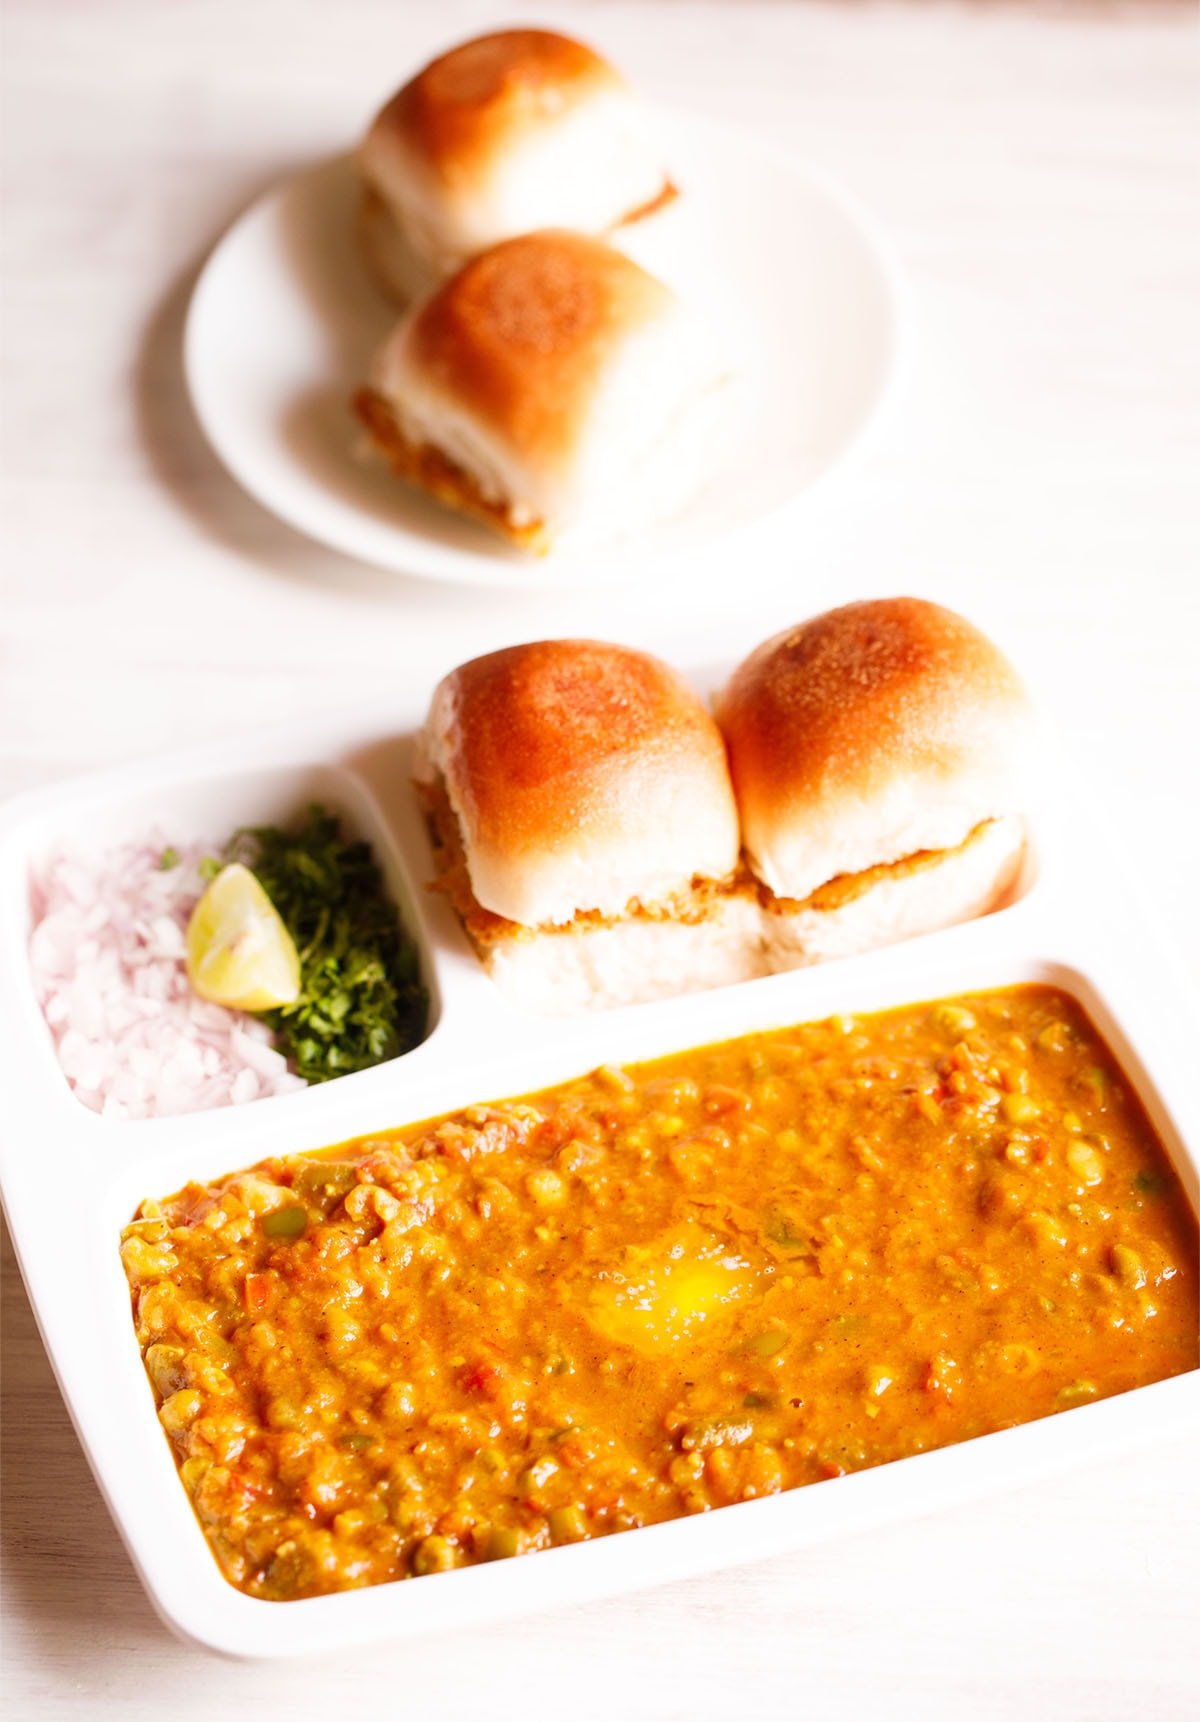
42. Serve piping hot Bhaji topped with a bit of butter paired with the lightly toasted pav and a side of finely chopped onions, coriander leaves and lemon wedges.
How to make Instant Pot Pav Bhaji
This is an easy and quick way to prepare the Pav Bhaji Recipe, using an electric pressure cooker or Instant Pot.
There are times when I make Pav Bhaji in the Instant Pot. Thus, sharing the same here as well. The best thing about this method is that apart from being easy, it saves time as well. When you have unexpected guests or are in a hurry, go for this procedure.
Obviously, the cooking method has to be different when using an Instant Pot. Unlike the street-side stalls, where it is made on a very large tawa (flat griddle), you can cook everything together in the Instant Pot to make it quicker.
Ingredients
2 to 3 tablespoons butter, salted or unsalted
½ teaspoon cumin seeds
½ cup finely chopped onions
2 teaspoons Ginger Garlic Paste
1 teaspoon chopped green chilies
2 cups chopped tomatoes
⅓ cup chopped capsicum
2 cups chopped potatoes
¾ to 1 cup chopped cauliflower
¾ cup chopped carrots
¼ cup chopped french beans, optional
½ cup green peas, fresh or frozen
½ teaspoon turmeric powder
1 to 1.5 teaspoons kashmiri red chilli powder
1.25 cups water
salt as required
2 tablespoons Pav Bhaji Masala
1 to 2 tablespoons butter – to add later
2 tablespoons chopped coriander leaves (cilantro)
To Serve With Bhaji
12 pav (dinner rolls) or as needed
3 to 4 tablespoons butter – for toasting pav
1 lemon or lime, chopped in wedges
1 onion – medium to large, finely chopped
3 to 4 tablespoons chopped coriander leaves – for garnish
2 to 3 tablespoons butter – for topping, add more for a richer version
Method
Prep Vegetables
1. Firstly rinse all the vegetables. Peel the veggies which need peeling. Chop all the veggies and keep them ready.
You can add your choice of veggies. I have used a mix of potatoes, cauliflower, carrots, french beans, peas and capsicum.
Chop the carrots, beans, cauliflower, potatoes in small cubes or pieces so that they get cooked faster.
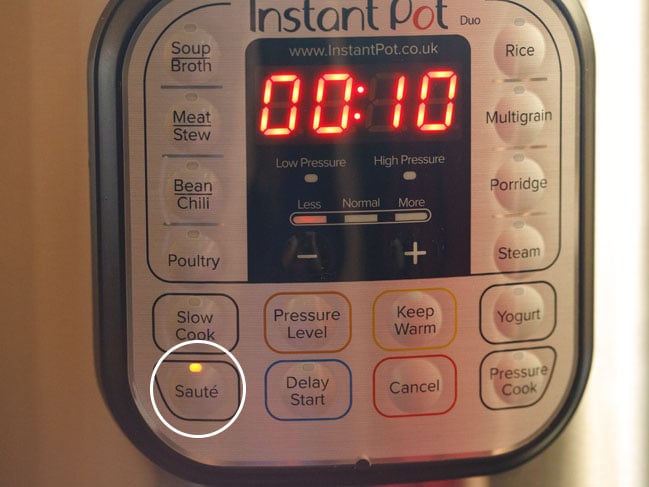
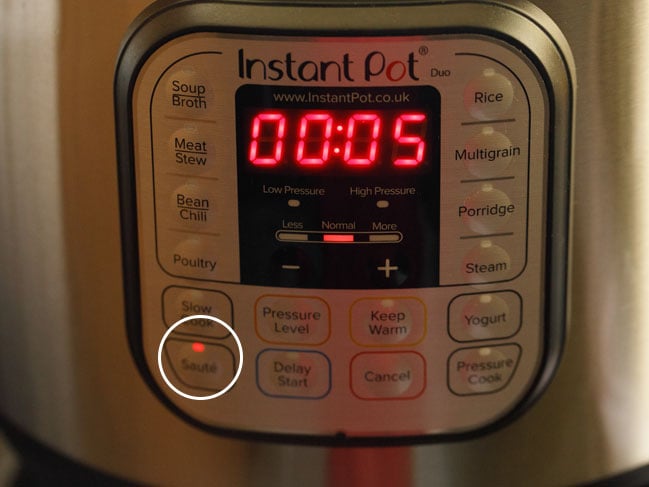
2. Switch on the instant pot. Press the saute button on less mode.
Sauté Onions, Tomatoes, Veggies
3. Add 2 to 3 tablespoons butter in the IP steel insert.
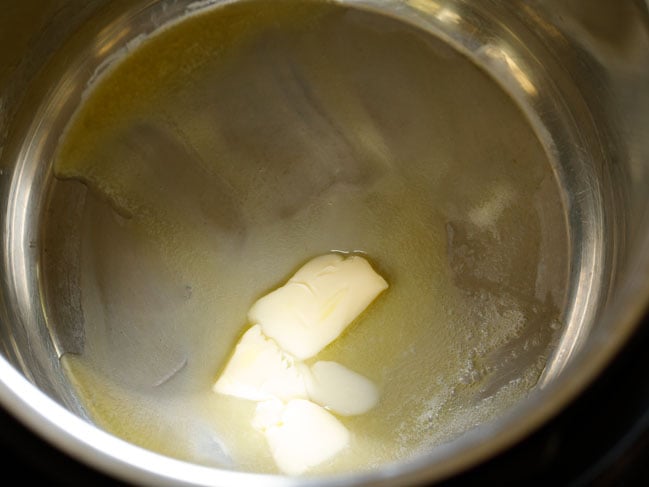
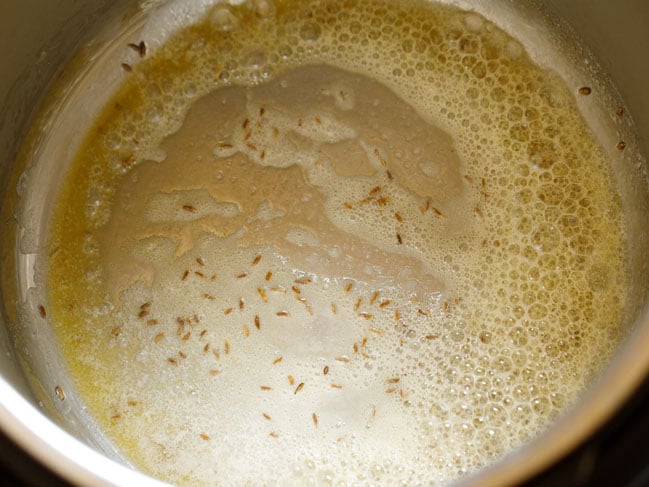
4. When the butter melts, add ½ teaspoon cumin seeds and let them splutter and change color.
5. Then add ½ cup finely chopped onions.
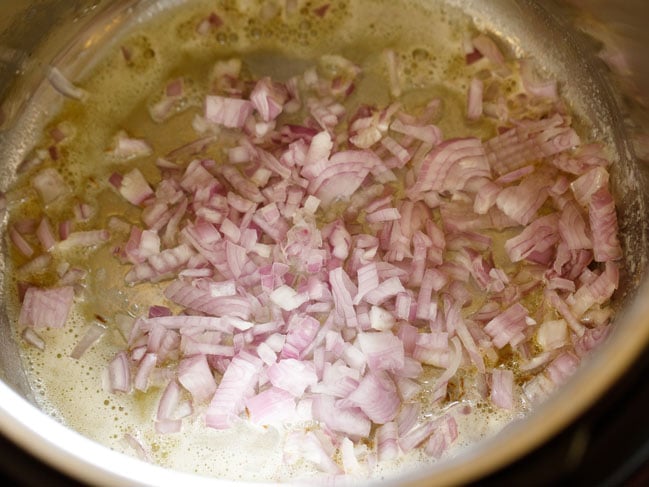
6. Sauté onions till they soften and turn translucent using the ‘less’ or ‘normal’ mode of the sauté option in the Instant pot.
7. Next add 2 teaspoons ginger-garlic paste and 1 or 2 chopped green chillies.
8. Stir and sauté for a few seconds until the raw aroma of ginger-garlic goes away.
9. Then add 2 cups chopped tomatoes and ⅓ cup chopped capsicum (green bell pepper). Sauté for 1 to 2 minutes.
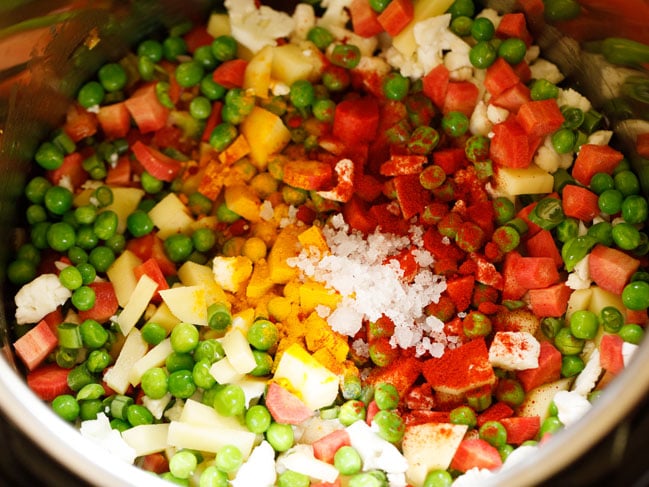
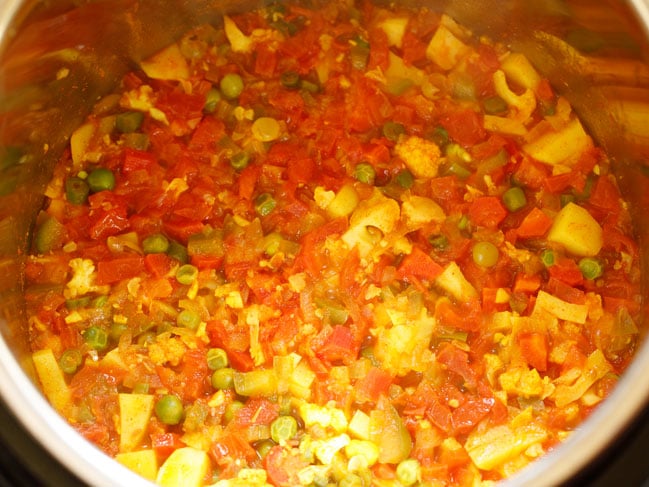
10. Add the chopped veggies and green peas.

11. Add ½ teaspoon turmeric powder and 1 to 1.5 teaspoons Kashmiri red chilli powder. If using any other red chilli powder or cayenne pepper, then you can add less of it.
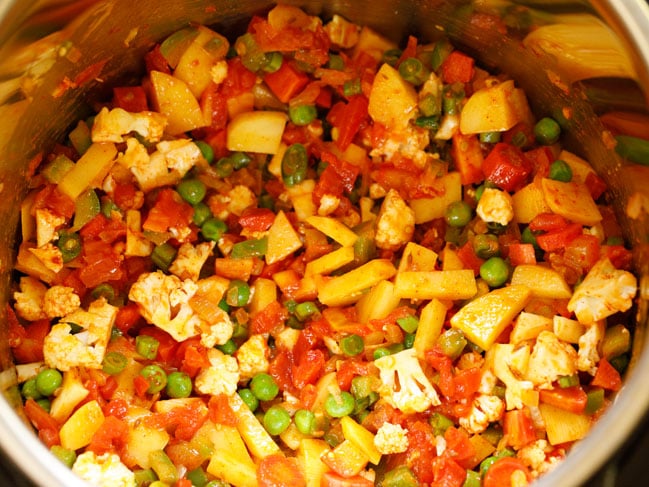
12. Mix everything very well. Deglaze while mixing so that any ingredients stuck at the bottom of the pan is removed. The moisture from the vegetables helps in deglazing.
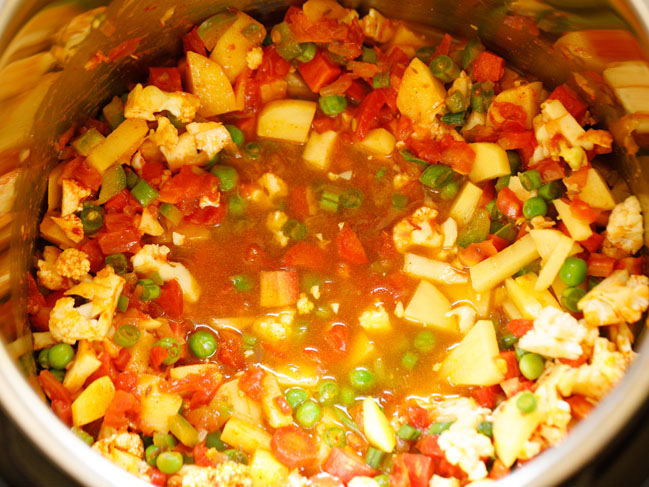
13. Add 2 cups of water. Stir again. Deglaze if required.
Pressure Cook Bhaji
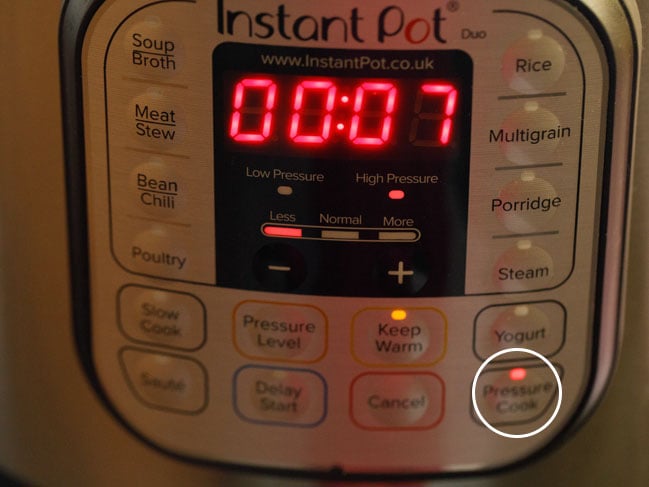
14. Press the cancel button. Now press the pressure cooker/manual button and set time to 7 minutes on high pressure.
15. When the beep sound is heard and the pressure cooking is complete, do a quick pressure release (QPR). When all the pressure is released, open the lid.
16. Using a napkin or oven mittens, remove the steel insert from the instant pot. Place it on your kitchen counter. With a potato masher, begin to mash the cooked vegetables.
Mash very well. You can even use an immersion blender and puree the veggies to a semi-fine consistency.
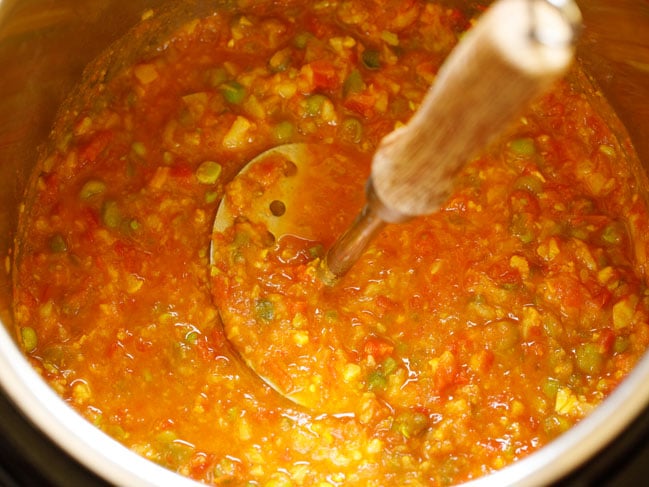
17. Now add 2 tablespoons pav bhaji masala and 1 to 2 tablespoons butter. You can skip the butter if you want. Mix very well.

18. Place the steel insert pan in the IP. Press the cancel button and then press the sauté button on normal mode. Set the timer to 3 to 5 minutes or more.
19. Simmer the bhaji for a few minutes, till it thickens a bit. Stir often, so that the bhaji does not stick to the bottom. If the bhaji looks very thick, then add some water.
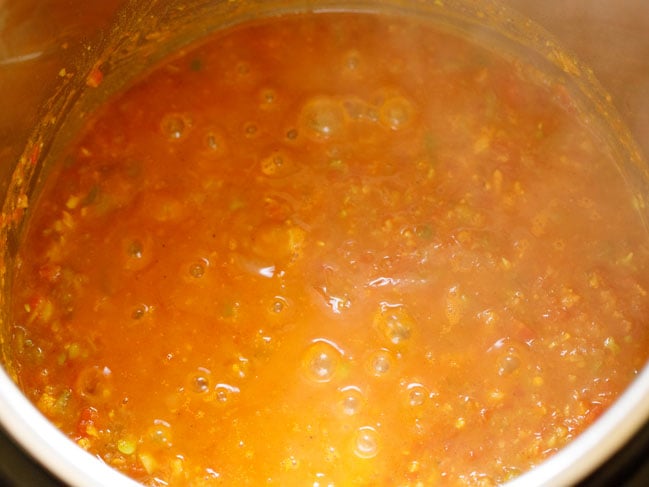
20. Simmer till you get the desired consistency.
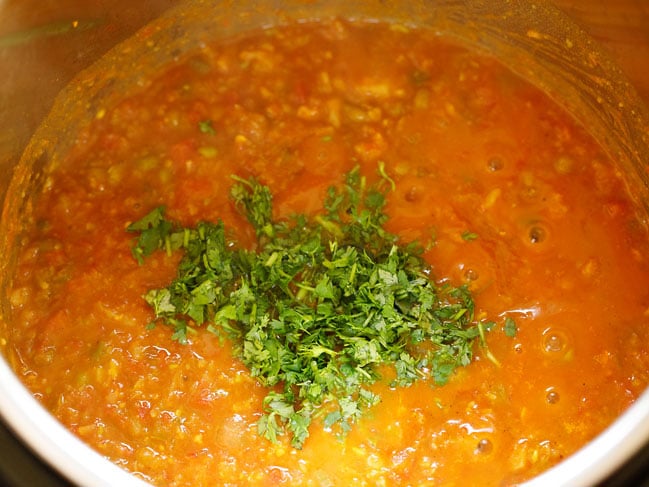
21. Sprinkle 2 tablespoons chopped coriander leaves. Mix very well.
Do check the taste and add salt, butter, Kashmiri red chili powder or pav bhaji masala if required. Cancel and keep the IP mode on warm.
Pan Fry Or Toast Pav
22. For the pav, heat a tawa or griddle and melt some butter on it. Place sliced pavs (dinner rolls) on it.
23. Let the pav soak the butter and become warm. If you want you can even lightly toast the pavs.
24. Serve hot Instant Pot bhaji topped with some butter paired with lightly toasted pav and a side of finely chopped onions, coriander leaves and lemon wedges.
Serving Suggestions
Whether you choose to make Pav Bhaji recipe in a traditional way or using the Instant Pot, you will have to eventually serve it in a few ways to make the whole thing become a tasty experience. Serving ways are:
- Transfer the bhaji in a bowl and top with some cubes of butter. Add more or less, as you prefer.
- Add some finely chopped onions, finely chopped fresh coriander leaves and lemon wedges on the side. You can even sprinkle these directly as well. If doing so, mix them well.
- You can then proceed to enjoy the jazzed-up bhaji with butter toasted pav. To lighten up your palate, you can consider serving Pav Bhaji with a cooling Cucumber Raita.
Expert Tips
- Cook veggies: I cook the veggies in a pressure cooker for the stove-top recipe. A pan or steamer pan can also be used instead.
- Taste: The end taste and color of the bhaji will differ depending on the quantity of veggies. For instance, more carrots in the bhaji means it’ll have a mild sweet flavor. Capsicum should not be missed, as it really brings in a good taste.
- Spices: Add more or less quantities of green chilies, turmeric powder, red chili powder, etc. according to how you prefer the bhaji. To make the bhaji really spicy, add more red chili powder or use a spicy pav bhaji masala powder.
- Pav Bhaji Masala: It is paramount that you use good quality pav bhaji masala for the bhaji. So, either opt for homemade or a trusted brand. You must also always avoid using rancid pav bhaji masala. It has to be fresh.
- Vegan and gluten-free options: If you don’t want to add butter, then you can also make the recipe with a neutral tasting oil or vegan butter. While serving too, use gluten free bread or pavs.
FAQs
Usually cauliflower, potatoes, carrots, peas, capsicum and French beans are added. Street side ones don’t have carrots in them. But you can add them in your homemade version.
Remember to just keep quantity of cauliflower less as compared to the other veggies.
What you can’t add – eggplant/brinjal, radish, corn, okra/lady’s finger, yam or green leafy veggies. Although, you can include cabbage, broccoli, zucchini, pumpkin. However, these are not added in the traditional street versions.
The bhaji that is served in restaurants has a bright orange or red color. Homemade bhaji usually does not have this color. I have heard about some street vendors adding artificial color to the bhaji.
To get the red color naturally, you can either make a red chili paste or include the mild Kashmiri red chili powder.
To make Red chilli paste – deseed 3 to 4 Kashmiri dried red chilies and soak in hot water for half an hour. Then, drain and grind to a fine paste with some of the water used for soaking.
You can use 2 teaspoons garam masala powder and 1 teaspoon amchur (dried mango powder) as an alternative to pav bhaji masala.
I will always vouch for the homemade pav bhaji masala. However, if out of stock, I trust the Indian brands Everest, Badshah, Pure and Sure for their pav bhaji masala.
The bhaji (veggie gravy) is traditionally had with soft pavs (bread rolls). The hot bhaji is topped with a few butter cubes and coriander leaves.
Along with this, add a side of chopped onions, squeeze some lemon juice in the bhaji, mix and have it with morsels of the pav. You can enjoy it as a lunch or dinner meal, or as an evening snack.
While the street style variant has humongous amounts of butter, which is served with pavs made of maida (all-purpose flour); you can customize and make a healthier dish at home.
Add less butter or use oil for the bhaji. Opt for whole wheat pavs and lightly toast them sans any fat.
Pav Bhaji Variations
There are many variations of making this snack. The bhaji remains the same in most variants and some more ingredients or spice blends are added.
- Paneer Pav Bhaji: Here, grated paneer or cooked paneer cubes are added on the bhaji.
- Cheese Pav Bhaji: In this, the bhaji is generously topped with grated processed/mozzarella/cheddar cheese.
- Jain style: This is made without onions, garlic and potatoes. Plantains (green, raw bananas) are added in place of aloo.
- No onion, no garlic style: In this, the bhaji is made without any onion or garlic. Thus, is satvik.
- Kala Pav Bhaji: The very regional kala masala or goda masala is added in the bhaji in this one. This results in the color of the dish, hence, also the name black Pav Bhaji. To make this interesting version, add 1 teaspoon kala masala or goda masala while adding the pav bhaji masala to the mashed veggies.
- Khada Pav Bhaji: This is one of the noteworthy variations with chunky, whole veggies and not mashed.
- Pav Bhaji Fondue: This is a fusion way of serving the Pav Bhaji recipe in many restaurants featuring fancy menus. They put the bhaji in a fondue bowl which is accompanied with bite-sized pav pieces.
- Kolhapuri style: This is a really fiery, hot bhaji made with the super spicy Kolhapuri masala or onion garlic masala (kanda lasun masala).
- Punjabi style: As obvious by the name, this is a robust version, where a lot more spice powders and butter is added.
- With mushrooms: You can turn the bhaji into a more umami version by adding some button mushrooms in the bhaji along with the rest of the lot. In this, make sure to add mushrooms after sautéing the onions, tomatoes, etc. Also, sauté the mushrooms till all the moisture evaporates. Then, add capsicum and other ingredients.
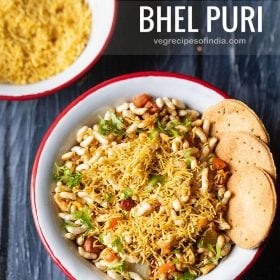
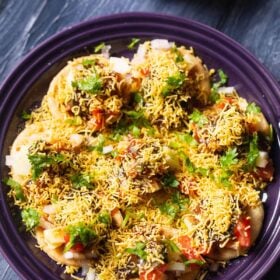
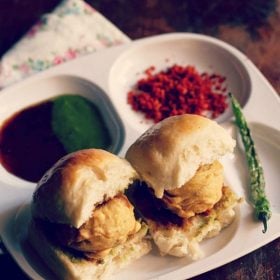
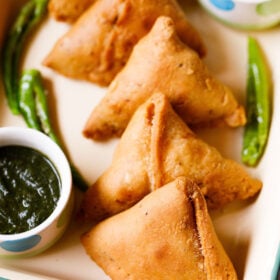
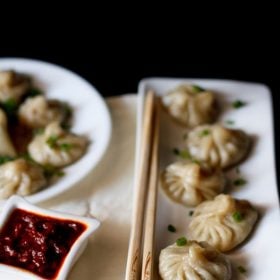
More Mumbai Street Food Recipes To Try!

Street Food Recipes
Street Food Recipes
Street Food Recipes
Maharashtrian Food
Please be sure to rate the recipe in the recipe card or leave a comment below if you have made it. For more vegetarian inspirations, Sign Up for my emails or follow me on Instagram, Youtube, Facebook, Pinterest or Twitter.

Mumbai Pav Bhaji Recipe
Ingredients
For making bhaji (vegetable gravy)
- 3 potatoes (medium-sized) – 250 grams
- 1 to 1.25 cups chopped cauliflower – 120 to 130 grams
- 1 cup chopped carrot
- 1 cup green peas – fresh or frozen
- ⅓ cup chopped french beans – 12 to 14 french beans – optional
- 2.25 to 2.5 cups water – for pressure cooking veggies
Other ingredients
- 3 tablespoons Butter – salted or unsalted
- 1 teaspoon cumin seeds
- ½ cup finely chopped onion or 1 medium to large onion
- 2 teaspoons Ginger Garlic Paste or 1.5 inch ginger & 5 to 6 medium garlic cloves crushed in a mortar
- 1 teaspoon chopped green chilies or serrano peppers or 1 to 2 green chilies
- ½ cup finely chopped capsicum or 1 medium sized capsicum (green bell pepper)
- 2 cups finely chopped tomatoes (tightly packed) or about 2 to 3 large tomatoes
- 1 teaspoon turmeric powder (ground turmeric)
- 1 teaspoon kashmiri chilli powder or freshly ground 3 to 4 soaked dry kashmiri red chilies
- 2 to 3 tablespoons Pav Bhaji Masala – add as required
- 1.5 to 2 cups water or the stock in which the veggies were cooked, add as needed
- salt as required
For Instant Pot Pav Bhaji
- 2 to 3 tablespoons Butter – salted or unsalted
- ½ teaspoon cumin seeds
- ½ cup finely chopped onions or 1 medium to large onion – 50 to 60 grams
- 2 teaspoons Ginger Garlic Paste or 1.5 inch ginger and 5 to 6 medium garlic cloves crushed in a mortar
- 1 teaspoon chopped green chilies or serrano peppers or 1 to 2 green chillies
- 2 cups chopped tomatoes or 3 large tomatoes – 300 grams
- ⅓ cup chopped capsicum (green bell pepper)
- 2 cups chopped potatoes or 3 medium or 2 large potatoes – 250 grams
- ¾ to 1 cup chopped cauliflower – 100 grams
- ¾ cup chopped carrots or 1 medium to large carrot – 100 grams
- ¼ cup chopped french beans – optional
- ½ cup green peas – fresh or frozen
- ½ teaspoon turmeric powder
- 1 to 1.5 teaspoons kashmiri red chilli powder or ½ to 1 teaspoon cayenne pepper or paprika
- 1.25 cups water
- salt as required
- 2 tablespoons Pav Bhaji Masala
- 1 to 2 tablespoons Butter – to be added later
- 2 tablespoons coriander leaves (cilantro)
Instructions
Cooking veggies
- Rinse, peel and chop the veggies. You will need 1 cup chopped cauliflower, 1 cup chopped carrot, 3 medium sized potatoes (chopped) and ⅓ cup chopped french beans. You can also add veggies of your choice.
- Add all the above chopped veggies in a 2 litre pressure cooker. Also add 1 cup green peas (fresh or frozen).
- Add 2.25 to 2.5 cups water.
- Pressure cook the veggies for 5 to 6 whistles or for about 12 minutes on medium flame.
- When the pressure settles down on its own, open the cooker and check if the veggies are cooked well. You can even steam or cook the veggies in a pan. The vegetables have be to cooked completely.
Sautéing onions
- Heat a pan or kadai. You can also use a large tawa. Add 2 to 3 tablespoons butter. You can use amul butter or any brand of butter. Butter can be salted or unsalted.
- As soon as the butter melts, add 1 teaspoon cumin seeds.
- Let the cumin seeds crackle and change their color.
- Then add ½ cup finely chopped onions.
- Mix onions with the butter and saute on a low to medium flame till the onions translucent.
- Then add 2 teaspoons ginger-garlic paste. You can also crush 1.5 inch ginger and 5 to 6 medium garlic cloves in a mortar-pestle.
- Mix and saute till the raw aroma of both ginger and garlic goes away.
- Then add chopped green chilies. Mix well.
Sautéing tomatoes
- Now add 2 cups finely chopped tomatoes. Mix very well.
- Then begin to sauté tomatoes on a low to medium heat.
- Saute till the tomatoes become soft and mushy and you see butter releasing from the sides. This takes about 6 to 7 minutes on a low to medium flame. If the tomatoes start sticking to the pan, then sprinkle some water and mix well.
- When the tomatoes have softened, then add ½ cup finely chopped capsicum (green bell pepper). Sauté for 2 to 3 minutes. If the mixture starts sticking to the pan, then you can sprinkle some water. You don’t need to cook the capsicum till very soft. A little crunch is alright.
Sautéing ground spices
- Add 1 teaspoon turmeric powder and 1 teaspoon kashmiri red chilli powder.
- Then add 2 to 3 tablespoons pav bhaji masala. mix very well.
Adding cooked vegetables
- Add the cooked veggies. Add all of the stock or water from the pressure cooker in which the veggies were cooked. Mix very well.
- Then season with salt as per taste.
- With a potato masher, begin to mash the veggies directly in the pan.
- You can mash the veggies less or more according to the consistency you want. For a smooth mixture mash more. For a chunky pav bhaji, mash less.
- Keep on stirring occasionally and let the bhaji simmer for 8 to 10 minutes.
- If the bhaji looks dry and then add some more water. The consistency is neither very thick nor thin.
- Do stir often so that the bhaji does not stick to the pan. When the pav bhaji simmers to the desired consistency, check the taste. Add salt, pav bhaji masala, red chili powder or butter if required.
- When the bhaji is simmering, you can fry the pav so that you serve the pav with hot bhaji. Slice the pavs.
Making Instant Pot Pav Bhaji
- Switch on the instant pot. Press the sauté button on less mode. Add 2 tablespoons butter in the ip steel insert.
- When the butter melts, add cumin seeds and let them splutter and change color. Then add finely chopped onions and sauté onions till they soften.
- Next add the ginger-garlic paste and green chillies. Mix and sauté for a few seconds till the raw aroma of ginger-garlic goes away.
- Then add chopped tomatoes and chopped capsicum. Sauté for 1 to 2 minutes.Add the chopped veggies and green peas.
- Add ½ teaspoon turmeric powder and 1 to 1.5 teaspoons kashmiri red chilli powder. If using any other red chili powder or cayenne pepper, then you can add less of it. Also, add salt as per taste.
- Mix everything very well. Add water and stir.
- Press the cancel button. Now press the pressure cooker/manual button and set time to 7 minutes on high pressure.
- When the beep sound is heard and the pressure cooking is complete, do a quick pressure release (qpr). When all the pressure is released, open the lid.
- Using a napkin or oven mittens, remove the steel insert from the instant pot. Place it on your kitchen counter.
- With a potato masher, begin to mash the cooked vegetables. Mash very well. You can even use an immersion blender and puree the veggies. Just make a semi-fine puree.
- Now add 2 tablespoons pav bhaji masala and 1 to 2 tablespoons butter. You can skip the butter if you want. Mix very well.
- Place the steel insert pan in the IP. Press the cancel button and then press the sauté button on normal mode. Set the timer to 3 to 5 minutes or more.
- Simmer the bhaji for a few minutes, till it thickens a bit and you get the desired consistency. Stir often, so that the bhaji does not stick to the bottom. If the bhaji looks very thick, then add some water.
- Sprinkle 2 tablespoons chopped coriander leaves. Mix very well. Do check the taste and add salt, butter, kashmiri red chili powder or pav bhaji masala if required. Cancel and keep the IP on warm mode.
Toasting pav (dinner rolls)
- Heat a skillet or a shallow frying pan. Keep the flame to a low and then add butter.
- When the butter begins to melt, add a bit of pav bhaji masala. You can skip pav bhaji masala if you want.
- Mix the pav bhaji masala very well with a spoon or spatula.
- Then place the pav on the butter.
- Rotate the pav all over the melted butter so that the pav absorbs the butter.
- Now turn over the pav and rotate them on the tawa so that the second side absorbs the butter. Add more butter if required.
- You can turn over and toast them more if required. Then remove in a plate and keep aside.
Serving suggestions
- Take the bhaji in a serving plate or a bowl. Top it up with one to two cubes of butter. You can add more butter, if you like.
- Place a side of finely chopped onions, lemon wedges and finely chopped coriander leaves. Or you can sprinkle onions, coriander leaves and lemon juice directly on the bhaji.
- Serve bhaji with the lightly pan fried and buttered pav. Pav bhaji is topped with chopped onions, coriander leaves and the lime or lemon juice is squeezed on the bhaji while eating.
Storage and Leftovers
- Refrigerate only the bhaji (vegetable gravy without any toppings of onions, coriander and lemon juice) in the refrigerator for 1 to 2 days.
- Reheat in a small pan. If the bhaji looks thick, mix in some water to loosen it a bit and reheat.
Video
Notes
The vegetables that are usually added are sturdy veggies like cauliflower, potatoes, carrots, peas, capsicum and french beans. In the pav bhaji that one gets in the streets of Mumbai, carrots are not added. But when you make at home, you can add carrots. You can also simply make bhaji with any of these veggie proportions but always keep the proportion of cauliflower less than the other veggies. Refrain from using veggies like okra, eggplants, radish, corn, yam or green leafy vegetables. Cabbage, broccoli, zucchini, pumpkin are some unique options that you can consider to add, but the traditional version does not include these vegetables. 2. Cooking veggies
In the recipe I have used a pressure cooker for cooking the vegetables. You can also steam or cook them in a pan on the stove-top. 3. Taste and Flavor
Depending on the quantity of these vegetables, the final taste and color of the bhaji will be different. Example, if you add more carrots, the bhaji will have a mild sweeter taste. However, do add capsicum (green bell pepper) as it gives a really good taste to the bhaji. 4. Spicing
The spice powders can be easily adjusted to suit your taste. So add them less or more according to your preferences. 5. Vegan option
If you don’t want to add butter, then you can also make the pav bhaji recipe with a neutral tasting oil or a vegan butter. 6. Gluten-free options
Make the bhaji as is following the recipe and serve with gluten-free dinner rolls or bread. 7. Pav Bhaji Masala
Use good quality pav bhaji masala or make it at home following my recipe – Pav Bhaji Masala 8. Do not have pav bhaji masala?
Not to worry. Try this option and it works so well, that no one will know the difference. Swap pav bhaji masala with 2 teaspoons garam masala and 1 teaspoon amchur (dry mango powder).
Nutrition Info (Approximate Values)
This Pav Bhaji recipe from the archives was first published in February 2010. It has been updated abd republished on November 2022.

I tried this recipe for the first time yesterday for my husband and I. He enjoyed it a lot, very tasty and recipe was very easy to follow. Will definitely make again, thanks for sharing your recipes!
I tried this recipe for the first time yesterday, and it turned out SO good!! I will definitely use this again. Thanks for sharing your recipe!
Wonderful and thanks a lot for sharing this super feedback. Most welcome.
Yum yum yum! Will be making this again!
Simply amazing and taste is exactly like Pav Bhaji from Mumbai streets. My kids loved it and have asked me to make again. Thanks so much for this awesome recipe.
Great and thanks a lot for this super feedback. Most welcome.
Step by step photos are super useful. Me and my sister enjoyed dish a lot. Thank you!
Great and thanks for sharing the feedback and also for the rating.
This recipe makes my mouth full of water. I am going to try it for sure
What brand pav baji masala is good?
Btw – love your recipes
Earlier I have used Everest and Badshah and they were good. Thanks for the feedback on the recipes.
Very good presentation of the recipe. Will try it today.
Tried this recipe today and it was absolutely delicious! Your website is a blessing for amateur cooks like me. I’m totally in love with it. Thanks a ton, ma’am! Keep up the good work. 🙂
thank you so much radhika. so glad to read your comment. welcome and wish you all the best.
This is so good and so easy. Have made this a few times, right now my lips are burning because i was pouring the red chilli from a bag and a lot came out, maybe 1/4 cup or more. So its hot but still very good. Added extra ghee to absorb the chili spice.
1/4 cup is a lot of red chilli powder. adding some mashed potatoes will reduce the heat and spiciness.
thank you for the feedback and rating. happy cooking.
Super awesome tried at party for 20people. Great taste! Kudos
This recipe’s sooo good!
I really appreciate Dassana’s efforts.
After few failed tries, I just started cooking again, and this time it seems so much easier all thanks to this blog.
Just a side note, this recipe was just a bit too spicy (hot) for me, so for anyone with low tolerance for spice, go down on ginger& garlic paste and red chilli powder
Happy cooking everyone !
Hi Dassana, all your recipes are awesome and so delicious. I always follow and do all your recipes and recommend to my peers about your website.
Thank you for posting in detail pictures helps to jump into the main cooking part without waiting
Surya
Can the recipe be doubled for 11 people?
Yes
Hi,
I have tried your Pav Bhaji, paneer tikka , veg pizza recipe. All the recipes are awesome and your detailed description with photos video and separate instructions make it easy to prepare. Thanks a ton and keep sharing new recipes. Cheers
thanks ellvis for the feedback on these recipes. welcome and happy cooking.
I have been an avid follower of your website. All the recipes are easy to follow and come out amazing. This is my go to method of making delicious pav bhaji. Thank you.
welcome and thanks for sharing this feedback as well as rating on pav bhaji recipe. glad to know.
I liked it very much
Is there any app so i can try every recipe
thanks. we do not have any app.
Lovely and delicious recipe. Explained very well.
Thanks for the measurements.
thanks manju for the feedback and welcome.
I like ur way of telling it’s very useful for the beginner’s
thanks.
I think this is the best Indian veg food blog on the web! Thanks for the lovely recipes Dassana.
thank you shalmali ????
Hello, we love your recipes. They are yummy, quick to make and simple. We wish w could get non-vegetarian recipes also from your website!! You might have to change the name from veg recipes of India though!! Thanks, Meheroo and Manisha
thanks a lot meheroo and manisha. wish you both all the best.
I am definitely not a great cook. But thought of getting out this recipe for Holi on my unsuspecting family. Turned out to be a amazing hit. I finally ran out of pav.
The perfect recipe I was looking out for.
thanks geetha for this lovely feedback. glad to know. happy cooking ????
Your recipes are my life-saver! Thank you making all the recipes seem so easy with your step-by-step pictorial graphics so that even a novice like myself can churn out great dishes…I have tried so many including the pav bhaji and have loved them all.
Welcome Sonal. Glad to know that step by step recipes are helping you. Thanks for sharing your positive feedback on pav bhaji and other recipes.
Instead of chopping the tomatoes, can I grind it into a paste?
Fathima, yes you can.
I’m making this recipe today and realized that I do not have a pressure cooker, as the recipe requires. Can you recommend whether I should boil on the stove or use a slow cooker? Look forward to trying the recipe as all the comments say it’s delicious!
manasa, you can easily boil the veggies with water just about covering them in a pan or pot on a stove. cover the pan or pot with a lid. with slow cooker, it will take more time. so i would suggest to use a stove. you can also steam the veggies. peel and chop the veggies. keep in a steamer pan or rack in a pan or pot. add some water in the pan. cover and steam.
Hi! Last week I made pani puri and masala puri which turned out very well! My grand babies enjoyed! This week made pav bhaji they had a good time! Thank you! The red chutney and the green were really delicious!
Welcome Nancy Ji. Glad to know this. Thanks for your positive feedback on recipes.
Must try receipe, i tried this receipe at home yesterday….I do not like pav bhaji much….but it turned out delicious…the pictorial presentation makes it very easy to understand. Taste was wonderful and will definitely make it again…everyone at my home liked it !
Thanks
welcome neha. glad to know that you liked this version of pav bhaji recipe.
Bhaji came out very well. I have become a fan of “vegreceipesofindia” site 🙂
Tried Dal fry, dal palak, rice kheer etc… All came out well.
As all the recipes are shown in step by step pic which make it easy to prepare.
Thanks a lot for all the wonderful recipes.
Welcome Radhika. Thanks for your kind words and positive feedback on recipes. Glad to know that so many recipes you have tried from blog have come out well.
Hello ma’am why ur app is not working..?
Need ur help please help me out as I love this app
Ruchika, We have removed the App. However all the recipes are posted in the website.
I was so excited when I got this morning to find this recipe as one of my “alerts”! We will be going to France at the end of November to spend two months with our daughter and her husband ( who grew up in Mumbai) and their little ones. This is one of my daughter’s favorite things to eat when they visit his family there. The recipe/instructions are excellent. I make a my own bread/rolls, etc., so I have that part down pat!
nice to know elizabeth. do try the recipe there and i hope it turns out great and your daughter and her family likes it.
can we add homemade butter
definitely, you can add homemade butter.
Gave it a try today. Came out really well. Thanks for the awesome recipe.
Welcome Rithika. Glad to know this.
Capsicums are not a must in bhaji. My mum never added them and ive always enjoyed it that way. Highly unlikely the traditional recipie has capsicum. Other than that dish looks mouthwatering
in mumbai pav bhaji, capsicum is always added. some amount of capsicum gives a very good taste. i have made pav bhaji without capsicum too, but have always felt some flavor and taste missing if they were not added.
This is one my favourite dish as well as recipe . Thnx for giving us superb recipes .
Welcome Disha
Do you notice a difference between steaming the veggies first before you add the masala versus steaming the veggies with the masala and then just mashing everything to the consistency of pauv bhaji?
Gita, there is a difference.
HI dassana,
I am big fan of your recipes. I have tried this pav Bhaji & It was so yummy. I also made some red garlic chutney & chopped onions on top & that really spiced things up.
I also appreciate the fact that you always reply to all comments & keep your site always updated. Request you to share more reciepes to make quick fixes from leftover food from evening since this is a big matter for lots of home-makers.
Best Regards,
Karishma
thank you karishma for this lovely feedback. red garlic chutney always peps up any dish. thats a good idea to serve it with pav bhaji. may be i should also give a try. i do have some recipes made with leftovers like leftover rice and dal. will try to keep your suggestion in mind and add some more recipes that can me made with leftover food.
Can’t wait to try this out! Been looking for a pav bhaji recipe!
I am in the US and have asked my MIL to get some pots/pans for me for cooking here on a gas stove. Do you recommend any brands? I have noticed that my subjis cook better in an aluminum karai. Do you recommend any good brands for a flat bottom aluminum karai. Do you have any other recommendations? Thanks in advance!
Welcome Shona. As far as possible avoid aluminium. use cast iron. they are much better for health and food cooks evenly. however maintenance is there but they last for a long time. for low maintenance you can use heavy steel kadai. cast iron pans from ‘lodge’ brand are good and they are easily available in US. so no need to buy from india. in india, you can get iron kadai and iron tawa for frying and making other curries or parathas. this iron kadai will be there in any good utensil shop or in a local market or sadar bajar. as such there is no brand for iron kadai. however there is one brand i purchased 2 kadai from amazon.in. it is zishta and their kadai were good.
As we get to hear pav bhaji we feel that spicy taste in our mind. This step by step recipe did the same. Thank you for sharing this delicious recipe.
Welcome Smita. Glad to know that you like the recipe presentation.
We can make this menu without cauliflower know?
cauliflower is one of the essential veggie used in mumbai pav bhaji. without cauliflower some taste will go away. but you can still make pav bhaji without cauliflower. but just that there will be slight change in the taste.
Thanks for the wonderful recipes.
I want to request You to please post an estimate of SALT also in dishes, at least the min required amount, that long be helpful, Thanks ??
welcome kanika. i do try to add the amount of salt in some recipes. but for most recipe i do not add as the preference for salt varies from person to person. though for any recipe having 3 to 4 servings, you can add 1/2 teaspoon salt first. then if you feel the salt is less, you can just add some more salt, like 1/8th to 1/4th teaspoon.
Hello Dasana, your above recipe demands for your name to be upgraded to Bara-anna, and the recipe itself is pure sola-anna. ! :-o) I don’t expect you remember me, but I wrote to you on March 14, 2015 because that was Pi day = 3.14 15, in the medu vada section. Anyway, I’ve been following many of your recipes, and have always had wonderful results. I’ve just finished dinner, and may I share some thoughts ? …..
1. I started late, and my wife came home from work, early, and the food was not ready – so she pouted, and had cornflakes and milk for dinner. But she did try my pavbhaji after an hour, and she liked it, so I am ecstatic !
2. I added a little beetroot, and it added some sweetness. ( I really don’t care much about the red color …). I also added 200cc of tomato juice, that I had left over after some sambar, 4 days ago. so I reduced the number of tomatoes and added less salt, because tomato juice has salt added to it. I added a whole bulb of fresh crushed garlic – only because I have too much garlic in my pantry …. I just reduced the onion somewhat. I added some MSG, because I add it to almost everything I make. I don’t know if it makes any iota of a difference. ;-D)
3. Finally, it’s nice to see you’re going strong, and your website still comes up number one, for me, on most indian vegetarian recipes ! My niece is a VP for Google, in Chicago, and she says the algorithm is so secret, even she has no idea. Best wishes for continued success, and sincere regards to Amit.
G Kulkarni Ji, I remember you clearly. Because very few readers write humorous comments which makes you laugh. Laughter is something which we are missing in present time. My hubby told me that in old times there used to be 16 anna in one rupee which he has further learn from his grand father. Its good to see that you experiment with food because thats what brings out the flavor which one wants. I believe even google does not know the real algorithm because its becoming more machine oriented. But they definitely favor sites which are liked by readers. So sharing good recipes not only generate good karma in form of readers love and support but also attracts google attention !!!
Wow that’s a great read between you both. I love your recipes and am 100% confident that it comes out well. This aspect of humor and good karma caught me bang on. Best wishes to you
thanks a lot rashmi. best wishes to you too.
i like ur recipes very much. plz share some microwave recipes.
nishtha, when i started the blog, i had shared some microwave recipes as i used to use it often. now for health reasons, i have stopped using microwave completely. hence i am not adding any microwave recipes on the blog.
Hi dassana,
I love all ur receipes and they turned up so good . My family likes it too . I m known in my street line for my Pav Bhaji ( made in ur way :)) i always ask them just to check ur website(those who can).
Though i have made few changes-
1) i add haldi after frying onion in butter.
2) Then ginger garlic paste . after adding tht i wait for few mins and add garam masala , kashmiri lal mirch. After cooking this for a min i add tomatoes and salt.
3) Rest steps i follow urs
Thnx alot to u for such a great website , receipes. u r a boon 🙂
thank you mini and also thanks for sharing your experience and the changes you have made. nice to read your comment. thanks again.
Very nice..I made it at home & everybody love it
thanks chaitali for sharing positive feedback.
Super recipe
Hello dassana.. Just love ur recipes.. They are awesome! One question,can i replace cauliflower with cabbage if i dont hv cauliflower? Wl it make any difference in taste?
taposhi thanks, caulifower has a different texture hence it gives a nice flavor and texture to pav bhaji. so use cauliflower is possible, hope this information helps you. do let us know once you try the pav bhaji.
Firstly m biggest fan of urs..ur recipe is awesome….Please share the recipe of lithhi chokaa pls pls pls
pleased to know this sandhya, have taken your request for lithhi chokaa recipe on our file. do allow us some to post the recipe thanks.
i always fllw ur recipe whle i m in kitchen
pleased to know this thank you barnita 🙂
its awsme, i jst lv ur recipe, its so simple and easy to get the idea how to cook the particular item. so hlpfl….
thank you barnita for your kind and positive words 🙂
I’m just a big fan of ur recipes and u…
Thnx for all the awsome tastes, which I learn from us website..
Tnxn alot..
welcome bhagya shree. thanks for your kind words.
Good this like U food
Can I just say you’re my goto person/site for veg recipes! You make it really simple to cook and everything I’ve tried from paneer tikka masala to fried rice just turned out fantastic! I’ve only been cooking for about a year now and I’m enjoying it all thanks to the ease with which you describe them. Thank you with all my heart and the clean licked plates 🙂 Much love!
welcome ramya and thank you very much for this sweet feedback and appreciation.
I made this pav bhaji for my daughter’s birthday party for 50 people it was so tasty even I got only a little to eat. Your recipes are amazing. Can u post recipes for lunch box for adults as well as pre schoolers.
glad to know pooja. thanks a lot. there is already a category on tiffin box recipes. it includes both adults and kids lunch box recipes. you can have a look in your free time.
link – https://www.vegrecipesofindia.com/recipes/tiffin-recipes/
I’ve this twice, and it’s the best pav bhaji I’ve ever had. My kids love it too. Also made pav from your recipe and it turned out really good. Waiting to try more of your recipes 🙂
Thanks!
surely try safia and let us know thankyou for your kind and positive words :
hi Girl
Great steps for the recipe. Following it to the T.
Thank you so much !!
thankyou so much and you are always welcome.
I prepared it seeing ur blog it really came out well.. Every body liked it and Wil be preparing again ad again as I became perfect with this taste.. Thank u for ur help
Pleased to know this mamatha 🙂 thankyou for your kind and positive words. also you are always welcome.
Hey hi we can add little kashmiri laal mirch powder for red colour it comes out good n attractive too like street food
i know poonam. thanks for sharing the tip though.
i prepared it today, and every one liked it now its time to follow all your recipe and creat more delicacies, thank you so much for showing a very easy and fast way of cooking, it would be more helpful if you could provide cooking tips like pros and cons
?
thankyou prasad for your suggestion and for your kind words 🙂 will try working on the same and you are welcome.
Super recipe! Tried it today and it came out really well.
glad to know shashank and thanks for the feedback.
I’m going to make Pav Bhaji today eve for the first time n let’s c how it becomes, I liked the above pav bhaji recipe so I’m going to do the same, lets c, Wish me luck…
i hope the pav bhaji turned out good. happy cooking 🙂
Try adding a beetroot with the other vegetables while cooking them. You will get the red colour of the street vendors’ pav bhaji
thankyou for sharing your tip meenakshi would try making that way.
I am in Germany currently and craving for Indian food.. thought of pav bhaji and as always visited your site. It came out very well, thank you so much.My husband liked it a lot. I never go wrong with your recipes 🙂
One doubt – how to get that orangish-red colour?? No doubt the taste was awesome!
thanks vindhya. nice to know. i suspect the street vendors add color. but we don’t need to add any color. just grind some red chilies ( 2 to 3) and use the red chili paste. don’t add any red chili powder. the color will be orangish to red, depending on the type of red chilies used. pre soak the chilies in hot water for 30 minutes before grinding.
Hi
I tried this recipe and it was awesome, your all recipes r very easy n good, I follow your veg recipes n I simply love it
glad monika you like our blog recipes thankyou for your kind words 🙂
I made pav bhaji recipe tomorrow in the lunch..n it was my first time…n guess wat…it turned out super delicious n the best part…i made the pav bhaji masala powder at my home!!. Thanks for such a amazing recipe..
thats nice to know anjali. thank you 🙂
Thanks fr ir reciepe….bt one thing u missed is beet…v can put dat fr d colour
generally in mumbai pav bhaji beet is not added. apart from giving the color, beets also change the taste. will make the pav bhaji somewhat sweet. so i do not add beet.
Can we make dish without peas and cauliflower?
Thks
simran you could make pavbhaji without peas and cauliflower but major taste and flavor would be missing then.
Today i tried this paav bhaji recepie for the second time…. And it was yummmm… Thanks
thanks shweta for the positive feedback.
I made it today and it came awesome……… thanx a lot 🙂
thankyou shalini and you are welcome 🙂
The pav bhaji that is made by street vendors have a bright red tinge which makes the food quite attractive. Is there a possibility that the vendors secretly add red food colour? I am asking this question because when I followed your recipe, my guests commented that the red colour of the street pav bhaji was missing.
homemade pav bhaji won’t have the red color. i am not sure about the street vendors using red color, but i have seen some of them adding a red paste. which i thinks is red chili garlic ginger paste. so the red color could be due to the dry red chilies.
In My first trial of paav bhaji colour was not red… But this time i added more tomatoes along with red carrot and red chilli powder… And it was luking beautiful and tasting yummm..
the color depends on the type of red chili powder. some recipes also use red chili paste. with red chili paste the color is a deep red. adding more tomatoes and red carrots is a good and a healthy idea.
Just had an Indian curry party in my co., Japan, last friday. I had to cook. I followed your recipe. I made Rajma Masala and Sambar and served with Basmati rice. My japanese friends liked very much and planning to have another curry party. This time I plan to make pav bhaji. I have tamarind but no amchur. Can I use tamarind in place of amchur to get sour taste? It is not at all.easy to get indian ingredients in Japan.
By the way thanx a lot for ur recipe guide.
thats nice to know satish. happy cooking for colleagues. now coming to your query, tamarind can give a different kind of sour taste than amchur. i suggest to use lemon juice, instead of tamarind. just add a few drops of lemon juice to the pav bhaji, to give a slight hint of sourness. the sourness should be subtly felt. while serving of course, you can serve with some lemon wedges, so that the person can add more or less as per his/her choice.
I made it today and it came awesome
My guest liked a lot
Thanks a lot
pleased to know this neha 🙂 thankyou and you are welcome.
thankyo vijaya 🙂
Sir I always read ur recipe Before I start cooking n trust me I found my confidence double. But kindly reply me that when all vegees are pressure cooked. How much time I have to pressure cook it.or can I used boiled cauliflower or mutter in place of pressure cook?:-
thanks. you can cook all the veggies for 2 to 3 whistles, about 10 to 12 minutes. you can also use boiled cauliflower and mutter. but i do suggest to add some potatoes and carrots.
hi, i’m going to try pav bhaji on Sunday. let’s see. Fingers crossed
Made pav bhaji for the 1st time by following ur recipe… Trust me it was mindblowing….
thanks neha for sharing positive feedback.
Welcome to Mumbai thts wht ill say after trying this wonderful pav bhaji recipe of urzzz…loads of love to uuuu
thanks riya
Yummilaciuos!!! I made this last weekend..thanxz
welcome jerin
Hey! I made pav bhaji using ur recipe and had my own homemade pav bhaji masala
It turned out very nice, I’m especially happy because it was my first attempt at pav bhaji
thanks wardah
Very nice ……now i can make it easily
The beauty of this recipe is (as is the case with anything you present to your readers) lies in its simplicity (i’m sure we all had an ‘oh i didn’t know it was that easy!’ moment at some point in time when attempting to create your work) , secondly its versatility – the same bhaji could go with chapati as an accompaniment also and last not the least , the health benefits of having all these ‘colourful’ foods minus the scary angry-looking orange (food colouring i suspect) that gets added in restaurants. For those (like me) concerned about cholesterol etc skipping on butter makes it a very healthy dish actually. Good day and look forward to trying more things!
thanks anusha for your thoughtful comment.
Very good receipe
I tried and gets compliments
Thanks
welcome pihu. glad to know this.
I Wanted to know how to boil or cook the vegetables in the microwave
use a microwave safe glass bowl or pan with a lid. add chopped veggies in the bowl. cover them with water up to 2 inches. then cover with the lid. micro high for 10 to 12 minutes or more if required till the veggies are cooked. use a deep bowl, so that the water does not spill out while cooking. if the water dries up, then add more water.
Thnx dassana
welcome hina
i am very much excited to read and prepare in my home.
Very nice recipe
thanks pinkey
Nice to taste and made less in time.
thanks priti
Great
Excellent recipe (Pav Bhaji)tasty,delicious,palatable and mouth watering .
thanks yogesh
Thanks………..
Ekdam mast recipe v tasty…..
welcome kavita
My interest in cooking Indian food has doubled after following your recipe. I loved it!
thanks jenna. glad to know this.
Love all ur recipers Dassana…Thank you 😀
welcome sameera
i loved by knowing how to make this recipe thank you for showing.
welcome sushree
I tried this recipe.. Turned out very well. My family loved it. Thank u so much for ur recipes. Recent days I’m referring lots of recipes from ur blog. TFS
welcome padma. glad to know this.
very nicely explained…
Thank u for giving recipes of pav bhaji i want to open a stall of pavbhaji so its helpful to me to know all ingredients which added good taste to it and i wish i serve better to people who loves pav bhaji.
welcome kapil. glad to know that this pav bhaji post helped you.
I have made pav bhaji (at a friends recommendation) from this recipe several times. Its turned out great every time and to my surprise when I gave it to my 11 year old nephew with a lamb curry (I skipped the bread) he said it was the nicer one. Very clear
thanks margaret for sharing your experience. its a pleasant surprise to know that your nephew preferred the pav bhaji. because of much of our liking for food and taste, is from childhood eating habits.
My first attempt at pav bhaji and turned out pretty good because of this easy-to-follow recipe. Your blog has been immensely useful for me in the past as well. Thank you 🙂
welcome saloni. thanks for sharing positive feedback.
Thank you Dassana, there couldn’t be a more easier recipe. Pav bhaji came out yummy!
welcome anirban. glad to know this.
Thank you Dassana ji…its the best paav bhaji recipe i have ever come across…loved it so much
welcome simi. glad to know this.
it was nice very tasty. in one word simply superb easy recipe
thanks smitha ji
I like the simple way to make pav bhaji at home
thanks sweety
I like the recipe of Pav Bhaji. So i am going to try. No butter, no Pav Bhaji Masala, simple. Thanks.
welcome sarla
thanx a lot………….this will be a helpfull suugestion for me
welcome ruchika
Thanks a lot. …….I enjoyed real taste and aroma of all ingredients.
welcome praful
awesome pav bhaji recipe……… i like it. i prepare it at my home and every one praise it. thank you amit sir. i love this site very much as i learn many new recipies from here. thanks again .
welcome sarika. glad to know this. do try some more recipes.
Dassana i really love your website.i have a business and your website really very helpful for me . Thank you very much for creating a very good and useful website. Now you can start another website for non veg.
welcome monalisa. glad to know this. i only cook vegetarian food at home.
wow…………………, super website .cogatulations to you and to yourwebsite . fantastic your website
thanks
thank you,
gopi krishna.
welcome gopi krishna
very nicely explained this receipe i have tried at home and really good taste.
thanks nitin
di can I use other veggies to like carrots turnip etc…..plz tell because I want to make it tomorrow ……..I have already followed ur pav bhaji recipe and it comes out awsme….bt this time want to try other veggies too……
you can add carrots. they give a slight sweet taste. also turnips can be added. but add less turnips as they many change the taste.
Realy sooooo gooooood and easy to make less time consuming … i just want to ask one thing that which co pav bhaji masala u use in receipe so we can get the juhu pav bhaji taste.?
thanks smita. i use badshah pav bhaji masala.
luks yummy wud gv it a try
thnks
welcome.
thank u for this wonderful recipe.. it turned awesome and me n my husband both loved.. wan try again.
welcome swathi.
I like ur recipes.
These are really easy and amazing.
Thank you dassana thanx a lot…….
thanks a lot to you swati for your positive comment 🙂
I doesn’t know that I can prepare pav bhaji so well. The credit goes to u dassana .it just came out wow……thank u for the perfect recipe…
thanks leena for the feedback. the credit goes to you as you have made the pav bhaji 🙂
Thanks for the recipe!! Made it last night and it came out very well. This is a keeper.
thanks pooja for the feedback.
Awesome recipe!!! Tried it today and came out very well. Thanks
welcome pooja
hello, just going to make it , but i dont have capsicum, and I am planning to use dried green peas .. will it taste same like bombay road side?? i simply love that taste
please comment
better to add capsicum. try to get one, if you are making. yes it does taste like the bombay road side pav bhaji if you use dried green peas. but soak the peas in water for some hours or overnight and then cook them till they are completely soft.
Hi, please make some pav bhaji for me.
Thanks
Made this today for dinner. It was yummy. Thank you. Will try with more tamotoes next time….as we like bit more sour.
welcome huner. thanks for sharing your feedback.
It’s is very useful
My pavbhaji becomes heavy, dry and not as smooth and light as Bombay pavbhaji that we eat at chowpatty or any street in Mumbai.. what could be my mistake??
please reply here.
thanks
the reason is adding less water. for a medium to thin consistency, add more water. removed your email for security reasons.
Hello Dassana,
Thanks for yuor reply..I will try with adding little water.. thanks for the tip,,
Thank you so much… Great recipe. I’m 16 was hungry as usual.. This recipe helped me to make the perfect pav bhaji at once.. Yummy! 🙂
welcome anish. glad to know that you liked the pav bhaji recipe.
When i saw this dish in your site its became easier for me and the description with picture is the excellent work and made the dish more easier.thanks
welcome surya. glad to know this.
It was really awesome i loved the recipe and even my friends liked it a lot and they were happy for i was cooking kitchen stuff for the very first time and it was tasty ..
thanks Jordan for this positive feedback on pav bhaji.
its really awesome ……………..
i tried it and it tastes superb……..
thanks keerthana
I tried this recipe several times and it turned out great.
thanks tazeen for positive feedback
Dear Dassana,
You post wonderful receipes. So far I have tried multiple receipes from your website all turned out perfect. Everybody enjoys the food prepared! I sometimes cant imagine how someone can be so good at giving steps with pictures and tips for any dish preparation. You have spread the aroma of your receipes in every home! We wish you all the best ..may we always get such wonderful receipes from you! Thanks! Regards- Pranjali
thanks pranjali for this encouraging feedback. the secret is passion for cooking and sharing. any thing which you love is never a job or burden on you. e.g. children can keep on playing for hours.
i am a pav bhaji lover. nvr knew it would be so easy to make it. thnk you 🙂
welcome ankita. yes, pav bhaji is easy and simple to make.
I tried out your recipe & it turned out fab. I see you really take the time to post a recipe along with pics. I have tried some of your other recipes too like Patra. That turned out very well too,ur inclusion of step by step pics was a great help to me as I had never made it before. Keep up the good work,looking forward to seeing more!
welcome seema and big thanks for this positive feedback. glad to know that you liked the recipes you tried.
My spouse was missing Mumbai. Thanks to your pav bhaji recipe blog, she isn’t any more missing mumbai. : ).
welcome mathew 🙂
Tried this today. Came out great. Thanks.
welcome pragya
Trying it out tonight. Will post later how it turns out. This is the most apt recipe ive found on the internet.
sure satyajeet. do share your feedback.
Thank u so much.. My wife asked me to cook pav bhaji I was so confused but yourr recipe saved the day for me… Thank u so much
welcome iqbal
Ohky well dis ws really helpful….I m a college goin student n an amateur cook..so I like trying new stuff dis ws ma first time for pao bhaji….I guess I cud neva make a better dish Dan dis….yeah I added alil mayo sauce in da end n a tinge of lemon before serving…..wid those crispy paos….it ws hell amazing Dats wht I ws told…but ur recipe helped me Giving dat basic idea…thanx a ton….I managed to make some one feel special…coz I cooked it on sUm
Occasion….tq..:)
tq and welcome.
Hi Dassana ,
Thanks a lot for sharing this .I tried it and it came out really well …Thanks a lot again:)
welcome rohini
I like veg receipes of india because i learn to make paneer butter masalsa and some north indian dishes
thanks nandhini
good on…………..
Hi dassana..
Your recipes are really very awesome..i am a college going girl and after reading your recipes i have developed interest in cooking..which was not so earlier..keep on posting new ones..and thanks again 🙂
welcome mahvish. nice to know that the blog is helpful to you. happy cooking.
Looks yummy !! I pretty much follow same recipe, except lately I have started making pav-bhaji using crockpot/ slow-cooker.
I’m all set with all my ingredients ready and chopped. Making it for the first time.. But now i realised that i missed ginger 😛 so making it like dat only. Excited to see how it turns out. After all its my frst time. Thank u so much for posting such a nice and simple recipe. 🙂
welcome rinki. i hope you enjoy pav bhaji recipe. its one of my favorite.
very nice recipe i missed too much bombay juhu beach recipe,i will try to make at home…..thanks for sharing this recipe.
welcome deepa
Hi Dassana
Your Pav bhaji recipe looks very yummy.I love pav bhaji, but my husband doesn’t like it much. Following your recipe I’ll try it at home.. Hope my husband will like it.
thanks shilpa. i hope your husband likes it. do give it a try. happy cooking.
Thank you Dassana.
I followed your recipe,as I dint hv Pav bhaji masala so I hv used garam masala n amchur(as u suggested) n it came out very tasty
welcome swati. garam masala is a good alternative to pav bhaji masala. even i have also used garam masala on few occasions while making pav bhaji.
thanks
so mouth watering looks nice thank you for posting
thanks.
I am making pav bhaji following your recipe just as i am writing this. Last time i made it,it was a huge hit. My mom started eating pav bhaji( she never liked it much). Luv u thanks for this amazingly easy recipe.
regards
ananya
welcome ananya. nice to know that your mom liked the pav bhaji as well.
Hi dassana,
Tried ur pav bhaji recipe.i was showered wid compliments.i felt so glad.thanks for bringing out the best in me.ur recipes are simply mind blowing
welcome saadiya. nice to know that you all liked the pav bhaji recipe.
Hello Dasanna,
I made your Pav Bhaji last time and my daughter said ‘it is the best pav bhaji i have ever eatn”
I am going to make it on large scale for a party. Can I use cabbage instead of cauli flower? Also everytime I post my comment. I use the bestest words of praise for you ( because you deserve it so much). But why do they get deleted? Today my daughter was asking me whether the person I am following (that is you) is a guy or girl.Because from the name she thinks you are a guy. I showed her your picture. But she is asking me why is the name Amit?
thanks a lot sandy. i have not deleted your comments. may be your comments have gone in the spam folder. it happens sometimes when certain words are used. i will check the spam folder. we delete comments which are rude, arrogant and use swear words or are negative or over the top.
cabbage would give a different taste and texture to pav bhaji. generally cabbage is never added to pav bhaji. so my suggestion would be not to use cabbage. skip the cauliflower if you don’t have it.
give my love & hugs to your cute daughter. my name is dassana and surname is amit. my husband’s name is amit. since i am half south indian, we take our husband’s name after marriage as the surname. you can tell her this 🙂
Thank you so much. You deserve nothing but wonderfull praiseworthy words. I do not know why comments might have gone to spam. Anyways once again want to thank you so much for your receipes It has improved our life style.I also started baking whole wheat pavs now at home. Falling short of words to praise and thank you. Keep up the good work. God Bless you.
When I read other peoples comments for you, I feel so so happy as if they are for me. People praise so much without holding anything back, because your receipes are so clear and neat.
hey sandy, i was thinking about you a few days back. guess its telepathy. sometimes comments go in spam. i don’t know how it happens. and sometimes real spammy comments do not go in the spam folder. thanks a lot for all your positive wishes sandy.
Looking forward to trying this recipe! I’m American, and after visiting Hyderabad, a couple of months ago, it is time for me to learn to cook more Indian dishes. I had bought a prepared version of Pav Bhaji, today, and then looked up this recipe. Can I use chaat masala (which i have), instead of pav bhaji masala(which i don’t have) , or is garam malasa (have that, too) the only acceptable substitute?
Now, if I could only conquer dosa-making! Thanks for this, and all.
hi vicki, i hope you had a great time in india and enjoyed indian food.
now for the pav bhaji – chaat masala would make the pav bhaji tangy and salty. chaat masala is generally used to perk up dishes like salads, raita or yogurt dips, sandwiches and indian chaat snacks. add garam masala. about 1 to 2 tsp would be fine. depends upon your taste as garam masala is pretty strong. and some dry mango powder to get hint of sourness in the pav bhaji. if you don’t have mango powder, then just sprinkle lemon juice on the pav bhaji when you have it. you can also add one extra tomato as that will also make the pav bhaji a bit tart. the tomatoes can be minced or pureed too.
dosa making is easy provided the dosa batter ferments well. however do try making dosa at home.
Thanks…….!
Nice………..!
&
I proud of your Recipe……!
Really nice recipe..solved my problem of pleasing my mother in law tonight..thanks Dassana!
welcome pooja
Hey…..it has so awesum taste me nd ma wife loved ths….
so mch thnks
welcome pushpam
Your pavbhaji reciepi helps me so much so thnx
thanks anchal
hi Dassana,
i have started cooking recently and your bolg has come to my rescue whenever my mum isnt available on phone. i tried the pav bhaji receipe today and received a lot of compliments. all thanks to you..:)
thanks tanvi
hi Dassana,
i have recently started cooking for myself and my husband and you come to my rescue when my mum isnt available on the phone. i tried this receipe today and well received a lot of compliments. thankyou..:)
thanks tanvi
Superb recipe , all time favourite , my family loves this recipe, and it’s easy to prepare.
thanks lalitha
Its awesome recipe
thanks pranali
good one thanx
welcome neha.
Hi Dassana,
I usually like cooking for family during the weekend. This time around I tried this recipe for my weekend lunch for my hubby and my brother. They were completely blown away and showered me with compliments, all thanks to you 😀
thanks punya. nice to know that your family liked the recipe.
Hi , I love chats but its rare i use to eat because of my ammi..she wanna make chat in home..This recipe is very helpful for her.. Inspite of cauliflower can v add any other vegetable..
don’t add cauliflower fathima. you can just add some extra potatoes, peas, carrots in place of the cauliflower. sometimes i make pav bhaji just with potatoes, peas and carrots too.
Thank you for the wonderful recipe! This was delicious .
thanks danielle
Very nice recipe… have tried it and loved it thoroughly… kudos!…closest to the juhu pav bhaji i have had yet..
thanks bhanu
i want to make pav bhaji as outside made so your recipe help me making my dish which
i want to make and by study this recipe i thought it will be delicios
Hi, I’ve just read the notes.. Thanks for adding that garam masala can be used as a substitute.. Impatient to try it!:-)
okay. just read my previous comment to you on the amount of garam masala and amchur powder to be added.
Hi, I want to try this recipe badly.. But actually am from Mauritius and I don’t think pav bhaji masala is available here.. What can I use as a substitute for that?
hi diksha, you can add garam masala powder + amchur/dry mango powder as a substitute for pav bhaji masala. for this recipe first just add 1 tsp of garam masala powder + 1 tsp amchur powder. taste the pav bhaji and if you feel the spice and sourness is less, then add some more of the garam masala and amchur powder. if you don’t have amchur powder, then add an extra tomato and towards the end add some lemon juice. you can easily adjust the lemon juice as per your taste.
Hi
Could you help me I accidentally put too many green vegetables and it loooks and tastes greeny what should i do
there is not much you can do. at the most top up with some grated cheese. will change the taste and flavor a bit.
hi,Dassana
i am very fond of your blog Veg Recipes of India , vn ever i get time i go through it , today i read Mumbai Pav Bhaji Recipe, bt littel problem with it . i work in middle east
‘ kuwait’ we dont get some brand like pav baji, usal pav “massala packs”. so can you please share this secret massala recipes on your blog, if you share i will be great full. because by cooking your recipe we get our INDIAN flavour in this middle east country and so we never fell that we are far from our Motherland,friends & family. it was great to read middeleast recipes like peta bread, Hamous & Fallifal “yes” it is a very good tasty snacks and most popular dish every where we get in kuwait. it is liked by every one rich & poor. i wish our indian should try this in there home vt there family. love to see your blog genaration to come GOD bless you
thanks dominic. at home we all love the middle eastern recipes. since i make these sometimes, these recipes get posted on the blog too. even i wish indians should try middle eastern food.
i only have a punjabi garam masala powder on the blog. haven’t updated with pav bhaji masala or usal masala. this recipe of garam masala is too good. i use this powder for everyday cooking. i even add these to the usals i make at home. i even add this powder to the biryanis and dals i make at home.
i have even added to pav bhaji and the taste is good. so you can make this garam masala recipe and add it to the pav bhaji or usal. for pav bhaji along with this masala, you will need to add amchur powder/dry mango powder also and the turmeric powder and red chilli powder. if you don’t have amchur powder than add some lemon juice instead, but not too much. just to get a hint of sourness in the pav bhaji.
garam masala recipe here: https://www.vegrecipesofindia.com/punjabi-garam-masala/
thank Dassana,
for the garam masala recipe, i will try and let you know bt still if you have this usal & pav bhaji masala please put on your blog. thank you one’s again GOD bless you……………..
whenever i make the pav bhaji or goda masala (which is used in maharashtrian dishes like usal, dal veggie dishes etc) i will update on the blog.
thanks a lot , wating for the masala recipe. GOD bless you…………..
I am a student in USA, stay with roomies… and when my cooking turn comes, stun them with your mouth watering recipies 🙂 Thanks :))
thanks a lot snehil.
Hi Dassana,
Your receipe was super duper hit..i made it on weekend and everyone said it is even better than restuarant …thanks a alot…now one more dish is added in my list for guests and that is Dassana’s Pav Bhaji….I am very confident in making it……..thanks to you…
when r u posting my Gatta’s receipe
thanks renuka. am glad… i really feel good when readers try my recipes and they turn out fab. even at my home everybody asks me only to make pav bhaji 🙂
the gatta recipe will take time. we will be relocating our house in some time. so may be no posting for some weeks. but i will surely post the recipe after some weeks or a month.
Hello Dassana, today i tried bhaji receipe and it was full of flavours…my 2 yrs old son also liked it and wanted more & more -:)…Thank you so much for the all the sincere efforts & providing us the detailed, step by step pics….with love meeta, bye tc…
thanks meeta. glad to know your 2 year old son liked it. with kids and their picky eating habits, i know how difficult it is for parents at times.
Thanks a lot dassana,yesterday i tried ur veg. briyani recipe & it was super hit…i always scared of making briyani,b’coz i believe this is the most toughest recipe,but u made it so easy for me to prepare my 1st briyani.once again thanks a loooooootttttt………..
thanks bonika
Cool….Unbelieveable receipes…great help….grateful to you and thanks alot
thanks arpita
Dassana, I made this on Sunday…and the whole family loved it…I used amul butter as you had mentioned to use it…it tasted exactly like the chat wallas….a big thank you from my kids too!! they had a blast yesterday!! I am sharing this on my FB page…
thanks nisa for this sweet comment. i am glad you all liked the pav bhaji.
This was really good. I also added garam masala, amchur and grated mozzarella cheese at the end of cooking. The gravy became kind of sticky. Added grated cheese along with other garnishing. Thank you.
thankyou sabina 🙂 and you are welcome.
i dont know where my comments disappear….i have to keep on posting……. I added garam masala and amchur along with pav bhaji masala. Served it with grated cheese along with other garnishing. It tasted like Juhu beach pav bhaji. Thank you very much.
your comment had gone in the spam folder. sometimes for some unknown reason a few comments automatically go to the spam folder. then we unspam them and reply. thanks a lot for the feedback sabina and comparing this pav bhaji with juhu pav bhaji 🙂
I made bhaji following this recipe for tonight’s dinner. My kids and husband loved it.. thank you for sharing this wonderful recipe with us all! Will keep you posted as and when I try your recipes. Good night 🙂
thanks reshmi for the feedback. glad to know. sure do let me know about how the recipes go for you or if there are any queries in general.