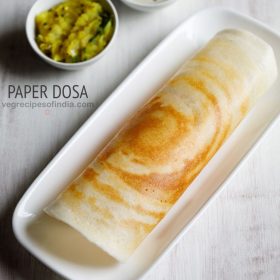
Paper Dosa Recipe
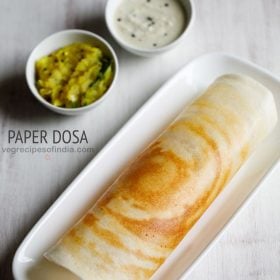
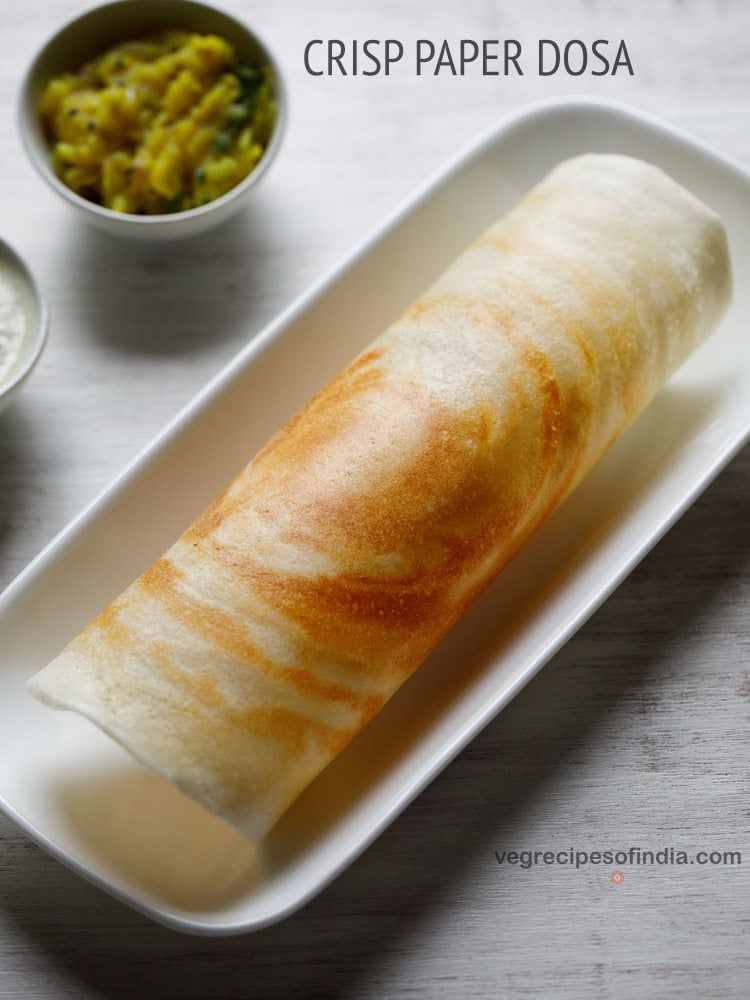
Paper Dosa is a thin and extra-crisp South Indian dosa made from a fermented rice and urad dal batter. It’s known for its delicate, paper-like texture and golden color. Light, thin, and perfectly crispy, my recipe for Paper Dosa is the ideal pairing for coconut chutney and potato masala. This simple vegan recipe is made with just 7 ingredients and about 20 minutes of cooking time, giving you restaurant-style results at home.
Restaurant-Style Paper Dosa Recipe
Paper Dosa is a thin, crispy South Indian dosa made from a fermented batter of rice and urad dal (split black gram).
It’s called Paper Dosa because it’s very light, wafer-thin, and almost transparent; similar to a sheet of paper. The batter is spread thinly on a hot tawa (flat skillet/griddle) and cooked until golden and crispy, usually without flipping.
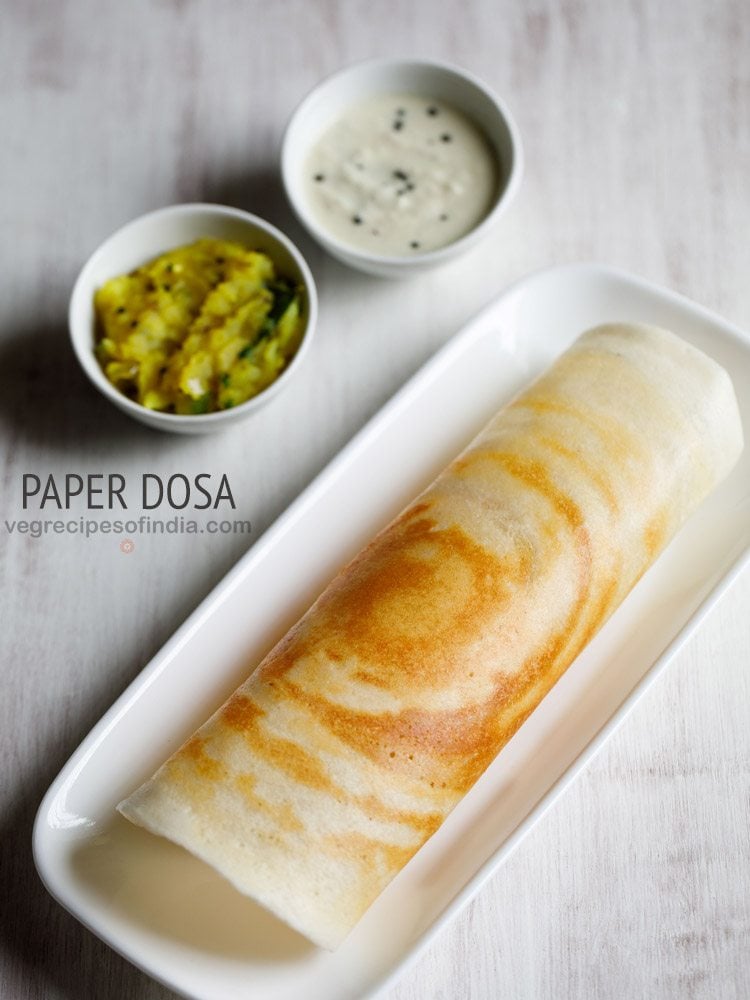
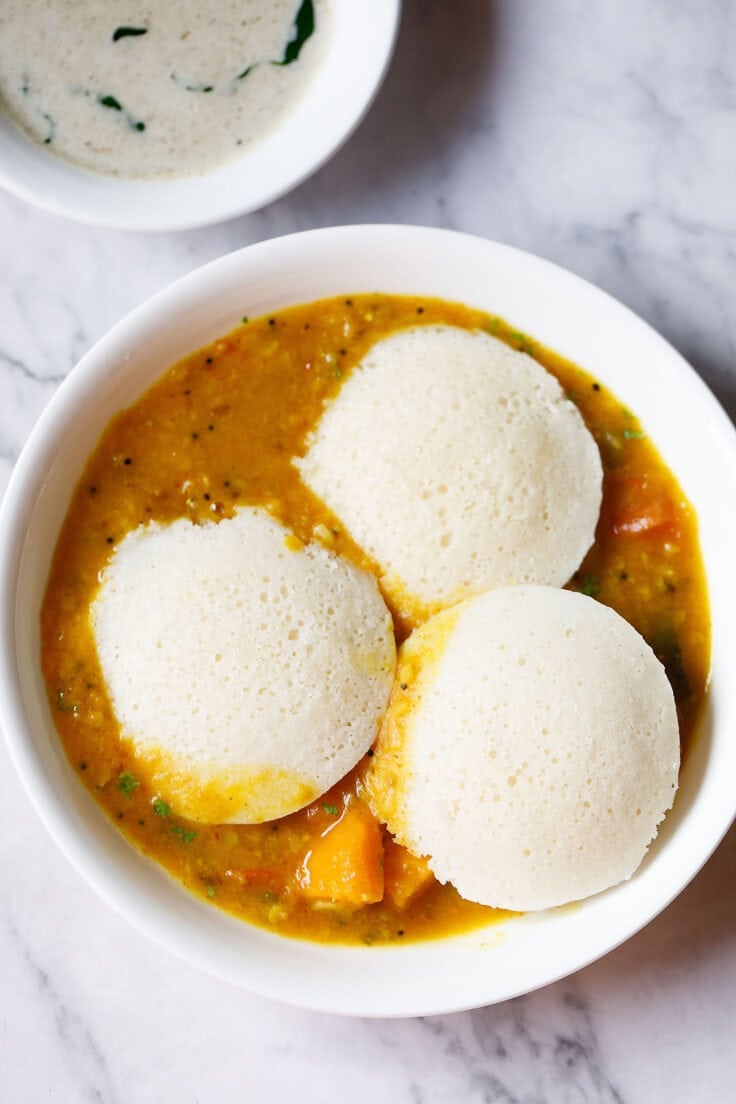
Paper dosa is larger than regular Dosa or Masala Dosa and is often served with coconut chutney, and sambar. It’s popular in restaurants for its texture and appearance rather than for stuffing or fillings.
This recipe gives you light, crisp papery dosa similar to the one we get in restaurants. The addition of chana dal and rava (sooji) helps in creating a deliciously crisp texture that will have you coming back for more.
This restaurant style paper dosa can be served with Coconut Chutney, Tomato Chutney and Sambar. If you have time, I also suggest you make Potato Masala and Paper Masala Dosa for a true Indian feast.
The best part of this recipe is that you don’t need to use parboiled rice or idli rice. You can easily use any rice varieties like sona masuri, gobindbhog, kolam, surti kolam, parmal, or whatever else you have on hand.
This Paper Dosa recipe is similar to the Ghee Roast Dosa I had shared earlier. To make your everyday regular and traditional dosa you can check this recipe of Masala Dosa.
Serve Paper Dosa as soon as they are made. You can have them for breakfast, brunch or lunch. At times I even make these dosas for dinner.
How To Make Paper Dosa
While the total recipe time might list over 9 hours, most of the time is spent soaking or fermenting. You really only need about 20 minutes of cooking time to make these delicious paper dosas at home. Here’s how it’s done.
Soak Rice & Lentils
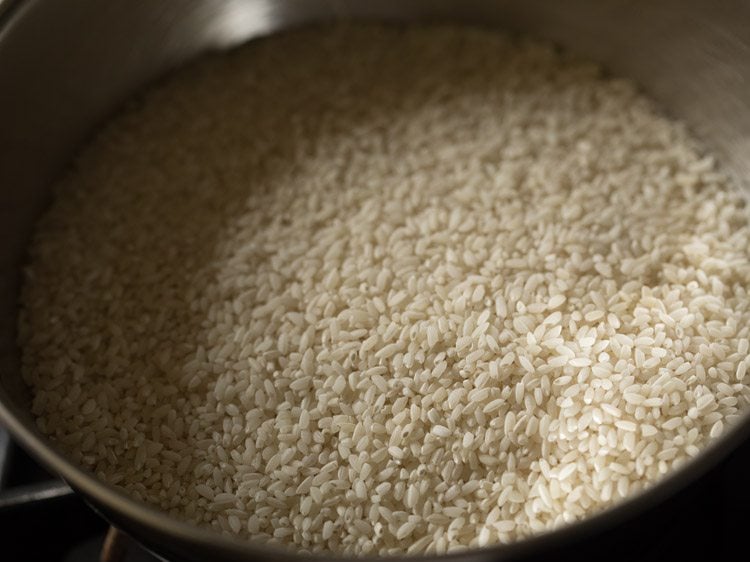
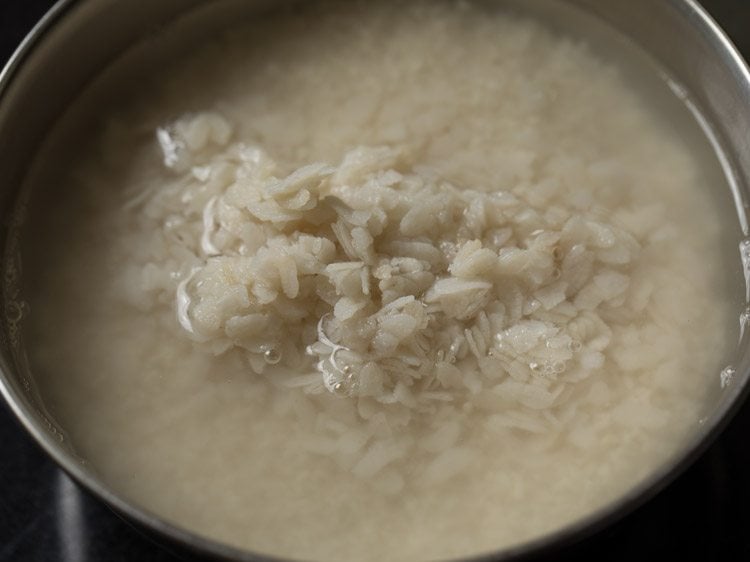
1. Firstly take 1.5 cups regular rice (325 grams).
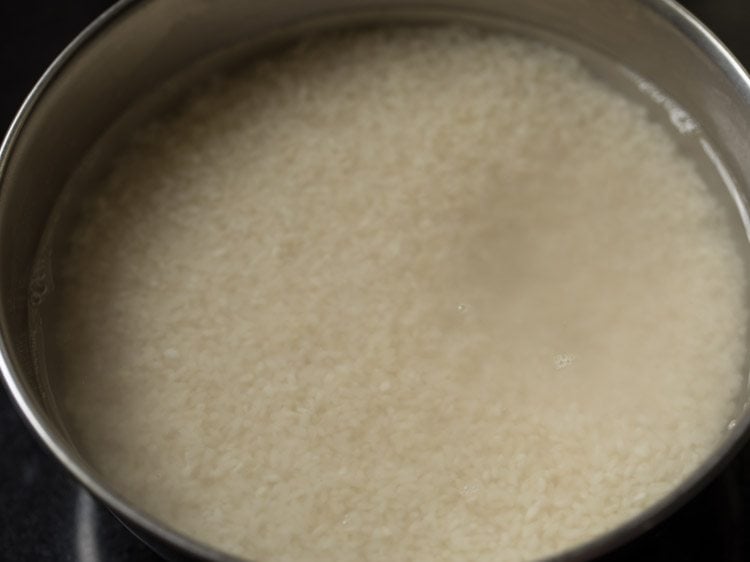
2. Rinse a couple of times and then soak in 1 cup water.
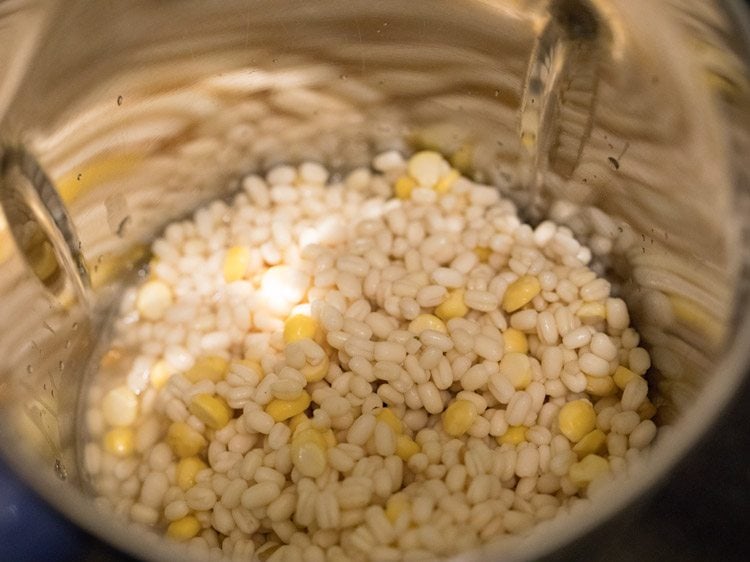
3. Take ½ cup urad dal (125 grams), 1 tablespoon chana dal and ¼ teaspoon methi seeds in another bowl.
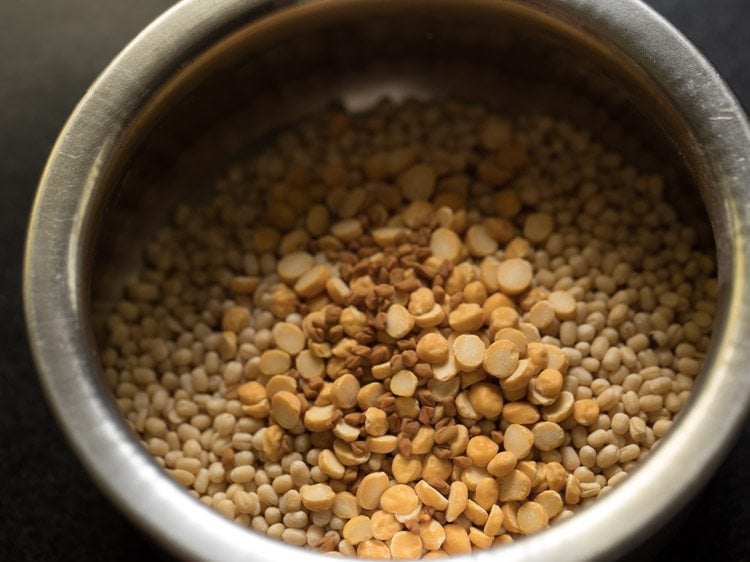
4. Rinse a couple of times and then soak in 1 cup water for 4 to 5 hours.
5. Take ¼ cup thick poha (20 grams) in a small bowl.
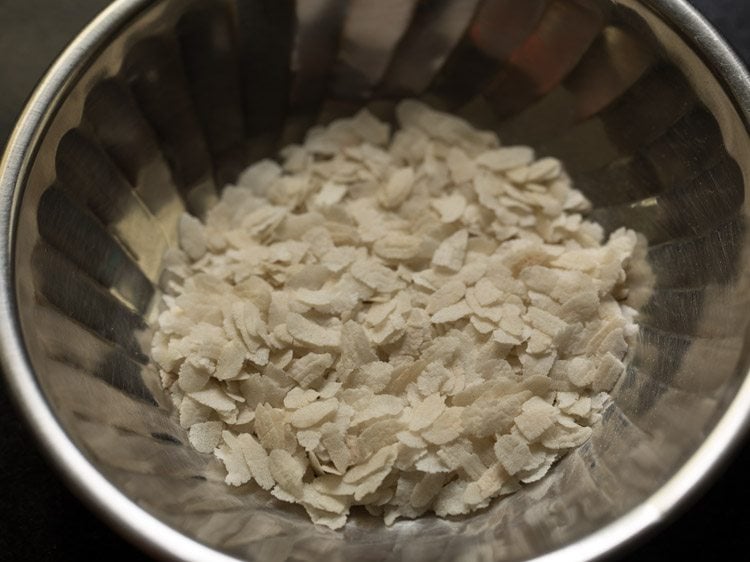
6. Rinse poha once or twice with water.
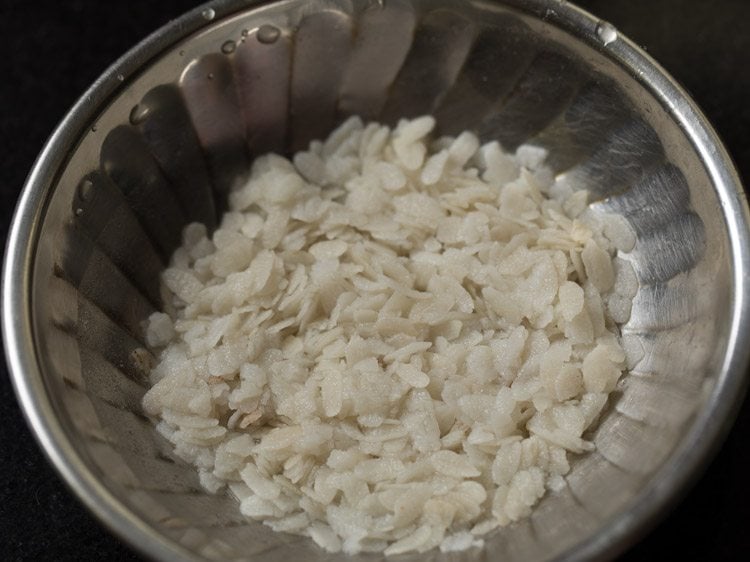
7. Then add the rinsed poha in the rice bowl. Mix, then cover, and soak for 4 to 5 hours.
Make Batter & Ferment It
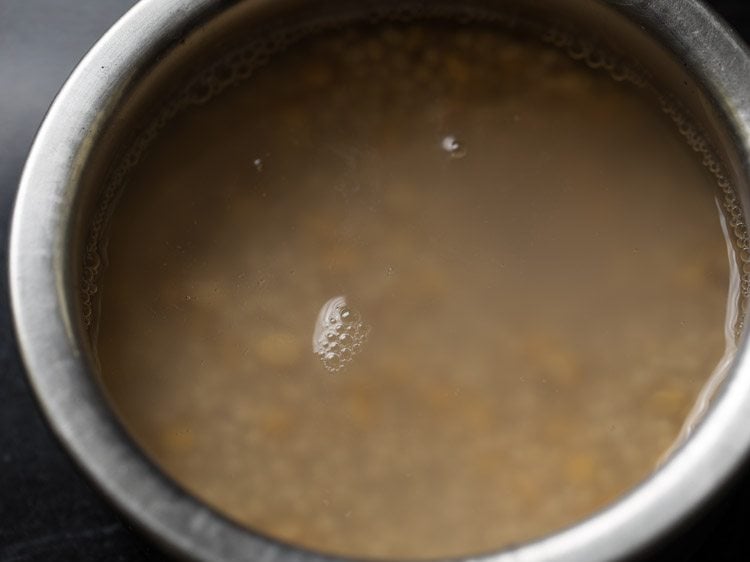
8. After 4 to 5 hours, add the lentils along with the soaked water in the grinder jar. Also add ¼ cup of fresh water.
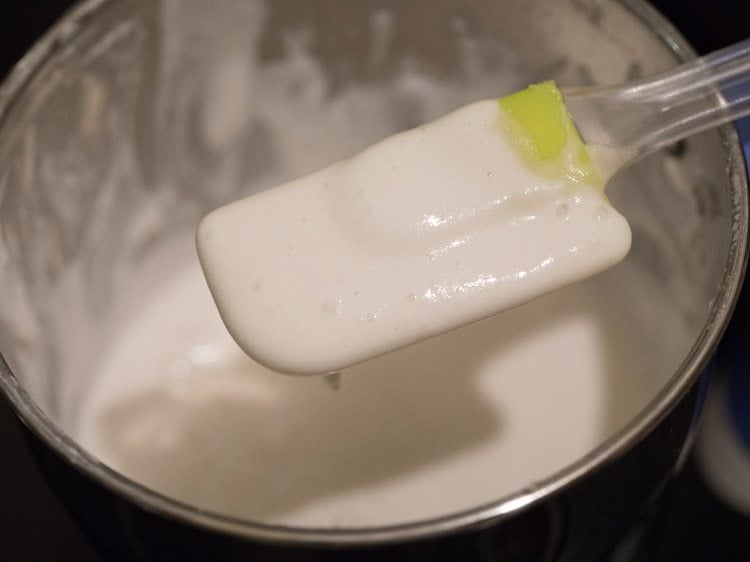
9. Grind the urad dal, chana dal and methi seeds till you get a batter which is light and fluffy. The urad dal has to be ground really well, so that the batter ferments well.
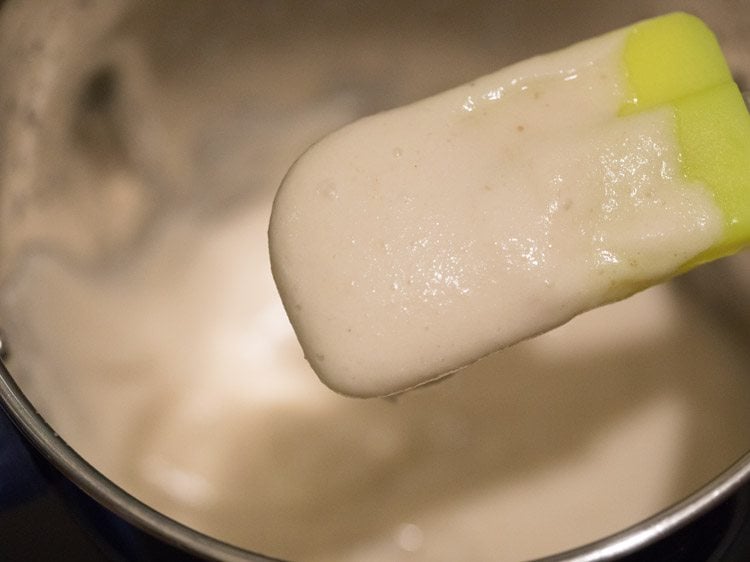
10. Transfer the batter to a large bowl or pan.
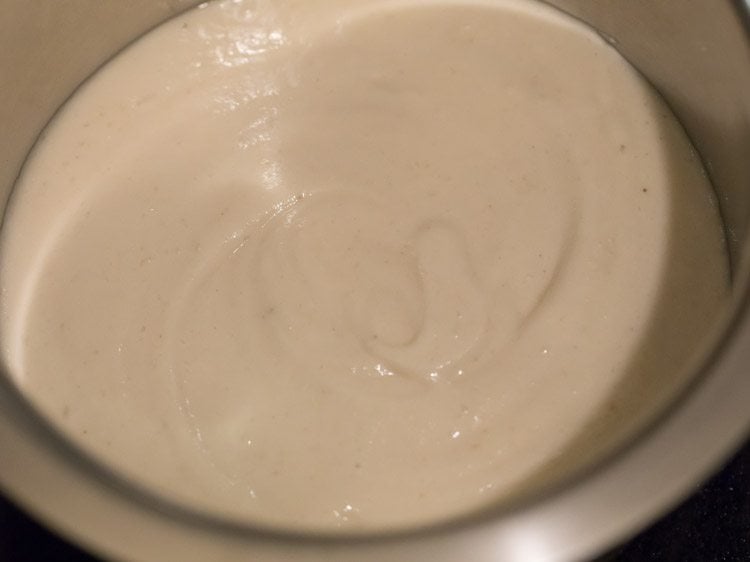
11. Strain the rice well and drain the water. Then in the same grinder, add the soaked rice and ½ cup fresh water.
You can grind rice in one batch or in two batches depending on the size of the grinder jar. I ground in one batch and added ½ cup water for grinding.
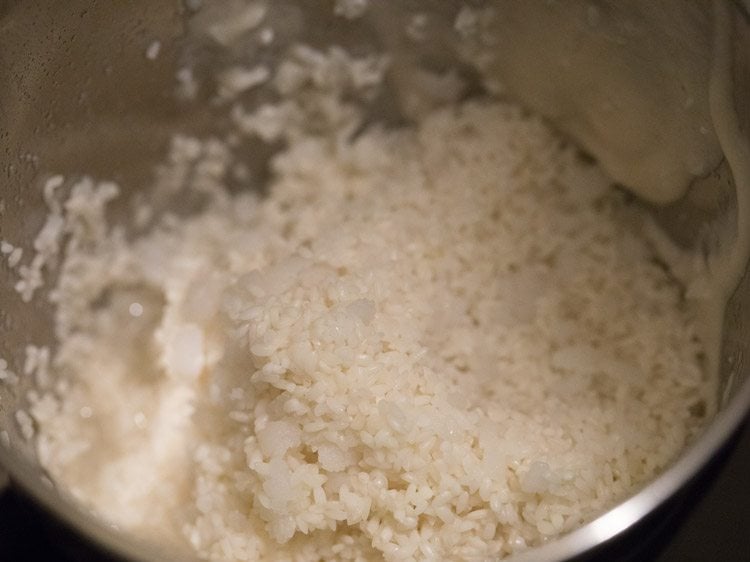
12. Grind rice to a fine grainy consistency like that of idli rava.
13. Now pour the rice+poha batter into the same pan or bowl containing the urad dal batter.
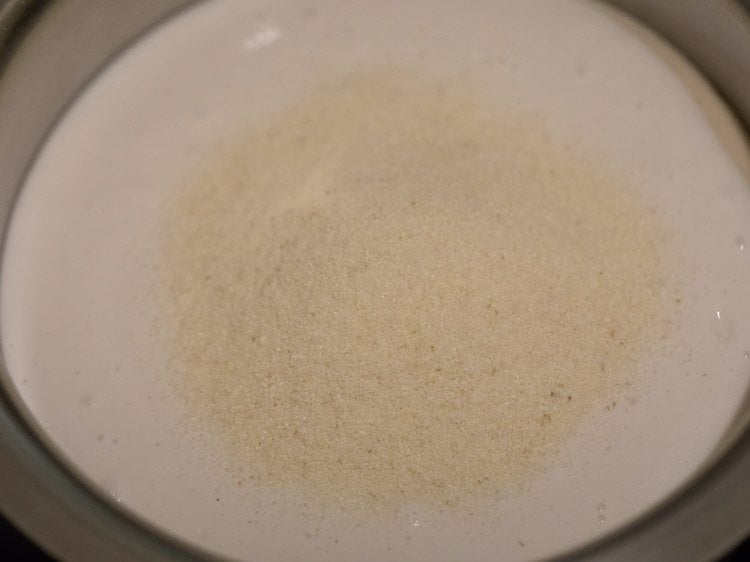
14. Add 3 tablespoons rava.
15. Next add 1 teaspoon of rock salt, sea salt, or regular salt.
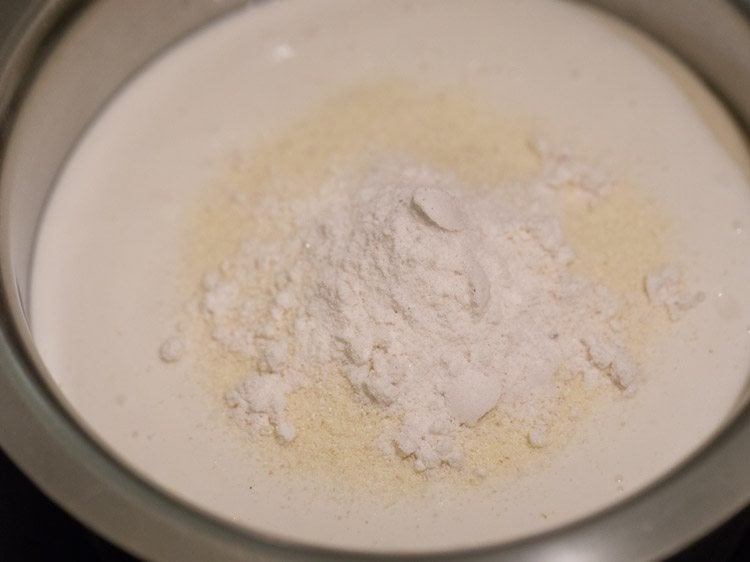
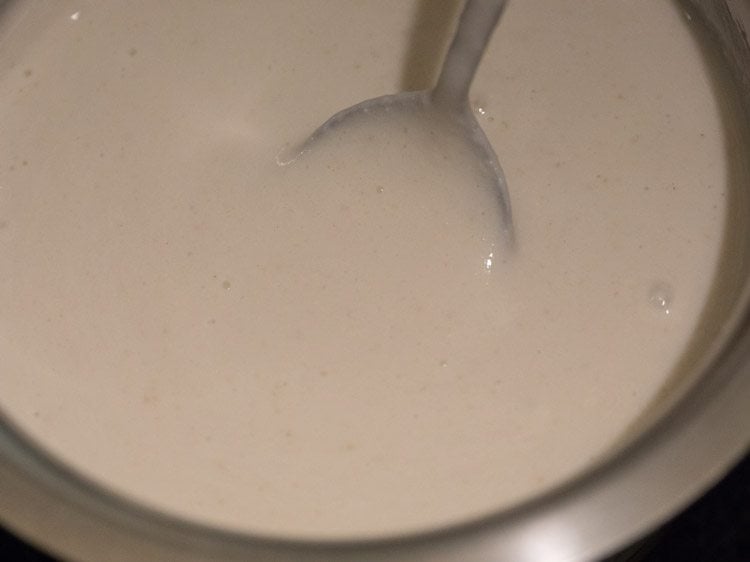
16. Mix the salt evenly with the Paper Dosa batter. Also mix both the batters very well. cover and keep aside to ferment for 8 to 9 hours.
You can keep for less or more time and this will depend on the temperature conditions in your city.
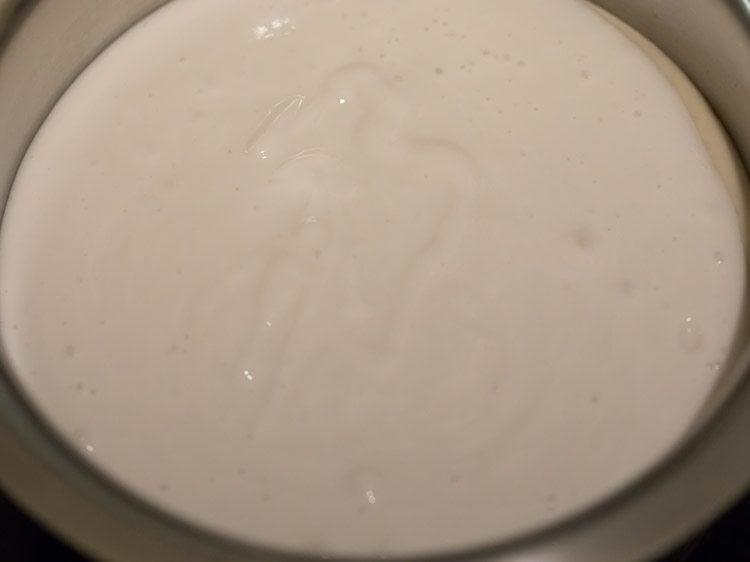
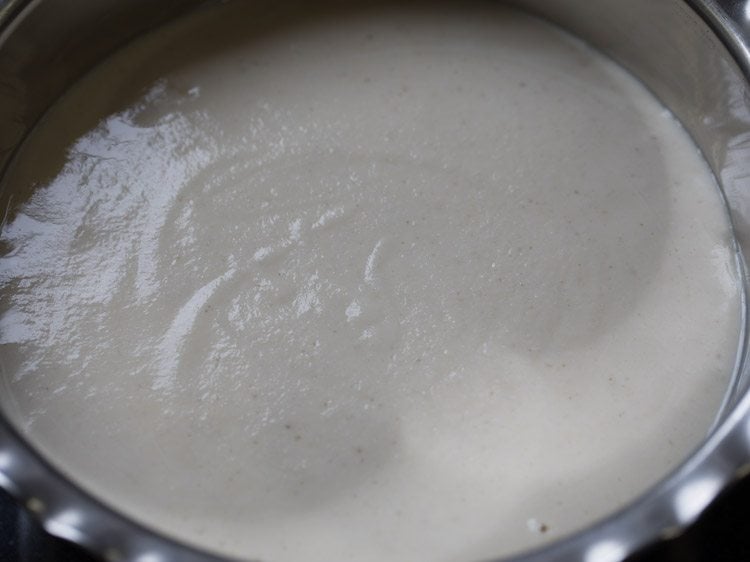
17. Below is a photo of the batter the next day. I kept it for about 15 hours as it is cold during monsoons here.
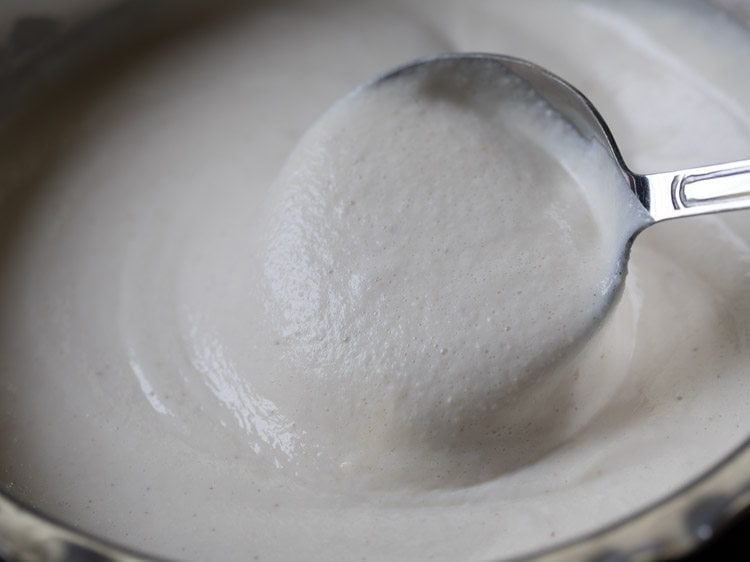
18. Now lightly stir the batter, before you begin to make dosa. You will also see tiny air pockets in the batter.
Make Paper Dosa
19. Heat a thick-bottomed cast-iron griddle or non-stick pan. The pan should be made medium-hot before reducing the heat. You can keep the heat to a low or medium while making paper dosas.
If using an iron pan, then spread ¼ to ½ tsp oil/ghee all over the pan. Use a heat safe brush, spoon, kitchen towel, or an onion half to spread the oil/ghee.
Tip: Do not spread oil/ghee on a non stick pan.
Keep the heat on low to medium-low flame, so that you can easily spread the batter. If the pan base is very thick, then keep the heat to medium. Pour a ladle of the batter in the center.
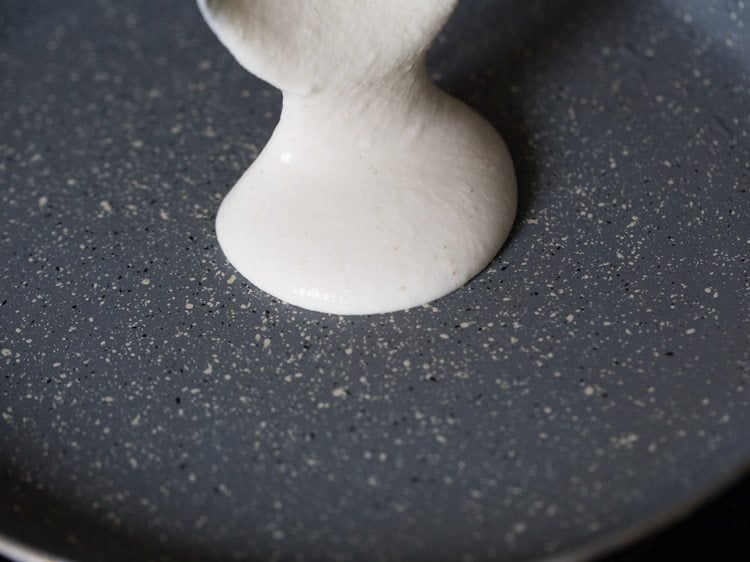
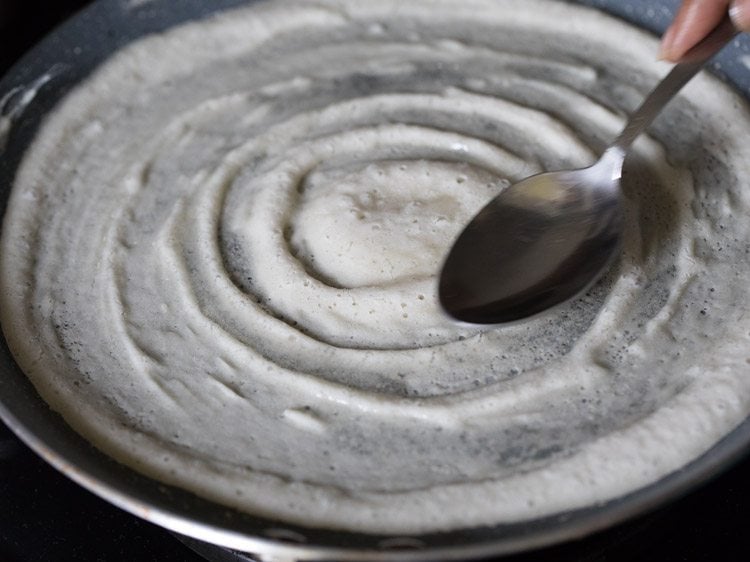
20. With the back of the ladle, gently begin to spread the batter in round circles. If the pan is very hot, you won’t be able to spread the batter in a round circle.
So for a nonstick pan, just lift the pan from the flame and keep outside for some seconds or half a minute. Then again place it on the stovetop.
For an iron griddle you can sprinkle some water on the pan to lower the temperature of the cast iron griddle.
Note: Please do not sprinkle water on nonstick pan as the nonstick coating may wear off if you do.
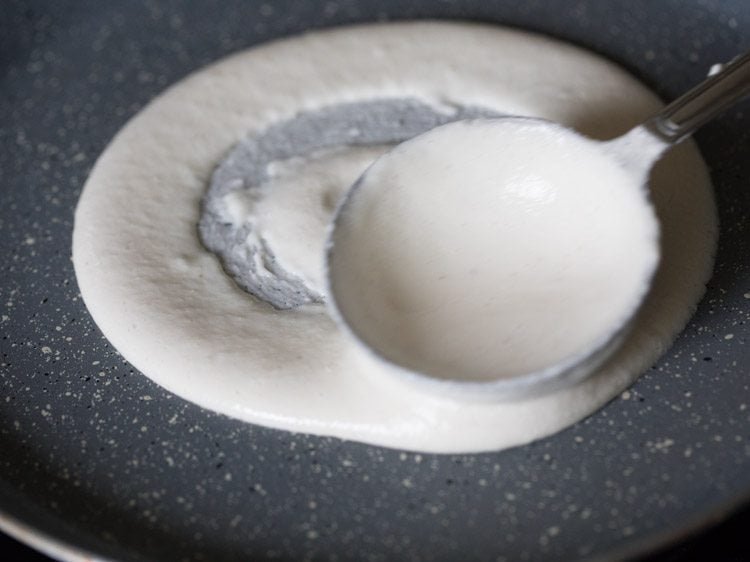
21. Spread the batter to a neat, round shaped thin dosa using the back of the ladle.
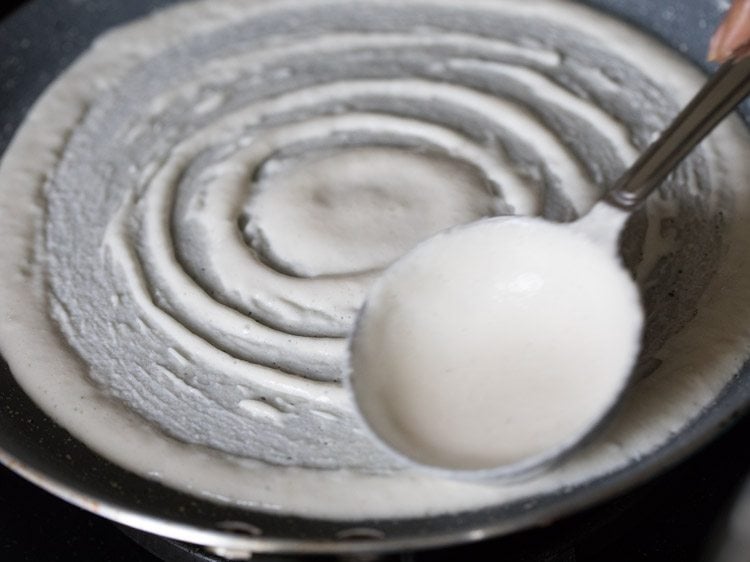
22. On a low to medium flame, begin to cook.
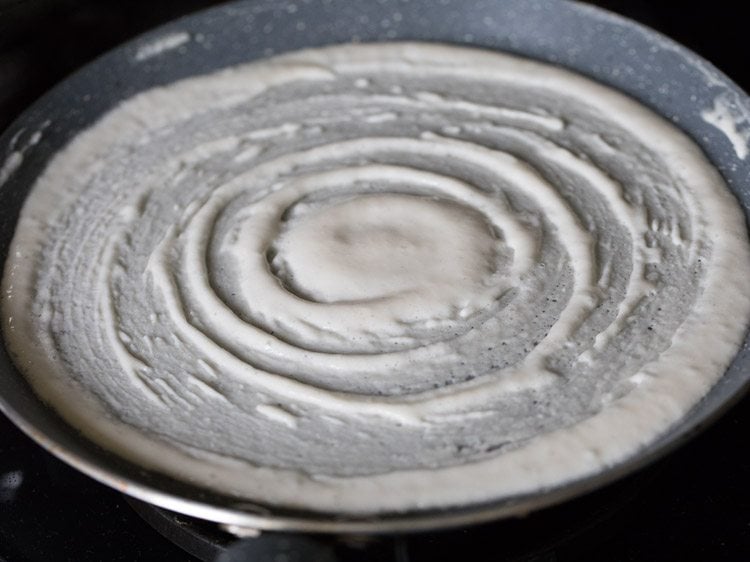
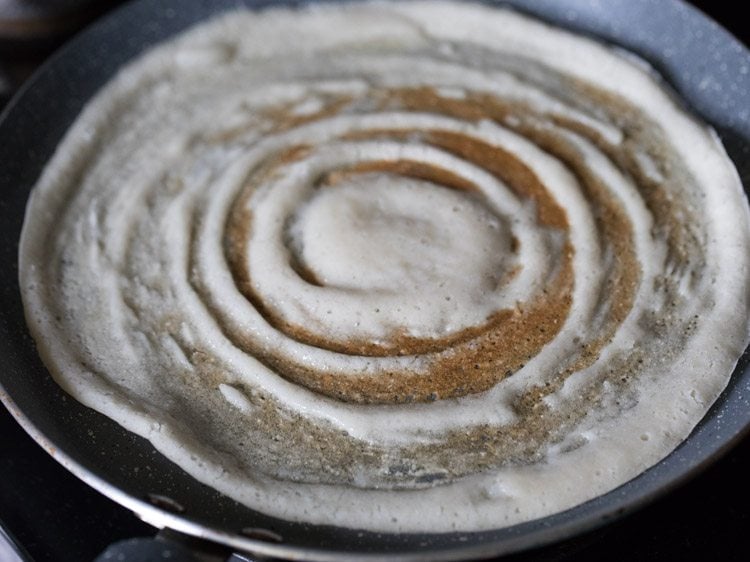
23. Let the top side get cooked. You will see the batter firming up.

24. Once the top side looks cooked, then with a spoon drizzle and spread some oil on the dosa. you can add less or more oil as per your needs.
25. Keep cooking till you see the base becoming golden. The more the base becomes golden, the paper dosa becomes more crisp.
26. Now with a spatula fold the crisp paper dosa.
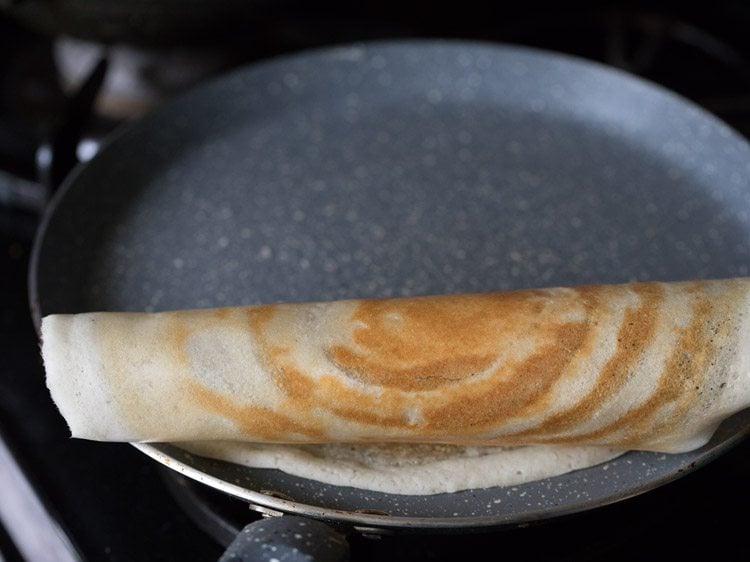
27. Serve Paper Dosa with coconut chutney and sambar. Continue making paper dosa with the remaining batter.
Leftover batter can be refrigerated and stays good for 2 to 3 days.
Tips & Tricks
- Make sure the batter is well fermented, with a light and bubbly texture. Poorly fermented batter may not spread well and the dosa won’t turn crisp.
- In cooler weather, ferment the batter in a warm place or inside an oven with the heating turned off but the light on. The gentle warmth helps the batter ferment well and develop a mild, pleasant tangy flavor.
- While making paper dosa, maintain the correct temperature of the tawa or skillet. If it’s even slightly hot, you won’t be able to spread the batter evenly. If it’s not hot enough, the dosa won’t become crisp. Keep the heat at a medium level throughout cooking, so do regulate the heat as you cook each dosa.
- Always use a well seasoned tawa that is only used for making dosas. You can use either a non-stick tawa or a cast-iron tawa.
- Before spreading the batter, lightly grease the surface or wipe it with a small piece of onion dipped in oil. You can also use a folded paper tissue or a cotton napkin for this. It helps control the temperature and prevents the dosa from sticking.
- Paper dosas can be served folded, rolled, or made into a cone (Topi dosa). If using a cast-iron tawa, you can make the cone shape by cutting and folding the dosa. Avoid doing this with a non-stick pan to prevent scratching the surface.
- After spreading the batter, drizzle a few drops of oil or ghee around the edges. It helps the dosa turn evenly crisp and gives a nice golden color.
- Once the dosa turns light golden and leaves the edges, avoid flipping it. Paper dosa is cooked only on one side to keep it thin and crisp.
FAQs
Do I have to flip the dosa and cook the other side?
It is not required, but you can do so if you like.
What is the best way to clean a non-stick tawa between cooking dosas?
Simply use a clean soft paper towel or kitchen towel to wipe it. Do not add water or you’ll risk ruining the non-stick surface.
Can’t we soak and grind all the ingredients together instead of separately?
Traditionally speaking, they are ground separately in order to achieve the proper fineness of the grains. That said, if you have a powerful blender like a Vitamix, you can blend everything together. Just make sure to grind the ingredients all until the batter is light and fluffy with no visible grains.
More Tasty Dosa Varieties
Step by Step Photo Guide Above
Paper Dosa Recipe (Restaurant Style)
Ingredients
- 1.5 cups or (325 grams) regular rice
- ½ cup or (125 grams) urad dal
- ¼ cup or (20 grams) thick poha (flattened rice)
- 1 tablespoon chana dal (husked and split bengal gram)
- ¼ teaspoon methi seeds (fenugreek seeds)
- 1 cup water – for soaking rice
- 1 cup water – for soaking urad dal
- ¼ cup water – for grinding urad dal
- ½ cup water – for grinding rice
- 3 tablespoons fine rava – (sooji or cream of wheat)
- 1 teaspoon rock salt (edible and food grade) or sea salt or regular salt – add as required
- oil – as required for cooking dosa
Instructions
Soaking lentils and rice
- Firstly take the regular rice.
- Rinse a couple of times and then soak in 1 cup water.
- Next take the urad dal, chana dal and methi seeds in another bowl.
- Rinse a couple of times and then soak in 1 cup water for 4 to 5 hours.
- Take thick poha in a small bowl.
- Rinse poha once or twice with water.
- Add the rinsed poha in the rice bowl. Mix. Then cover and soak for 4 to 5 hours.
Making & Fermenting Batter
- After 4 to 5 hours, add the lentils along with the soaked water in the grinder jar. Also add ¼ cup of fresh water.
- Grind the urad dal, chana dal and methi seeds till you get a batter which is light and fluffy. The urad dal has to be ground really well, so that the batter ferments well.
- Transfer the batter to a large bowl or pan.
- Strain the rice well and drain the water. Then in the same grinder, add the soaked rice and ½ cup fresh water. You can grind rice in one batch or in two batches. This will depend on the size of the grinder jar. I ground in one batch and added ½ cup water for grinding.
- Grind rice to a fine grainy consistency like that of idli rava.
- Now pour the rice and poha batter in the same pan or bowl containing the urad dal batter.
- Add 3 tablespoons rava and 1 teaspoon rock salt or sea salt or regular salt. Adjust salt according to taste.
- Mix the salt with the batter. Also mix both the batters thoroughly.
- Cover and keep aside to ferment for 8 to 9 hours. You can keep for less or more time and this will depend on the temperature conditions in your city.
Making Paper Dosa
- After the batter is well fermented, before making the paper dosa, lightly stir the batter. You will also see many tiny air pockets in the batter.
- Next heat a thick bottomed cast iron tawa (griddle/skillet) or a nonstick pan. The pan should be medium hot.
- You can keep the heat to a low or medium while making dosas. If using an iron pan, then spread ¼ to ½ tsp oil/ghee all over the pan. Use a heat-safe brush or spoon or paper towel or a cotton napkin or onion halve to spread the oil/ghee. Do not spread oil/ghee on a non-stick pan.
- Do keep the heat to a low or medium-low, so that you are easily able to spread the batter. If the pan base is very thick, then keep the heat to medium. Pour a ladle of the batter in the center.
- First pour the batter using a ladle and then with the back of a ladle gently begin to spread the batter in round circles. Note that if the pan is very hot, you won't be able to spread the batter in a round circle.
- Using the back of a ladle spread the batter to a neat, round shaped thin dosa.
- On a low to medium heat, begin to cook the dosa.
- You will see the top side getting cooked and the batter firming up.
- Next with a spoon drizzle and spread some oil on the dosa. You can add less or more oil as per your requirements.
- Keep cooking till you see the base becoming golden. The more the base becomes golden, the paper dosa becomes more crisp.
- Now with a spatula fold the crisp paper dosa.
- Serve with coconut chutney and sambar. Same way make paper dosas with the remaining batter.
- Leftover batter can be refrigerated and stays good for 2 to 3 days.
Dassana’s Notes
- I recommend using a well seasoned tawa that is only used for making dosas. You can opt to use either a nonstick tawa or a cast iron tawa.
- After pouring the batter, spread it quickly and evenly in a thin circular layer. If the batter isn’t spread properly, the dosa will turn thick and won’t become crisp.
- Use a medium-hot tawa. If it’s too hot, the batter won’t spread and if it’s too cool, the dosa won’t crisp up.
- Grease, brush or wipe the tawa lightly with oil before pouring the paper dosa batter to prevent it from sticking and helping the dosa cook evenly.
- This recipe can be easily doubled or tripled.
The best paper dosa recipe ever.
Thank you so much. So happy to hear that you loved it — means a lot!
I liked the nutrition facts that you have shared in this recipe. Its very useful for a dietician to plan diets.
Thanks and glad to know the approximate nutrition facts are helpful.
Thanks for this excellent dosa recipe. I have been trying to make crisp dosa at home for many years , but without success. Today i was able to achieve it , thanks to you
Great to know and thanks for sharing your positive feedback Manisha. Most welcome.
I love you recipes and the photos. They are great !!!
Thanks dear for this recipe…..
It really worked… I love it….it’s really good and crispy…
thanks afroz for the feedback and review on paper dosa. happy cooking.
Hi dassana, I made this crispy paper dosa.. just awesome… this recipe is definitely for keeps .. thanks for sharing.. take care..
.
Welcome Marina. Nice to know that you liked this recipe of paper dosa.
very nice recipe & images.
Thanks PRANITA
Is it not required to roast it on other side too? Also, how to clean non stick tawa in between two dosas?
not required. but if you want you can cook. for a non-stick pan, just wipe it a clean cloth. do not add water as the water will ruin the non stick coating.
Awesome any one can learn from this amazing site..Thank u
thank you sukanya.
I totally agree..????
thank you marina ????
Thanks for such great recipe.i want to know what will happen if we soak all the ingredients together n them grind them together?What will be the difference in texture of dosa?
you can do this way. there is no difference if the batter is ground well. but i always prefer to grind urad dal separately. since a well ground fluffy urad dal batter helps in fermentation.
You will not get the desired fineness if they are ground together. This is why traditionally they are ground separately.
thanks deepti.