Always wanted to bake your own Brown Bread at home without any hassle? You’re at the right place as this Brown Bread recipe is going to turn you into a brilliant bread baker! With step-by-step photos and all your major queries/concerns answered, I’m sure you’ll only have fun now onwards whenever you want to make a Brown Bread at home. Also, because there’s no comparison of a home cooked food product/dish versus a store bought one. Happiness indeed is homemade!
About Brown Bread Recipe
As we all know Brown Bread is one of the most eaten variant of bread all over the world. It is usually made with more portions of whole wheat flour mixed with all-purpose flour.
To give a deeper shade of brown, sometimes coloring ingredients like caramel or molasses are also added in the commercially prepared brown bread.
But do not that Brown Bread is different from Whole Wheat Bread as the latter is only made with Whole Wheat Flour and does not contain all-purpose flour.
Table of Contents
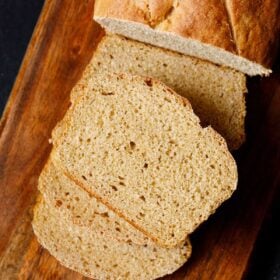
This Brown Bread recipe, results in a soft, light and great textured bread. I have used a combination of whole wheat flour and all-purpose flour in a ratio of 1:3 for this Brown Bread recipe.
You can go ahead and tweak this proportion to a half-half or even 2:1. I tried the Garlic Bread with a similar ratio of 2:1 of these two flours and that also came out really well.
Once you bake this Brown Bread at home, you will give-in to baking and will almost forget buying it from the market.
Watching the bread getting baked, rising and shining perfectly is not just a feel-good factor but is intimidating to many.
Not to forget, the lovely aroma of the baked Brown Bread enveloping the entire house is supreme, in fact magical!
This Brown Bread recipe will definitely help you to overcome your bread baking fears and master the art of making a perfect one at home.
Baking a whole meal bread with 100% whole wheat flour or whole meal flour results in a dense bread with a nutty flavor.
In order to get the right light texture and taste, you must add some flour with glutinous properties like all-purpose flour, especially in India where gluten powder is not available easily.
Thus, this Brown Bread recipe gives you exactly what is needed to get that apt texture and mouthfeel.
Bread Baking Basics
There are few bread baking basics that if you get them right, will make you a pro baker. I cover them one by one below. Here I answer the queries and doubts which I mostly get on bread baking.
Yeast and Flour
It is a fact that using premium quality ingredients, including yeast and flours, will result in the best version of your baked Brown Bread.
Try and go for an organic brand as there are no impurities in it. I have used a good quality dry yeast, organic stone ground whole wheat flour and an organic all-purpose flour as well.
For the yeast you can opt to use dry active yeast, fresh yeast or instant yeast to make this Brown Bread recipe.
Follow this conversion: 1 teaspoon instant yeast = 1.5 teaspoon active dry yeast = 1 tablespoon fresh yeast.
Keep in mind that dry active yeast and fresh yeast need to be activated in warm water. But for instant yeast (or rapid rise yeast), it can be simply be mixed with the flours and other ingredients and kneaded to a dough.
Proofing, Leavening and Temperatures
I always try and use dry active yeast for baking. So, when using it, you have to activate it in warm water first. The temperature range for this warm water should be between 40 to 46 degrees C or 105 to 115 degrees F.
A much lower or higher range of temperature hampers the process of yeast activation. You can use a thermometer to check the temperature of the water.
Baking requires a lot of precision in every element that goes in a particular recipe. So, if the yeast doesn’t proof, then I recommend you to discard the mixture and begin again.
If it still doesn’t proof, then the yeast has reached its expiry date. Hence, check before you start with the process.
While using dry active yeast, you have to allow the Brown Bread dough to rise/leaven twice. Firstly, in a bowl and later in the baking pan.
In order to have a perfect leavened/risen dough, you must keep it in a warm temperature. So, if you stay in a place with cold climate, then use your oven or the Instant Pot to do so.
Preheat your oven to 49 to 66 degrees C or 120 to 150 degrees F for 10 to 12 minutes. Turn off the oven, place the Brown Bread dough inside and keep it there till it doubles in size.
Remember to remove the bread from the oven before you again preheat the oven for baking. All this might sound cumbersome and requiring too much efforts, but then the fruits of patience are mostly sweet.
Note that when leavened the dough with instant yeast, the time taken to double it will be less as compared when using active dry yeast or fresh yeast.
Kneading The Dough
I have used the KitchenAid mixer to knead the dough. However, you can also knead it in a food processor or by hand.
The instructions for both these are mentioned in the recipe details below. If using any other stand mixer, food processor or bread machine, then make sure to follow the manufacturer’s instructions as well.
If kneading by hand, then knead for a good 10 to 12 minutes. The dough should be pliable, soft and stretch easily.
Just be persistent, follow the steps carefully for a guaranteed satisfaction at the end.
How to make Brown Bread
Proof Yeast and Knead Dough
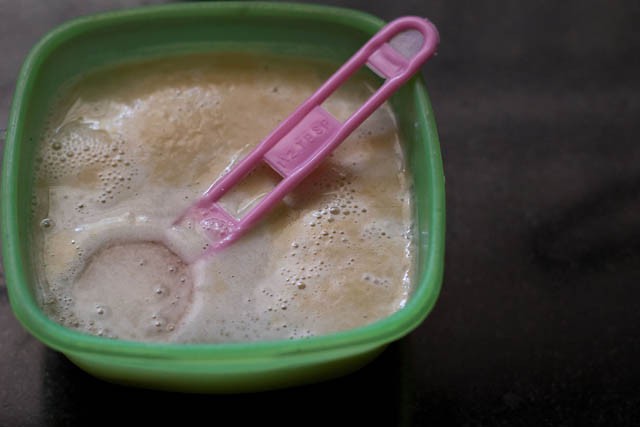
1. Warm 1 cup water in a pan or microwave. Add 1 tablespoon sugar and 1.5 teaspoons dry active yeast (or 1 teaspoon instant yeast) and stir.
Let this mixture remain undisturbed. After 10 minutes, the mixture will become bubbly and frothy.
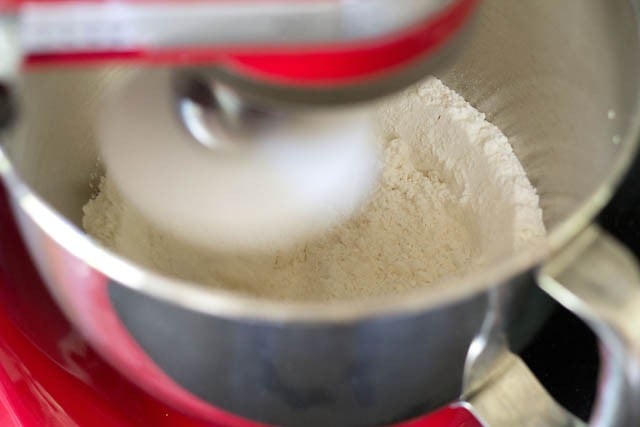
2. On speed 1 of KitchenAid mixer, mix 1 teaspoon edible rock salt (or 1 teaspoon regular salt) with 2.25 cups all-purpose flour and ¾ cup whole wheat flour for some seconds.
3. Now add the frothy yeast mixture, 2 tablespoons oil (or 2 tablespoons melted butter), some warm water and on speed 2, mix the dough.
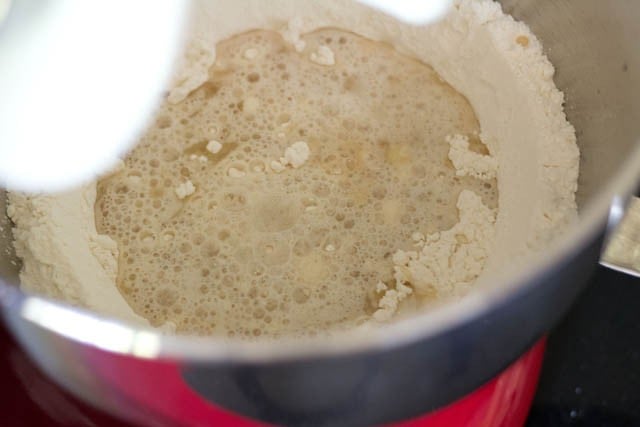
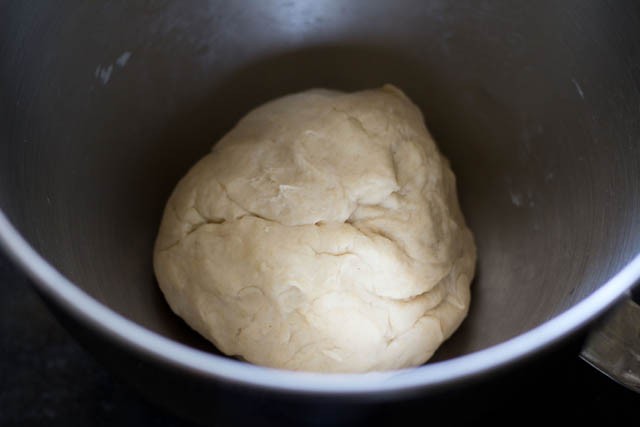
4. Continue on speed 2 for a couple of minutes, till the dough begins to come together.
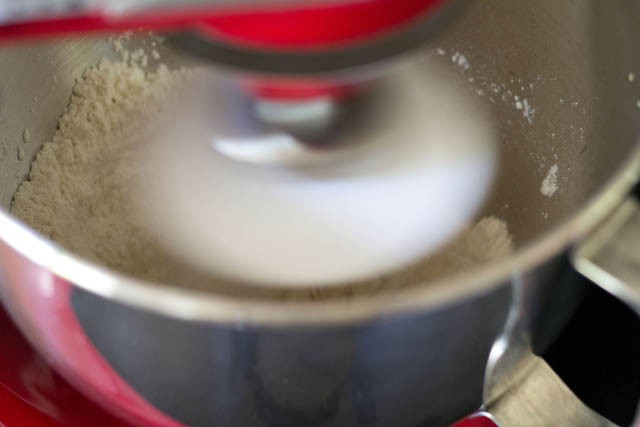
5. After 2 minutes, this is how the dough appears.
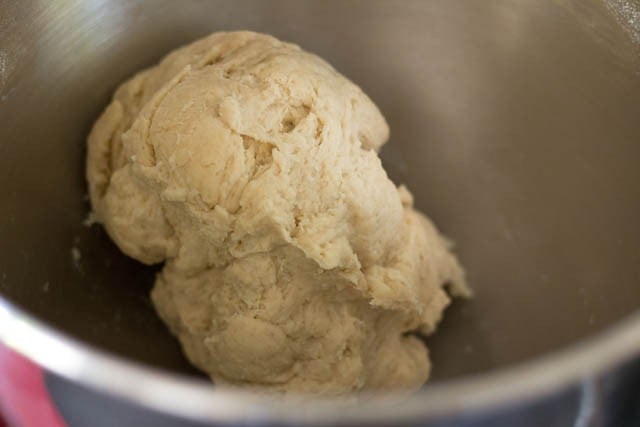
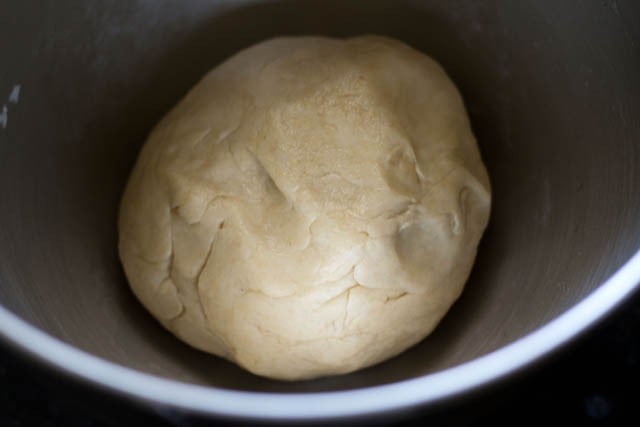
6. Check the dough. If it feels dry, add some warm water. It if feels sticky, add some flour. When the dough is fully kneaded, stop the mixer. You should have a smooth and pliable dough.
Below photo is of the dough after 4 minutes. Stretch a small piece of dough between your fingers into a thin sheet. If it does not tear, it means that the dough is well kneaded.
Leaven Dough
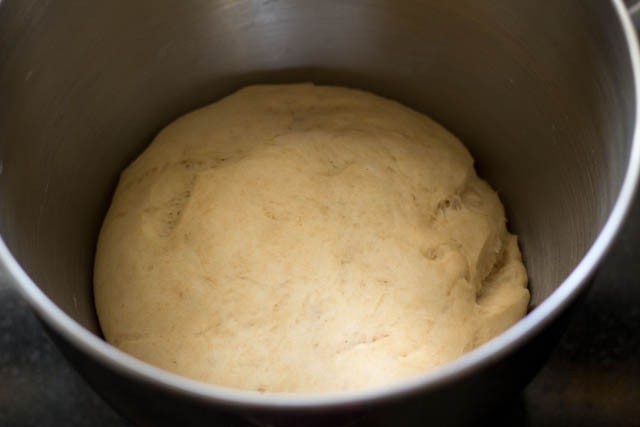
7. Rub some oil or water on the whole dough. Put in a bowl (I used the same KitchenAid bowl), cover with a kitchen towel and keep in a warm place for the dough to leaven.
8. After 2 to 3 hours, the dough will rise. I kept the dough a tad longer (for 3½ hours) due to a cooler temperature here on this day.
Shape Bread Dough
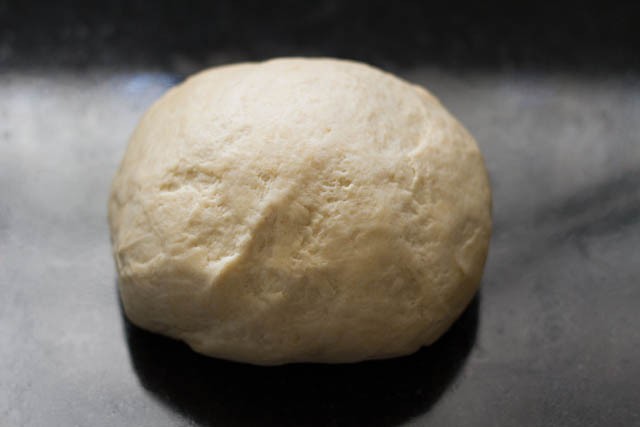
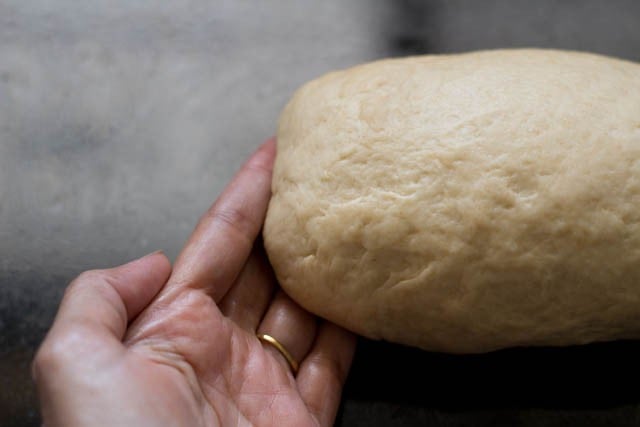
9. Punch or knock back the dough with light hands and knead lightly.
10. Roll the dough into a log shape.
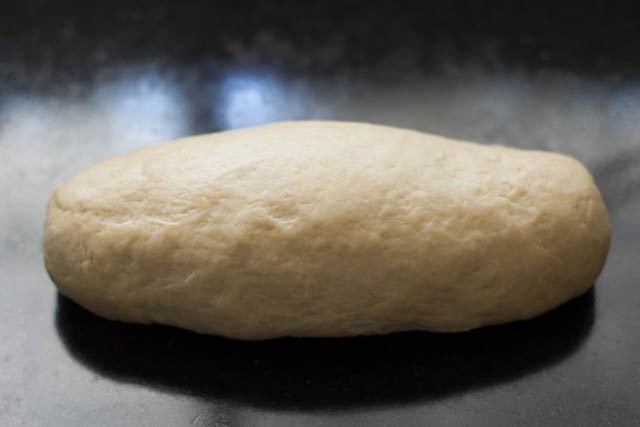
11. Seal the edges of the dough on both sides.
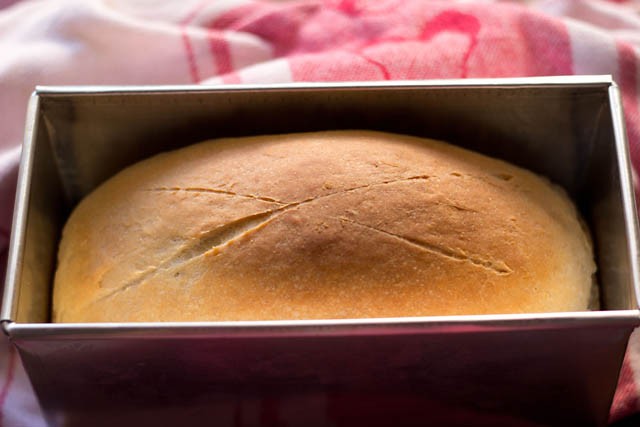
12. Place the dough log in a greased or parchment lined loaf pan (9×5 inches) with the sealed edges down.
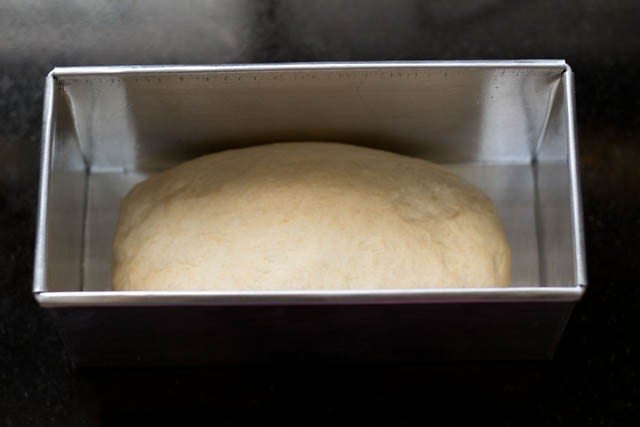
13. Keep covered for 35 to 40 minutes or 1 hour for the dough log to rise. This time may vary according to the temperature at a given place. I kept for an hour.

Bake Brown Bread
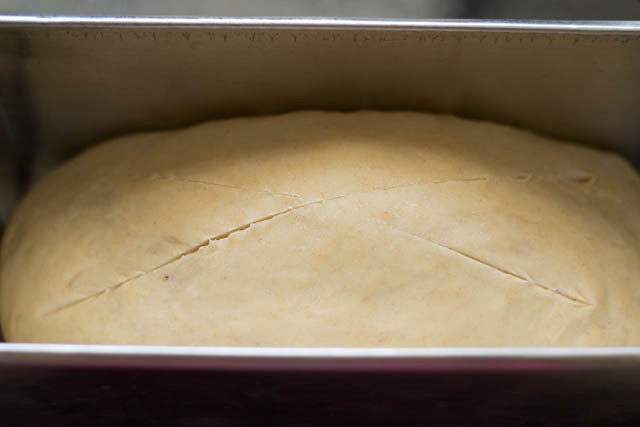
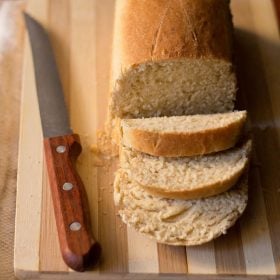
14. Before baking, preheat the oven to 180 degrees C or 375 degrees F. With a serrated knife, make a cross on the top of the dough.
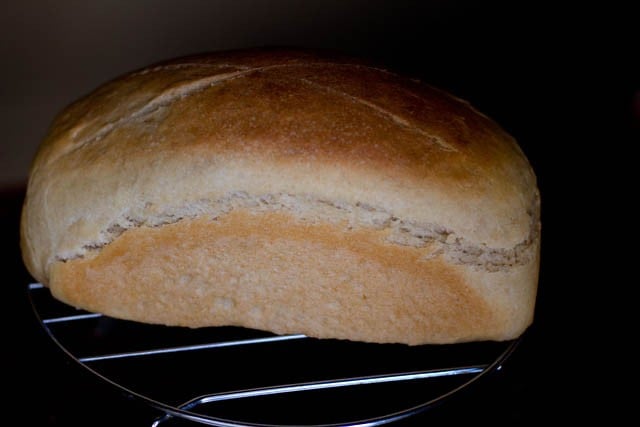
15. You can brush the loaf with some plant based milk or soy milk if you want. Bake in the oven for 45 to 50 minutes or till the bread browns from the top and when you tap on it, it sounds hollow.
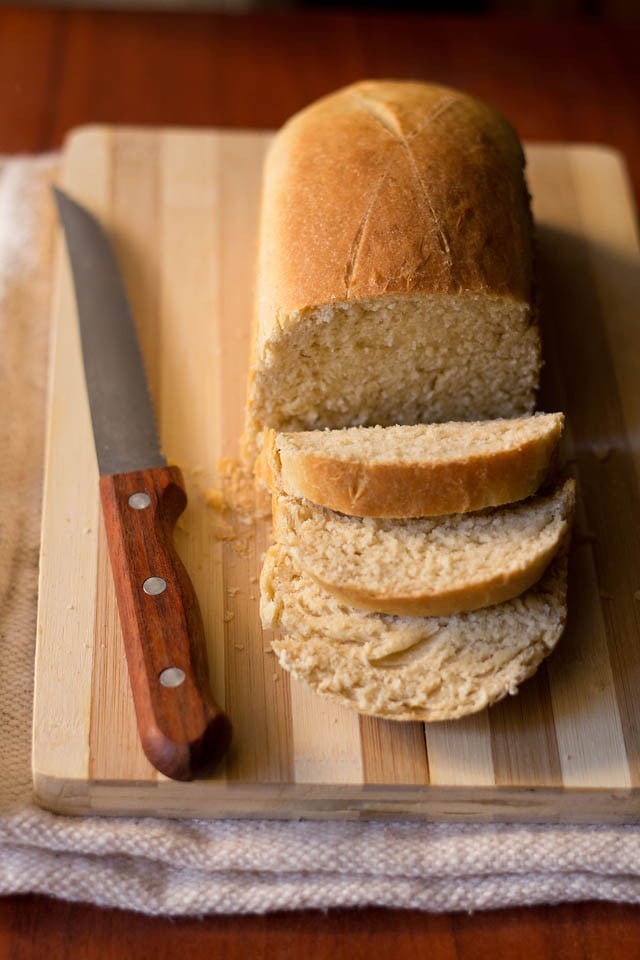
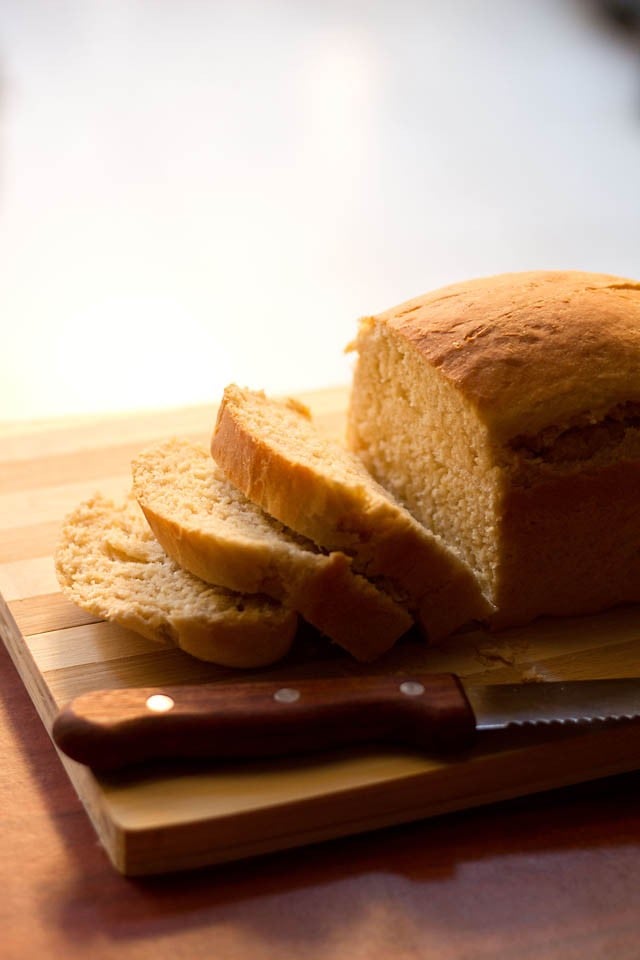
16. Wait for 3 to 5 minutes. Then while the bread is still hot, remove the bread with the help of mittens/gloves from the loaf pan. Allow the Brown Bread to cool to room temperature on a wire rack or tray.
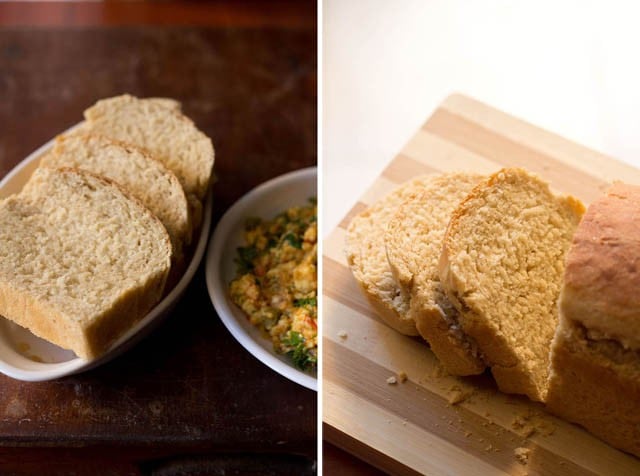
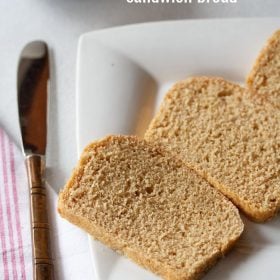
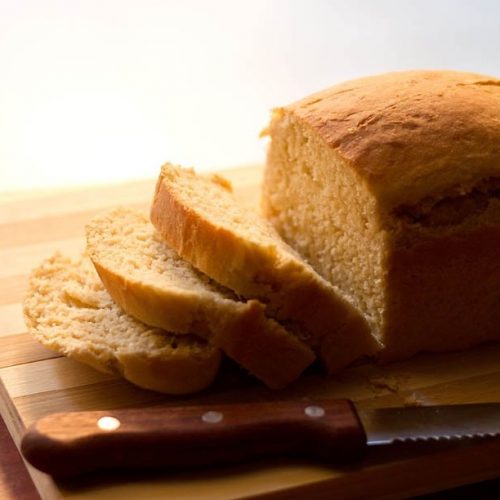
17. Slice and serve the Brown Bread immediately or keep it in a bread box. It is advisable to store the Brown Bread in a refrigerator in hot and humid countries or countries with extreme weather conditions like India. This way, it stays longer.
This Brown Bread can be used to make Bread Pakora, Veg Sandwich, Cheese Sandwich, Bread Roll and many other dishes that require bread.

My Baking Journey
I still think about the days when I had just started baking, was impatient and creating a lot of mistakes against today, when I’m confident with my baking recipes which result in great products.
I would say that if you are even a bit interested in baking, take it up seriously because it is one form of cooking which is a therapy in itself. All that kneading, stretching, etc. does calm the mind and soul.
Plus, the cleaning that follows after is a great exercise for the body! Not to forget, when you end up with a gorgeous baked product at home, the happiness is unparalleled.
Despite having tried my hands in successfully baking artisan breads, buns, rolls, etc. over the years, I enjoy making baked goods for me and my family at home even today. I think I have come a long way.
But there’s still so much more to achieve or ‘bake,’ as ‘this world’ is ever-expanding! I aim to develop and recreate more and more recipes for my blog, so that you all can get to baking your own beautiful stuff in your kitchen.
Alongwith this Brown Bread recipe, you will also find other recipes here (listed below) for some of the most popular baked goods/dishes. I say, give them all a try!
Expert Tips
- Quality ingredients: Invest in best, premium quality/organic ingredients for a top-class baked bread. Make sure all the ingredients are within the expiry date.
- Yeast activation: When using dry active yeast, make sure to dissolve it in warm water (43 to 46 degrees C or 110 to 115 degrees F) to properly activate it. The yeast won’t be activated if the water is too cold. If it is too hot, the yeast will be cooked. You can substitute the dry active yeast with either instant or fresh yeast as well. Follow this conversion: 1 teaspoon instant yeast = 1.5 teaspoon active dry yeast = 1 tablespoon fresh yeast.
- Kneading: Remember to knead your dough well. If kneading by hand, spend at-least 10 to 12 minutes doing so. To check the doneness of the dough, flatten and stretch a small piece of dough into a thin sheet/layer. If it does not tear or break, it means that the dough is well kneaded. You can add less or more water depending on the quality of flour. The time taken for the final dough log to rise may vary from place to place. Keep it covered accordingly.
- Baking: The time taken to bake the bread may vary from oven to oven as no two ovens are the same. If the surface of the bread starts browning while baking, then cover it with an aluminium foil or parchment paper. To check the doneness of the cooked bread, make sure the bread is well browned from the top. Also, tap on it. If it sounds hollow, it’s done. You can refrigerate the leavened dough and use it the next day.
- Storing: Best way to store the Brown Bread is to refrigerate it. This way it stays good for longer, especially in countries with a hot and humid/extreme climate like India.
- Variations: Add variety to your bread recipe, divide in parts and use them to make delicious dinner rolls. Add some herbs (fresh or dried) to make a fragrant herbed bread. Water can be replaced with milk (dairy or vegan) for a milk bread. Include some more sugar, nuts, berries, dry fruits for a sweet bread.
- Scalable recipe: A large batch of 2 to 3 loaves can be made by easily scaling this recipe.
- Be patient and have fun: There’s a lot of time that will go into resting and waiting while the dough rises and the loaf bakes. Avoid the urge to rush and you will be rewarded with the fluffiest, most tender and tastiest homemade bread.
FAQs
Yes, the Brown Bread can be baked in the convection mode of microwave at the same temperature mentioned in the recipe details. Also, microwave doesn’t have a rack option. So, keep the baking pan on the glass turn plate.
Yes, you can. Follow this conversion: 1 teaspoon instant yeast = 1.5 teaspoon active dry yeast = 1 tablespoon fresh yeast.
If the Brown Bread is well browned from the top and sounds hollow when tapped on, it means it’s fully baked or cooked.
Yes, you can. Make sure to refrigerate the leavened dough if not baking on the same day.
You can cover the bread with an aluminium foil or butter paper in this case.
Yes, you can. But if you are adding eggs, then you’ll have to reduce the quantity of water.
Most of the times, heaviness in bread is due to the yeast not getting proofed well. The smell could be due to the quality. Thus, try using a good quality yeast.
More Similar Recipes To Try!

Bread Recipes
Bread Recipes

Italian Recipes

Italian Recipes
If you’ve tried this recipe, please rate it in the recipe card or leave a comment below – I’d love to hear your feedback. For more vegetarian inspiration, sign up for my email updates or follow me on Instagram, Youtube, Facebook, Pinterest or X.
Brown Bread Recipe
Ingredients
- 2.25 cups all-purpose flour
- ¾ cup whole wheat flour
- 1 cup water or as needed
- 1.5 teaspoon dry active yeast or 1 teaspoon instant yeast or 1 tablespoon fresh yeast
- 2 tablespoon sunflower oil or melted butter
- 1 tablespoon raw sugar or regular white sugar
- 1 teaspoon rock salt (edible and food grade) or regular salt or pink salt
Instructions
Proofing yeast
- Warm 1 cup of water in a pan or in the microwave. The water should be lukewarm and not hot.
- Add sugar and dry active yeast.
- Stir to combine and let the yeast activate.
- This usually takes about 10 to 12 minutes.
Kneading dough in a bowl
- Sieve both the flours with salt in a large wide bowl or a large tray.
- Add the proofed yeast and oil.
- Mix all the ingredients.
- Then begin to knead the dough.
- If the dough feels sticky, add some flour.
- If it feels dry, add some water.
- Continue to knead for 10 to 12 minutes or until you get a smooth, supple dough which when stretched doesn't tear.
Kneading in a KitchenAid mixer
- Add the flour and salt in the bowl.
- On speed 1, mix the flour and salt for some seconds.
- Add the yeast mixture and oil and on speed 2 knead the dough.
- Continue kneading for 2 minutes and check the dough.
- If it feels dry, add some warm water.
- If it feels sticky, add some flour.
- Continue kneading further for 2 to 3 minutes on speed 2 or till you get a smooth and pliable dough.
Leavening dough
- Rub oil or water all over the dough and keep in a covered bowl to leaven for 2 to 3 hours.
- After 2 to 3 hours, remove the dough. Punch or knock back the dough with light hands and knead lightly.
- Roll a single log of the dough.
- Tuck the edges down on both sides of the dough log.
- Place the dough log in a greased loaf pan (9×5 inches) with the tucked edges facing downwards.
- Cover the loaf pan and let the dough leaven for 40 minutes or 1 hour.
Baking Brown Bread
- Preheat oven to 180 degrees C or 350 degrees F.
- Bake the loaf for 35 to 40 minutes or until the bread is well browned on top and sounds hollow when tapped.
- Wait for 3 to 5 minutes. While still hot, then using oven mittens, remove the loaf from the pan. Place the bread on a wire rack or tray to cool to room temperature.
- Slice and serve the Brown Bread or refrigerate for later use.
Notes
- If not baking on the same day, the leavened dough can be refrigerated.
- The leftover baked bread can be wrapped in a foil or cling film and refrigerated.
- The recipe can be doubled.
- The bread can also be baked in the convection mode of microwave oven at the same temperature mentioned in the recipe details.
- If the surface of the bread starts browning while baking, then cover it with an aluminium foil or parchment paper.
Nutrition Info (Approximate Values)
This Brown Bread recipe from the blog archives first published in March 2013 has been updated and republished on December 2022.

How to bake brown bread in an oven? Can u pls share.
this brown bread recipe is baked in the oven only. the temperature for preheating and baking is same – 180 degrees C/375 degrees F. keep in the center rack or in the second lower bottom rack if the oven is small. use either the bottom heating element (bake mode) or both the top and bottom heating elements (toast mode).
Can I bake in cooker as pressure cooker cakes are made?
yes you can make in pressure cooker.
Hi
How are you…after gap now trying my hand on baking breads at home…..last attempt was a big disappointment……couple of questions……when adding instant yeast then flour rises much quickly….so should I go bake it….or should follow the instructions exactly……can we add milk to it?
with instant yeast it will take less time for both the rises. so as soon as the loaf rises, you can bake it. if the bread is over leavened, then it does affect the structure of the bread. the instructions here are for baking with dry active yeast.
Hi can you please make oats bread and share the receipe anything that is wheat free
making any gluten free bread requires testing the recipe many times. i did try but did not succeed with bread made only from millet flours. some wheat flour has to be added. there are gluten free baking flours available in the indian market but they are very expensive and one can easily make bread from these flours. however for the readers i wanted to share a recipe which can be made with our local millet flours, but all the times i tried, the bread texture failed. if i make oats bread also then i will need to add atleast some wheat flour in it.
Hi,
Can you please tell me what should be the temperature if i bake bread in convection microwave and also which rack should be used?
Ishita, You can use 180 degree celsius. Bake in convection mode of microwave. Pre heat the oven for 15 minutes at 180 degree celsious before baking. In microwave oven there is no rack option. so keep the pan on the glass turn plate. In oven I keep it on middle rack.
1 – how much time to bake at 180 C ?
2 – should i use CONV only while baking or COMBI+CONV while baking ?
3 – i tried 250 C for almost 40-45 min, but the bread did not bake at all. Only its sides turned brown and all the inside dough was a bit raw. Pls guide.
1 – will take 30 to 45 minutes as timing depends on the type and size of oven.
2 – only use convection mode. please do not use combination + convection mode.
3 – before baking oven has to be preheated prior to baking for at least 15 minutes. 250 degrees celsius is a high temperature for baking bread. sometimes even though we set the oven to a high temperature, the actual temperature is less. so its always better to calibrate or check the oven temperature. you can check more about calibrating oven in google. from what you say, i guess the bread needed to be baked for some more time. usually in convection ovens, the outer part gets golden fast as compared to regular ovens. so here you can cover the pan with an aluminium foil or parchment paper. but only use foil or parchment paper in convection mode.