Always wanted to bake your own Brown Bread at home without any hassle? You’re at the right place as this Brown Bread recipe is going to turn you into a brilliant bread baker! With step-by-step photos and all your major queries/concerns answered, I’m sure you’ll only have fun now onwards whenever you want to make a Brown Bread at home. Also, because there’s no comparison of a home cooked food product/dish versus a store bought one. Happiness indeed is homemade!
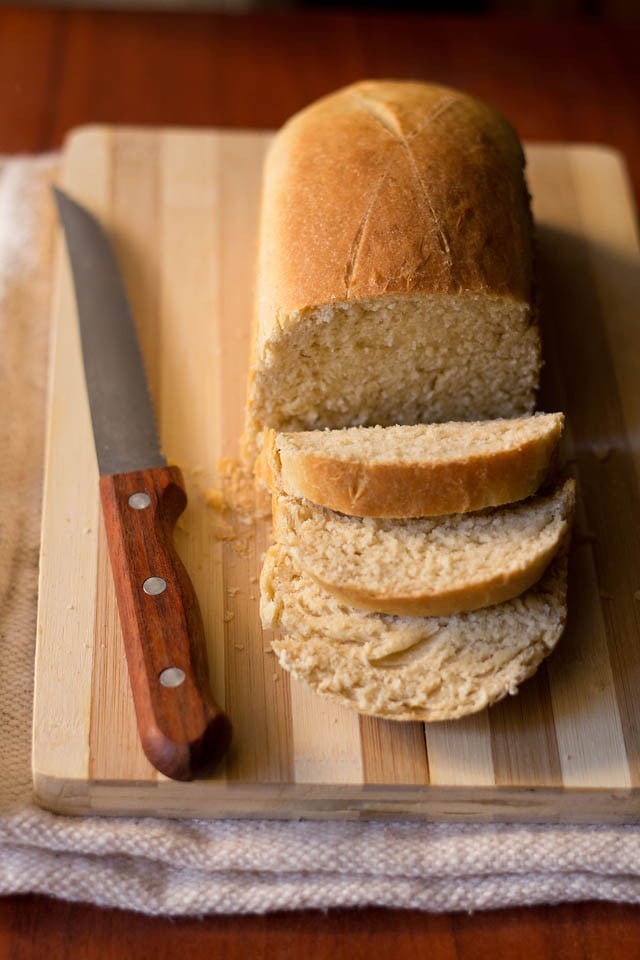
Table of Contents
About Brown Bread Recipe
As we all know Brown Bread is one of the most eaten variant of bread all over the world. It is usually made with more portions of whole wheat flour mixed with all-purpose flour.
To give a deeper shade of brown, sometimes coloring ingredients like caramel or molasses are also added in the commercially prepared brown bread.
But do not that Brown Bread is different from Whole Wheat Bread as the latter is only made with Whole Wheat Flour and does not contain all-purpose flour.
This Brown Bread recipe, results in a soft, light and great textured bread. I have used a combination of whole wheat flour and all-purpose flour in a ratio of 1:3 for this Brown Bread recipe.
You can go ahead and tweak this proportion to a half-half or even 2:1. I tried the Garlic Bread with a similar ratio of 2:1 of these two flours and that also came out really well.
Once you bake this Brown Bread at home, you will give-in to baking and will almost forget buying it from the market.
Watching the bread getting baked, rising and shining perfectly is not just a feel-good factor but is intimidating to many.
Not to forget, the lovely aroma of the baked Brown Bread enveloping the entire house is supreme, in fact magical!
This Brown Bread recipe will definitely help you to overcome your bread baking fears and master the art of making a perfect one at home.
Baking a whole meal bread with 100% whole wheat flour or whole meal flour results in a dense bread with a nutty flavor.
In order to get the right light texture and taste, you must add some flour with glutinous properties like all-purpose flour, especially in India where gluten powder is not available easily.
Thus, this Brown Bread recipe gives you exactly what is needed to get that apt texture and mouthfeel.
Bread Baking Basics
There are few bread baking basics that if you get them right, will make you a pro baker. I cover them one by one below. Here I answer the queries and doubts which I mostly get on bread baking.
Yeast and Flour
It is a fact that using premium quality ingredients, including yeast and flours, will result in the best version of your baked Brown Bread.
Try and go for an organic brand as there are no impurities in it. I have used a good quality dry yeast, organic stone ground whole wheat flour and an organic all-purpose flour as well.
For the yeast you can opt to use dry active yeast, fresh yeast or instant yeast to make this Brown Bread recipe.
Follow this conversion: 1 teaspoon instant yeast = 1.5 teaspoon active dry yeast = 1 tablespoon fresh yeast.
Keep in mind that dry active yeast and fresh yeast need to be activated in warm water. But for instant yeast (or rapid rise yeast), it can be simply be mixed with the flours and other ingredients and kneaded to a dough.
Proofing, Leavening and Temperatures
I always try and use dry active yeast for baking. So, when using it, you have to activate it in warm water first. The temperature range for this warm water should be between 40 to 46 degrees C or 105 to 115 degrees F.
A much lower or higher range of temperature hampers the process of yeast activation. You can use a thermometer to check the temperature of the water.
Baking requires a lot of precision in every element that goes in a particular recipe. So, if the yeast doesn’t proof, then I recommend you to discard the mixture and begin again.
If it still doesn’t proof, then the yeast has reached its expiry date. Hence, check before you start with the process.
While using dry active yeast, you have to allow the Brown Bread dough to rise/leaven twice. Firstly, in a bowl and later in the baking pan.
In order to have a perfect leavened/risen dough, you must keep it in a warm temperature. So, if you stay in a place with cold climate, then use your oven or the Instant Pot to do so.
Preheat your oven to 49 to 66 degrees C or 120 to 150 degrees F for 10 to 12 minutes. Turn off the oven, place the Brown Bread dough inside and keep it there till it doubles in size.
Remember to remove the bread from the oven before you again preheat the oven for baking. All this might sound cumbersome and requiring too much efforts, but then the fruits of patience are mostly sweet.
Note that when leavened the dough with instant yeast, the time taken to double it will be less as compared when using active dry yeast or fresh yeast.
Kneading The Dough
I have used the KitchenAid mixer to knead the dough. However, you can also knead it in a food processor or by hand.
The instructions for both these are mentioned in the recipe details below. If using any other stand mixer, food processor or bread machine, then make sure to follow the manufacturer’s instructions as well.
If kneading by hand, then knead for a good 10 to 12 minutes. The dough should be pliable, soft and stretch easily.
Just be persistent, follow the steps carefully for a guaranteed satisfaction at the end.
How to make Brown Bread
Proof Yeast and Knead Dough
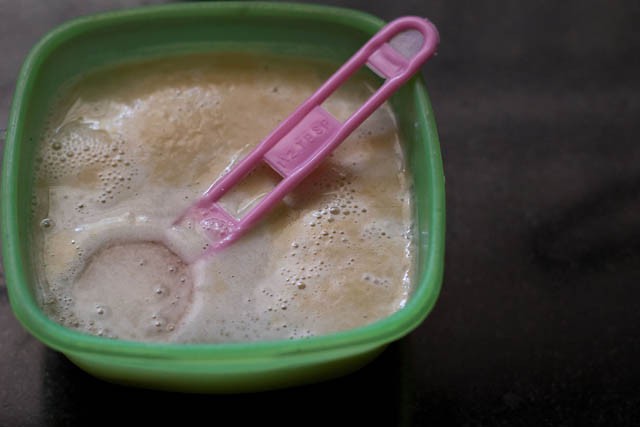
1. Warm 1 cup water in a pan or microwave. Add 1 tablespoon sugar and 1.5 teaspoons dry active yeast (or 1 teaspoon instant yeast) and stir.
Let this mixture remain undisturbed. After 10 minutes, the mixture will become bubbly and frothy.
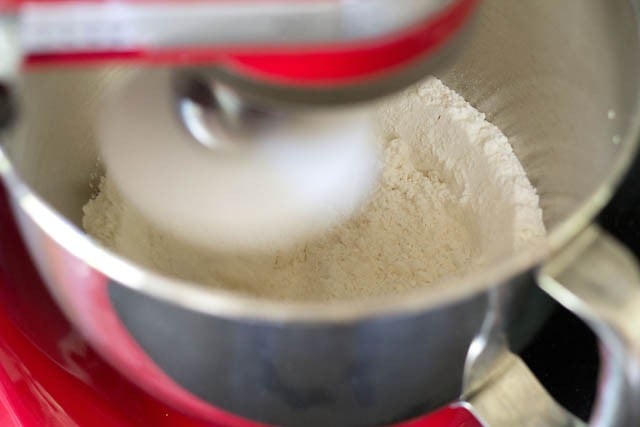
2. On speed 1 of KitchenAid mixer, mix 1 teaspoon edible rock salt (or 1 teaspoon regular salt) with 2.25 cups all-purpose flour and ¾ cup whole wheat flour for some seconds.
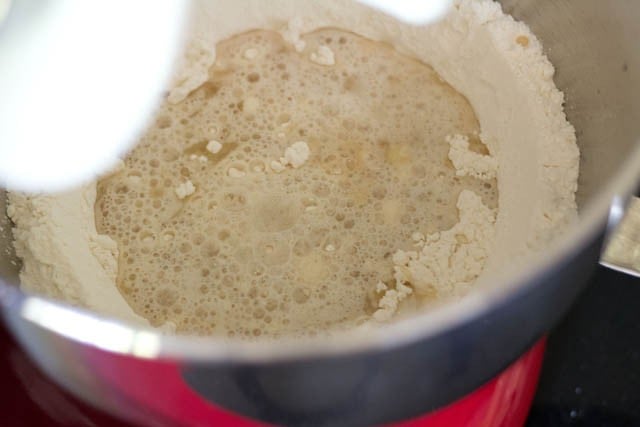
3. Now add the frothy yeast mixture, 2 tablespoons oil (or 2 tablespoons melted butter), some warm water and on speed 2, mix the dough.
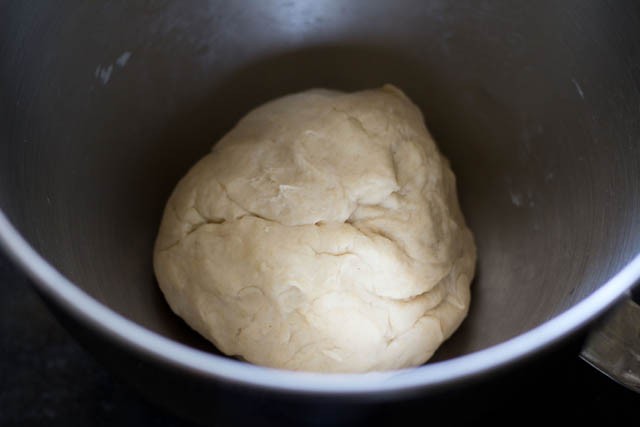
4. Continue on speed 2 for a couple of minutes, till the dough begins to come together.
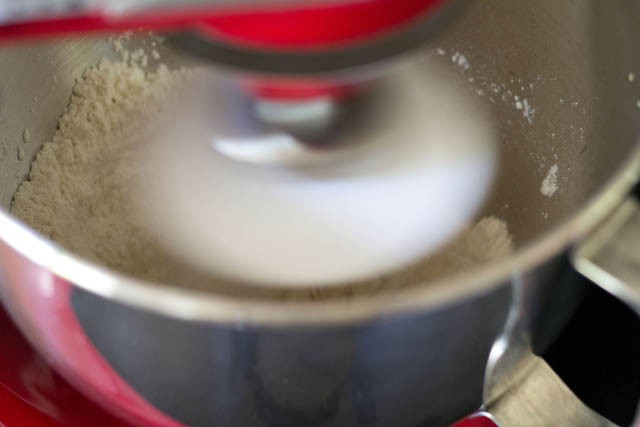
5. After 2 minutes, this is how the dough appears.
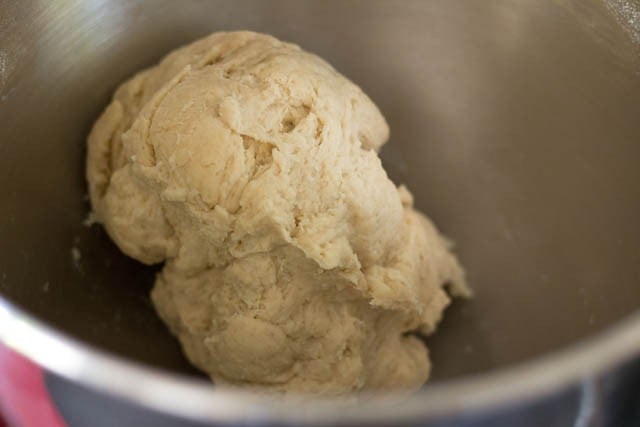
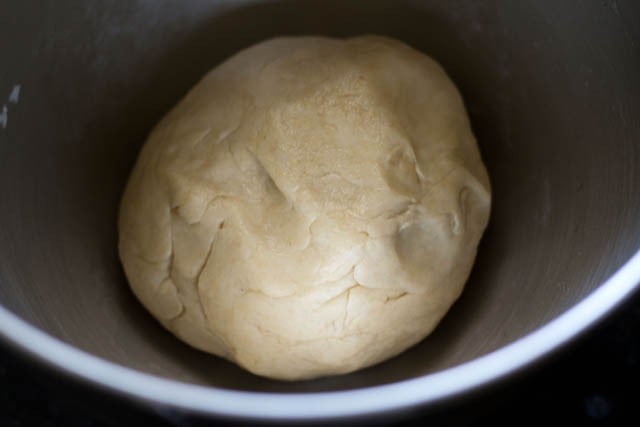
6. Check the dough. If it feels dry, add some warm water. It if feels sticky, add some flour. When the dough is fully kneaded, stop the mixer. You should have a smooth and pliable dough.
Below photo is of the dough after 4 minutes. Stretch a small piece of dough between your fingers into a thin sheet. If it does not tear, it means that the dough is well kneaded.
Leaven Dough
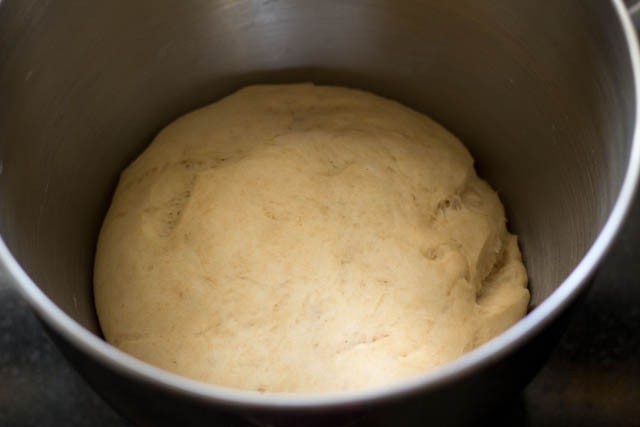
7. Rub some oil or water on the whole dough. Put in a bowl (I used the same KitchenAid bowl), cover with a kitchen towel and keep in a warm place for the dough to leaven.
8. After 2 to 3 hours, the dough will rise. I kept the dough a tad longer (for 3½ hours) due to a cooler temperature here on this day.
Shape Bread Dough
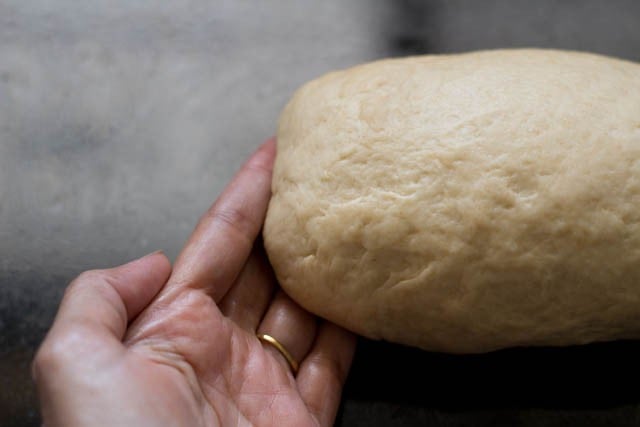
9. Punch or knock back the dough with light hands and knead lightly.
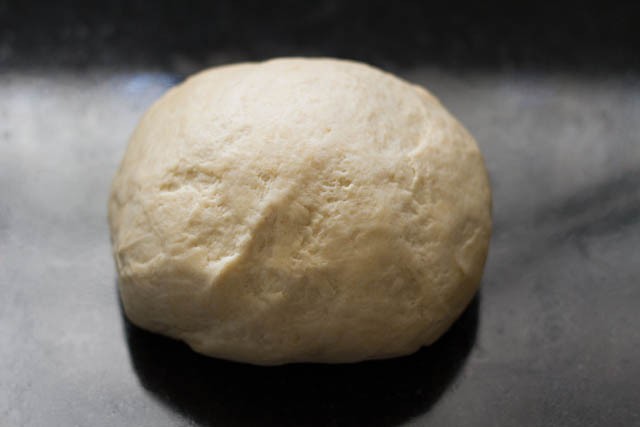
10. Roll the dough into a log shape.
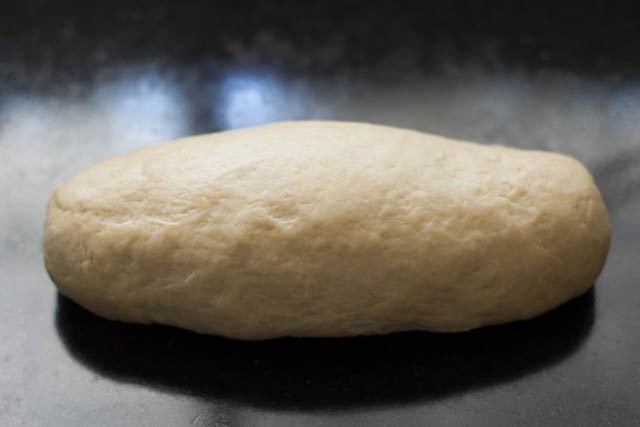
11. Seal the edges of the dough on both sides.
12. Place the dough log in a greased or parchment lined loaf pan (9×5 inches) with the sealed edges down.
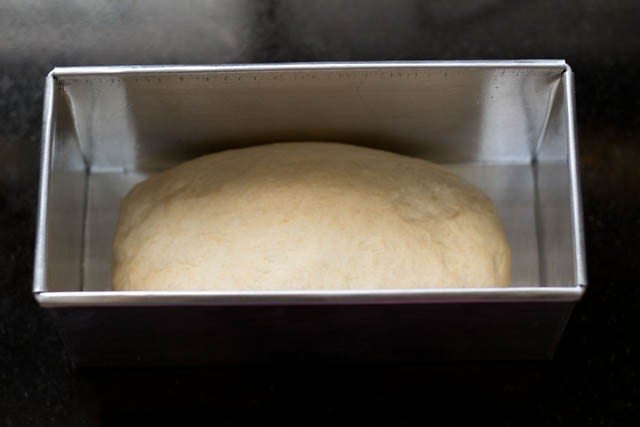
13. Keep covered for 35 to 40 minutes or 1 hour for the dough log to rise. This time may vary according to the temperature at a given place. I kept for an hour.

Bake Brown Bread
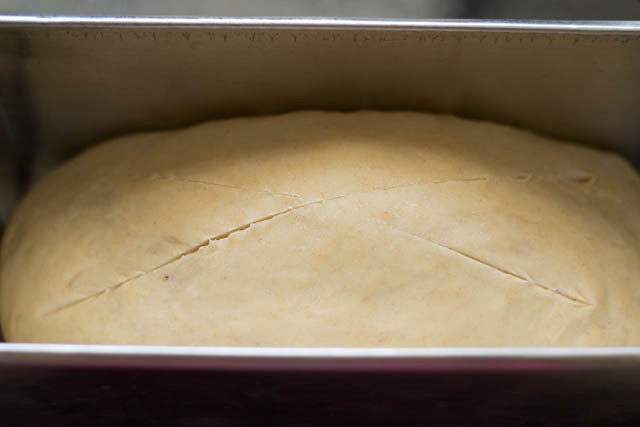
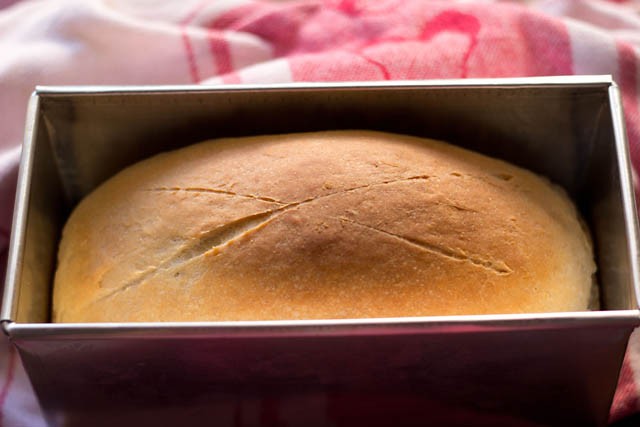
14. Before baking, preheat the oven to 180 degrees C or 375 degrees F. With a serrated knife, make a cross on the top of the dough.
15. You can brush the loaf with some plant based milk or soy milk if you want. Bake in the oven for 45 to 50 minutes or till the bread browns from the top and when you tap on it, it sounds hollow.
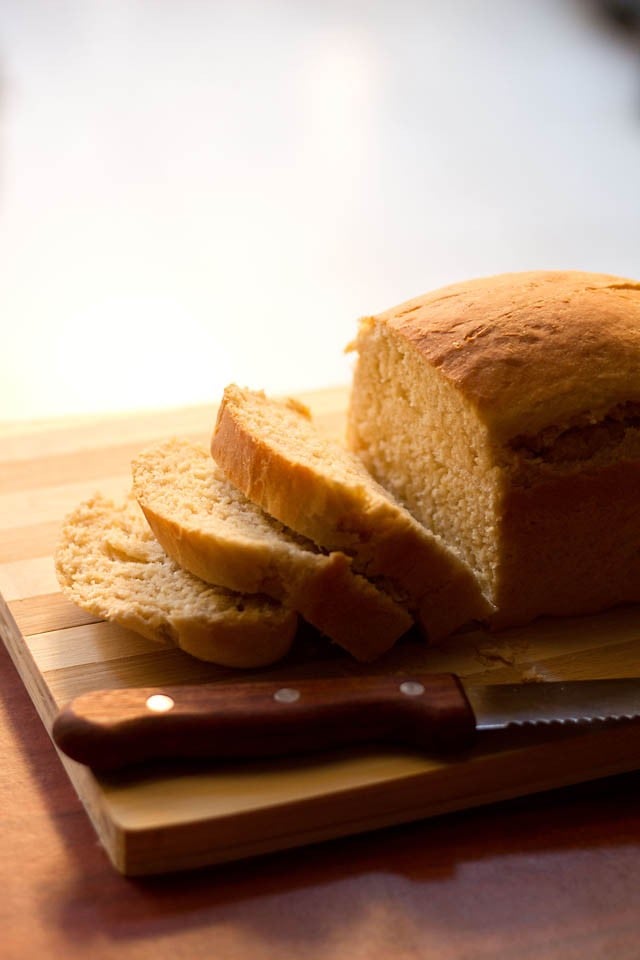
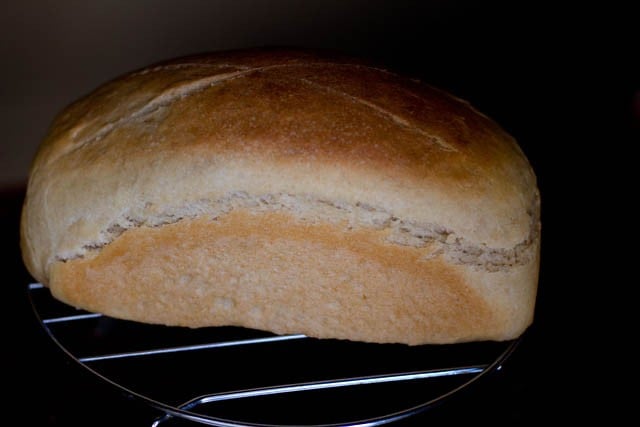
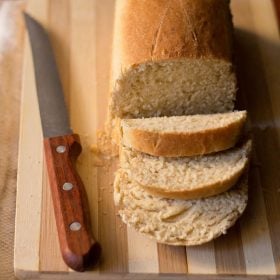
16. Wait for 3 to 5 minutes. Then while the bread is still hot, remove the bread with the help of mittens/gloves from the loaf pan. Allow the Brown Bread to cool to room temperature on a wire rack or tray.
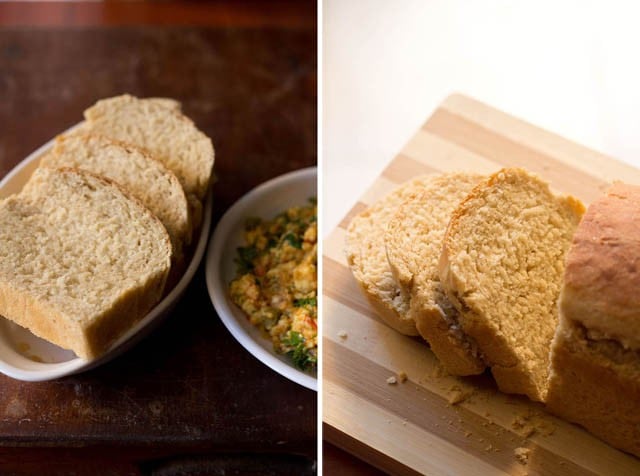
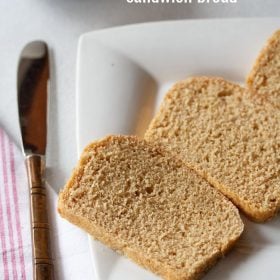
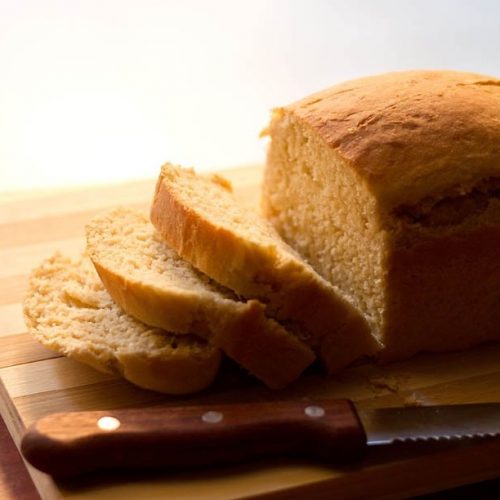
17. Slice and serve the Brown Bread immediately or keep it in a bread box. It is advisable to store the Brown Bread in a refrigerator in hot and humid countries or countries with extreme weather conditions like India. This way, it stays longer.
This Brown Bread can be used to make Bread Pakora, Veg Sandwich, Cheese Sandwich, Bread Roll and many other dishes that require bread.

My Baking Journey
I still think about the days when I had just started baking, was impatient and creating a lot of mistakes against today, when I’m confident with my baking recipes which result in great products.
I would say that if you are even a bit interested in baking, take it up seriously because it is one form of cooking which is a therapy in itself. All that kneading, stretching, etc. does calm the mind and soul.
Plus, the cleaning that follows after is a great exercise for the body! Not to forget, when you end up with a gorgeous baked product at home, the happiness is unparalleled.
Despite having tried my hands in successfully baking artisan breads, buns, rolls, etc. over the years, I enjoy making baked goods for me and my family at home even today. I think I have come a long way.
But there’s still so much more to achieve or ‘bake,’ as ‘this world’ is ever-expanding! I aim to develop and recreate more and more recipes for my blog, so that you all can get to baking your own beautiful stuff in your kitchen.
Alongwith this Brown Bread recipe, you will also find other recipes here (listed below) for some of the most popular baked goods/dishes. I say, give them all a try!
Expert Tips
- Quality ingredients: Invest in best, premium quality/organic ingredients for a top-class baked bread. Make sure all the ingredients are within the expiry date.
- Yeast activation: When using dry active yeast, make sure to dissolve it in warm water (43 to 46 degrees C or 110 to 115 degrees F) to properly activate it. The yeast won’t be activated if the water is too cold. If it is too hot, the yeast will be cooked. You can substitute the dry active yeast with either instant or fresh yeast as well. Follow this conversion: 1 teaspoon instant yeast = 1.5 teaspoon active dry yeast = 1 tablespoon fresh yeast.
- Kneading: Remember to knead your dough well. If kneading by hand, spend at-least 10 to 12 minutes doing so. To check the doneness of the dough, flatten and stretch a small piece of dough into a thin sheet/layer. If it does not tear or break, it means that the dough is well kneaded. You can add less or more water depending on the quality of flour. The time taken for the final dough log to rise may vary from place to place. Keep it covered accordingly.
- Baking: The time taken to bake the bread may vary from oven to oven as no two ovens are the same. If the surface of the bread starts browning while baking, then cover it with an aluminium foil or parchment paper. To check the doneness of the cooked bread, make sure the bread is well browned from the top. Also, tap on it. If it sounds hollow, it’s done. You can refrigerate the leavened dough and use it the next day.
- Storing: Best way to store the Brown Bread is to refrigerate it. This way it stays good for longer, especially in countries with a hot and humid/extreme climate like India.
- Variations: Add variety to your bread recipe, divide in parts and use them to make delicious dinner rolls. Add some herbs (fresh or dried) to make a fragrant herbed bread. Water can be replaced with milk (dairy or vegan) for a milk bread. Include some more sugar, nuts, berries, dry fruits for a sweet bread.
- Scalable recipe: A large batch of 2 to 3 loaves can be made by easily scaling this recipe.
- Be patient and have fun: There’s a lot of time that will go into resting and waiting while the dough rises and the loaf bakes. Avoid the urge to rush and you will be rewarded with the fluffiest, most tender and tastiest homemade bread.
FAQs
Yes, the Brown Bread can be baked in the convection mode of microwave at the same temperature mentioned in the recipe details. Also, microwave doesn’t have a rack option. So, keep the baking pan on the glass turn plate.
Yes, you can. Follow this conversion: 1 teaspoon instant yeast = 1.5 teaspoon active dry yeast = 1 tablespoon fresh yeast.
If the Brown Bread is well browned from the top and sounds hollow when tapped on, it means it’s fully baked or cooked.
Yes, you can. Make sure to refrigerate the leavened dough if not baking on the same day.
You can cover the bread with an aluminium foil or butter paper in this case.
Yes, you can. But if you are adding eggs, then you’ll have to reduce the quantity of water.
Most of the times, heaviness in bread is due to the yeast not getting proofed well. The smell could be due to the quality. Thus, try using a good quality yeast.
More Similar Recipes To Try!

Bread Recipes
Bread Recipes

Bread Recipes

Italian Recipes
Best Thin Crust Pizza (Crispy Crunchy and Light Pizza Crust)
Please be sure to rate the recipe in the recipe card or leave a comment below if you have made it. For more vegetarian inspirations, Sign Up for my emails or follow me on Instagram, Youtube, Facebook, Pinterest or Twitter.
Brown Bread Recipe
Ingredients
- 2.25 cups all-purpose flour
- ¾ cup whole wheat flour
- 1 cup water or as needed
- 1.5 teaspoon dry active yeast or 1 teaspoon instant yeast or 1 tablespoon fresh yeast
- 2 tablespoon sunflower oil or melted butter
- 1 tablespoon raw sugar or regular white sugar
- 1 teaspoon rock salt (edible and food grade) or regular salt or pink salt
Instructions
Proofing yeast
- Warm 1 cup of water in a pan or in the microwave. The water should be lukewarm and not hot.
- Add sugar and dry active yeast.
- Stir to combine and let the yeast activate.
- This usually takes about 10 to 12 minutes.
Kneading dough in a bowl
- Sieve both the flours with salt in a large wide bowl or a large tray.
- Add the proofed yeast and oil.
- Mix all the ingredients.
- Then begin to knead the dough.
- If the dough feels sticky, add some flour.
- If it feels dry, add some water.
- Continue to knead for 10 to 12 minutes or until you get a smooth, supple dough which when stretched doesn't tear.
Kneading in a KitchenAid mixer
- Add the flour and salt in the bowl.
- On speed 1, mix the flour and salt for some seconds.
- Add the yeast mixture and oil and on speed 2 knead the dough.
- Continue kneading for 2 minutes and check the dough.
- If it feels dry, add some warm water.
- If it feels sticky, add some flour.
- Continue kneading further for 2 to 3 minutes on speed 2 or till you get a smooth and pliable dough.
Leavening dough
- Rub oil or water all over the dough and keep in a covered bowl to leaven for 2 to 3 hours.
- After 2 to 3 hours, remove the dough. Punch or knock back the dough with light hands and knead lightly.
- Roll a single log of the dough.
- Tuck the edges down on both sides of the dough log.
- Place the dough log in a greased loaf pan (9×5 inches) with the tucked edges facing downwards.
- Cover the loaf pan and let the dough leaven for 40 minutes or 1 hour.
Baking Brown Bread
- Preheat oven to 180 degrees C or 350 degrees F.
- Bake the loaf for 35 to 40 minutes or until the bread is well browned on top and sounds hollow when tapped.
- Wait for 3 to 5 minutes. While still hot, then using oven mittens, remove the loaf from the pan. Place the bread on a wire rack or tray to cool to room temperature.
- Slice and serve the Brown Bread or refrigerate for later use.
Notes
- If not baking on the same day, the leavened dough can be refrigerated.
- The leftover baked bread can be wrapped in a foil or cling film and refrigerated.
- The recipe can be doubled.
- The bread can also be baked in the convection mode of microwave oven at the same temperature mentioned in the recipe details.
- If the surface of the bread starts browning while baking, then cover it with an aluminium foil or parchment paper.
Nutrition Info (Approximate Values)
This Brown Bread recipe from the blog archives first published in March 2013 has been updated and republished on December 2022.
How to bake brown bread in an oven? Can u pls share.
this brown bread recipe is baked in the oven only. the temperature for preheating and baking is same – 180 degrees C/375 degrees F. keep in the center rack or in the second lower bottom rack if the oven is small. use either the bottom heating element (bake mode) or both the top and bottom heating elements (toast mode).
Can I bake in cooker as pressure cooker cakes are made?
yes you can make in pressure cooker.
Hi
How are you…after gap now trying my hand on baking breads at home…..last attempt was a big disappointment……couple of questions……when adding instant yeast then flour rises much quickly….so should I go bake it….or should follow the instructions exactly……can we add milk to it?
with instant yeast it will take less time for both the rises. so as soon as the loaf rises, you can bake it. if the bread is over leavened, then it does affect the structure of the bread. the instructions here are for baking with dry active yeast.
Hi can you please make oats bread and share the receipe anything that is wheat free
making any gluten free bread requires testing the recipe many times. i did try but did not succeed with bread made only from millet flours. some wheat flour has to be added. there are gluten free baking flours available in the indian market but they are very expensive and one can easily make bread from these flours. however for the readers i wanted to share a recipe which can be made with our local millet flours, but all the times i tried, the bread texture failed. if i make oats bread also then i will need to add atleast some wheat flour in it.
Hi,
Can you please tell me what should be the temperature if i bake bread in convection microwave and also which rack should be used?
Ishita, You can use 180 degree celsius. Bake in convection mode of microwave. Pre heat the oven for 15 minutes at 180 degree celsious before baking. In microwave oven there is no rack option. so keep the pan on the glass turn plate. In oven I keep it on middle rack.
1 – how much time to bake at 180 C ?
2 – should i use CONV only while baking or COMBI+CONV while baking ?
3 – i tried 250 C for almost 40-45 min, but the bread did not bake at all. Only its sides turned brown and all the inside dough was a bit raw. Pls guide.
1 – will take 30 to 45 minutes as timing depends on the type and size of oven.
2 – only use convection mode. please do not use combination + convection mode.
3 – before baking oven has to be preheated prior to baking for at least 15 minutes. 250 degrees celsius is a high temperature for baking bread. sometimes even though we set the oven to a high temperature, the actual temperature is less. so its always better to calibrate or check the oven temperature. you can check more about calibrating oven in google. from what you say, i guess the bread needed to be baked for some more time. usually in convection ovens, the outer part gets golden fast as compared to regular ovens. so here you can cover the pan with an aluminium foil or parchment paper. but only use foil or parchment paper in convection mode.
Hi, I’ve tried so many recipes of yours and almost every recipe come out excellent. but in the baking section, like breads and pavs there is always left the smell of yeast in the taste. plz give some solution. Thanks
Welcome Utsavi. thanks for your positive feedback on recipes. use a good brand of yeast. or you can use fresh yeast.
Tried the white bread. Came out perfect. My family loved it. Thank you.
I wanted to try the brown bread recipe. Wanted your advice regarding how much can I tweak the proportion of whole-wheat flour to maida for avoiding the denseness, as stated in your recipe 2:1 or 3:1 or even further 4:1?
thanks shweta. with maida, i have used upto 1/2 cup of maida with 2.5 cups of whole wheat flour. even 1/3rd cup will work. less than that, there are chances of the bread becoming dense. in this recipe, you can easily use 2.5 cups whole wheat flour and 1/2 cup of maida.
In case I am using instant yeast, should I still add the sugar?
shweta, sugar is added irrespective of using instant yeast or dry active yeast or fresh yeast.
can I bake bread in steel container
you can try. but the steel container should be baking safe and oven safe – meaning it should be able to take the high oven temp. or else the steel may bend or warp or crack.
Hi Dasanna,
Thank you for all the beautiful recipes you share!! I have always referred to your site for those authentic North Indian recipes. You spread happiness!!!
You don’t know how happy I’m right now!!! We have been in the US for quite some time and moved to India for good recently. Just as you mentioned, I have stopped buying bread at shops after I started making my own. I’m into mostly local and organic, so I was determined to bake bread with the flour available in India and that has been driving me crazy.
Batch after batch I have been making dry, heavy breads. I have been using 24 Mantra organic whole wheat atta and organic maida from a brand called Bhojanam. Could you please share the brands that worked out for you in making these breads. I did a lot of reading, some suggested 24 Mantra will be great for bread and others said it has very less gluten.
I’m not giving in to buying the commercial wheat or maida and have been considering buying a mill to make my own flour, because that’s what some sites suggested. I mostly bake for kids and bake-sales and I do it chemical-free. Please help me out.
Thanks,
Malar
thank you much malar. i use 24 letter brand chakki ground atta & maida and organic garden brands’s atta & maida. i never had any issues with leavening the dough with flour used from both the brands. i have also used fabindia brand of whole wheat flour and even that was good. 24 letter mantra has always worked well for me. i have made breads, cakes, muffins and pizzas and never faced any issue. even i was thinking of buying a mill, but then dropped the idea as my kitchen is totally packed with various gadgets.
if you have kitchenaid, there is an attachment for grinding and milling. you can check this and see if the resulting flour is fine or not. i did see a few videos, but i felt the flour was gritty and hence not purchased the attachment.
in india even vital wheat gluten is available, but i am not comfortable using it. some bran added to the flour also helps in good leavening.
hope the suggestions help you.
Thanks for the detailed info Dasanna, does the 24 Mantra brand has maida? I get the 24 Mantra chakki atta in the supermarkets, but not the maida. I checked their site, they don’t have it online either.
Was able to find a USDA organic 3 kg maida @ organic garden.
In the US there is the unbleached all-purpose flour, its the maida without the chemical bleach. It has a creamy color and beautifully replaces the regular maida in most of the recipes. I called the customer care of the “Bhojanam” brand maida and asked them about their processing procedure. The person said there is only one facility in the northern part of India that does this organic processing. She said the individual companies send their wheat and they process it to Maida which is patent protected and they don’t reveal the process to anyone. (As we are spending extra bucks for the maida, I just wanted to make sure I’m getting my money’s worth).
I will work with my bread and let you know how it turns out. Thanks!!
~ Malar
welcome malar. 24 letter mantra used to have maida, but now they have stopped it i suppose. so i buy from organic garden. i am aware about the unbleached maida, but i do not know if organic garden sells unbleached maida. a few years back i had placed an order for maida from some organic company in gurgaon. but i am not able to recollect their name now. you can check with organic garden folks to find if the maida is unbleached or not. but i have a feeling its difficult to get unbleached maida in india.
sure do give me the feedback about the bread.
Hi Dasanna thanks for the recipie. ..can we add egg in to this?
you can add eggs. but then reduce the amount of water.
Hi dasanna,thank u so much for the detailed explanation,yes instant yeast which I have looks like poppy seeds I got them by eBay,thank u so much for clarifying my doubt abt warm water I tried many of ur recipes n they turned out super yummy,ur app is like cooking guru for me,u r doing a grt job,thanks once again?.
most welcome anusha and thank you. then for instant yeast, just mix with water at room temperature and sugar and then add. in fact instant yeast is directly added to the flour. i do not add as sometimes the granules do not dissolve after kneading. so i mix it with water+sugar and then add. do note that the leavening time will reduce by half for both the rises. you can refer to this atta bread recipe for the leavening time – https://www.vegrecipesofindia.com/100-whole-wheat-bread-atta-bread/
hi dasanna bread looking yummy,i want to bake one so pls tell me up to what time we have to heat water in Microwave to get warm or room temperature water,i have instant yeast so tell me the right temperature to heat water i want my bread to raise pls help me.
anusha, i cannot tell the exact time as some microwave ovens heat faster and some slow. the water just needs to be lukewarm. when you dip your finger in it, it should feel warm and not hot. if its hot, then let it cool a bit at room temperature. if you are using instant yeast, then no need to heat water. just add water at room temperature along with sugar. mix and add to flour. the rising time will also be halved for both the rises.
instant yeast is very fine and looks like poppy seeds. in india i have seen some packets being sold as active instant yeast. but its not instant yeast and is dry active yeast. so if the yeast granules does not resemble poppy seeds then it is active dry yeast, which are slightly bigger in size than instant yeast. for dry active yeast you will need to warm water.
Hi Dassana ,
Am soooo proud of myself today ,all thanks to you. I baked a BREAD today !!!!!! Yeyyyyy……..
But I have two problems – the bread didn’t brown and all the six faces became quite hard and crusty. Secondly, the bread smells of yeast although I used bluebird dry active yeast !!
Please advise as I want to perfect this recipe
welcome smita. looks like the yeast is a problem here. if the bread become hard and crusty, then the yeast has not proofed well. the aroma is also due to the quality of yeast. try to get a better brand of yeast. mauripan, red star brands give good results.
hii can i bake this bread in cooker, like we bake cakes in pressure cooker
yes you can bake this bread in pressure cooker.
nice methods
thank you riddhika 🙂 for your feedback.
Well, it didn’t seem to rise fully after taking it out of the fridge, probably would have been better had I baked it last night. It’s still delicious and good texture, soft and fluffy.
thank you lindsey for this as well your previous comment. after removing from the fridge, let the dough come to room temperature and then bake.
You have made bread making seem so easy that I got over my image of how daunting the task was, it is so simple just takes a little time. This will be my third bread recipe I have tried, it’s in the oven now. I have been making the dough the night before and keeping it in the fridge to bake the next day, it works out well for me with two small children it can be hard to complete in one day. I was worried the dough wouldn’t rise but it always does once it warms back up.
Hello
I tried baking the bread.Had a good first and second raise but it didn’t rise in the oven. I got a dense bread with crust. what went wrong? thanks
could be the yeast proofing not done well. this can happen due to the quality of yeast or the temperature of water either on the cool side or hot.
Thank u very much for this recipe. .. I tried baking my first bread using this recipe. .. despite my microwave giving me trouble while baking it, I managed to bake a 90% perfect bread. Will try the other variations now
pleased to know this thankyou geetha 🙂
hi I want to bake this bread today but don’t have active dry yeast I have instant yeast so can I use that if yes please tell me the measurement for yeast how much should I add n I hope remaining all ingredients will be same…plus help me out..
add 1 tsp of instant yeast. the rest of the ingredients will be same.
Very nice recipy, I just make this bred in cooker, it is very nice,thanks once again
Made brown bread with above recipe but turned out heavy and dense.Used 7gms of yeast for 3 cups of mixed flour (plain and wheat ).
Please help as i want to try making it again.What did i do wrong?
7 grams yeast is a bit too much for 3 cups flour. about 5 grams yeast would have been fine. whenever a loaf turns heavy and dense, its the yeast proofing or the quality of yeast, mostly at fault. if the yeast does not bubble up and become frothy, then the texture of the bread does not come out well. hope this helps.
I am so impressed with your blog. You make sure that you dnt miss out on any point ,giving tiny details of each step. Also your writings are very useful for those who are new to using microwaves.
Have become a great fan of yours:)
Wish you more success.
thank you so much purvi. glad 🙂
Hii dassana…
I just loved your cooking and am found of you….Am following only you in cooking…
I hv doubt regarding OTG I got tat but I dnt knw Hw to use that can you plz help me…
Shall I use otg to prepare bread and cakes etc..
hi vasu, you can prepare breads and cake in OTG. in words it will be difficult to explain how to use an OTG. since most brands and models have a different make and knobs functionalities. i would suggest you to call a company rep of the brand you have or check the manual if you have one.
I love to eat brown bread, but i didn’t have idea how to make , so i request this, i will try to make these kind of bread
thank you for your receipes
Thank’s
Kelly
welcome kelly and thankyou 🙂
Dear Dassana,
I tried this bread. The texture was very heavy and I had the smell of the yeast. What could be the error?
heaviness in bread is most of the times due to the yeast not getting proofed well. the smell could be due to the quality. try using a good quality yeast.
Hi if i want to use fresh yeast what should be the quantity to use for the brown bread receipe?
add 1 tbsp of fresh yeast.
Hello I have a convection Microwave and I use convection mode to make bread. Is this same as grilling bread. I mean in an OTG one can bake bread in bake mode, so in bake mode the grills get red heated, so its same as grilling but only difference may be from top and side. So is convection mode ok in multipurpose ovens. My breads are very dry from top and does not brown at 180?? any suggestions
grilling bread is different than baking. what gets heated in an OTG are the top and bottom heating elements. for grilling the food is kept close to the top heating element. while baking the food is not kept close to the top heating element. convection mode is fine for baking in microwave ovens. dryness could be due to less water content in the dough. for browning you can brush the top of the bread with some milk or beaten eggs.
it was so great to learn about making bread at home used to think its so hard but am going to try it out .thnk u so much
welcome aisha
Its a great help. One can sense the passion of cooking from the descriptions.
I would like to ask, can we add oats along with whole wheat and all purpose floor, for making oats bread ?
thanks. yes you can add oats.
Loved your recipe and followed your instructions. However the bread was raw in the middle. While the top half tasted divine, the raw section spoiled the look. Where did I go wrong? I baked till I heard the hollow sound- about 25 Mins…did I take it out too early?
the bread was not cooked from the center. more baking was required and thats why the uncooked center.
Can I knead the dough of the bread
ankita, we always knead the dough for making bread.
Hi tried this 3rd time and this tim it’s perfect in taste.thnkyou so much.only one problem from both sides ,along the length,it got cracked.nw wn I m cutting ,the pieces r nt perfect.can u pls help
okay. you need to knead the dough more, so that it has some elasticity. i guess thats why it cracked from the sides. try adding some more water while kneading. a slight sticky consistency in the dough is fine.
Tried it and Omg!was totally awesome…Would not have done it but for your instructions and proportions.was jus perfect…The colour..texture…aroma and taste.As you had mentioned..It is very satisfying.Thank you for the pics they really helped.Can’t believe I baked my own bread..thank you Dassana …God Bless
thats great deepa. the joys of baking bread on your own is creative as well as satisfying. thanks for the generous feedback and for your wishes 🙂
I tried the bread and Omg! Simply awesome…jus brilliant..You made the whole process seem so easy.As you perfectly said..
It sure is satisfaction guaranteed! Would not have done this if not for your clear instructions….Can’t thank you enough…God Bless.
welcome deepa. thanks for this awesome feedback and your best wishes. happy baking.
This bread looks wonderful. I’m interested in making this with sunflower seeds and maybe some other small nuts. Do you this would work, if so at what stage would I add the nuts?
you incorporate the right in the beginning once you knead the dough.
wow what a nice bread looks very very tasty ok by now let me eat it
what nice bread that i ever had
thanks kanchan
Very nice and a lucid step-by-step account. Loved it as much as it helped me bake my first bread at home. Thanks a Ton!! Will keep in regular touch to learn more.
welcome namita. glad to know that you are able to make bread at home. keep visiting.
Hii amit, hv tried diff recipe …bread cdnt rise..i hv fresh yeast so can u tell me how i cn use th ..i hv never used it..frst tym bought..its in half kg bar..i dont know even how to use it nd get best result…pl. help me n tell me wot ratio nd procdre i hv to use to mk good bread..
firstly keep the fresh yeast in the freezer. you can easily use fresh yeast in breads or buns, even when recipes have mentioned dry active yeast or instant yeast. generally for recipes using dry active yeast, you will have to double the amount of fresh yeast. for this brown bread recipe, you will have to add 1 tbsp of fresh yeast. for 1 tsp of instant yeast, you will have to add 1 tbsp of fresh yeast. you can follow any recipe which has active dry yeast or instant yeast and make the necessary changes in the yeast amount.
dissolve sugar in warm water. stir in the fresh yeast and let the solution sit for 10 to 12 mins till the yeast doubles up. the solution will become bubbly and frothy. then add this proofed yeast solution to the flour along with the rest of the ingredients and then knead the dough. this link is helpful for yeast conversions – http://www.traditionaloven.com/conversions_of_measures/yeast_converter.html
Hi. I tried making this bread today and messed up with salt sugar proportions. Also, the bread dint bake well in 40 mins (was kachcha in some places) and neither did it get the brown crust. So I baked it for abt 20 more mins. Still the crust dint come. Where cud I have gone wrong and there was no fragrance as well :(…plz guide
what happened with the salt and sugar proportions? either the proportions or kneading issue or yeast proofing issue. let me know.
Thanks dasanna!!tried it. Was really good.
welcome gj
Hi,
Will be trying this out. I made your stuffed capsicum today and they were awesome! Can you please let me know where you get those aluminium vessels for the oven in India?
Thanks!!
thanks gj. you will be able to get the aluminium baking pans in a baking shop or in a large super store. generally people who specialize in baking equipments and stuff, have these pans.
I always want to make brown bread, I am going to try this out.Thank you.
welcome rowena
Described very nively,the method.l will try at the very first opportunity.
Hey,
You said to pre-heat on 40Degree but in microwave-convection I do not hv that degree what to do then?
Can we make wheat flour & Maida in 2:1 proportion?
i have mentioned 180 degrees Celsius and not 40 degrees. 180 degrees Celsius will be there in your microwave convection oven. yes you can use 2:1 proportion of wheat flour and maida.
Hii can the active yeast be substituted with instant yeast if so what’s the quantity of yeast required..
use 1 tsp of instant yeast. you can easily substitute instant yeast with dry active yeast or for that matter even fresh yeast.
hello! another great recipe! thanks a lot 🙂
would you mind telling where did u get this kitchen aid stand mixer in india and for what price??
i have looked everywhere online but can’t find it 🙁 :”(
i would really appreciate it if u can take out some time to answer my question! please?
thanks. when i got the kitchenaid mixer, kitchenaid was officially not in india. i ordered it from one of their authorized shops in delhi. but now kitchenaid is officially in india and you can order from their website directly. even have a look at their facebook and twitter pages. its expensive but worth the money. i do all the atta kneading for chapatis and parathas in the kitchenaid. cleaning is also easy. here is their website – http://www.kitchenaidindia.com/
Hi
I just ordered my KitchenAid mixer on amazon.in and I cannot wait to start using it ! Thanks Dassana for the lovely recipes and step by step pics, its a lot of effort and much appreciated !
Will be trying this bread soon 🙂
Rukhsana
welcome rukhsana. please check whether the kitchenaid mixer has 2 pin plug or 3 pin plug. because if it is 2 pin plug then it might give shock as no earthing. i am having this issue. otherwise kitchenaid is a very good product and good investment. but servicing in india is only done in gurgaon and for any fault you have to send the product to gurgaon. they should do open some more centers.
It was a nice presentation. It’d have been better if there were some video clip of it.
I live in US. The ovens are too big. So everytime I bake one bread loaf, I may wastel lot of electricity. So my question is can I bake 4/5 loaves at a time? Because we need bread almost everyday. and can I keep them refrigerated?
you can make 4-5 breads at a time. i have a small oven and i do sometimes back 2 loaves simultaneously. you can refrigerate or even freeze the bread. they don’t get spoiled.
Thanks to you Dassana, i have now learned to make good bread.
Please let me know whether this recipe can be doubled. When i double the flour quantity, should i double the quantity of yeast too?
welcome ida. you will have to double the yeast quantity too. this recipe can be doubled. double up all the ingredients proportionately. add more water if required while kneading the dough. a little moist and sticky dough is alright.
dear dassana,
today i prepared brown bread with 1:1 ratio of flour. bread ws nice n soft bt not raised like u rs. i m also having 9*5 loaf pan n before baking it ws raised nicely bt after baking it come down. i baked first half without lid n second half with lid. will u tell me wt ws wrong?
seema, the bread should be baked without the lid. there are certain types of bread that are baked with the lid on but not brown bread or white bread. thats the reason why the bread must have flattened after baking. generally it does not happen.
thank u.
I made brown bread y’day and it turned out perfect!!! Thanks!!
thanks sonali
Hi Dassana
Thanks for such a wonderful bread. Its mouth-watering! 🙂
I read we can make bread in covection mode of microwave at 180C for abt 40 min – 1hr. Plz suggest.
Also i dont have a glass bowl or any bread making pan, what should i use instead of these?
Can v use a aluminium vessel for the domestic microwave oven?
Please clarify my doubts.
Thanks in advance.
hi madhav, firstly baking in the convection mode in the microwave oven is similar to baking in a regular oven. you have to use good quality aluminium pans that won’t get affected by the high temperatures. generally for baking, there are aluminium pans and trays available in the market. i would suggest you to use these. they are not expensive as compared to the glass pans. you need a loaf pan if you want to make a loaf. if you want to make buns or rolls, then you use a square or a round pan or a tray.
however, when using the microwave mode, don’t use aluminium or any metal as arcing happens with the metal. when microwaving or warming food, using the microwave mode, you have to use a microwave safe bowl or pan. also you cannot use the microwave safe plastic bowls or pans when using the convection mode.
both microwave and convection are different modes for different cooking methods. microwave is for only cooking and warming the food. whereas convection is for baking and grilling. so what pan you use in one mode you cannot use in the other. however, there are some glass wares like pyrex bowls or pans that can be safely used while microwaving or using the convection mode. when you buy check the functions of the bowl or pan, whether they are microwave or baking safe.
i hope now there are no doubts.
Am thankful for your recipes.actually i have gained alot.i havn’t tried that one of microwave before,but i wil try soon.evn i endup lacking of words,because its abigger achievement.keep it up.may Our God mighty bles..
thanks Am Boniface mwaniki for the sweet comment.
Hi Dassana,
Thank u so much for the lovely post again.. and the picture itself says everything.. One More favour, I saw the recipe of making this whole wheat bread in Microwave from “You Tube”. Have u tried it in microwave and if not, with your experience can you suggest few points to be looked into while trying bread in Microwave.
First of all let me know whether we can try this bread in Microwave 🙂
thanks vasundhara. i have still not tried making bread in the microwave. so i cannot give you any pointers. however, i will be trying a few recipes soon in small batches.
this brown bread recipe cannot be made in the microwave.
Hi Dassana,
Looking forward for your recipes – small / big batches whatever may be!!! 🙂 And thank u so much for your reply too…
welcome vasundhara. will try soon.
Once again a great recipie..turned out perfect ..i tried with both half n half wheat and maida and 2:1 wheat and maida… Dont think i will buy bread from th store again.. Thanks a ton dassana
thanks shilpa. once one starts to bake bread at home, the chances of buying from out become less 🙂
Once again a great recipie..turned out perfect ..i tried with both half n half wheat and maida and 2:1 wheat and maida… Dont think i will buy bread from th store again.. Thanks a ton dassana.
thanks shilpa
Wow looks absolutely perfect!
p.s also post the recipe for homemae tofu if you can
what a coincidence. today, i just made soy milk for the first time at home. so different from the packed soy milk. i shall try making the tofu too. its a little time consuming to make soy milk. making almond milk & cashew milk is easy.
Hi Dassana,
thanks for lovely post on wheat bread it seems to have a nice texture ,thanks for explaining in such detail I really admire your multitasking skills I mean preparing the food and clicking at the same time and then writing according to the clicked pictures and that too posting almost everyday. could please post on wheat bran and multigrain too. where do you source cold pressed oils from which brand is good ?.
thanks priya. i am quite good at multi tasking things 🙂 multigrain bread is on my to list. and wheat bran bread i have made a couple of times. just did not take the pics.
i got the cold pressed oils – sunflower and sesame from down to earth brand. i have two organic shops near by where i live. so got from them. you can even but online. you can try any organic brand for the oils.
Wow, what a lovely loaf! Amazing texture. 🙂
love it.
thanks riyas.
Hi Dassana, please tell me if you use the dough attachment or flat paddle in stand mixer and also a better method of proofing and my bread took too long to cook. Please help
i don’t use the flat paddle while kneading in a stand mixer. i use the dough hook. i follow the same usual method of mixing warm water + yeast + sugar. always works for me. even for instant yeast, i follow this method. the time taken for baking depends on the temperature in the oven. try increasing the oven temperature to 10 or 15 degrees more and bake. even the preheat time has to be from 15 to 20 minutes.
healthy and lovely one !
I can see that you r putting ur new gadget kitchen aid 2 full use…tempting me to buy one..bread looks nice and perfect