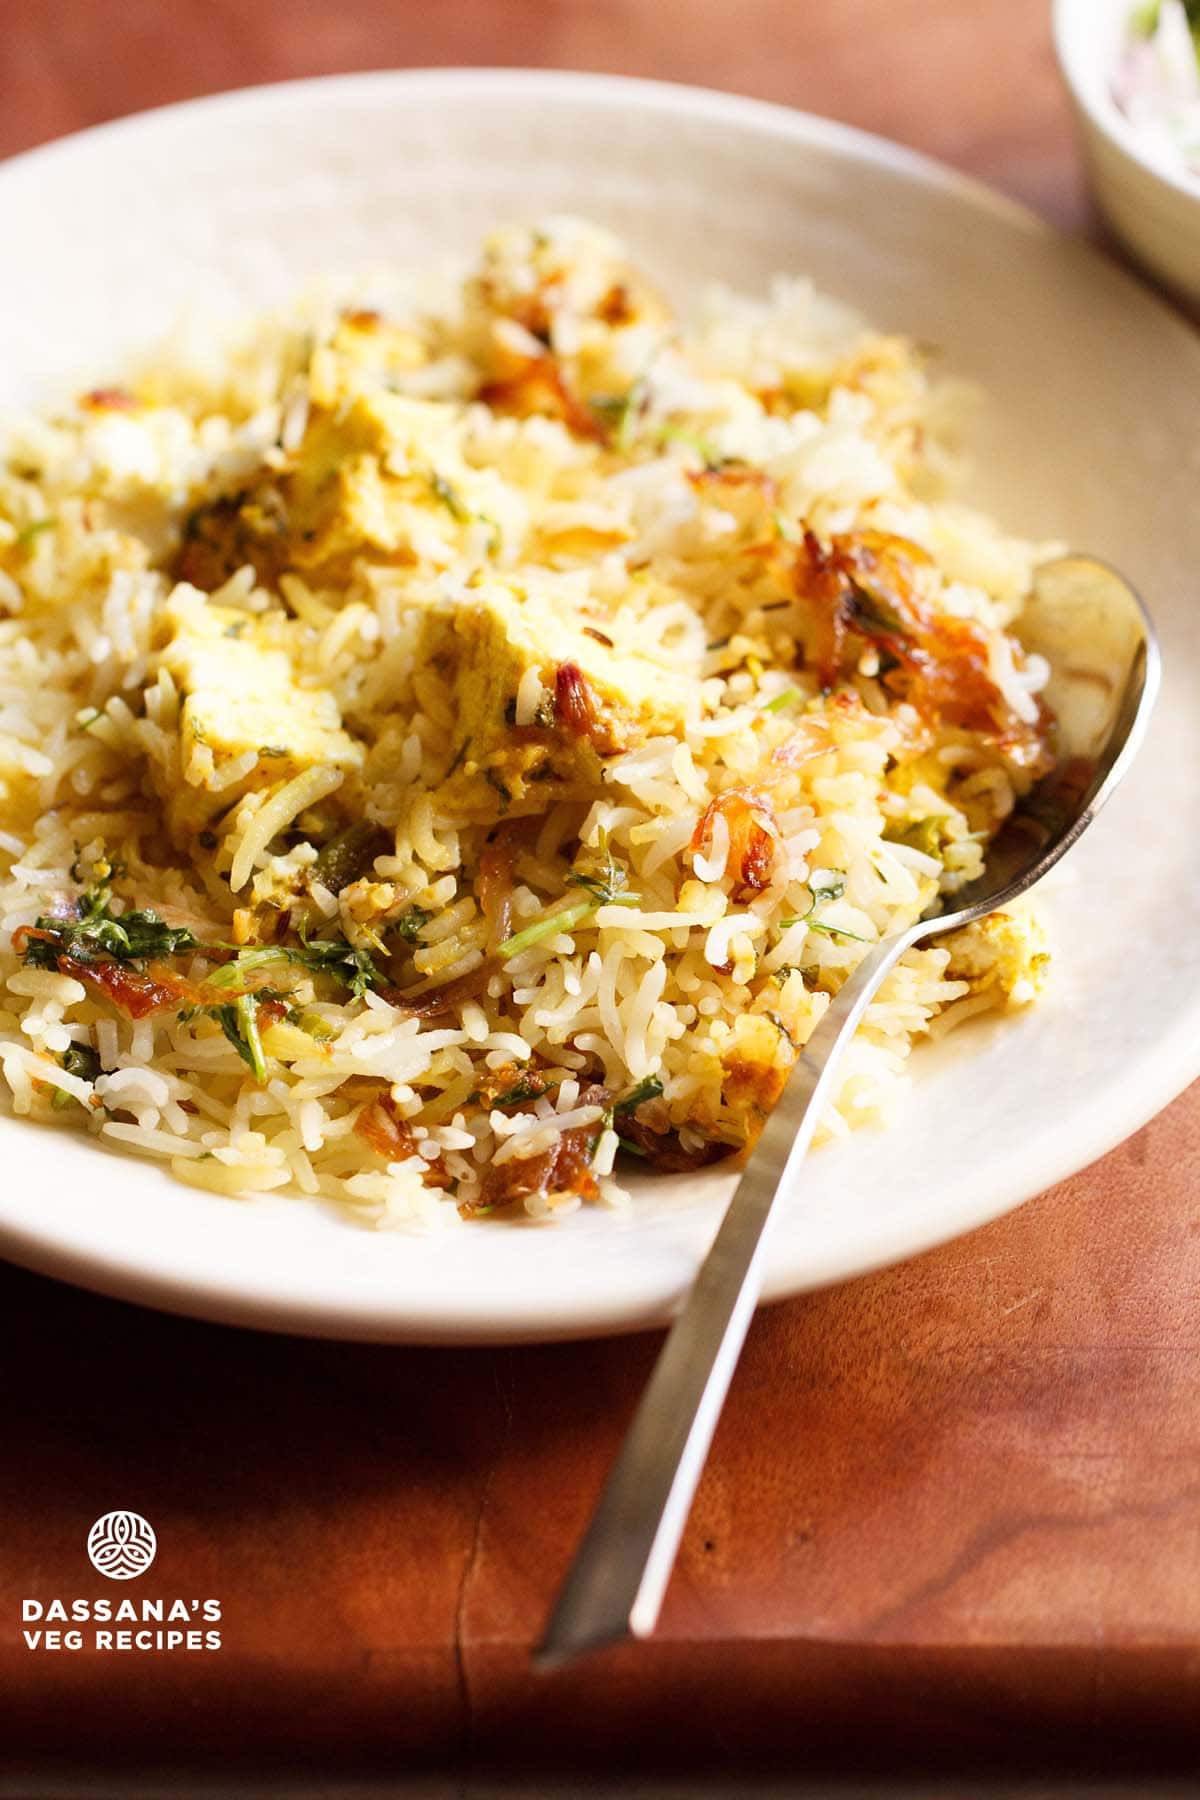
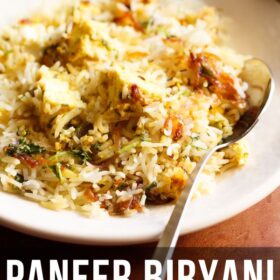
Paneer Biryani is a traditional, dum-cooked vegetarian biryani made by layering yogurt-marinated paneer with par-cooked basmati rice, fried onions (birista), herbs, saffron milk and ghee. Mildly spiced and delicately flavored, it’s a hearty one-pot dish that pairs perfectly with raita. Though it takes time to prepare, the result is always worth it – flavorful, filling, and simply irresistible. Cook it on the stovetop or in the oven.
About Paneer Biryani Recipe
I know many people who would get into a debate about how vegetarian biryanis are not a thing! But in my opinion, a non-meat biryani is also simply delicious.
Just like this Paneer Biryani which is made with Indian cottage cheese (paneer) and other biryani essentials.
A classic Paneer Biryani Recipe is a slow-cooked layered casserole of cubed paneer in a yogurt-based marinade with fried onions and par-cooked rice that is flavored with spices, saffron or rose water.
You will find many variations of making this biryani that are not only made in a pan but also in a pressure cooker and in the Instant Pot.
All traditionally made biryanis have separate layers of the rice and curry, and prepared by the dum method of cooking.
The rice and gravy layers are slow-cooked and steamed in a tightly sealed pan or pot, where the steam is unable to escape.
This Paneer Biryani recipe is quite the unique one as there is no preparation of any gravy in this recipe. Here, I just marinate the paneer cubes and layer the marinated paneer with cooked rice in a pan. Later, cook everything together. Easy, right?
Also, though the list of ingredients might just frighten you a bit, but then what is a good biryani without the choicest of ingredients!?
The same goes for this Paneer Biryani too. The ingredients are many, but most of them are easily source-able and available at an Indian home kitchen.
What’s Unique About This Recipe
Like I said earlier, there is absolutely no need to make any gravy for this recipe of Paneer Biryani. Bonus, the paneer cubes do not become dense or hard since we are not cooking them twice – like frying or cooking in the gravy and adding to the rice while layering.
Yes, easy in a way, but there is some prep work like frying onions (also known as birista) and cooking the rice.
After these 2 steps, making the biryani is a breeze. You need to make the layers in a pot or pan and cook the biryani on stovetop or in the oven.
When I had posted this particular recipe of Paneer Biryani, it was the first of its kind on the web, as usually, other versions were made by first frying the paneer and then combining it further with the gravy or rice. Today, I don’t really know. There might be other similar recipes as that of mine.
This Paneer Biryani has mild, delicate aroma and flavors of the spices. It is not spicy or pungent.
Also, if you love the combination of paneer with rice, check out these recipes of Paneer Pulao and Paneer Fried Rice, which have distinct flavor profiles and are made with different cooking techniques.
How to make Paneer Biryani
Soak Rice & Fry Onions
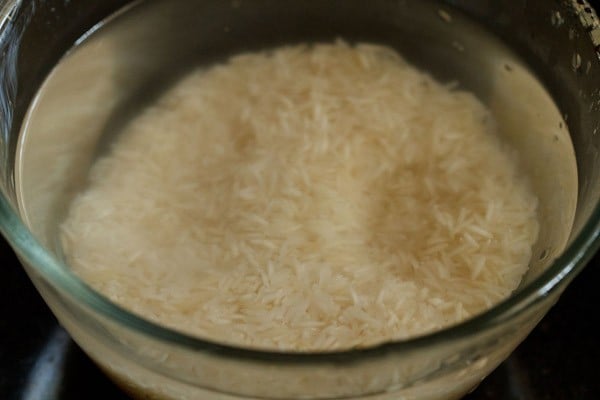
1. Rinse 1 cup basmati rice very well in running fresh water until the starch clears from the water.
The water should be clear and not cloudy or opaque. Soak the rice grains in water for 30 minutes.
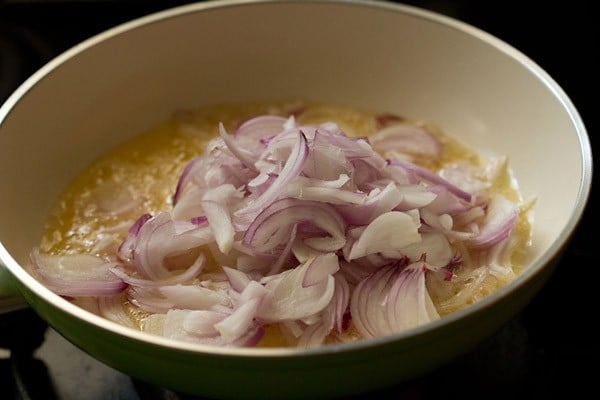
2. While the rice is soaking, prep the ingredients for the biryani. Thinly slice 2 medium onions. You will need about ¾ to 1 cup sliced onions.
Heat 4 tablespoons oil or ghee in a small frying pan and add the sliced onions.
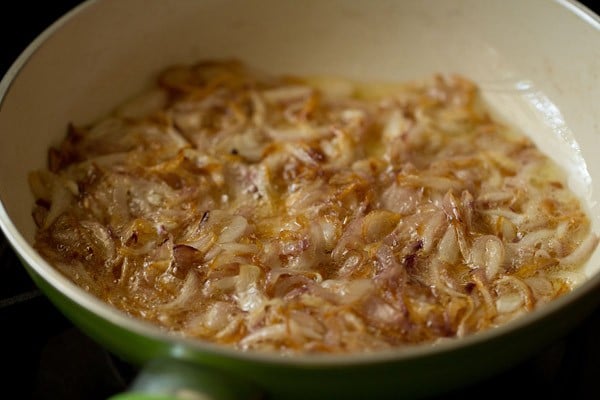
3. Stir and begin to fry the onions on low heat until golden. Add 1 or 2 pinches of salt for quick browning of the onions. Stir often, for uniform browning.
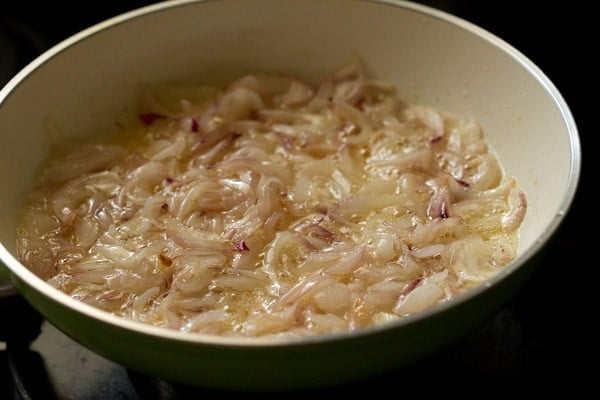
4. In the picture below, the onions have begun to turn golden.
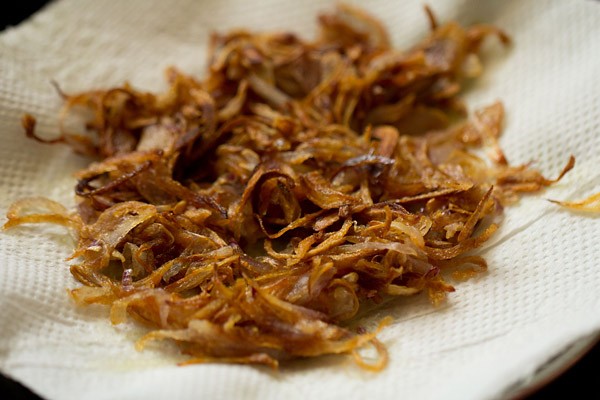
5. When the onions are golden and caramelized, remove with a slotted spoon. Place the fried onions on kitchen paper towel and keep aside.
These crispy golden fried onions are also known as birista.
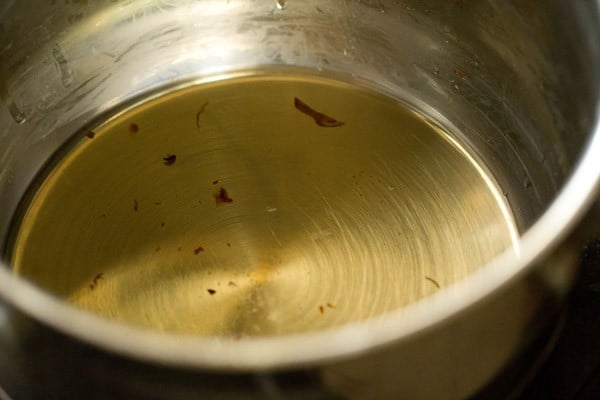
Keep the oil or ghee in which we fried the onions aside. We will be using this oil or ghee while layering the biryani.
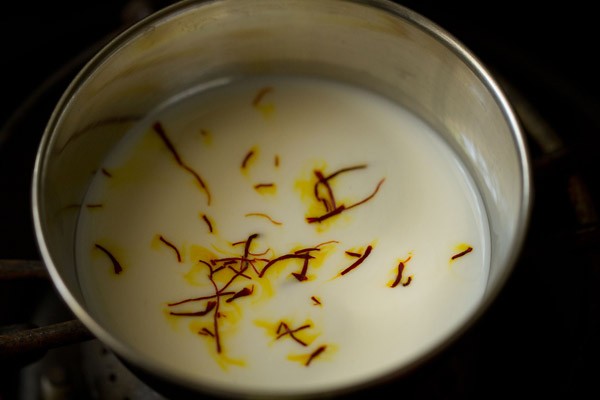
6. Warm ¼ cup milk on stovetop or in the microwave. Add 16 to 18 saffron strands to the milk. Stir and keep aside.
Make Marinade
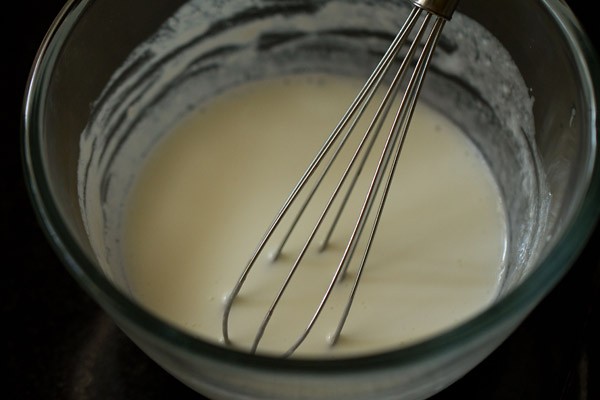
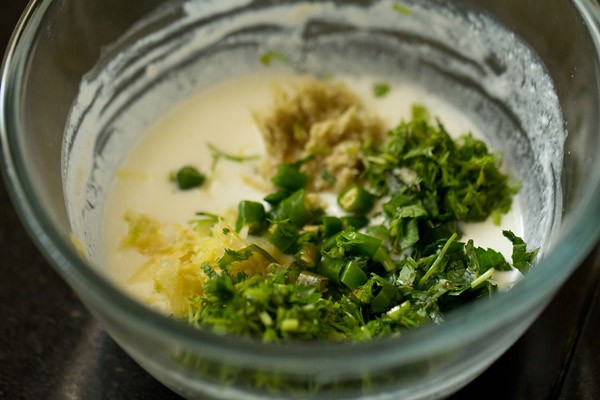
7. Whisk ½ cup whole milk curd (yogurt) in a mixing bowl until smooth.
Do not use sour curd as it will make your biryani taste sour.
8. Add the following and mix well:
- 1 teaspoon ginger paste
- 1 teaspoon garlic paste
- 1 teaspoon chopped green chilies
- 1 tablespoon chopped coriander leaves
- ½ tablespoon chopped mint leaves
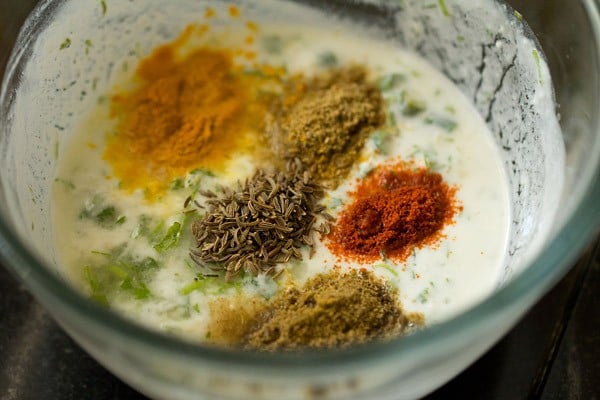
9. Add in the following spices and mix again:
- ¼ teaspoon of turmeric powder (ground turmeric)
- ¼ teaspoon caraway seeds (known as shahi jeera in Hindi)
- ¼ teaspoon red chili powder or cayenne pepper
- ¼ teaspoon of garam masala powder (subtitute ½ teaspoon curry powder instead)
- ½ teaspoon coriander powder (ground coriander)
- 1 teaspoon lemon juice
- salt as needed
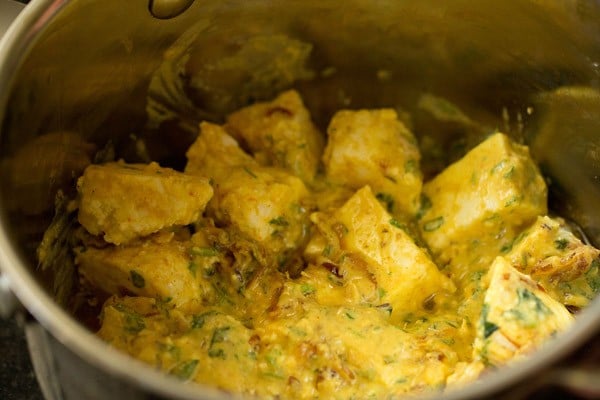
10. Add half of the fried onions and 200 to 250 grams cubed paneer.
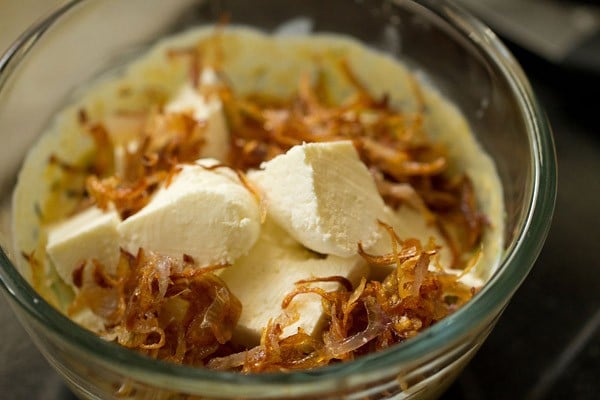
11. Mix gently. Cover and keep the marinated paneer aside for 30 minutes at room temperature. If you plan to marinate for a longer time, keep the bowl covered in the refrigerator.
Cook Basmati Rice
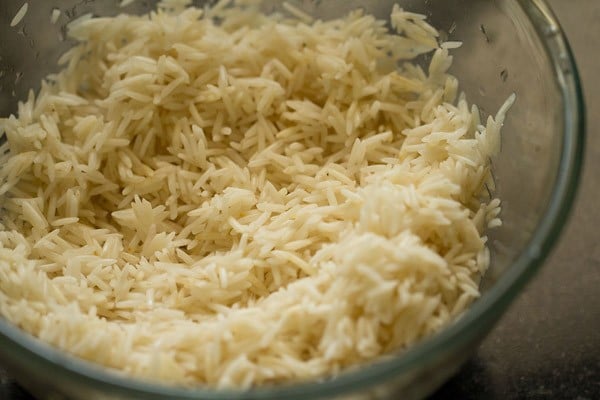
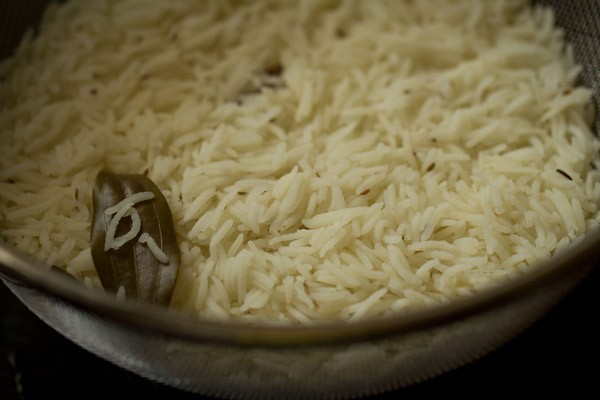
12. In the picture below, you see the soaked and drained basmati rice after 30 minutes. Drain all the water from the rice very well and keep aside.
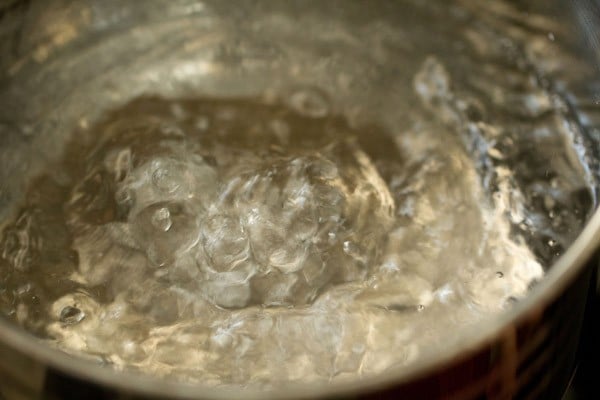
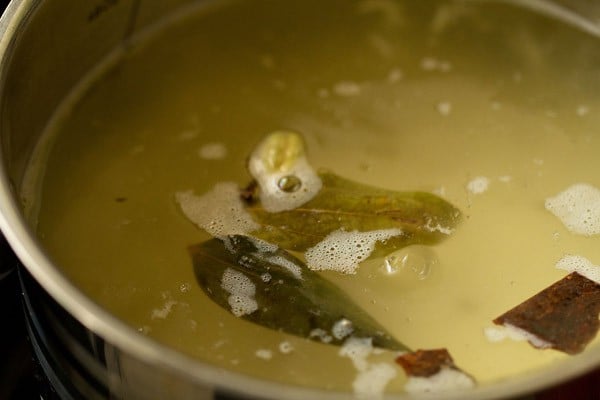
13. Bring 4 cups water to a rolling boil in a pot.
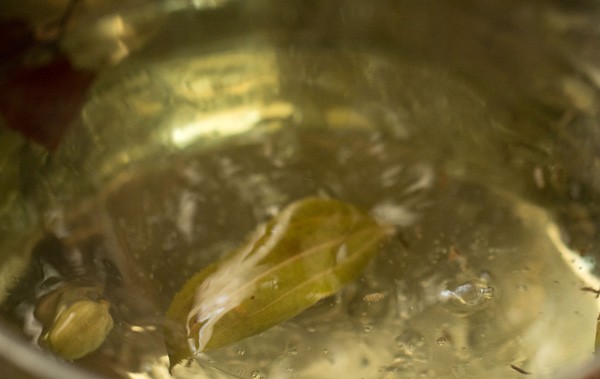
14. Add the whole spices listed below:
- 1 inch cinnamon stick
- 1 medium-sized or 2 small tej patta
- 2 to 3 cloves
- 2 to 3 green cardamoms
- ¼ teaspoon caraway seeds (shahi jeera)
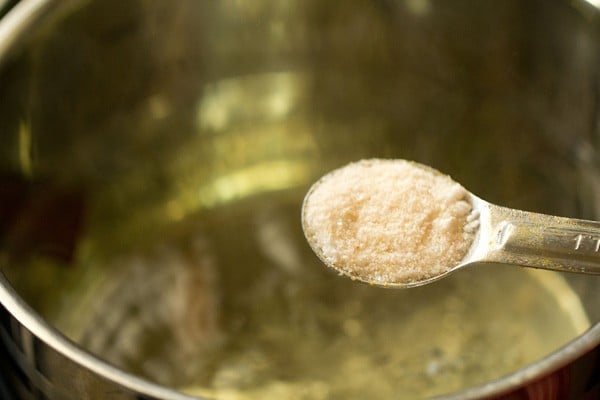
15. Add 1 teaspoon salt.
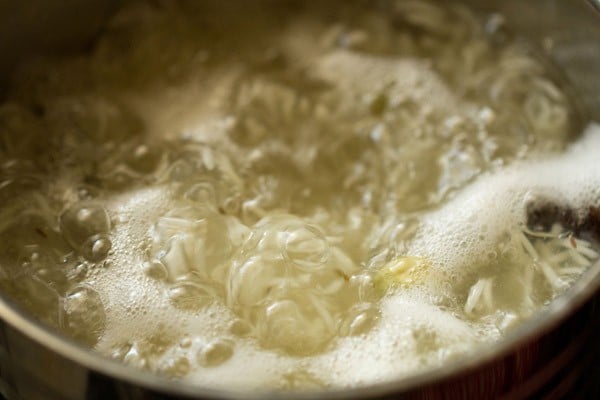
16. Now, add the soaked rice.
17. Do not stir and you will see the temperature drops a bit after adding rice. Do not cover the pan while cooking rice.
18. Keep the heat to high and cook the rice without lowering the heat.
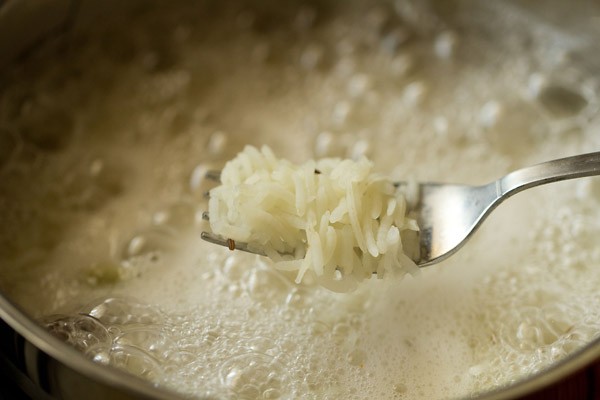
19. Boil the rice grains till 75% or ¾th cooked. It should have a bite when you eat.
20. Drain the cooked rice in a colander. You can rinse the rice grains gently to remove starch, if any, and to stop the grains from cooking.
Cover with a lid and keep the cooked basmati rice aside.
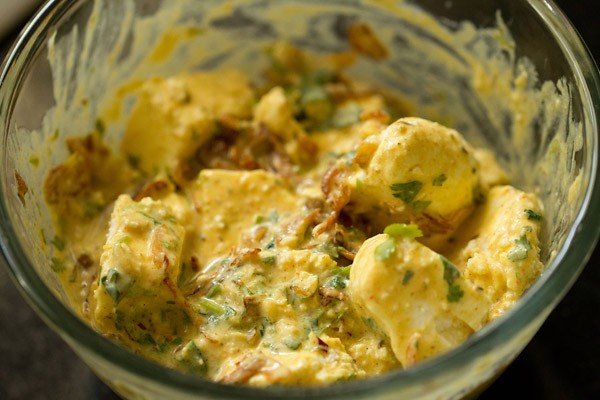
21. This is the marinated paneer after 30 minutes.

Assemble & Layer
22. Add the same oil in which we fried the onions to a thick-bottomed pan or pot. If cooking the biryani in an oven, add the oil to an oven-safe glass bowl or pan.
23. Add the marinated paneer and layer neatly.
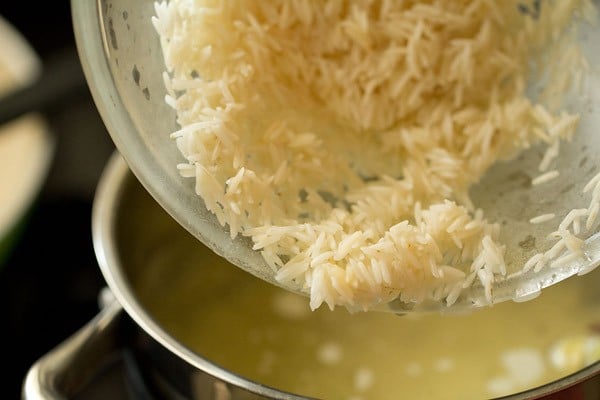
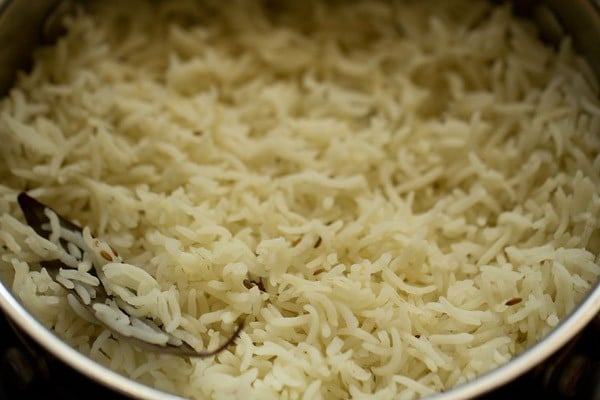
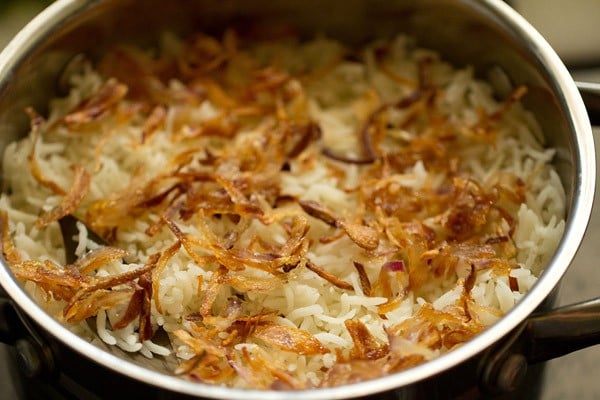
24. Make a rice layer now. Add all the rice.
I have just made 2 layers. If you want, you can make 4 layers each of the marinated paneer and cooked rice.
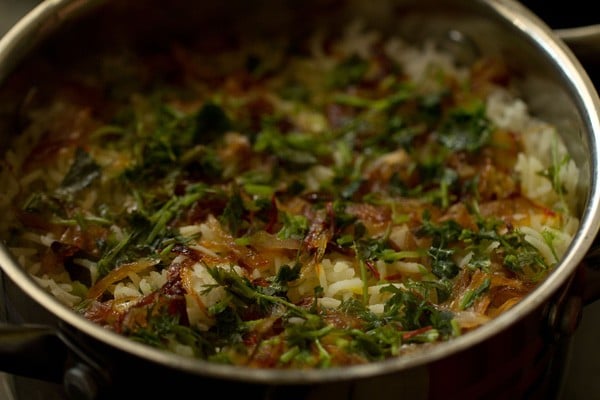
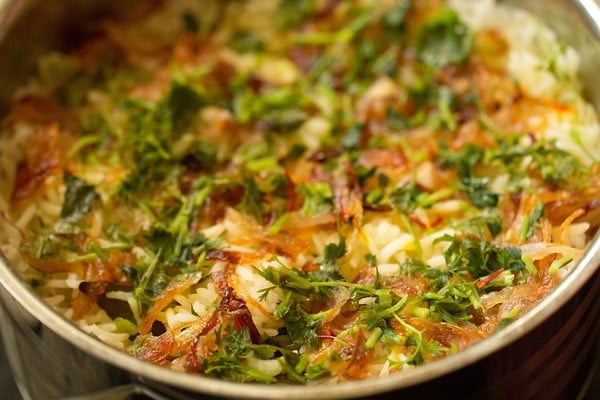
25. Add the remaining fried onions.
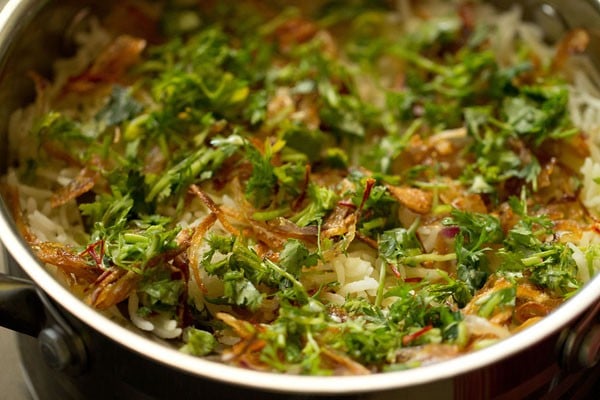
26. Now, add 1 tablespoon chopped coriander leaves and ½ tablespoon chopped mint leaves.
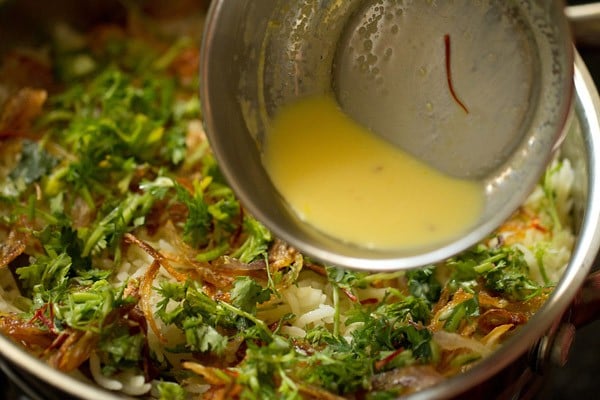
27. Drizzle the prepared saffron milk all over. Place the saffron strands as well on the rice.
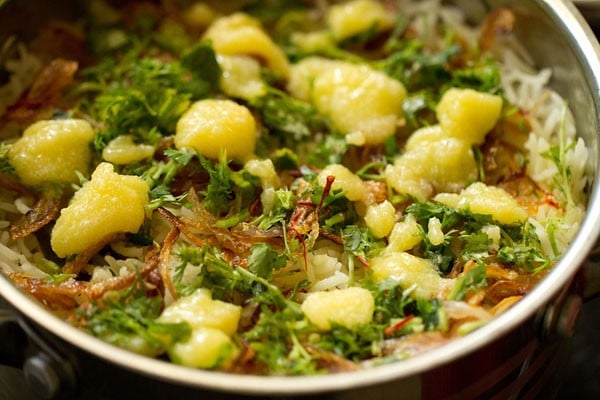
28. Dot with 1 to 2 tablespoons ghee.
You can also add 1 tablespoon rose water or kewra water at this step.
Make Paneer Biryani
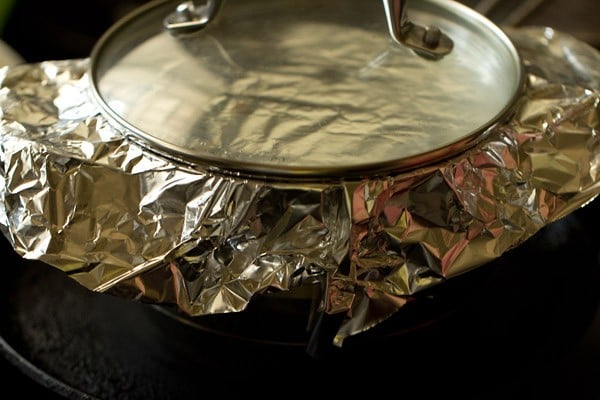
29. Cover with an aluminium foil or with a moist cotton kitchen napkin.

30. Place the lid tightly on the pan and place it on a tawa or skillet.
31. For the first 5 minutes, dum cook the biryani on medium heat. Later, reduce the heat and cook on low heat for 12 to 15 minutes.
You can cook the biryani in a preheated oven for 20 to 25 minutes at 180 degrees C (350 degrees F).
32. Here’s the Paneer Biryani after being dum cooked for 20 minutes. Check the bottom with a spoon and there should be no liquids.
If you find the bottom of pan watery or with any gravy or liquid, dum cook for 5 to 10 minutes more.
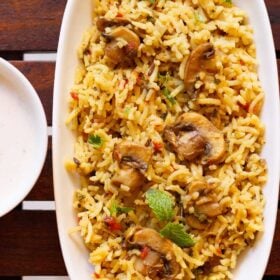
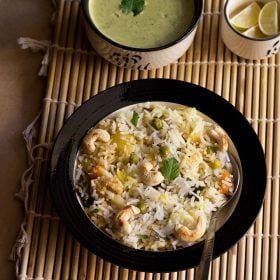
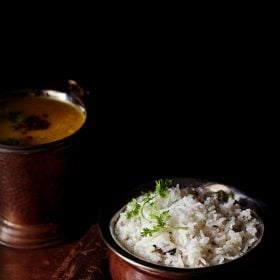
33. Serve Paneer Biryani hot or warm with plain curd (yogurt), raita of your choice, salad or your favorite salan or curry.

Serving & Storage Suggestions
You can enjoy this lovely Paneer Biryani hot or warm with a raita like Onion Raita, Cucumber Raita or Boondi Raita. You can serve with sliced onion-lemon salad or Kachumber Salad too.
Pairing it with curries like Mirchi Ka Salan and Bagara Baingan also is awesome. Even a simple plain yogurt tastes nice with this biryani.
Got leftovers? Place in any sealed box or container and refrigerate for 1 to 2 days. Reheat by warming in the oven at 90 degrees C (190 degrees F) or by steaming in the Instant Pot for 5 minutes.
Expert Tips
- Rice: For any biryani recipe, I usually prefer aged basmati rice as the grains become fluffy, tender and non-sticky when cooked. Parboiled basmati rice (sella basmati rice) is another variety I like to use. You can make this biryani with any long-grained, non-sticky rice.
- Cooking rice: Do not cook the rice completely, should be slightly underdone. Fully cooked grains will end up in a mushy biryani since the rice cooks further during the dum-cooking process.
- Paneer: Use homemade paneer for best taste and texture. For frozen paneer, thaw in warm or hot water for some minutes.
- Marinating paneer: I always marinate paneer for 30 minutes at room temperature. If I have more time, I marinate overnight in the refrigerator.
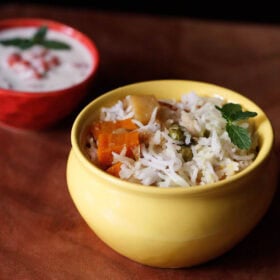
- Adding vegetables: You can add some steamed green peas and steamed veggies like carrots, cauliflower, potatoes to this recipe. But you will have to increase the curd and other spices accordingly to accommodate them.
- Making birista: The fried onions (birista) can be made a day before and stored in an air-tight container. You can also make a big batch and freeze for a longer storage and use.
- Whole spices: I recommend adding all the spices and herbs in the same proportion as listed in the recipe. The only suggestion I offer, which will alter the flavor slightly, is to replace caraway seeds (shahi jeera) with cumin seeds.
- Nuts and dried fruits: Fried cashews and raisins can be added on top of the rice layers.
- Vegan option: For a vegan biryani, use tofu, oil and a dairy free curd and milk like cashew or almond milk/curd. Avoid soy or peanut yogurt, as it gives an after taste.
FAQs
Yes, but marinating the paneer enhances the flavor and prevents it from tasting bland. A simple yogurt-based marinade with spices works well and improves the overall taste of the biryani.
Basmati rice has always been traditionally used for biryani due to its long separate grains and fragrance. Make sure to soak the rice for 20 to 30 minutes before cooking for the best texture.
Yes, as long as all the ingredients (especially spice blends) are gluten-free, paneer biryani is naturally gluten-free.
Store it in an airtight container in the refrigerator for up 1 to 2 day. Reheat gently on the stovetop or in a microwave or in the Instant Pot, sprinkling some water to maintain moisture.
More Biryanis To Try!

Mushroom Recipes

Rice Recipes
Kashmiri Recipes
Please be sure to rate the recipe in the recipe card or leave a comment below if you have made it. For more vegetarian inspirations, Sign Up for my emails or follow me on Instagram, Youtube, Facebook, Pinterest or Twitter.

Paneer Biryani Recipe (Traditional Dum Cooked)
Ingredients
For birista or fried onions
- 1 cup or (150 grams) onions – thinly sliced
- 4 tablespoons oil or ghee (clarified butter)
For cooking rice
- 1 cup or (180 grams) basmati rice – preferably aged basmati rice
- 4 cups water
- 1 teaspoon salt
- 1 inch cinnamon
- 1 tej patta (medium-sized) or 2 small tej patta
- 2 to 3 cloves
- 2 to 3 green cardamoms
- ¼ teaspoon shahi jeera (caraway seeds)
For paneer marination
- 200 to 250 grams Paneer (Indian cottage cheese)
- ½ cup Curd (yogurt) – fresh
- 1 teaspoon ginger paste or 1 inch ginger crushed to a paste in a mortar-pestle
- 1 teaspoon garlic paste or 4 to 5 garlic medium-sized cloves crushed to a paste
- 1 teaspoon green chilies – chopped or swap with serrano pepper or 1 to 2 green chillies
- 1 tablespoon coriander leaves – chopped (cilantro)
- ½ tablespoon mint leaves – chopped
- ¼ teaspoon turmeric powder (ground turmeric)
- ¼ teaspoon red chili powder or cayenne pepper
- ¼ teaspoon Garam Masala
- ½ teaspoon Coriander Powder
(ground coriander)
- ¼ teaspoon shahi jeera (caraway seeds)
- 1 teaspoon lemon juice
- salt as required
Layering ingredients
- ¼ cup milk
- 16 to 18 saffron strands
- 1 to 2 tablespoons Ghee (clarified butter)
- 1 tablespoon coriander leaves – chopped (cilantro)
- ½ tablespoon mint leaves – chopped
- 1 tablespoon rose water or kewra water (pandanus water) – optional
Instructions
Cooking rice
- Rinse basmati rice very well in water till the starch clears from the water. The water should be clear and not cloudy or opaque.
- Then soak the rice in water for 30 minutes. Later drain the rice well and keep aside.
- Bring 4 cups water to a rolling boil in a pot.
- Add whole spices – cinnamon, tej patta, cloves , green cardamoms, caraway seeds. Also add salt.
- Now add the soaked rice. Do not stir the rice.
- Keep the flame to high and cook the rice without lowering the temperature.
- The rice grains have to be cooked till 75% or ¾ done. They should have a bite to them when eaten.
- Drain the rice in a colander. You can also rinse the rice grains to remove starch if any and to stop the grains from cooking. Cover with a lid and keep the rice aside.
Making birista or fried onions
- When the rice is soaking, prep the ingredients for the biryani. Slice the onions. Heat the oil or ghee in a small frying pan and add the sliced onions.
- Stir and begin to fry the onions till they turn golden. Add one or two pinches of salt for quick browning of the onions. Stir often for uniform browning and fry on a low flame.
- Here the onions have begun to get golden.
- Once the onions become golden, then remove them with a slotted spoon and place them on kitchen paper towels. Keep the fried onions aside.
Preparation for marination
- Warm the milk on stove top or in the microwave. Add 16 to 18 saffron strands to the milk. Stir and keep aside.
- Whisk full fat curd (yogurt) in a mixing bowl till smooth.
- Add ginger paste, garlic paste, chopped green chilies, chopped coriander leaves and mint leaves. Mix well.
- Now add the spices- turmeric powder, red chili powder, garam masala powder, coriander powder, caraway seeds and lemon juice.
- And salt as required. Mix again.
- Then add the half of the fried onions and the paneer cubes.
- Mix gently. Cover and keep the marinated paneer aside for 30 minutes.
Assembling and layering
- Add the same oil in which we fried the onions to a pan or pot.
- Add the marinated paneer and layer neatly.
- Make a rice layer now. Add all the rice. I have just made two layers. If you want you can make four layers.
- Add the remaining fried onions, chopped coriander and mint leaves.
- Sprinkle the saffron infused milk.
- Dot with ghee. You can also add rose water or kewra water.
Dum cooking paneer biryani
- Cover with a aluminium foil or with a moist kitchen cotton towel or napkin.
- Place the lid tightly on the pan and place it on a tava or griddle. For the first 5 minutes dum cook the biryani on a medium heat.
- Then lower the flame and cook the biryani.
- On dum for 12 to 15 minutes. You can also cook the biryani in a preheated oven for 20 to 25 minutes at 180 degrees C (350 degrees F). Use an oven proof pot or pan.
- Serve the Paneer Biryani hot with boondi raita or cucumber raita or onion raita or kuchumber salad.
Serving Suggestions
- Enjoy Paneer Biryani hot or warm with raita like an onion-tomato raita or cucumber raita or boondi raita. You can also serve with sliced onion-lime salad or onion-tomato-cucumber salad.
- Pairing it with curries like mirchi ka salan and bagara baingan also tastes awesome. Even a simple plain yogurt tastes nice with it.
Storage
- Place any leftovers in any sealed box or container and refrigerate for 1 to 2 days. Reheat by warming in the oven at 90 degrees Celsius (190 degrees Fahrenheit) or by steaming in the Instant pot for 5 minutes.
Video
Notes
- Rice: Use aged basmati or sella basmati for fluffy, non-sticky grains.
- Cooking Rice: Cook rice until 75% done; it finishes cooking during dum.
- Paneer: Homemade paneer is best. Soak frozen paneer in warm water.
- Marination: Marinate paneer for 30 mins (or overnight in fridge).
- Veggies: Add steamed peas, carrots, potatoes. Adjust yogurt and spices accordingly.
- Birista: Opt to make fried onions ahead. Store airtight or freeze for later.
- Whole Spices: Make sure to use as listed. Replace shahi jeera with cumin if needed.
- Garnish Options: Add fried cashews and raisins while layering rice.
- Vegan: Use tofu, oil, and almond or cashew yogurt/milk.
Nutrition Info (Approximate Values)
Paneer Biryani recipe from the blog archives was first published on March 2015.
Thanks for the wonderful recipe!
Where and when can I add the vegetables?
By steamed vegetables, do you mean that they should be cooked a bit before adding to marinade or directly to the pan just before layering the rice on top? I appreciate you time!
Thank you!
Most welcome. The vegetables have to be cooked until they are soft and tender but not overdone or mushy. You can either steam or boil them whichever method you prefer.
Either add the cooked veggies to the marinade or you can also place them on the paneer marinade layer while layering. Hope this helps.
Wonderful! Thank you! That makes total sense 🙂
Welcome and thanks.
This looks delicious, gonna try it!!!
Thank you Priya.
Great recipe, have tried it with different combinations, yet yours is simply a breeze to cook. Yummy taste..
Good to know and thank you for sharing this lovely review. Thanks for the rating as well.
I am about to try this recipe today . I noticed when I chsnged to “x2” the number of onions changed from 2 to 4 but the number of cups remained still at 1 . Havent checked the rest of the recipe for this error but this might be misleading to people only looking at the number of cups.
Yes, I am aware of this and I am seeing what can be done. Still looking for solutions.
Can we put the paneer masala and rice layers twice?
yes you can do this way.
Hi dassana aunty ,
I’m madhuri and I’m 13 years old .I love to cook and experiment with various recipes.By Far your blog is my favourite and easy to understand.I have tried most of your recipes and my family has appreciated me a lot.Recently I.tried this paneer biryani and it came out really awesome.So thank you so much for you recipes 🙂
Welcome Madhuri. Glad to know that you like the blog and recipes are liked by everyone. Thanks for your positive feedback.
dasanna,tried this recipe its good ..but it burnt a little at the bottom..few paneer pieces are burnt..I used thick sandwiched bottom pot…and cooked twenty minutes …
shree, did you keep a tawa below the pan. usually when making any biryani, always keep a tawa on the flame. then place the pan or pot on the tawa. this way the heat is distributed evenly and the biryani does not get burnt. a couple of times, i have also used thick bottomed sandwiched pan and on occasions the base has got slightly burned. in fact today only i made biryani 🙂
hope this helps you shree.
whats the meaning of dum cooking..
i have mentioned it on this veg biryani recipe post – https://www.vegrecipesofindia.com/hyderabad-veg-biryani-hyderabadi-vegetable-dum-biryani-recipe/
is it okay if the curd has become a little sour
little sour is fine, but if too much sour, then no add. you can also mix some milk or cream in the curd, to reduce the sourness.
I tried this biryani and the taste was awesome except for a little bitter taste initially when we put it inside the mouth. What do you think could be the reason for the bitter taste and what would you suggest to avoid in future?
thanks shruthi. must be because of the onions getting browned too much.
i made this for my friends nd they just loved this a lot…. nd even i liked it nd especially my brother bcz he loves panner… nd thanx a lot for this yummy recipes… my friends were continously telling me that sanjana its awsmm… nd i was feeligs sooo happy.. ????????
thanx once more…
very pleased to know this sanjana thankyou for your kind words. glad to know your friend’s liked the paneer biryani always stay happy!
I tried this recipe yesterday, it ‘s so tasty.Thank you..
thankyou navitha 🙂
What if I use a cooker to dum the biryani? I will place it on the tawa before placing it on the gas.
yes, place the cooker on the tawa and place the tawa on the gas flame.
i am going to try this right now for my dinner………..can i ask u a question???? i want to make chicken soup …i know u r a vegetarian but can u suggest any book or anything else from where i can learn to make chicken soup…….i hope u dnt mind
during my home science course, i have made chinese chicken soups. you can follow any of the chinese soup recipes on the website and substitute chicken with veggies. either you saute the chicken first or cook first and then add to the soup. do use the stock in which you cook the chicken. its many many years now that i don’t cook chicken. but i do know the method used and i have only made chinese style soups.