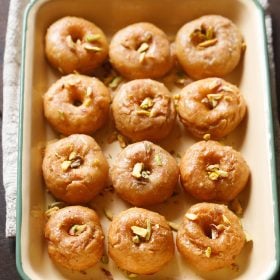
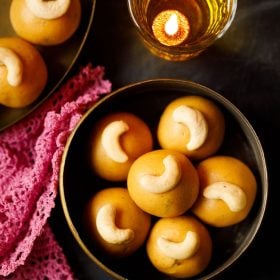
Learn to make the popular Gujiya recipe that is a classic North Indian sweet of crisp, flaky pastry filled with khoya (milk solids) and nuts stuffing. Gujia is generally fried but in this recipe post, I am sharing both the fried and baked versions. Take your pick and enjoy making these traditional sweet for Holi or Diwali festival.
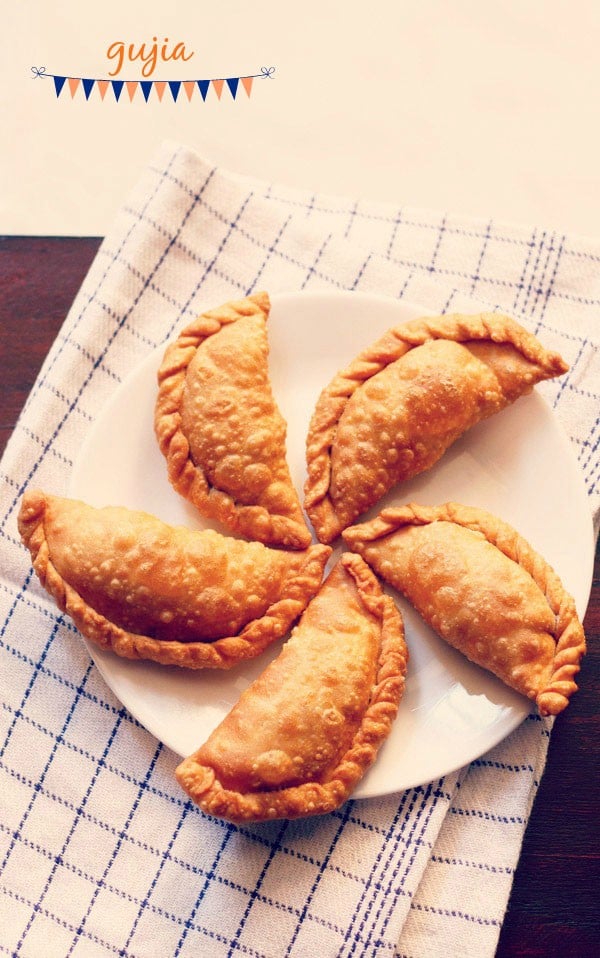
Table of Contents
What is Gujiya
Gujiya are crescent shaped filled pastry that are deep fried. The traditional gujiya recipe has a filling of sweeetned khoya or mawa (milk solids), cardamom and some nuts.
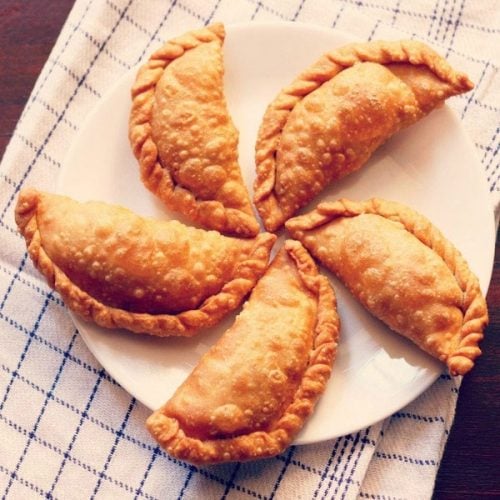
These delish fried pastries resembles the Mexican empanadas. In fact gujia are very much popular in North India, especially during the Holi festival.
You will get to see many variations of gujiya in the sweet shops during Holi. Gujia is made on both Holi and Diwali festivals.
On the eve of Holi I make either Puran Poli, Karanji or gujiya.
Gujiya vs Karanji
Karanji and gujiya are similar sweets, except for the stuffing.
Karanji which is popular in Maharashtra has a stuffing of coconut, poppy seeds, sesame seeds and nuts.
Whereas guijiya has a stuffing of khoya or mawa (dried milk solid)with nuts, dry fruits. In some variations desiccated coconut is also added. But I do not add coconut to the khoya stuffing.
The varied and unique fillings give a completely different taste, texture and flavor to both the gujiya and karanji.
About Gujiya Recipe
My gujiya recipe is the traditional North Indian recipe and is made with the stuffing of khoya (mawa), sugar and nuts.
Generally, in a gujia, the outer pastry is made of all-purpose flour. But you can break away from the norm and make the pastry dough with whole wheat flour.
In this recipe, I have included half-half of both all-purpose flour and whole wheat flour.
I baked some gujiya and fried the rest and have illustrated both the baking and fried methods in the step by step guide.
Texture and taste wise the fried gujiya are definitely much better. However for health reasons and to cut down on the fat you can easily bake them when making this gujiya recipe.
How to make Gujiya
Make Pastry Dough
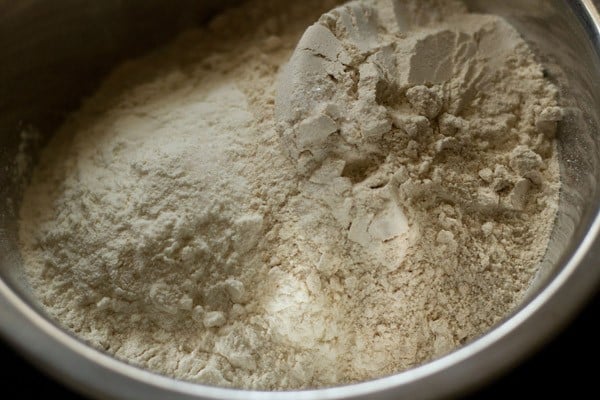
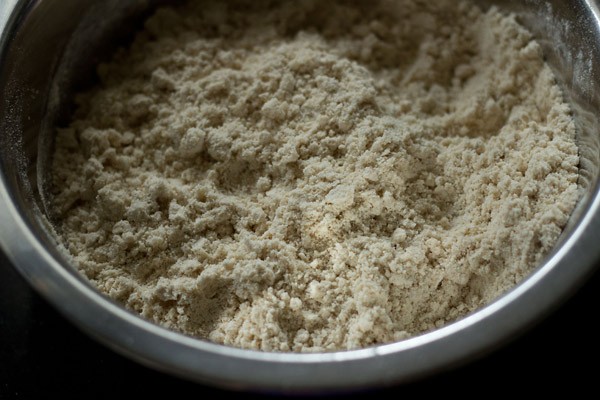
1. In a bowl take 1 cup whole wheat flour (atta), 1 cup all-purpose flour (maida) and ¼ teaspoon salt.
You can include 2 cups of all-purpose flour OR 2 cups of whole wheat flour. Overall you need 2 cups of flour + ¼ teaspoon salt.
*Do check the Notes section of the recipe card to know about water proportion if using only whole wheat flour or all-purpose flour.
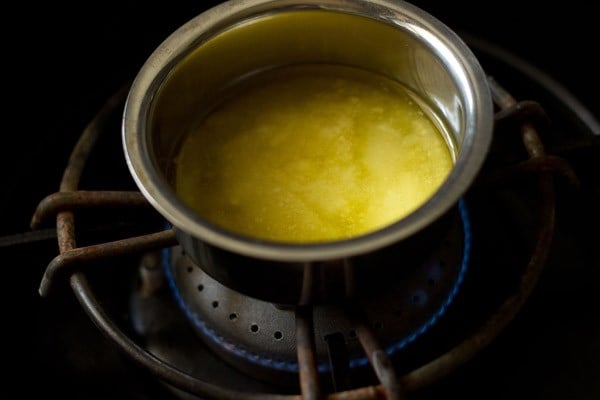
2. Heat 2 tablespoons ghee (clarified butter) in a small pan or bowl until it melts and becomes warm.
3. Pour the warm ghee on the flours.
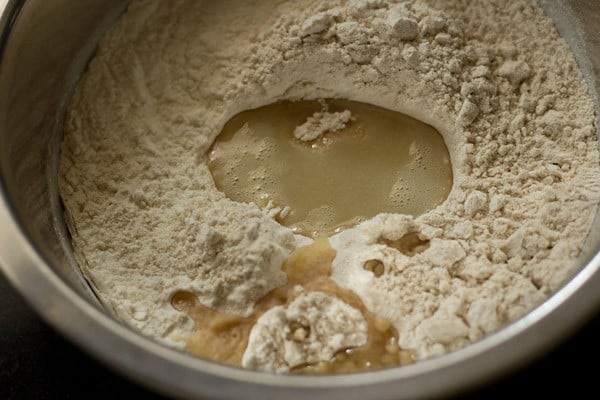
4. First mix with a spoon. Then rub and mix the ghee with the flours, with your fingertips to form a bread crumb like texture.
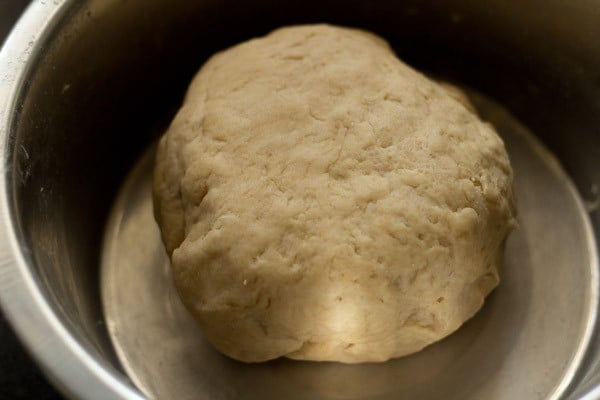
5. Add ⅓ to ½ cup water in parts and begin to knead. The amount of water needed will depend on the quality and texture of flour.

6. Knead the dough until it is firm and tight.
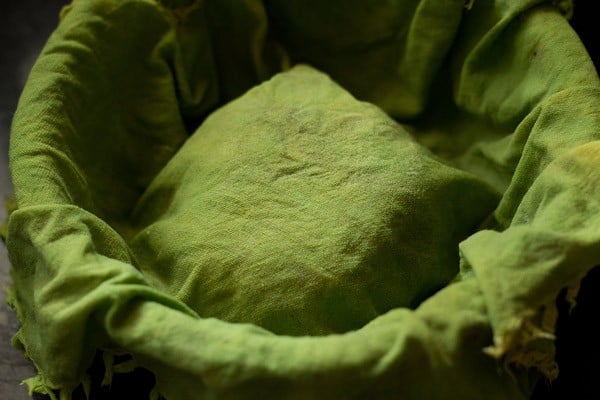
7. Cover with a moist kitchen napkin and set aside for 30 minutes.
Make Stuffing
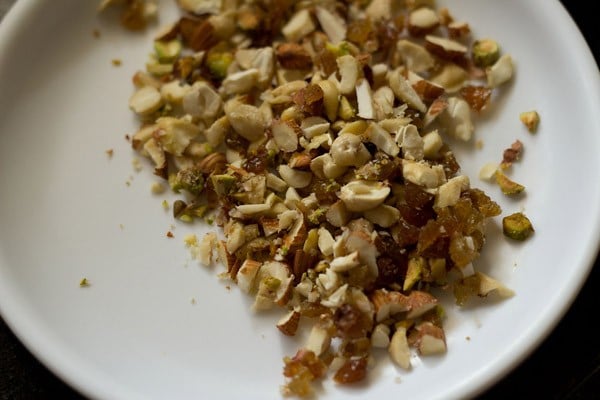
8. Chop 10 cashews, 10 almonds, 10 pistachios and ½ tablespoon raisins. Set aside.
9. Melt ½ tablespoon ghee in a pan on a low heat.
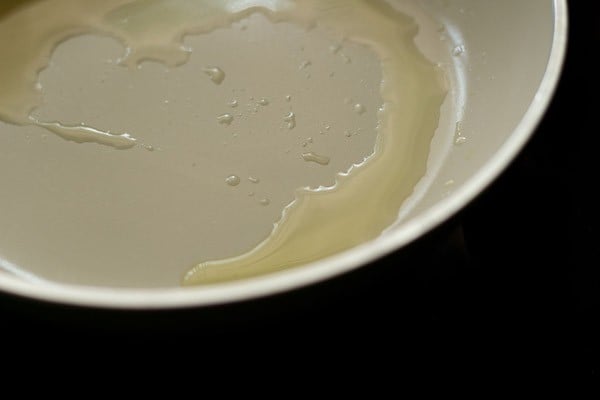
10. Add 1 cup crumbled or grated khoya. Khoya can be made at home or purchased from the market.
To know how to make khoya, you can check this method of making traditional Khoya (Mawa).

11. Stir the khoya continuously on a low heat.
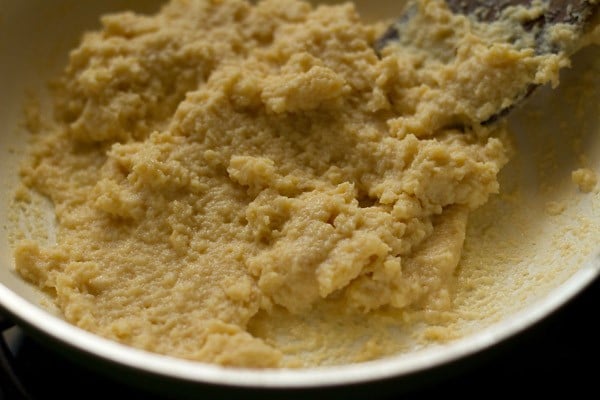
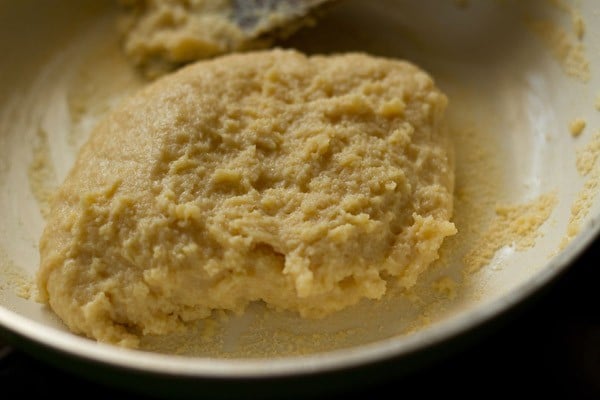
12. Cook the khoya until it begins to gather around itself. Switch off the heat and place the pan on the kitchen countertop.
Let the khoya stuffing cool completely at room temperature. You can even transfer the khoya stuffing to a plate and let it cool.
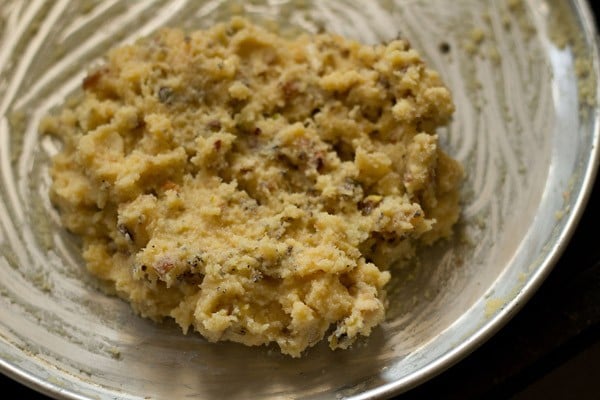
13. Add ⅓ cup powdered sugar (or confectioner’s sugar), the chopped nuts, raisins and ½ teaspoon cardamom powder. I suggest to to sieve the powdered sugar if there are lumps. This makes the mixing easier.
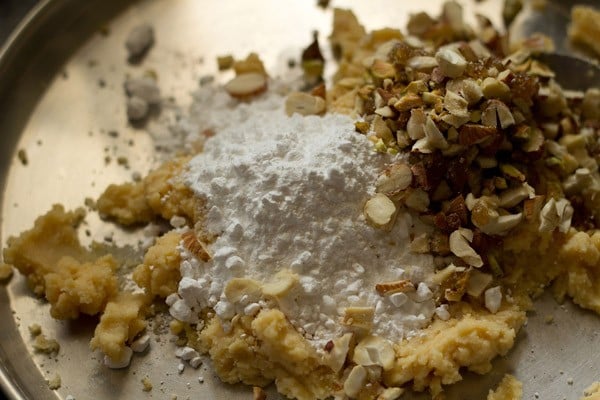
14. Mix everything well and keep the stuffing aside. Check the taste and add more powdered sugar if you prefer.
Assemble
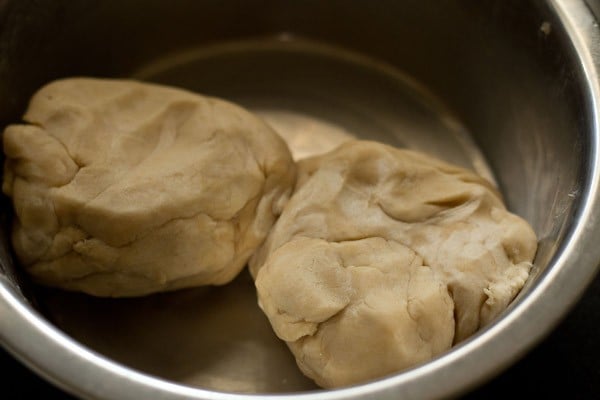
15. Divide the dough into two parts.
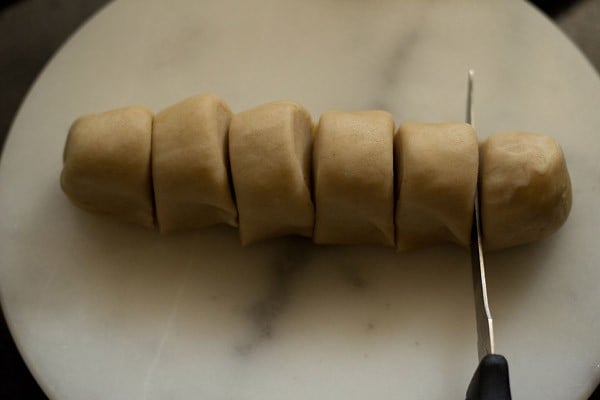
16. Make a medium-sized log of each part and slice or portion it into equal parts.
17. Roll each part in your palms to form a ball. Prepare all the dough balls this way and place them in the same bowl. Cover with a moist kitchen towel.

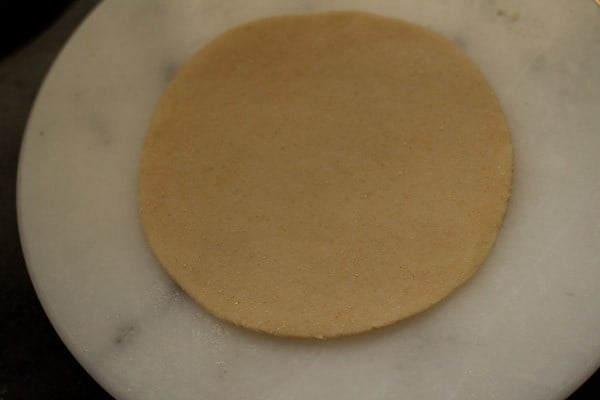
18. Dust the rolling board lightly with some flour. Roll each ball with the rolling pin to a small circle having 4 to 5 inches diameter.
Use less flour and if possible you can avoid the flour for dusting completely.
19. with your fingertip or a pastry brush, apply water all over the circumference edge.
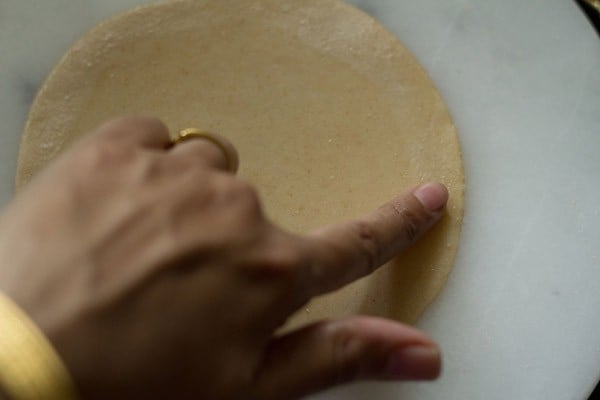
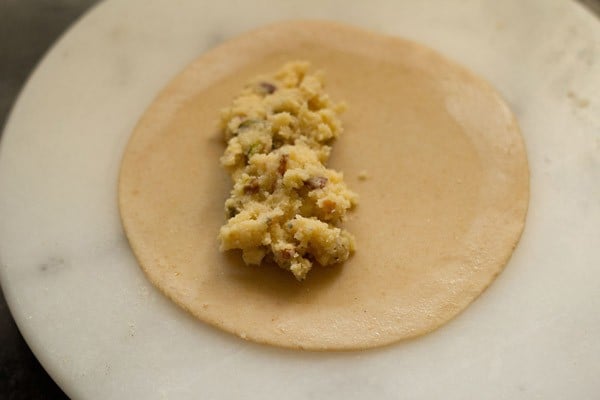
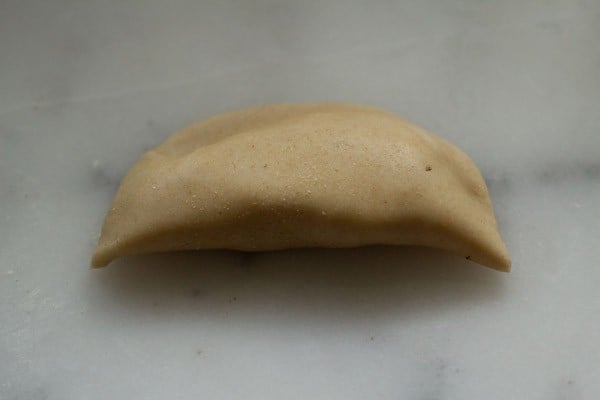
20. Place about 1 to 1.5 tablespoons of the the prepared khoya filling on one side of the circle, keeping the edges empty.
Don’t add too much of the stuffing as it becomes difficult to shape the gujia and this can lead to them breaking in the oil while frying.
Shape for Baking
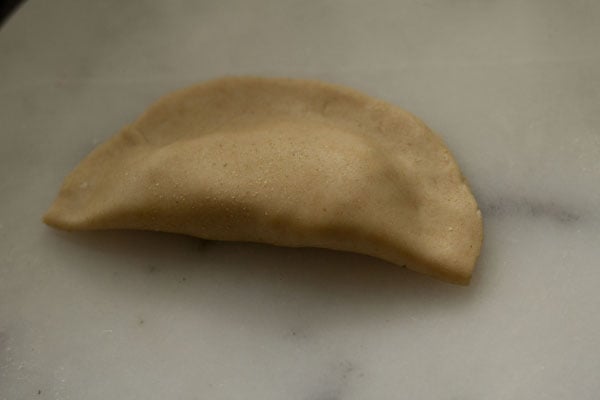
21. Carefully, bring together both the edges and join. Gently press the edges. The edges have to be pressed well and sealed, so that the filling does not come out while frying.
22. With a gujiya/karanji cutter or small pizza cutter, trim the extra edges. When doing this method, it is very important that the gujiya is pressed and sealed well.
Note: Avoid this method of cutting the edges, if you plan to fry the gujiya. If baking then this method is good. As even if the filling comes out, you don’t have to worry, as there is no mess.
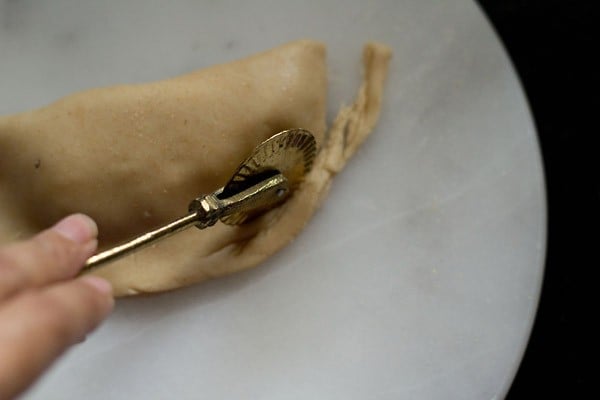
23. The neatly trimmed gujiya photo below.
Shape for Frying
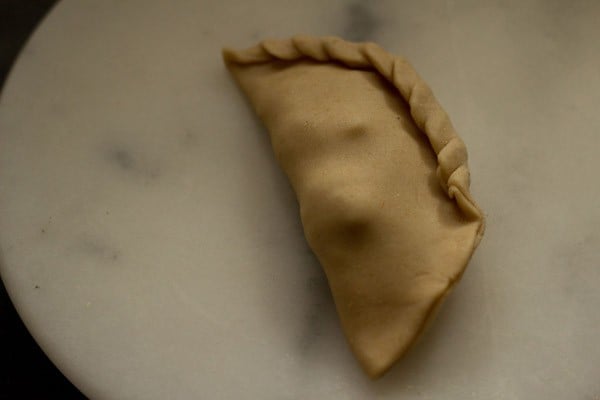
24. For deep frying, it is best to make pleated design at the edges. This way the stuffing does not come out while frying and the gujiya looks good too. Just keep on folding and twisting the edges till the end.
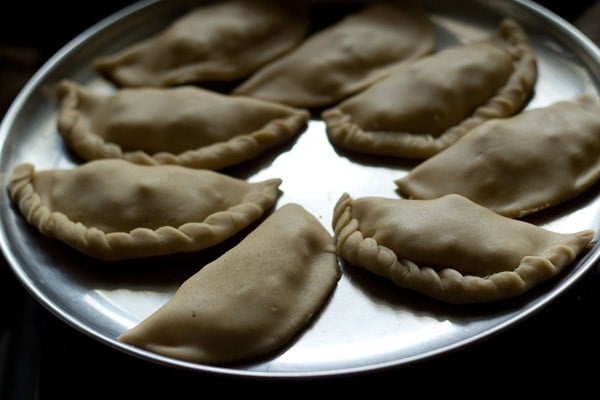
25. Prepare gujiya this way and arrange them on a plate or tray. Keep them covered with a moist napkin so that the dough does not dry out.
Bake Gujiya
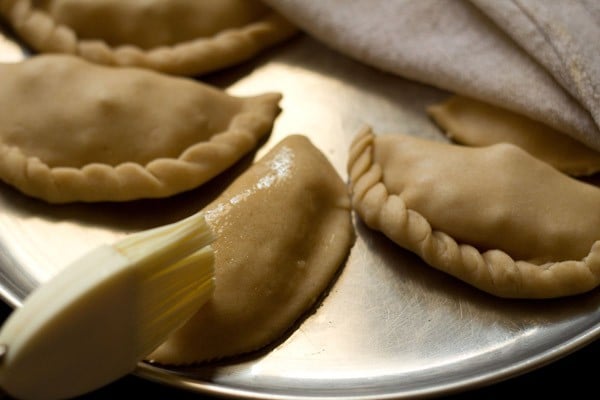
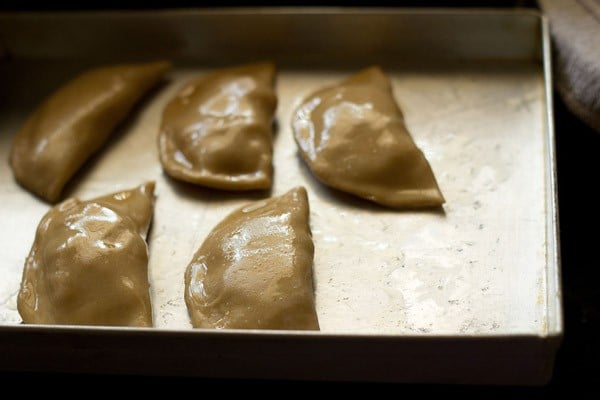
26. Preheat the oven to 200 degrees celsius (390 degree Fahrenheit). Brush oil or melted ghee on the gujiya evenly all over. If using oil, use a neutral flavored oil.
27. Place them on a baking tray.
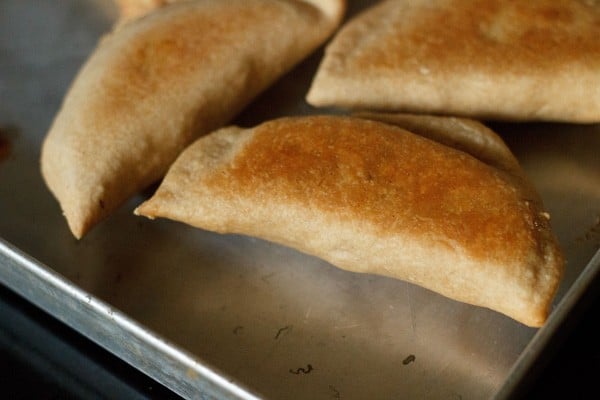
28. Bake the gujiya for 20 to 30 minutes at 200 degrees celsius (390 degree Fahrenheit) until they are golden.
Oven temperatures vary, so do keep a check while baking. Place them on a wired rack for cooling. Once cooled at room temperature, store the baked gujiya in an air-tight jar or box.
Fry Gujia
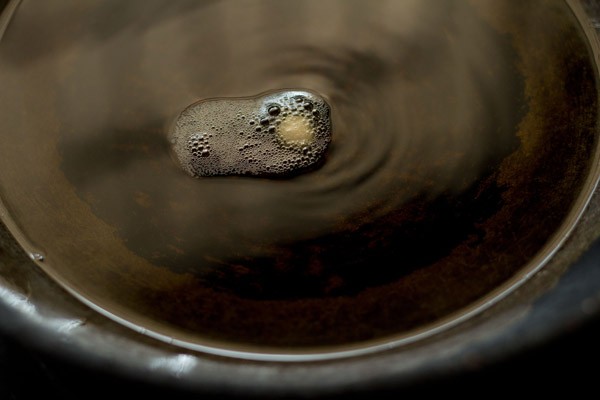
28. Heat oil for deep frying in a kadai or pan. First test the temperature of oil, before frying.
Add a small piece of the dough into the oil. If the dough comes up steadily and briskly, the oil is ready.
The oil is still cold if the dough sits at the bottom. If the piece of dough comes up briskly and quickly, the oil is too hot.
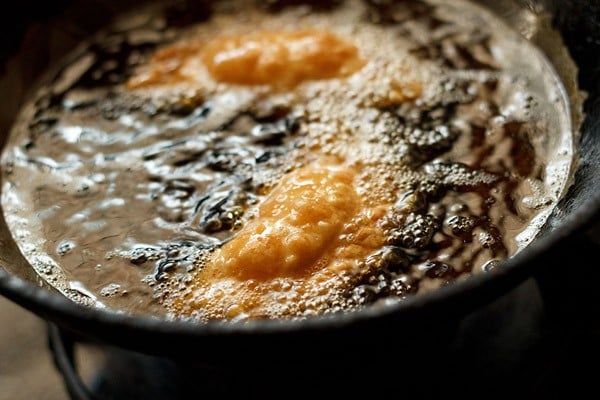
29. Gently slid the gujia in oil. Just add a few pieces and don’t overcrowd. Depending on the size of the pan/kadai, you can fry 2 to 3 gujiya at a time.
Fry gujiya at medium heat. If your pan or kadai is not heavy but light, then fry gujia at medium-low heat.
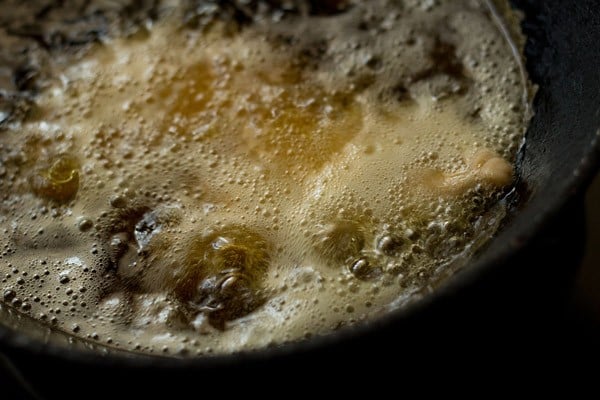
30. Turn them over carefully and fry the other side. Deep fry them till they have become golden turning over as needed.
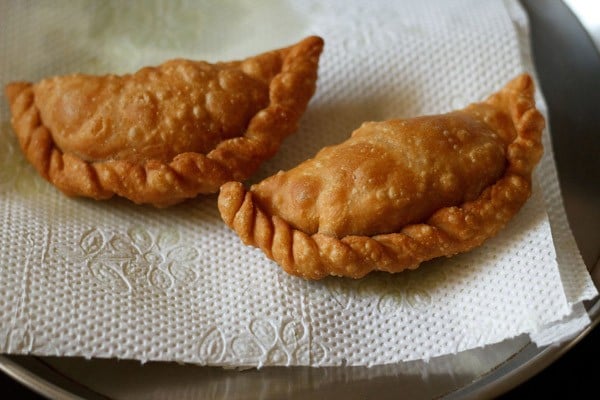
31. Place the fried gujia on kitchen paper tissues. Fry all the prepared gujiya in batches. Once they are cooled completely, store them in an air-tight box.
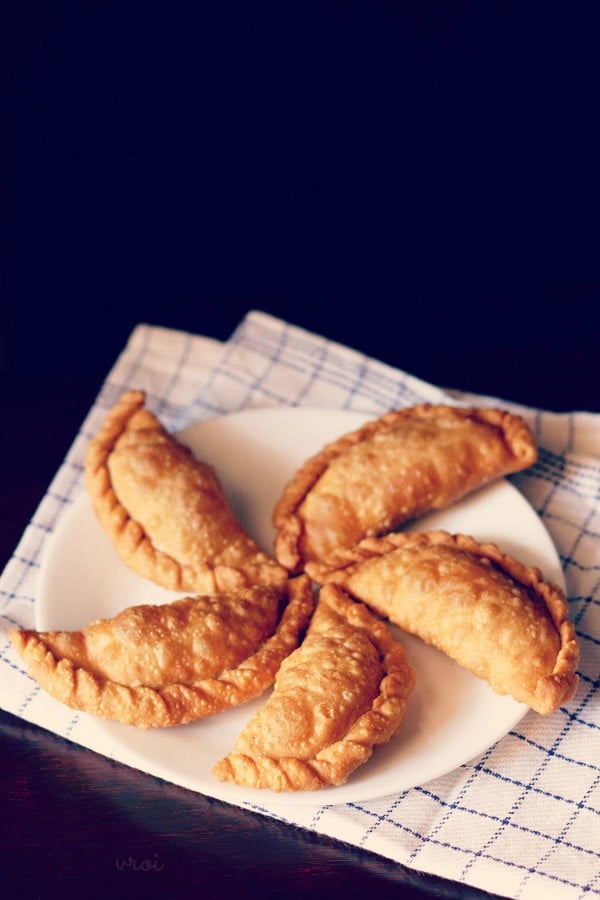
32. Serve gujiya to your family, friends and guests.
Serving Suggestions
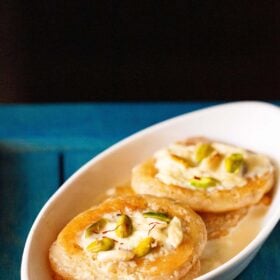
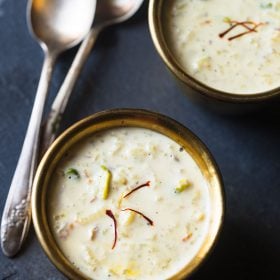
Mawa gujiya is eaten like any Indian sweet as it is. If you fancy something more indulgent, pair the gujiya with some Rabri (thickened sweetened milk).
Storage
When the gujia cools at room temperature, immediately place them in an air-tight jar. They stay good for a few hours at room temperature. Since the stuffing is made with milk solids, I suggest to keep any leftovers in the refrigerator.
Expert Tips
- Dough: Knead the dough to a tight and firm dough. If the dough is soft, the outer pastry of the gujia will become soft.
- Oil temperature: The oil has to be medium hot while frying gujiya. If the oil is cool, the gujiya pastries will absorb a lot of oil making them soggy. They can break or fall apart while frying at a low temperature in the oil. If the oil is very hot, the outer part of the pastry will cook and get browned faster while the insides of the dough will be raw or undercooked.
- Stuffing variations: For variations in the stuffing of the gujiya recipe, you can include some thandai powder, gulkand (rose preserve), cocoa powder (for a chocolate flavored gujia) and any nuts or dry fruits you like.
- Flours and water: You can use the following proportions of flour – 2 cups of all-purpose flour or 2 cups of whole wheat flour.
If you use all-purpose flour, begin by adding ¼ cup water first and add a few tablespoons more as you go on mixing and kneading dough.
For whole wheat flour, start with ⅓ cup water and add some more tablespoons if needed. Thus add water in parts as you go on working the dough.
If the dough appears dry, then add more water and if the dough become sticky, then add more flour. - Scaling: To feed a crowd, make a large batch of this gujiya recipe. You can halve the recipe as well to make a small batch.
More Indian Sweets For You!
Sweets Recipes
Sweets Recipes
Sweets Recipes
Sweets Recipes
Please be sure to rate the recipe in the recipe card or leave a comment below if you have made it. For more vegetarian inspirations, Sign Up for my emails or follow me on Instagram, Youtube, Facebook, Pinterest or Twitter.
Gujiya Recipe (Fried and Baked)
Ingredients
For pastry dough
- 1 cup whole wheat flour – 120 grams
- 1 cup all-purpose flour – 125 grams
- ¼ teaspoon salt
- ⅓ to ½ cup water or add as required
- 2 tablespoons Ghee
For sweet stuffing
- 1 cup Khoya – tightly packed or 200 to 220 grams (mawa or evaporated milk solids)
- ½ tablespoon Ghee
- 10 almonds
- 10 cashews
- 10 pistachios
- ½ tablespoon raisins
- ⅓ cup powdered sugar or confectioner's sugar, add as required
- ½ teaspoon green cardamom powder or 6 to 7 green cardamoms powdered in a mortar
- oil as required for deep frying
Instructions
Making the pastry
- Take the all purpose flour, whole wheat flour and salt in a bowl.
- Heat ghee in a small pan or bowl until it melts and becomes warm. Pour the ghee on the flours.
- First mix the ghee with a spoon. Then rub and mix the ghee with the flours, with your fingertips to form a bread crumb like texture.
- Add water in parts and begin to knead. The amount of water needed will depend on the quality and texture of the flour.
- Knead the dough till firm and tight. Cover the dough with a moist cloth and set aside for 30 minutes.
Making sweet stuffing
- Crumble or grate the khoya (mawa).
- Chop the nuts, raisins and set aside.
- Melt ghee in a pan on a low heat.
- Add the crumbled or grated khoya.
- Stir the khoya continuously on a low heat.
- Cook the khoya, till it begins to gather around itself. Switch off the heat and place the pan on the kitchen countertop. Let the khoya stuffing cool completely at room temperature.
- Later add powdered sugar, the chopped nuts, raisins and cardamom powder. Better to sieve the powdered sugar if there are lumps.
- Mix everything well and keep the stuffing aside. Check the taste and add more sugar if you prefer.
Assembling and shaping
- Divide the dough into two parts.
- Make a medium log of each part and slice it into equal parts.
- Roll each part in your palms to make balls and place all the balls in the same bowl. Cover with a moist kitchen towel.
- Dust the rolling board lightly with some flour. Roll each ball with the rolling pin to a small circle having 4 to 5 inches diameter. Don't add too much flour while rolling. If you can roll without the flour, then it is better.
- With your fingertip or a pastry brush, apply water all over the circumference edge.
- Place about 1 to 1.5 tablespoon of the prepared khoya filling on one side of the circle, keeping the edges empty. Don’t add too much of stuffing as it becomes difficult to shape gujiya and they may break in the oil.
- Carefully, bring together both the edges and join. Gently press the edges.
- With a small gujiya cutter or pizza cutter, trim the extra edges. When doing this method, it is very important that the gujiya is pressed and sealed well. Avoid this method if you plan to fry the gujiya. If baking then this method is good. As even if the filling comes out, you don't have to worry as there is no mess.
- However, it is best to make pleated design at the edges if you plan to fry the gujiya. This way the stuffing does not come out while frying and the gujiya look good too. Just keep on folding and twisting the edges till the end.
- Prepare gujiya this way and arrange them on a plate or tray. Cover the guijya with a moist napkin so that the dough does not dry out.
Baking gujiya
- Preheat the oven to 200 degrees celsius (390 degree fahrenheit). Brush oil or melted ghee n the gujiya evenly all over.
- Place them in a baking tray.
- Bake the mawa gujiya for 20 to 30 minutes at 200 degrees Celsius (390 degree Fahrenheit), until they are golden. Oven temperatures vary, so do keep a check while baking. Place them on a wire rack for cooling. Once cooled, store them in an air-tight jar or box.
Frying gujiya
- Heat oil for deep frying in a kadai or pan.
- First test the temperature of oil, before frying. Add a small piece of the dough in the oil. If the dough comes up gradually and briskly, then the oil is ready. If the dough sits at the bottom, the oil is still cold. If the piece of dough comes up briskly and quickly, the oil is too hot.
- Gently slid the gujiya in oil. Just add a few pieces and don't overcrowd. At a time depending on the size of the pan/wok/kadai, you can fry 2 to 3 gujiya at a time on medium-heat.
- Turn them over carefully as fry the other side. Deep fry till they have become golden turning over as needed.
- Drain on kitchen paper tissues. Fry all gujiya this way and once they are cooled completely at room temperature, store them in an air-tight box.
- Serve gujiya to your family and guests when required.
Serving suggestions
- Gujiya is eaten like any Indian sweet as it is. If you fancy something more indulgent, pair the mawa gujiya with some Rabri (thickened sweetened milk).
Storage
- When the gujia cools at room temperature, immediately place them in an air-tight jar. They stay good for a few hours at room temperature. Since the stuffing is made with milk solids, I suggest to keep any leftovers in the refrigerator for about 1 to 2 days.
Notes
- * Flour and water: You can use the following proportions of flour – 2 cups of all-purpose flour or 2 cups of whole wheat flour. If you use all-purpose flour, begin by adding ¼ cup water first and add a few tablespoons more as you go on mixing and kneading dough. For whole wheat flour, start with ⅓ cup water and add some more tablespoons if needed. Thus add water in parts as you go on working the dough. If the dough appears dry, then add more water and if the dough become sticky, then add more flour.
- Dough: Knead the dough to a tight and firm dough. If the dough is soft, the outer texture will become soft.
- Oil temperature: The oil has to be medium hot while frying gujiya. If the oil is cool, the gujiya pastries will absorb a lot of oil making them soggy. They can break while frying at a low temperature in the oil. If the oil is very hot, the outer part of the pastry will cook and get browned faster while the insides of the dough will be raw or undercooked.
- Stuffing variations: For variations in the stuffing of the gujiya recipe, you can include some thandai powder, gulkand (rose preserve), cocoa powder (for a chocolate flavored gujia) and any nuts or dry fruits you like.
- Scaling: To feed a crowd, make a large batch of this gujiya recipe. You can halve the recipe as well to make a small batch.
Nutrition Info (Approximate Values)
This Gujiya recipe from the blog archives first published in October 2014 has been updated and republished on March 2023.

Can you make the stuffing before hand and freeze it?
You can do that but ensure to thaw the stuffing and bring it to room temperature before filling it in the gujiya pastry.
Hello Dassana,
I was wondering if it’s possible to replace khoya with something else (eg. milk powder or condensed milk)?
Thanks in advance 🙂
Hi Simi, milk powder will work. With milk powder if it is sweet, reduce the sugar and add some milk/water to moisten it. Condensed milk will work in combination with milk powder. You won’t need to add sugar if you use condensed milk and milk powder together.
Thanks a lot for your response.
Great
I tried your recipe exactly as described. Unfortunately, the gujjiyas started splitting in the oven and the filling started oozing out. What went wrong? Why would this happen? All the gujjiyas were sealed perfectly well. I used 2 c all purpose flour instead of a combination. Thanks!
Looks like the stuffing had lot of moisture and while baking they moisture and liquids starting releasing. The khoya or mawa should be cooked well and should not have any liquid in them. I hope you have used powdered sugar and not castor sugar. Castor sugar are very fine granulated sugar and can release moisture. Here the type of flour is not the problem, but the stuffing is. I hope this helps.
Hi Dassana,
I have been following your website since long. I’m highly impressed with your knowledge about so many recipes and how you prepare them with so much love! It’s an beautiful art! Your effort of sharing the knowledge makes a huge difference in our lives. My heart felt thanks to you.
thank you much vaishnavi. so glad to read your comment and made me feel good too. thanks again and happy cooking.
Hi, is it OK to roll out a large circle of the dough and cut out small circles from it for the gujiya? We are making a really big batch for diwali and my rolling skills are subpar. Thanks in advance 🙂
yes you can do this way too tanaya.
Hi Dassana, I always check your recipes to clear my doubts especially baking stuff. I tried this one gujiya, they puffed up beautifully and was crispy when it was hot, later they lost their crispness after storing them. Where have I gone wrong?
thanks priya. the gujiyas need to cool completely before you store them. if stored when they are slightly hot or even warm then due to moisture released from condensation they will loose their crispness. hope this helps.
Hello !!
I made gujiyas for the first time ever last year and followed the recipe to the T. The results were AWESOME !! Perfect gujiya with the perfect amount of sweetness. My toddler loved it. I’m planning to make em for Diwali this year and I had a question, can I double the recipe ? Shud I just add everything twice to make double amount (last year it yielded 30 bite-sized gujiyas) . Also can I half the recipe, like if I want to make smaller batch than the one u mentioned, can I just use half of the ingredients? Thank you in advance !!
thank you meA. glad to know. of course the recipe can be halved or doubled. just halve or double the ingredients proportionately. wish you happy diwali in advance.
Hi Dassana,
I followed your recipe to the tee including making khoya from scratch. Unfortunately all the gujiyas started to open within a minute while frying. I improvised, took them out of the oil & baked them for 10 mins at 350F. The filling came out of the cracks & caramelized but rest of the structure stood.
I don’t know what went wrong, my mom thinks I added too much ghee to the dough or kneeded it too soft or overstuffed the filling. I suspect I waited too long before frying them (waited almost 2 hrs).
However I want to thank you Dassana for this & many other recipes. And guess what, we are making another batch later tonight & plan to fry gujiyas within 30 minutes of assembling them. Any advice? Wish me luck!
Thanks Ankita. They have not been stuffed properly. If the stuffing is done well then the filling will not come out. Some more ghee in the dough does not lead to the stuffing coming out. I guess the stuffing is too much in the gujiya. Thats why while baking also the stuffing has come out. Do not over stuff the next batch and seal very well. All the best.
hey guys
last year when I try to make gujiya it was not soft as a want and there are small bubble on gujiya.someone plz suggest reason and solution. Iam going to make this year too.
bubbles are fine on Gudiya. if you do not want them, then try to cook on a medium flame or medium-low flame. on a high flame bubbles can appear. also do not make the dough too soft. hope this helps.
it means whenever ghee is mentioned for moyan we can use desi ghee or refined oil in the same quantity ?and also mam can we use desi ghee in the same quantity of butter for baking cookies and cakes instead of butter ?
you can use in the same quantity. you can even reduce the amount of ghee a bit if oil is used as a moyan. eg if a recipe has 3 tbsp oil as moyan, you can add 2.5 tbsp ghee as moyan. for making cookies and cakes, you can use the same amount of desi ghee as butter.
Hi!
I made gujias and Punjabi mathri following ur recepi and it was a hit.. All just loved them and I was so happy and satisfied
Thank you so much
pleased to know this himani 🙂 glad your family liked the mathru and gujias recipe from our blog. thankyou for your kind words and you are welcome.
may be water could be the reason..mam,when its talking about ghee for moyan is that mean vanaspati ghee ? i hope you will not mind my queries ,,,,,
not at all shuchi. feel free to ask your queries. both ghee and vanaspati can be used as moyan. i avoid vanaspati as its hydrogenated vegetable fat and not good at all for the body. you can read more or hydrogenated vegetable fats and oil on the internet. could be water is the reason. more water or less water can also change the texture of the crust.
I like it all recipe good knowlegefor indian food Thanks
welcome and thanks yogesh.
mam i made gujhia as per your recipe but the outer part of gujhia was so crust like papdis i think the quantity of moyan you mentioned is less…to make soft outer part what quantity should be used of moyan?
shuchi, the quantity of moyan is enough for 2 cups flour in a gujiya recipe. too much of moyan can make the crust soft or too flaky. i feel some more water needed to be added in the dough. could be due to this reason that the crust was papdi like. at the most you increase the moyan to 3 to 4 tbsp. but here the crust will be more like the crust of samosa. if you are fine with it, then add 3 to 4 tbsp of ghee.
have a look at this karanji recipe (similar to gujiyas) too. same amount of moyan has been used.
https://www.vegrecipesofindia.com/karanji-recipe-maharashtrian-karanji-recipe/
mam is the same quantity of single acting baking powder and double acting baking powder to be used ?and if we cant find aluminium free baking powder then what quantity of baking powder having aluminium has to be used ?
shuchi, i do not know about single acting and double acting baking powder. in india, we do not get these ones. if you do not get aluminium free baking powder, then use the same quantity of regular baking powder as mentioned in any recipe.
Hi mam,in some of your recipes you have mentioned only to gather the dough not to kneading that here i wanna know what is the differnce in between these two things and also tell me which brand of baking powder you use as mine has sodium aluminum sulfate which makes my recipe some bitter…and warm wishes for holi …..
shuchi, wishing you too a great holi. kneading the dough helps to give an even round shape while rolling the dough balls. there won’t be any cracked or jagged edges when rolled. while making gujiya, the edges need to be smooth or else it becomes difficult to shape them. i use aluminium free baking powder. the link is given below. this baking powder is aluminum free as well as gluten free.
link – https://www.amazon.in/Zero-G-Baking-Powder/dp/B00XL78OEI/
Hello Dassana,
It has been quite long time I am following your recipes. They are awesome. I have tried many of them including this one. And the way you describe the recipe is commendable. I have heard that after frying the gujiya they dip in sugar syrup for sometime. Have you tried this way? If yes tgen would love to know the stepwise process. Thanks. All the best.
thanks a lot purvi. yes the gujiya is dipped in sugar syrup. i do not make it this way as i feel its too much sugary and sweet. i have tasted this gujiya too. after you are done frying the gujiyas, let them cool down completely. then prepare sugar syrup with 1 string consistency. dip the gujiya and coat it with the sugar syrup. place them on a plate. you can take 1/2 cup sugar and add 1/2 to 2/3 cup water for this recipe.
Tried the baked version, and results are awesome, I also added some grated coconut in stuffing. I have fried gujiya for lots of times, but baked for the first time. Baked once are equally good n delicious. I may never fry my gujiya afterwards. 🙂 Thank you very much.
welcome rasika. nice to know this. thanks for sharing your positive feedback.
Can I add sugar instead of powdered sugar?
nitay, if you add sugar then add it when you add khoya. so that the sugar melts while heating khoya. otherwise sugar particle will come in the mouth.
Tried the fried version with all purpose flour… The result brought tears to my eyes. It’s unbelievable that a terrible cook like me could make something so delicious. Your step by step pics are very very helpful. Thanks a ton !
thats good vaishali. tears do come at times. even mine when i master a difficult complicated dish. no body is a terrible cook. we all learn. just that some people cook better, some okay and some not so good 🙂
Dassana
This recipe is also very popular in Andhra. It is made on many festive occasions like Diwali, Pongal etc. However, in Andhra, khoya with nuts is not used as stuffing. The stuffing is usually made by using coconut and either brown sugar or white sugar. Coconut is dry cooked along with brown sugar (jaggery) or white sugar till it becomes a sticky viscous solid. Then it is stuffed in the shell made with the flours you described. Semi tender grated coconut is required for this preparation. These are called ‘Kajji Kayalu’ Just wanted to let you know, in case you are not familiar with this.
thanks rom for sharing this info. i was not familiar about this recipe. good you shared the recipe.
Lovely gujiyas… nicely explained method of both frying and baking…
thanks ranjani