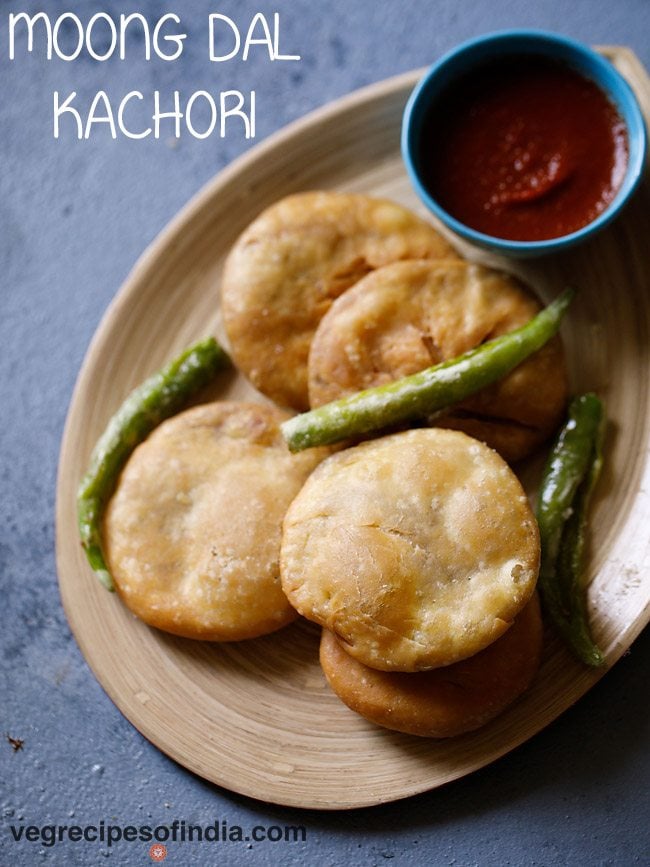
Kachori Recipe (Khasta Kachori With Moong Dal)
Kachori is a popular Indian deep-fried snack made with a crisp, flaky pastry and a savory filling. This Kachori recipe shows you how to make traditional Khasta Kachori with a spiced moong dal stuffing. The dough is prepared from scratch, filled, and fried until golden and crunchy. Serve these moong dal kachori as a tea-time snack or festive treat.
About Kachori Recipe
Kachori is a popular Indian snack made with a crisp, flaky outer layer and a spiced filling. These small, deep-fried discs are filling, flavorful, and perfect as a tea-time snack or street-style treat.
Across India, you will find many variations depending on the region. You can also try other types like Raj Kachori, Matar Kachori, Urad Dal Kachori, Koraishutir Kochuri (Bengali green peas kachori) and Lilva Kachori (Gujarati style fresh tuvar kachori).
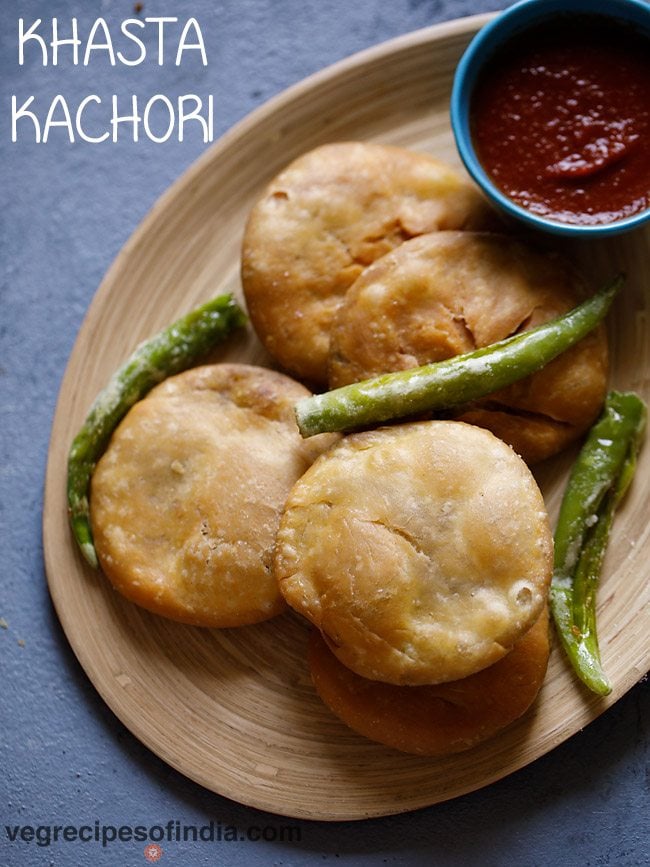
Table of Contents
This Khasta Kachori is a North Indian version made with a moong dal stuffing. The ground lentils have a slightly coarse texture and absorb the spices well, giving a balanced and earthy flavor.
In this recipe, the moong dal is soaked, ground and cooked with spices. This stuffing is then wrapped with dough and rolled into thick discs.
The kachori are deep-fried on low to medium heat until crispy and golden. They are usually served warm with Green Chutney or Tamarind Chutney.
This recipe takes some time and patience (similar to a Samosa), but the texture and taste are worth it. If you enjoy making traditional snacks at home, this is one recipe you should try.
How to Make Kachori (Step-By-Step)
Prepare Dough
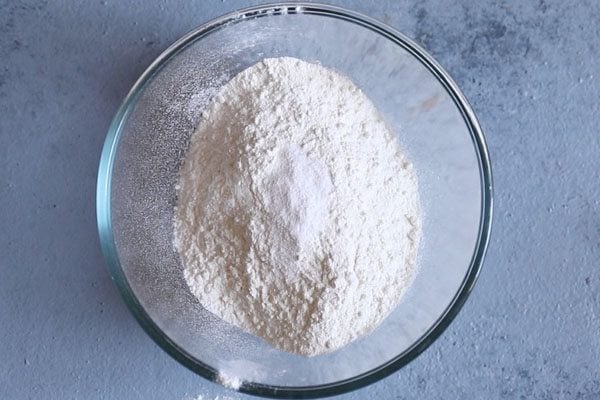
1. Take 2 cups all purpose flour (maida) in a bowl or pan. Add ½ teaspoon salt or as per taste.
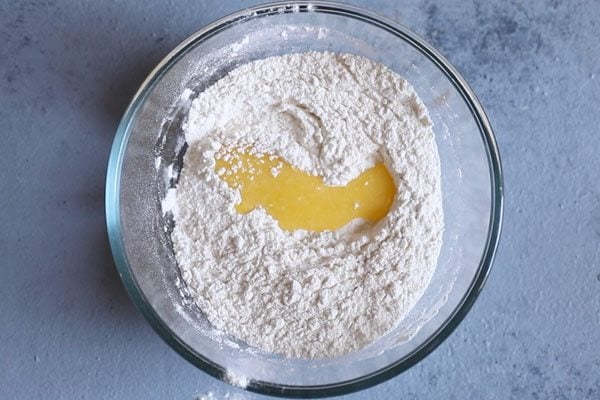
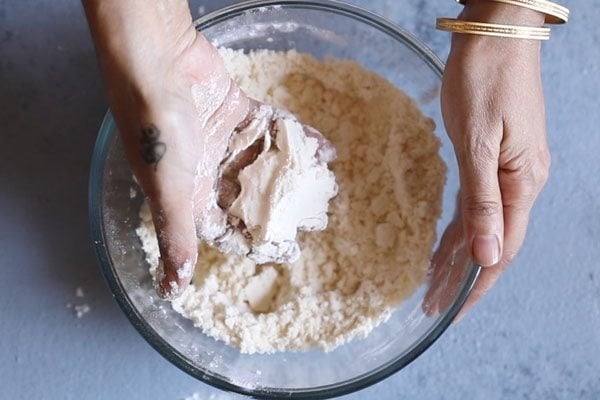
2. Add ¼ cup ghee. Make sure the ghee is in a semi-solid molten state as you see in the photo below.
3. With your fingertips mix the ghee evenly with the flour for a few minutes.
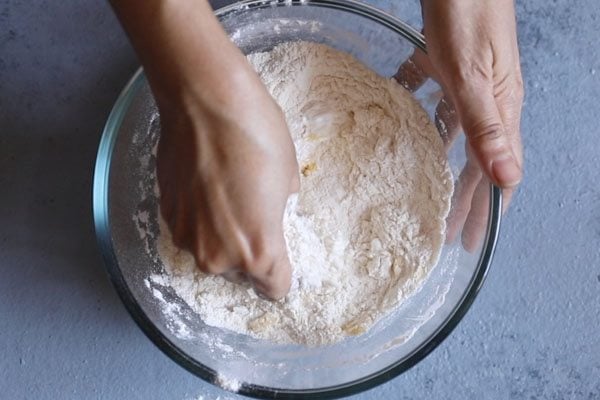
4. You have to mix well, till you get a breadcrumb like texture in the flour.
To check if the ghee has evenly mixed with the flour – take a small portion of this mixture in your palms and press it. When the mixture is pressed, it should not fall apart or break.
5. Next add ½ cup water in portions.
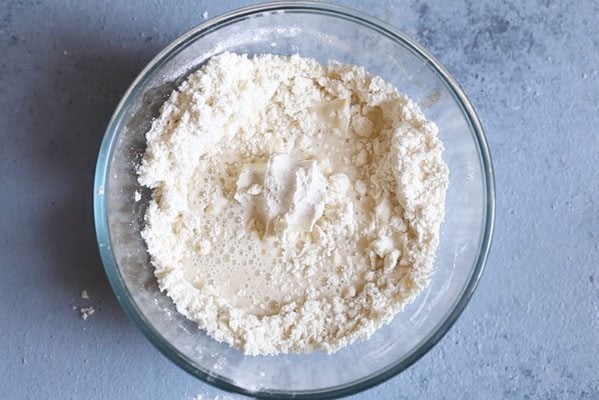
6. Mix first and then begin to knead.
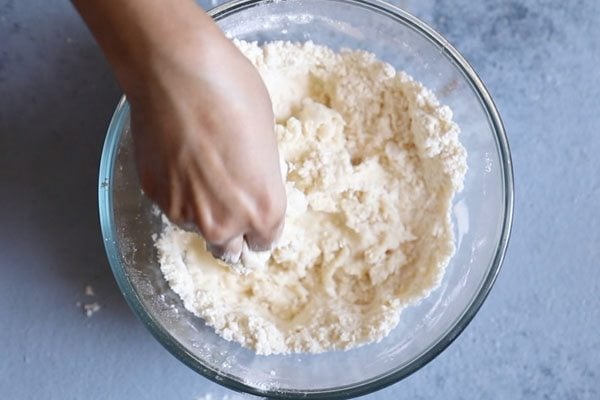
7. Knead to a smooth dough adding water bit by bit as needed. The dough can be semi-soft to soft. But do not make it too soft.
Tip 1: If the dough becomes sticky, then add some flour.
Tip 2: If the dough looks dry, then add some more water and knead.
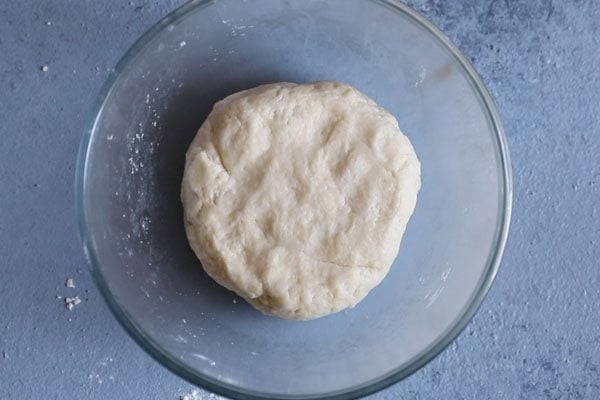
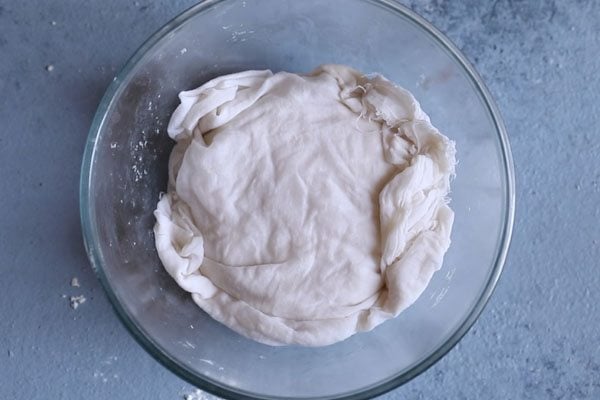
8. Cover the dough with a moist folded muslin/cheesecloth or a kitchen cotton towel. Let the dough rest for 30 minutes.
Make Moong Dal Stuffing
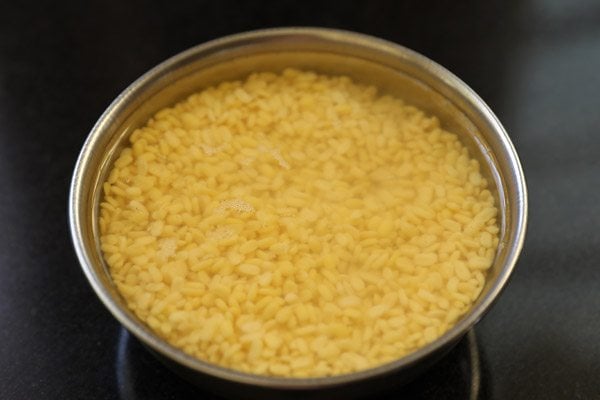
9. Rinse ½ cup of yellow moong dal in a bowl. Soak moong lentils for 2 hours in enough water.
10. Later drain all the water very well and add the soaked moong lentils in a grinder jar.

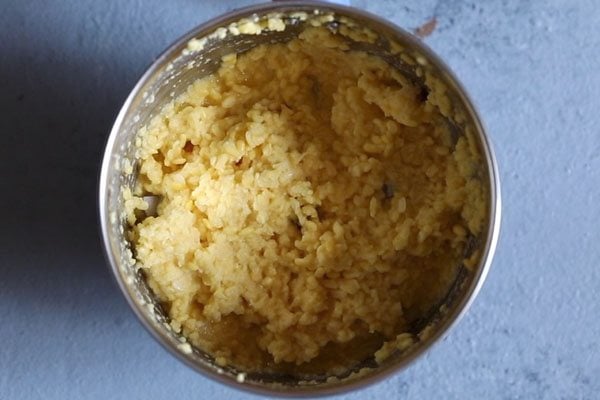
11. Using the pulse option, lightly crush or make a roughly coarse mixture of the moong lentils. Also do not add any water while grinding or blending.
Do not grind too much or make a fine paste.
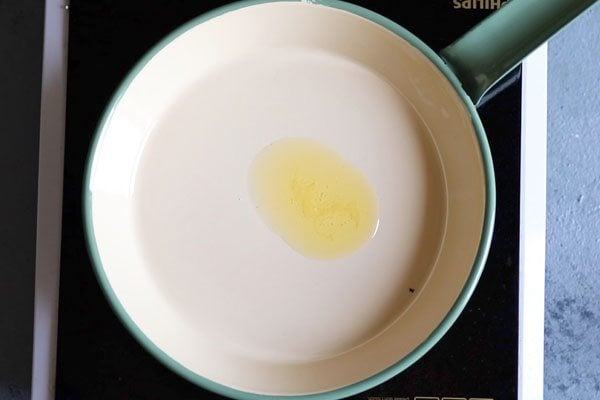
12. Then heat a frying pan or a sauté pan. Add ½ tablespoon ghee and keep heat to a low.
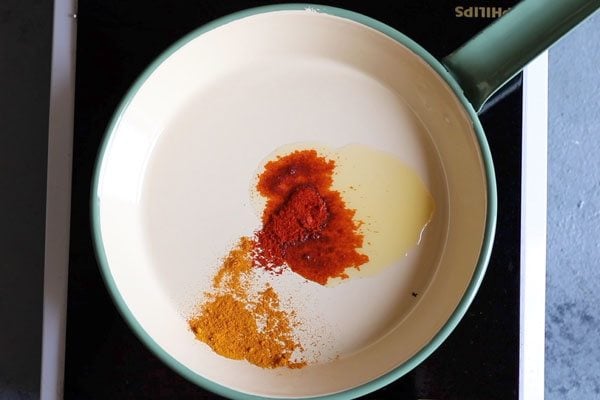
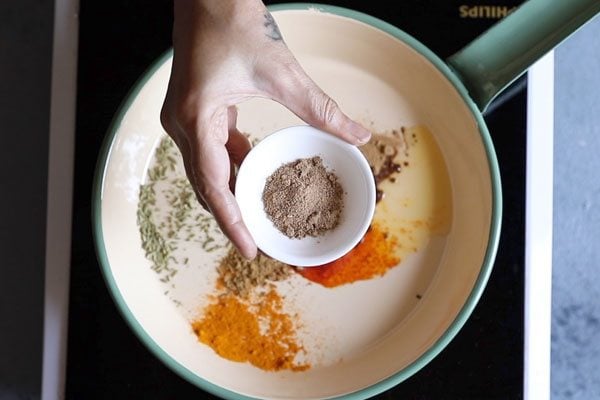
13. Once the ghee melts, keep the heat to the lowest or turn off the heat. Add all the ground spice powders one by one.
First add ¼ teaspoon turmeric powder and ½ teaspoon red chilli powder.
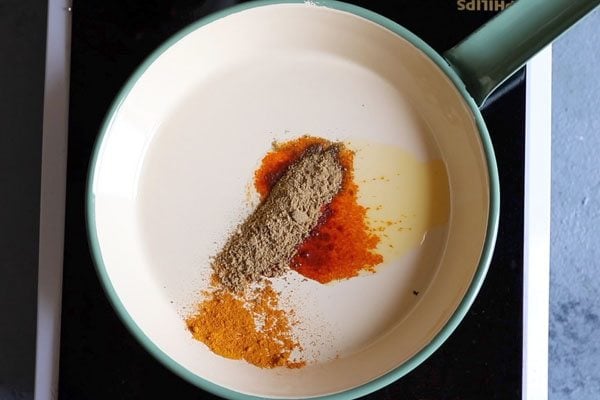
14. Then add ½ teaspoon cumin powder and 1 teaspoon coriander powder.
15. Add 1 teaspoon crushed fennel seeds. You can also use fennel powder.
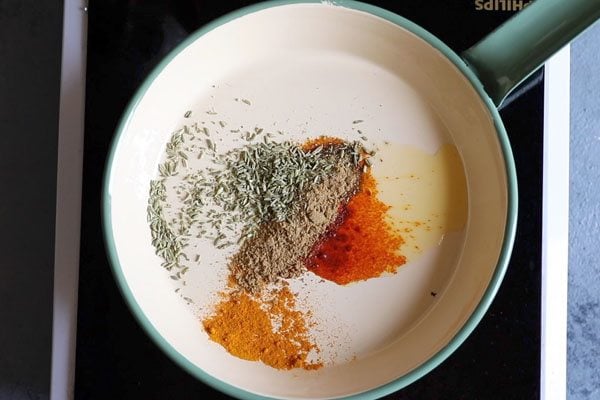
16. Add ½ teaspoon dry ginger powder (saunth powder).
Instead of ginger powder, you can also use ½ teaspoon finely chopped ginger. Some chopped green chilies can also be added.
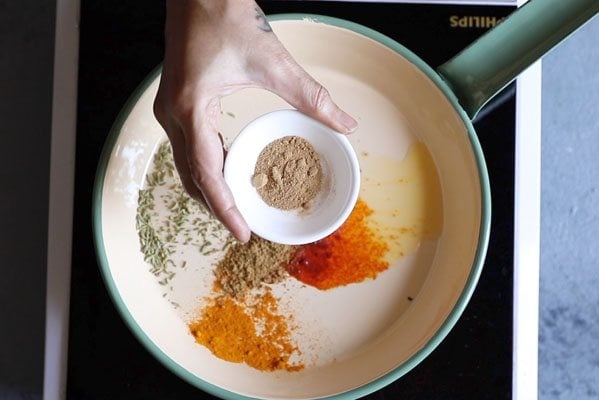
17. Now add 1 teaspoon dry mango powder (amchur powder).
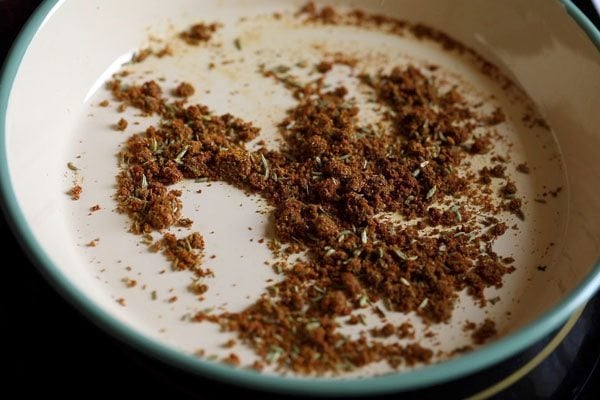
18. Keep the heat to its lowest and mix very well.
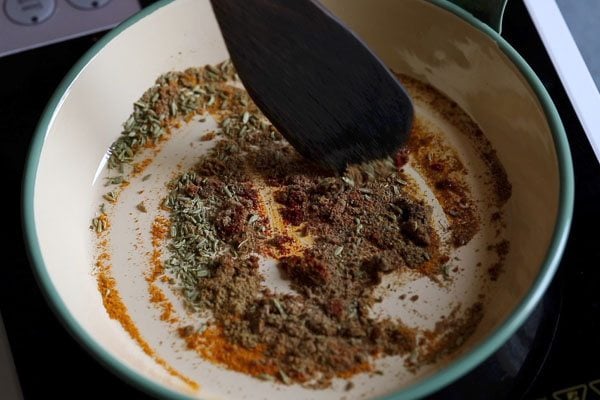
19. Do make sure that the spices do not burn.
20. Then add the coarsely ground moong dal. Also add salt and 1 pinch of asafoetida (hing).
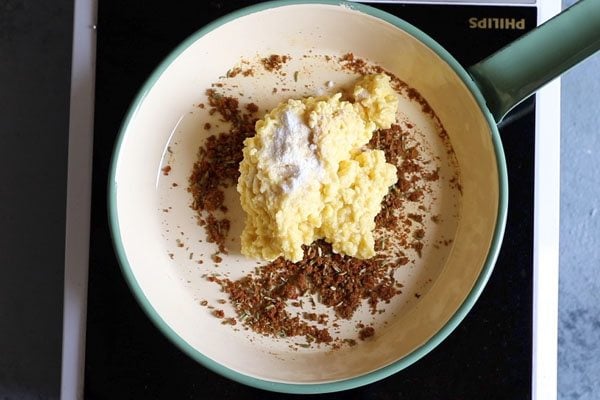
21. On a low heat mix very well.
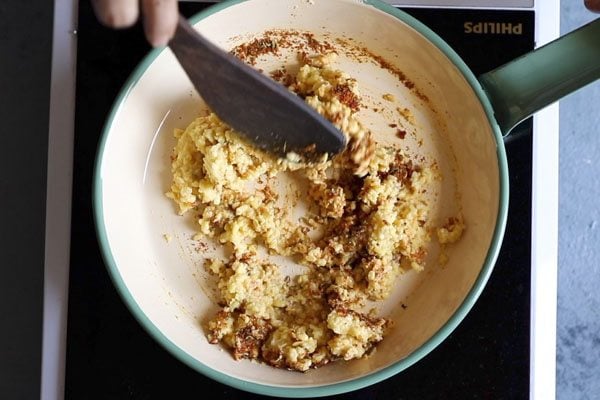
22. Sauté with nonstop stirring for 3 to 4 minutes on a low heat. Check the taste and if required you can add more spice powders like red chili powder and mango powder.
Let the moong dal stuffing become warm or cool at room temperature.

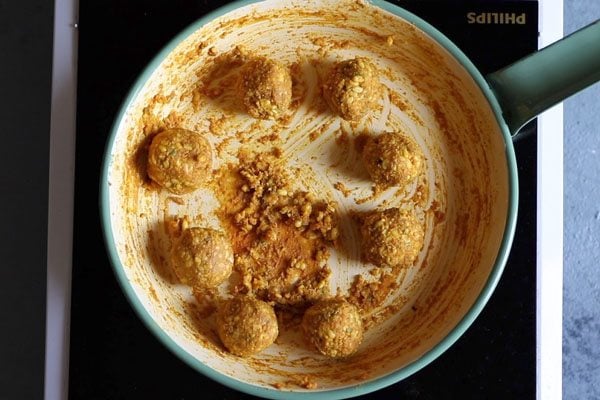
23. Now make small balls from this moong dal mixture. You can also spread some oil on your palms while making the balls. Cover and keep aside.
Assembe, Stuff, Shape
24. After 30 minutes, lightly knead the dough. Then roll the dough into a log.
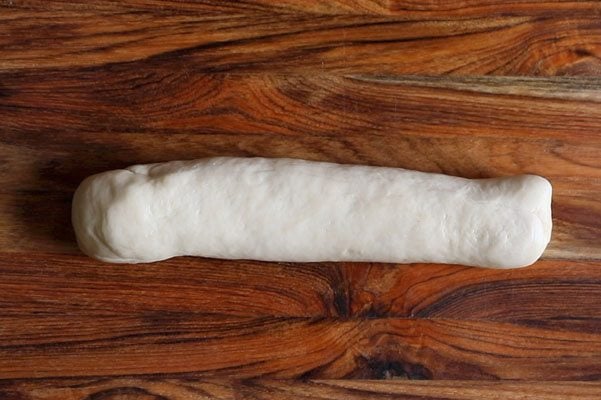
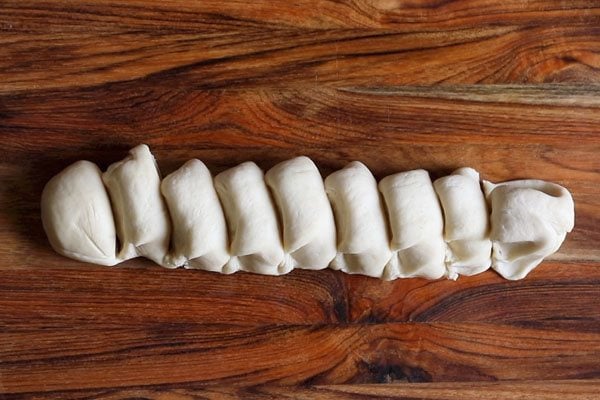
25. Now cut the dough in equal portions. This will depend on the number of moong dal mixture balls that were made. With this recipe, you will get about 9 to 10 kachoris.
26. Take a portion of the cut dough. Roll to a neat ball between your palms and then flatten it with your fingers.
Keep the edges thin while flattening. You can also use a rolling pin (belan) to flatten.
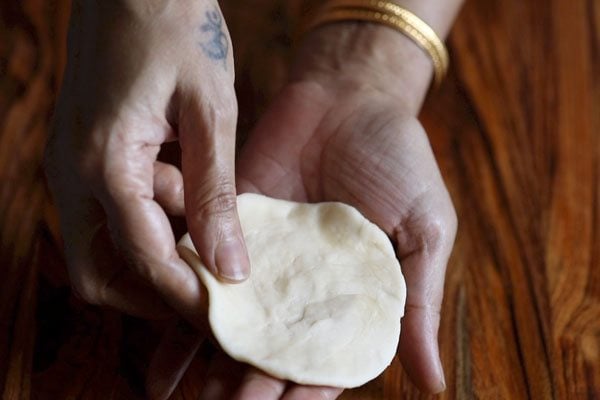
27. Now place the moong dal stuffing ball on the dough. Gently press to flatten the moong dal stuffing ball.

28. Bring the edges of the dough together and join them at the center. Excess dough can be pinched off and removed.
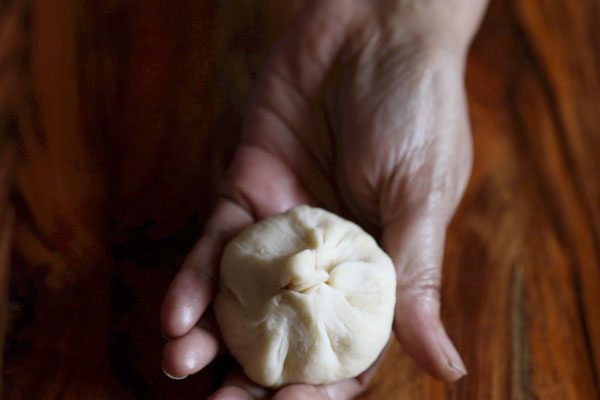
29. Press and then flatten the top. Do check the video above to see how the stuffing and shaping is done.

30. Now gently roll the kachori with a rolling pin to get a medium thick kachori. Stuff and prepare all kachoris this way.
Keep them covered under a moist muslin/cheese cloth or cotton napkin, so that they do not dry up.

Deep Fry Khasta Kachori
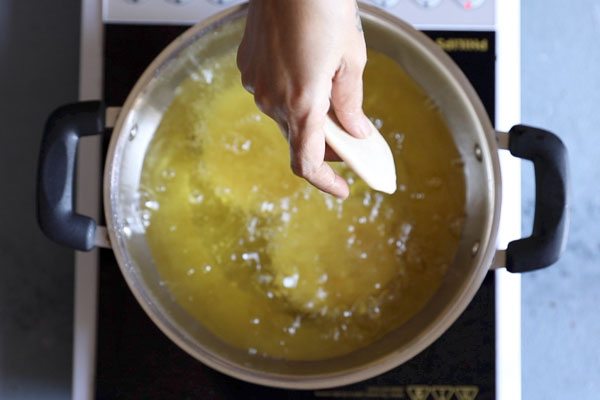
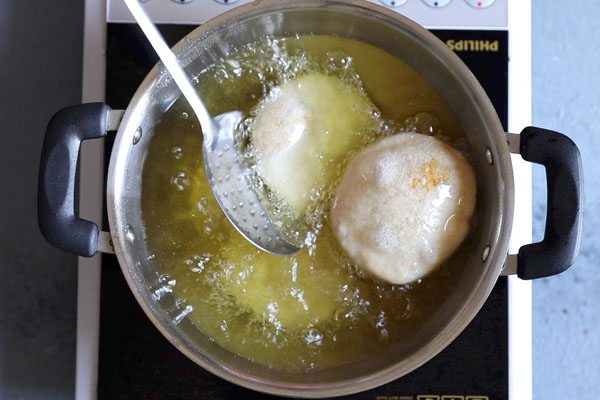
31. Heat oil for frying in a kadai (wok) and keep the heat to a low or medium-low. When the oil is just hot enough, you can add 2 to 3 kachoris or more depending on the size of your kadai (wok) or pan. Make sure the oil is not medium hot or very hot.
To check the temperature while frying, add a small piece of dough to the oil. If it comes slowly and steadily to the surface, then the kachoris are ready to be fried.
Tip: If the stuffed kachori comes quickly, the oil is too hot. So lower the heat. If it does not come on the surface, then the oil is cold. So increase the heat.
32. When the kachoris start puffing up, then gently nudge each kachori with a slotted spoon, so that they puff up well.
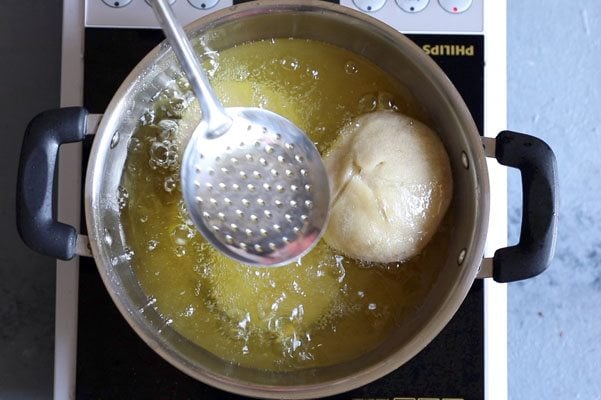
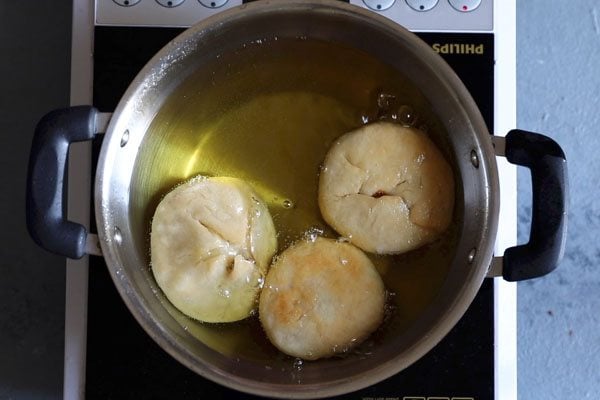
33. When the base becomes light golden, then gently turn them over. The frying takes about 7 to 9 minutes. So one has to be patient.
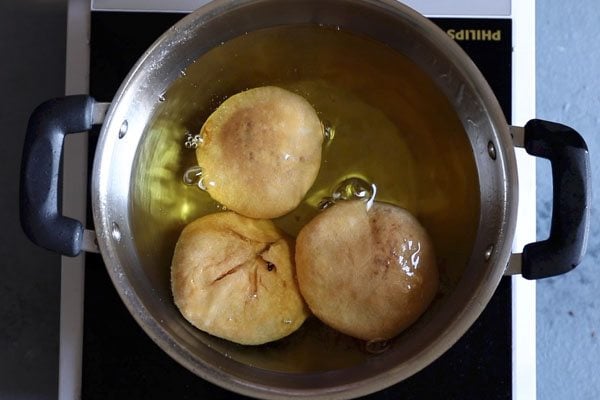
34. Continue to fry on a low to medium-low heat till the kachoris become golden. While frying you can turn them often to get an even color. Regulate the temperature from low to medium-low as needed.
35. Fry the kachoris till they become golden and nicely crisp from outside. You will also see that the oil has stopped sizzling and bubbling once the kachoris are fried.
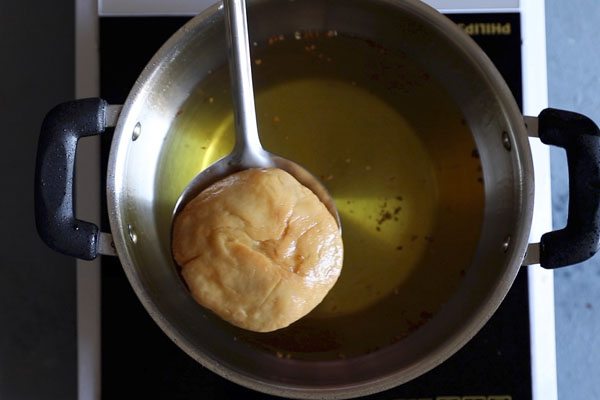
36. Remove with a slotted spoon draining the excess oil from the slotted spoon back in the kadai (wok).
Place khasta kachori on kitchen paper towels so that excess oil is absorbed. Fry the remaining kachori in batches this way.
37. Serve Khasta Kachori hot or warm with your favorite chutneys.
Serving Suggestions
Serve khasta kachori warm with tamarind chutney, Coriander Chutney, Mint Chutney or Garlic Chutney.
You can also pair them with fresh yogurt for a simple and cooling side.
For a more filling meal, serve with a thin spiced potato curry or any light gravy dish. You can try Aloo ki Sabji, Aloo Rasedar, or this simple Potato Curry.
Kachori also taste good on their own as a snack. You can serve them with a few fried and lightly salted green chillies on the side.
Storage Notes
- At Room Temperature: Store kachori in an airtight container at room temperature for 1 day. Make sure they are completely cooled before storing, or they can turn soggy.
- Refrigeration: You can refrigerate them for up to 3 days. The texture will soften slightly, but they will still taste good.
- Reheating: Reheat in an oven or air fryer at 160 to 170°C until warm and crisp. Avoid microwaving, as it can make the texture chewy.
- Leftover Filling: If you have extra moong dal stuffing, refrigerate it for 1 to 2 days and use it for making more kachori or even a stuffed paratha.
Dassana’s Recipe Tips
- Frying Temperature: To get a crisp and flaky kachori, fry them on low to medium-low heat. The oil should be hot, but not too hot. Slow frying helps the outer layer cook evenly without becoming too dark or burning. To check the oil temperature, drop a small piece of dough in the oil. If it sinks without bubbles, the oil is not ready. If it rises too quickly with rapid bubbles, the oil is too hot. It should rise slowly with steady bubbles.
- Fat in Dough: For a flaky texture, the proportion of fat (ghee or oil) in the dough is important. If there is less fat, the crust can turn dry. Too much fat can make the kachori absorb excess oil while frying.
- Rolling Thickness: Roll the kachori to a medium thickness. If too thin, they turn overly crisp and hard. If too thick, the inner layer may remain undercooked.
- Do Not Overfill: Add a moderate amount of stuffing. Overfilling can cause the kachori to break while rolling or frying.
- Fry in Batches: Do not overcrowd the pan. Fry a few kachori at a time so the oil temperature stays steady and they cook evenly.
Helpful Answers
What other flour blends can I use to make the khasta kachori dough?
In this recipe I use all-purpose flour (maida). But you can use a mix of both all-purpose and whole wheat flour.
Can I bake kachori instead of frying?
Yes, you can bake them as a healthier option. Brush the shaped kachori lightly with oil and bake in a preheated oven at 180°C/356°F until golden. The texture will be different from fried kachori and will be less flaky.
Why did my kachori not puff up?
Kachori may not puff if the dough is too stiff, the filling is too moist, or if they are rolled unevenly. Also, frying on very high heat can prevent them from puffing properly.
Step by Step Photo Guide Above
Ingredients
For dough
- 2 cups or 250 grams all-purpose flour (maida)
- ½ teaspoon salt or add according to taste
- ¼ cup ghee or oil
- ½ cup water or add as required
For moong dal stuffing
- ½ cup moong dal (hulled & split yellow moong lentils)
- ½ tablespoon ghee
- ¼ teaspoon turmeric powder
- ½ teaspoon red chilli powder
- ½ teaspoon cumin powder
- ½ teaspoon dry ginger powder
- 1 teaspoon coriander powder
- 1 teaspoon crushed fennel seeds or fennel powder
- 1 teaspoon dry mango powder (amchur powder)
- salt add as required
Other ingredients
- oil for deep frying, as required
Instructions
Making kachori dough
- Take 2 cups all purpose flour (maida) and salt in a bowl or pan. Mix very well.
- Add ¼ cup ghee. Ensure the ghee is in a semi-solid flowing state and not hard.
- With your fingertips mix the ghee evenly with the flour for a few minutes till you get a breadcrumb like texture in the mixture.
- Add water in portions. Mix first and then knead to smooth dough that is semi-soft or soft. Do not make the dough too soft.
- Cover the dough with a moist muslin or kitchen cotton towel and let it rest for 30 minutes.
Making moong dal stuffing
- Rinse ½ cup moong dal in a bowl. Soak moong dal with enough water for 2 hours.
- Later drain all the water very well and add the soaked moong lentils in a grinder jar.
- Grind to a roughly coarse mixture without adding any water.
- Heat a frying pan or sauté pan. Add ½ tablespoon ghee.
- Once the ghee melts, keep the heat to the lowest or turn off the flame.
- Add all the spice powders one by one.
- Keep the heat to its lowest and mix very well. Do make sure that the ground spices do not burn.
- Then add the coarsely ground moong dal. Also add salt and 1 pinch of asafoetida.
- On a low heat mix very well.
- Saute with non-stop stirring for 3 to 4 minutes on a low heat. Check the taste and if required you can add more spice powders like red chili powder and mango powder or salt. Let the mixture become warm or cool down.
- Now make small balls from this moong dal mixture. You can also spread some oil on your palms while making the balls. Keep aside.
Assembling, stuffing and shaping
- After 30 minutes, lightly knead the dough.
- Roll the dough into a log. Now cut the dough in equal portions. This will depend on the number of moong dal mixture balls that were made.
- Take a portion of the cut dough. Roll to a neat ball and then flatten it with your fingers. Keep the edges thin while flattening. You can also use a rolling pin to flatten.
- Now place the moong dal stuffing ball on the dough. Flatten the moong dal stuffing ball gently by pressing it.
- Bring the edges of the dough together and join them at the center. Excess dough can be pinched off and removed.
- Flatten the top and then gently roll the kachori with a rolling pin to get a medium thick kachori. Stuff and prepare all kachori this way. Keep them covered under a moist muslin or cotton cloth, so that they do not dry up.
Making kachori
- Heat oil for frying in a kadai (wok). Keep the heat to a low or medium-low. When the oil is just hot enough, you can add 2 to 3 kachoris or more depending on the size of the kadai.
- When the kachori start puffing up, then gently nudge each kachori with a slotted spoon, so that they puff up well.
- When the base becomes light golden, then gently turn them over. The frying takes about 7 to 9 minutes. So one has to be patient.
- Continue to fry on a low to medium-low heat till they become golden. While frying you can turn them often to get an even color. Regulate the temperature from low to medium-low as required.
- Fry till they become golden and nicely crisp from outside. Once the kachoris are fried well, the oil will also stop sizzling.
- Remove with a slotted spoon and place Khasta Kachori on kitchen paper towels so that excess oil is absorbed. Fry the remaining kachoris in batches this way.
- Serve Khasta Kachori warm accompanied with some fried & salted green chilies, tamarind chutney and green chutney. You can also serve them with chili garlic chutney or sweetened curd (yogurt).
Video
Dassana’s Notes
- Instead of ghee you can use oil for the dough.
- You can skip the step of grinding moong dal. But then you will have to cook the soaked dal adding water as needed for more time.
- You can even soak the moong dal for 3 to 4 hours.
- Spice powders can be added as per your requirements.
- Green chilies and ginger can also be added.
- Add lemon juice if you do not have dry mango powder.
- These kachori can be baked too. Bake them at 180 degrees Celsius/356 degrees Fahrenheit in a preheated oven till the crust is golden.
- Recipe can be doubled or tripled.
Nutrition
Kachori recipe from the blog archives first published on March 2017.

I made these kachoris and they turned out really good. I ended up cooking the daal in a little water. Thank you for the tips. I enjoy your recipes.
Thanks for the lovely feedback. Glad the tips helped.
It is a nice recipe.
I haven’t made this yet but love all of your other recipes I’ve made! I was wondering, do you think these could be made ahead and frozen?
Thank you. Kachori are best enjoyed hot or warm. For health reasons, I recommend to eat them fresh rather than freezing them.
Amazing step by step recipes.
Thank you.
Very Nice
Thanks.
Made it with your recipe for the very first time in my life. It turned out so good! I did not have all the spices, so I improvised on those, but followed your technique totally! Thank you very much!!
Great and thanks for the lovely feedback. The spices can always be adjusted according to what we have or is available. Most welcome.
Good
Hi,
Planning to try this recipe and I want to bake rather than fry – would I need to add some baking powder while preparing the dough, so it will puff up?
You can add baking powder if you want but not required. Just brush the kachori with some oil or ghee before baking.
HI – what are your recommendations for how to store in the fridge if making these a day or two in advance? I am making triple your recipe for a big dinner party and plan to make ahead but want to make sure they don’t dry out.
I would suggest half frying them first – just frying on medium heat them till they become opaque or pale golden. Then store in the fridge. Then on the party day, these can be fried till golden and served crisp.
Ohh my god your recipes can never go wrong.I found your website when I first visited banglore and had the best peanut chutney and sambhar of my life.Sambhar was different it was not at all what I have been eating.So that’s when the hunt for banglore style sambhar and chutney begin and I landed on your website made the sambhar from scratch and chutney and that was all that I was looking for????.Since then I have been here thousand times made lots of recipe. My apologies that I am writing late.My next from your food pitara is dhokla????.Thankyou for sharing your recipes and you manage to explain with such a ease and for me I need smallest of the details like not to fry kachori when oil is hot or medium hot and how to check.I just love you keep posting .Good wishes to you????
thank you so much amrita. no need to feel sorry for writing so late. felt good to read everything that you have said. comments like yours make my day ????. the dhokla recipe is very good. just make sure to use fresh eno for the batter. wish you too all the best and thanks again.
Just saying wow! You are amazing dassana ma’am…for me your recipes are my stressbuster…,????
thank you much pushpanjali. so glad to read that my recipes are your stressbuster. thanks again and i wish you all the best.
Thank you Dassana…you are a hands on cooking expert…no wonder whatever i hv tried from your cooking site..it was really appreciated..i even suggest my near and dear ones about your website…All the best and keep posting
welcome nidhi. thanks for this lovely comment and for suggesting the website to your friends and family. thanks again and happy cooking.
All your recipes are very good and detailed especially with the pictures. I am not a good cook, I was worried after marriage how I am going to cope with the food, but everything became easy with your website. Anything or anything new I want to cook, the recipes come from you and all my food are tasty and appreciated by my husband. 4 years of my marriage and I have become a good cook. Thanks for the recipes you share. All the best that you post more recipes and you should also have an app for instant access. Thanx.
thank you very much ankita. felt nice to read your comment. i am glad that the recipes and the website have helped you. i wish you all the best.
sure, i will keep on adding more recipes. for the time-being we have are not making an app, but will consider it for the future.
Can I use self raising flour?
yes you can use self raising flour.
All your recipes and detailed instructions with pics are awesome. I am writing to let you know I loved the hands in the pics (not sure its yours or a family member’s) filling kachori with ohm tattoo . I think I might get it too 🙂
Thanks Santwana for this positive feedback. They are my hands. Nice to know that you like the tattoo.
Me & my family loved it thanks for the recipe
Welcome Akshara
If we want to bake them in microwave convection? Than What will be the procedure?
preheat oven at 180 degrees celsius for 15 minutes. place the kachoris on a tray. brush them with some oil all over. then bake in the oven for 20 to 30 minutes till the crust is crisp and golden.
Hi !! Tried this recipe and it was awesome ,and so simple to make . Making it again for the second time today . Just one query, can these kachoris be frozen ?? Can it be filled up with the moong dal filling and frozen ??
thanks farina. i don’t think kachoris can be frozen. its best to make them and fry them freshly.
I just love d way u explain with pictures n measurements thanks a lot it’s very useful for us
welcome ayesha.
Made this last night and they were oh so good! Crispy and flaky…and the filling was full of flavour. Writing this one down for sure! Thank you for an amazing recipe….again!
thanks a lot yogita. nice to know. i feel good when i get positive comments on such recipes as these recipes are slightly tricky to prepare. thanks again ????
Just came back to this recipe for reference and saw you’re reply 🙂 Your recipes are so well written and explained with tips that make it easy to follow. Even complicated recipes look easy on you’re blog. I’ve tried different kachori recipes before but never got the same results…making this again today and I know it will be awesome! you’re recipes are failproof!
thanks a ton yogita. happy cooking and enjoy the kachoris ????
Hi can u please post few recipes of soya chunks
krupa, we don’t use soya chunks at home. thats no recipe on the blog.
As promised I did try the moong dal kachori. Absolutely awesome. U never have put a bad recipe ever. This too as usual met your high standards. My husband loved it. My neighbours loved it and tbey are not even Indian and have never even tasted kachoris. The other neighbours who have tasted also loved it.
Thank you for putting out a lovely recipe once again.
thanks a lot anu. glad to know that the kachoris came out great. i usually try the recipe first and if it is good, then I make it a couple of times. then take pics or videos (have been doing videos lately). both kachoris & samosa are made at some occasions, especially during festivals, so I have got a hang of preparing them now. thanks again.
Happy Holi Dassana, this is comment not the recipe,which certainly looks yummy but I have yet to try it out. I wanted to bring to your notice that when your site loads, the first thing that comes up in a recipe collection. In my opinion the recipes you have posted most recently and the search box should come up first. We should not be scrolling down to see the latest recipe or for the search box. This is what is happening when I open ur site, maybe you can check with your regular subscribers if this is how the site loads for them too.
Also while I liked the idea of a recipe video , cud you pls include the measurements and the music is a little loud for my taste, distracts while watching.
The recipe looks great as usual and is definitely on my list to try out.
Thanks Anu for your suggestion and feedback. I am planning to change the design in some days. This kachori video had the music selected for holi festival.
Can i store these kachiris? If so for how long ? Or should i consume it the same day?
Kriya, you can store the kachoris for 2-3 days. But taste best when served hot and fresh.