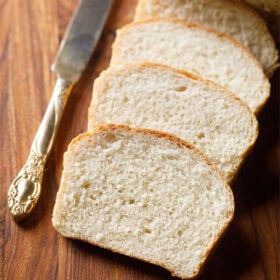
White Bread Recipe (Homemade Bread)
Homemade bread is fluffy, tender, and way better than store-bought loaves. It’s remarkably easy – and fun! – to make with only a few simple ingredients. Try this foolproof white bread recipe with step-by-step instructions and video and you’ll likely never want to buy package bread again.
Why this White Bread Recipe Works
I love baking breads at home. The whole process – from making the dough from scratch, kneading with your hands, patiently letting it rise and baking – is terrifically relaxing yet exciting at the same time.
Each loaf is slightly different but brings such joy, both to bake and to eat. And there’s just nothing better than sharing warm, soft slices of homemade bread with your family and friends…Like handing them a piece of your love!
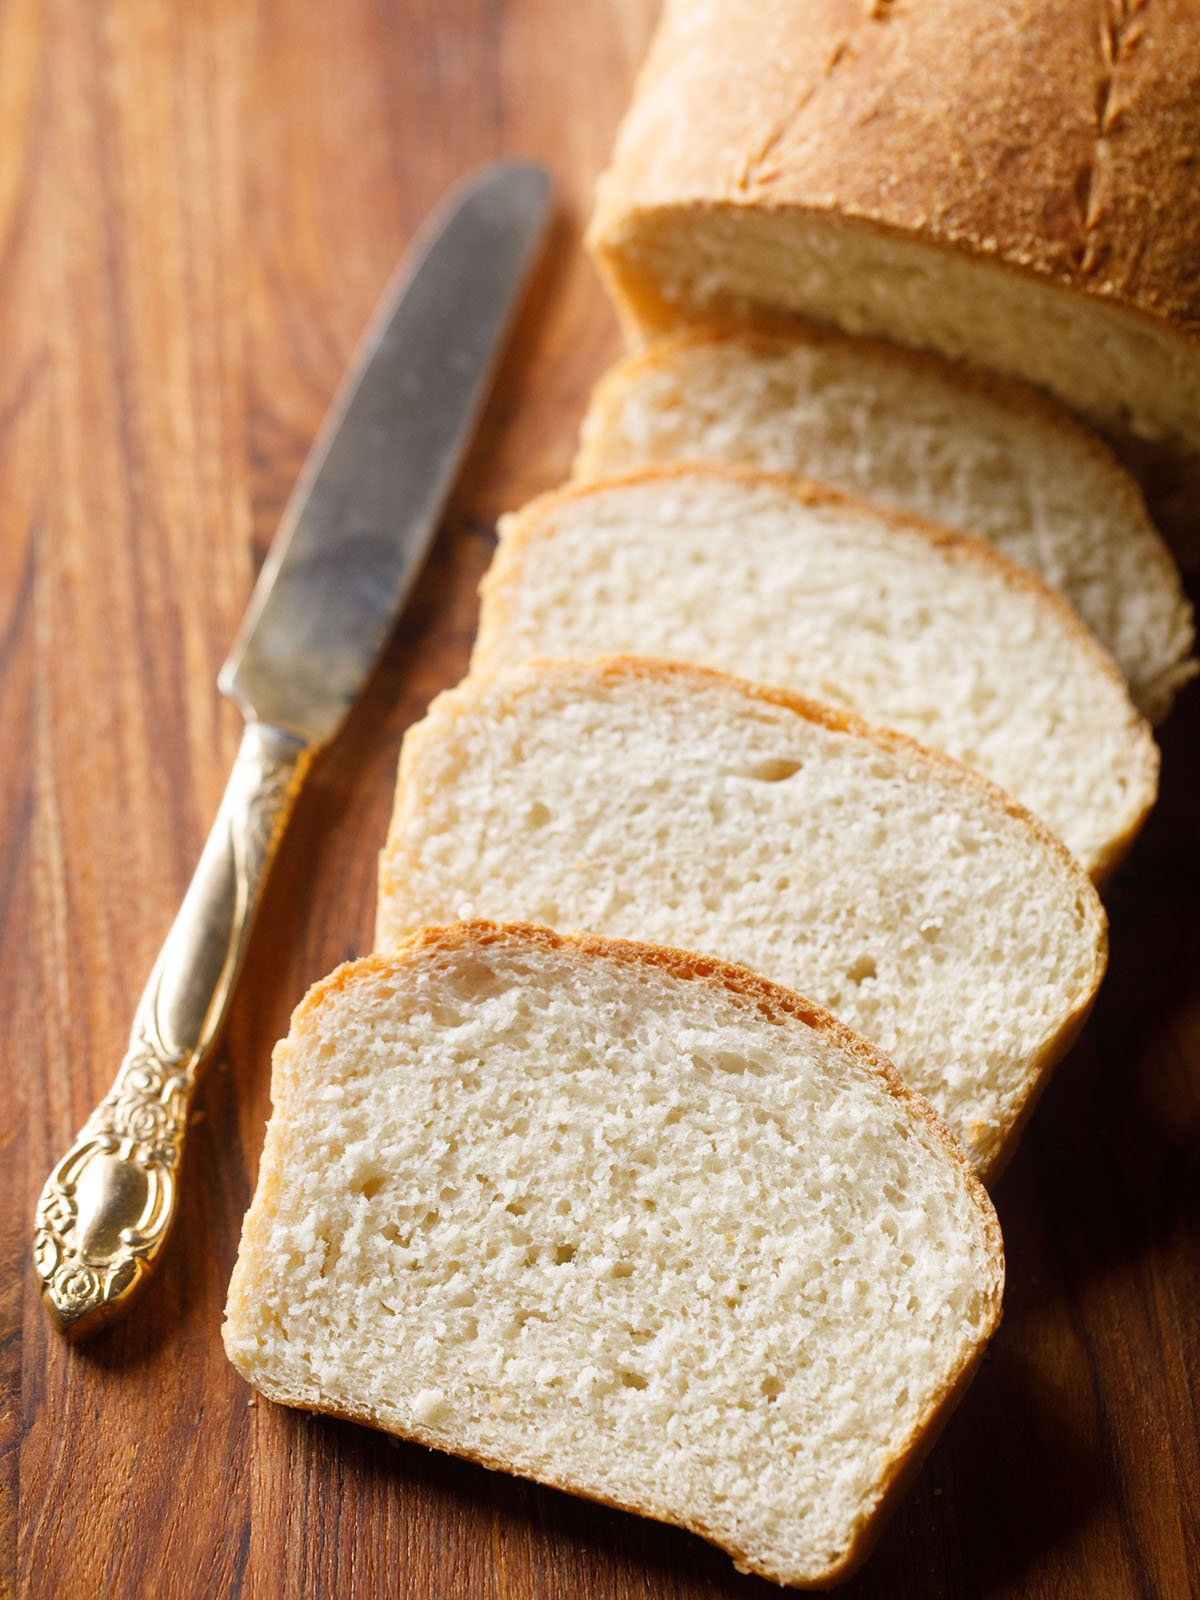
Table of Contents
This easy lean bread recipe is great for customizing with additional ingredients. If you want you can add some milk for a softer bread (details in the recipe).
You can also make it into sweet bread by adding extra sugar; or bakes a savory white bread by adding herbs and spices.
Below are steps and photos for making a perfectly fluffy and tender basic loaf of white bread. Give this simple homemade bread recipe a try and you’ll likely fall in love, too.

Essential Tips For Any Bread Recipe
While it is a very simple process to make bread from scratch, there are a few key points to keep in mind when you make any bread recipe. You need to follow these pro tips to ensure your loaf is perfect in every way, every time:
- Buy quality ingredients. The best, most delicious bread is made with the best ingredients available. Opt for high-quality flour and yeast, and make sure all ingredients are within the expiration dates. For white breads like these, I recommend unbleached all-purpose flour or bread flour, preferably organic.
- Use warm water. The dry active yeast needs to be treated just rise for the perfect rise. That means it needs to be dissolved in water that is neither hot nor cold but is somewhere in the warm 110-115 degree Fahrenheit (43-46 degrees Celsius). If the water is too cold it won’t activate the yeast, and if it is too hot it will cook the yeast and leave it inactive.
- Kneading: Remember to knead your dough well. If kneading by hand, then spend at-least 10 minutes doing so. The dough has to pass the windowpane test. Take a small portion of the dough and flatten, stretch, spread it into a thin layer. It should not tear or break. You should be able to see through it much like you see through a windowpane.
- Be patient. There will be some periods of resting and waiting while the dough rises and the loaf bakes. Avoid the urge to rush and you will be rewarded with the fluffiest and most tender homemade bread.
- Have fun. Baking bread is all about bringing some warmth and happiness to the house. Bread made with love – or any dishes made with love – simply tastes the best.
See? Simple. Once you perfect the easy, joyful art of baking fresh white bread at home I promise you won’t want store bought loaves again!

How to make Homemade Bread
Proofing the yeast
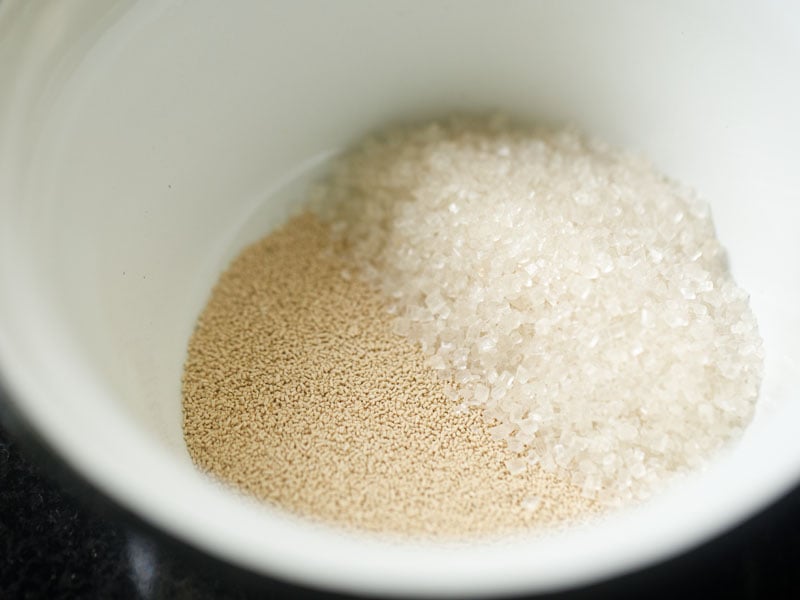
1. Take 1 teaspoon instant yeast (rapid rise yeast) or 1.5 teaspoons dry active yeast or 1 tablespoon fresh yeast and 1 tablespoon sugar in a small bowl.
Note: I have used instant yeast which can be directly added to the flour. But I am activating it in warm water just to illustrate to you the method of using dry active yeast or fresh yeast – which always needs to be activated.
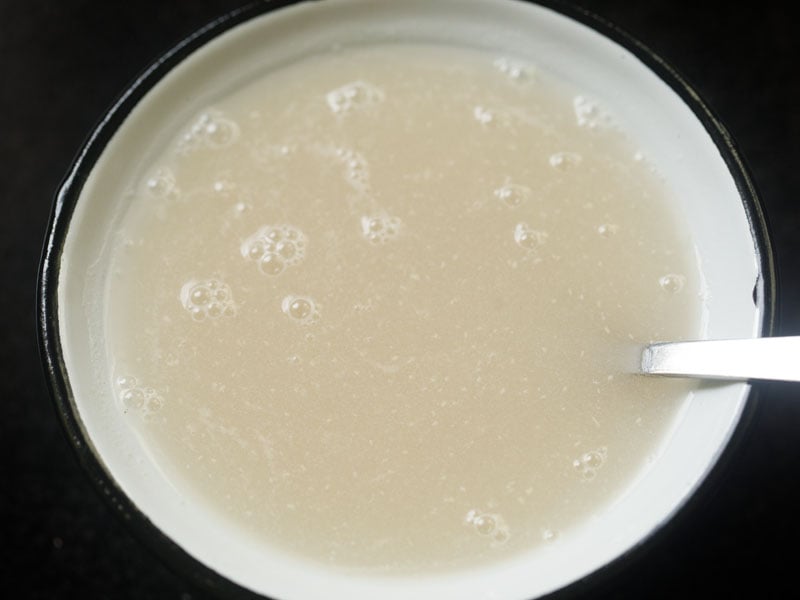
2. Add 1 cup of lukewarm water. Make sure that the water is not hot or cold. The temperature of water should be 41 degrees Celsius (105 to 106 degrees Fahrenheit). Mix it well.
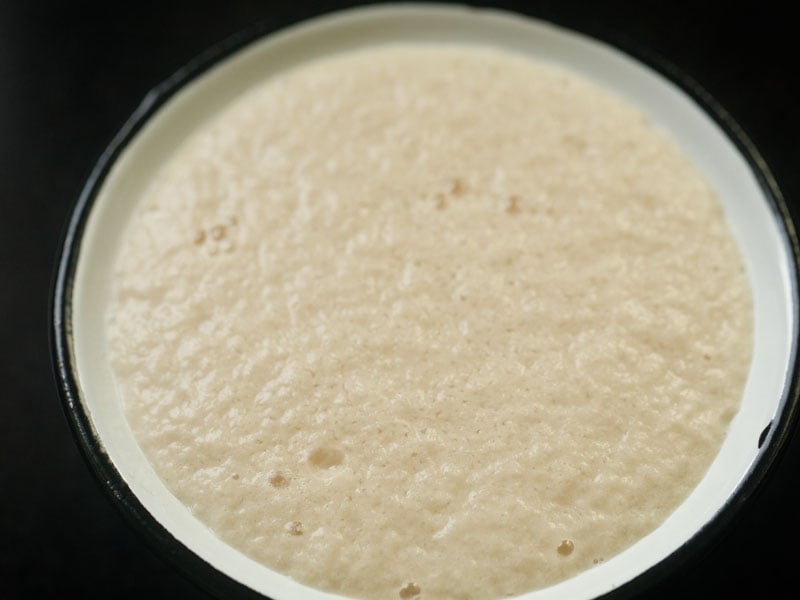
3. Keep in a warm place until the yeast becomes frothy. For instant yeast keep for 5 minutes and for dry active yeast keep for 10 to 15 minutes.
Forming Dough
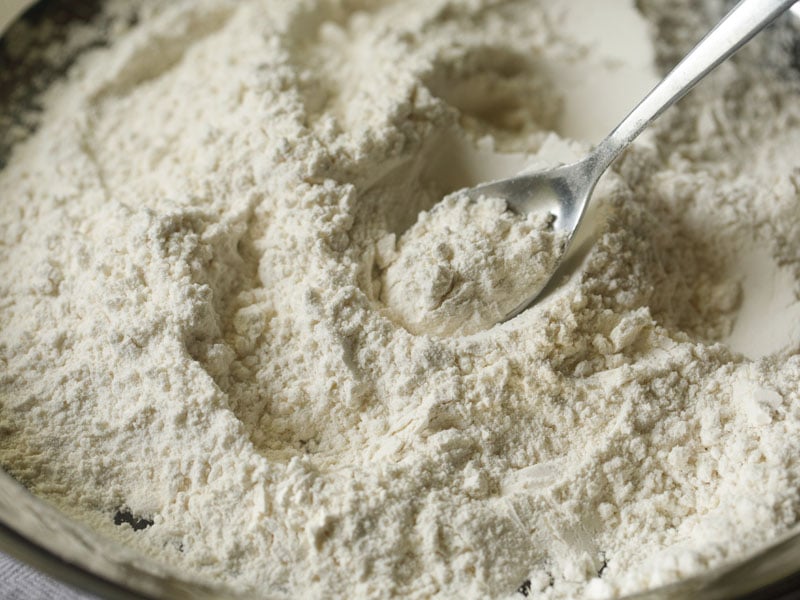
4. In the meantime take 3 cups of all-purpose flour or bread flour – unbleached or organic (360 grams) and 1 teaspoon salt in a large tray or board or a large bowl. You can also use a stand mixer for kneading dough.

5. Mix well. You can sift the flour with salt if you prefer.
6. Add 1 tablespoon oil – any neutral oil or olive oil. Oil can be swapped for 1 tablespoon butter (dairy or vegan).
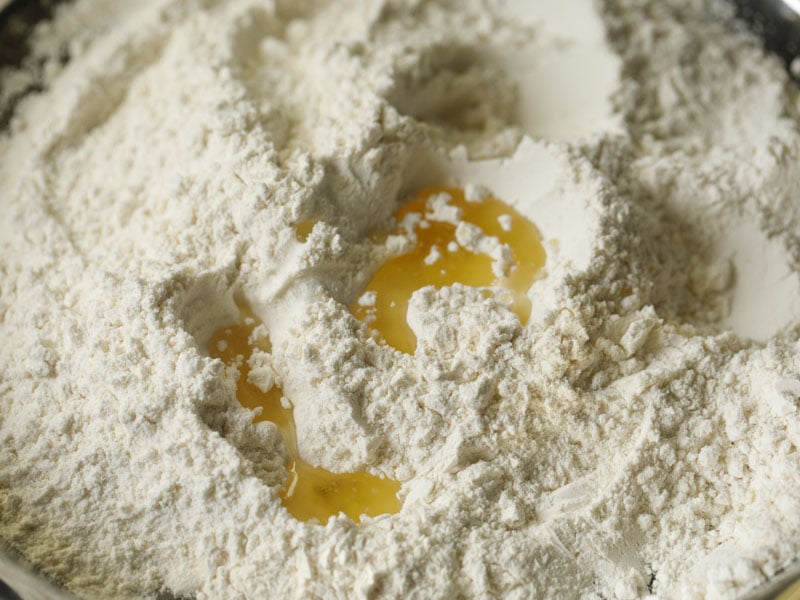
7. Add the frothy bubbly yeast mixture to the flour.

8. Mix with a wooden spoon and you will see that the dough becoming sticky.

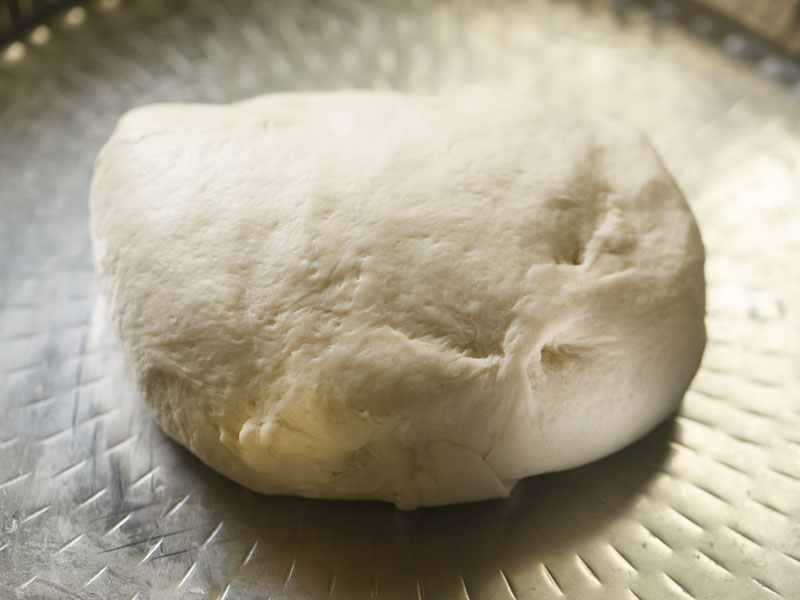
9. Now start kneading the dough for atleast 8 to 10 minutes or until you get a soft smooth, pliable and light consistency.
Tip: If the dough becomes sticky add some flour – mix and knead. If the dough looks floury or dry add a few tablespoons of lukewarm water and knead. Bread flour will need a bit more water than all-purpose flour.

Leavening Dough (First Rise)
10. Cover your bread dough loosely with a large bowl or a kitchen napkin and keep at room temperature to leaven. I used the same plate in which I kneaded the dough. You can brush some oil on the dough prior to leavening it.
- For instant yeast – leaven dough for 45 mins to 1 hour.
- For dry active yeast or fresh yeast– keep for 1.5 to 2 hours.
Tip: A great idea which I follow very often is to leaven the dough using the yogurt settings of your Instant Pot. It works like a charm and so helpful on colder days.

11. After 45 minutes my dough has doubled beautifully.

12. Now grease or brush a 9 x 5 inches loaf pan with oil. On a lightly floured surface, lightly knead the dough. This will deflate the dough.
Shaping into a Loaf
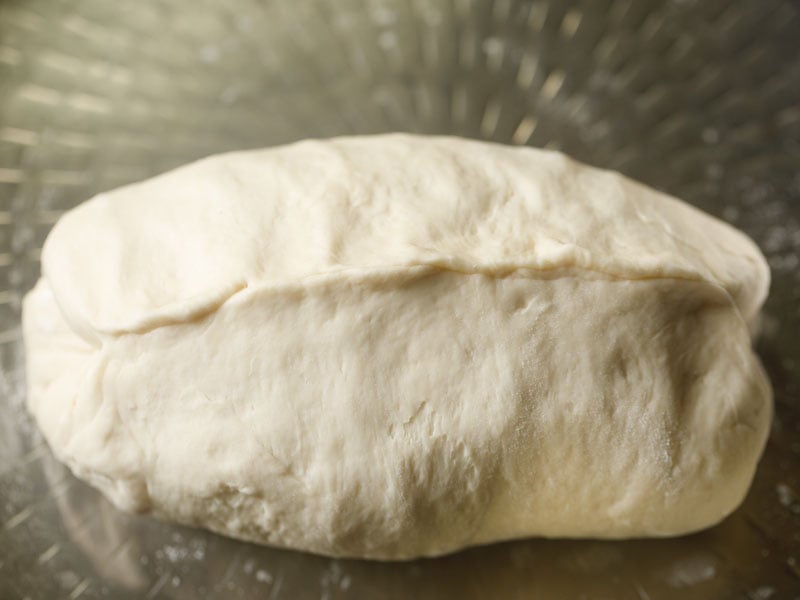
13. Flatten the dough with your fingers to a round or square shape. Then begin to roll it.
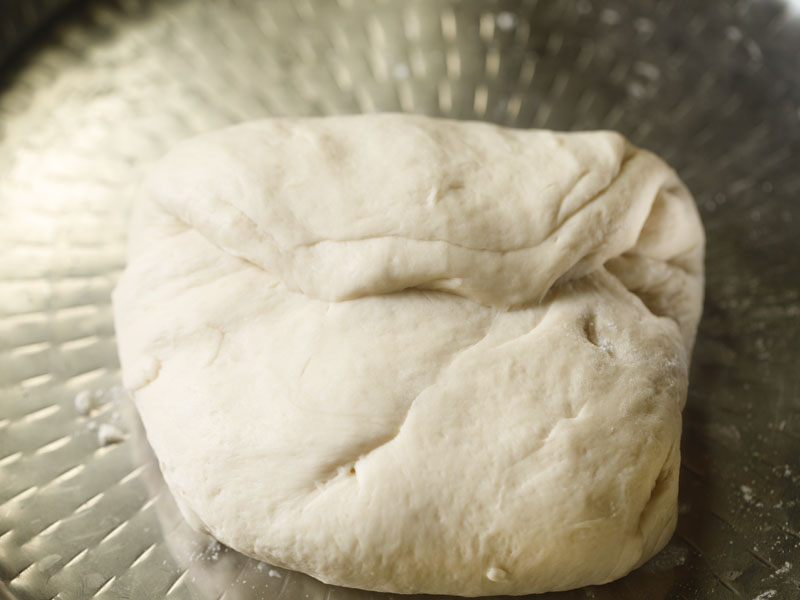
14. Make a neat rolled dough.
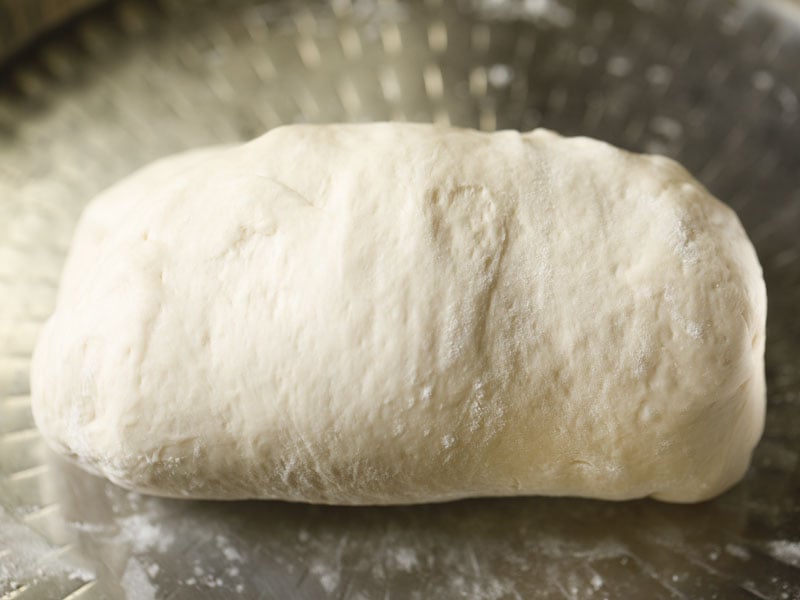
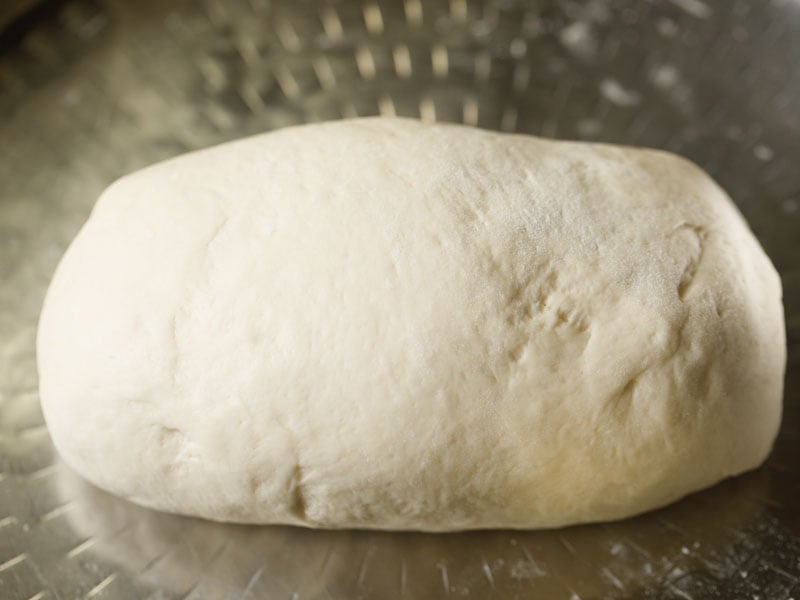
15. The place where the edges meet, join them first. Then press, flatten and smoothen them with your fingers. Smoothen the sides of the loaf as well.
16. Your loaf is ready for the second rise.
Second Rise
17. Place it in the greased 9 x 5 inches loaf pan with the seamed joined edges touching the bottom of the pan.
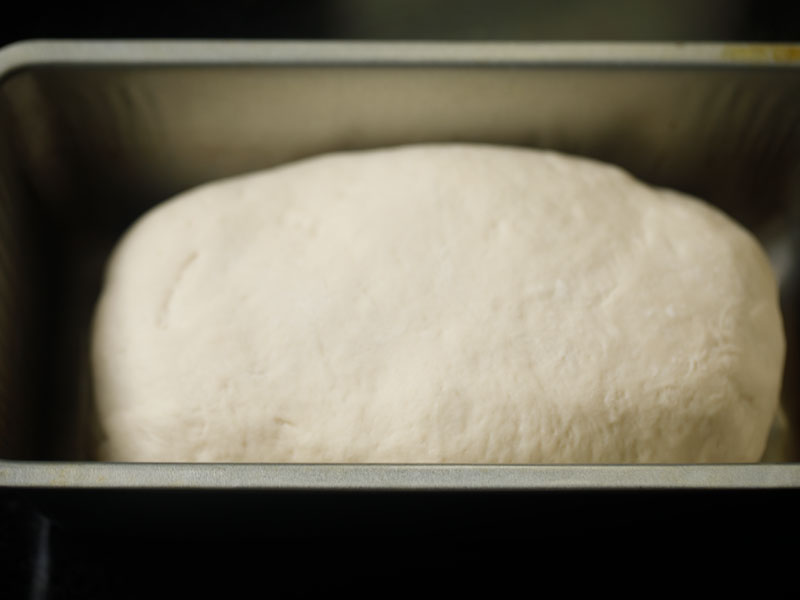
18. Cover the loaf pan with a kitchen towel. Keep it in a warm place.
- If you have used instant yeast – leaven for 20 to 30 minutes.
- For dry active yeast or fresh yeast – set aside for 45 minutes to 1 hour.

19. The loaf will rise in volume. Remember to preheat your oven 20 minutes prior to baking. Preheat at 190 degrees Celsius (375 degrees Fahrenheit).

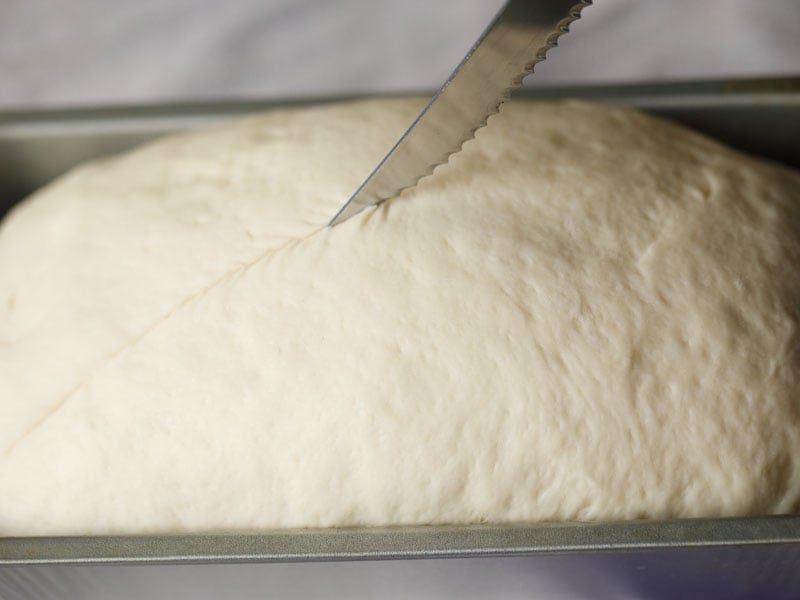
Scoring
20. With a small serrated knife or any sharp knife or a lame, make one long slash or two slashes lengthwise on the center of the dough about ¼ inch deep.
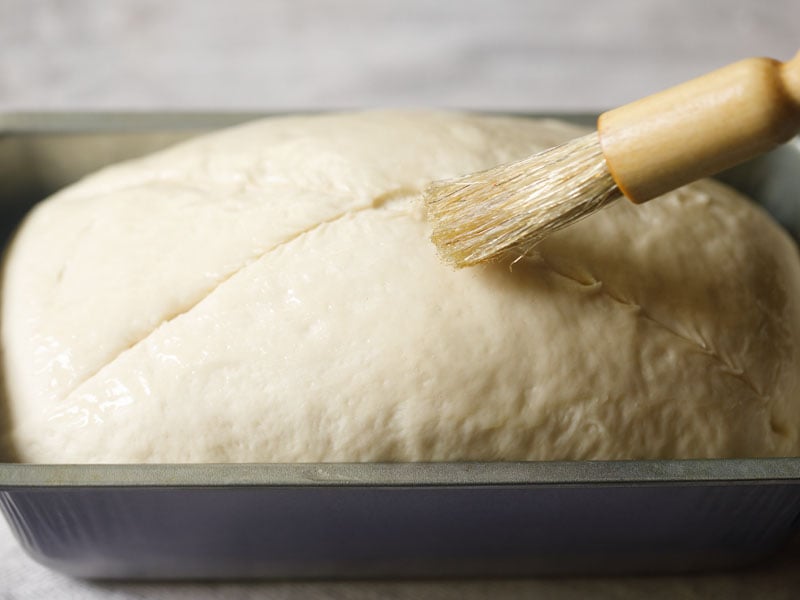
21. Brush the surface with some milk (dairy or vegan). This is an optional step.
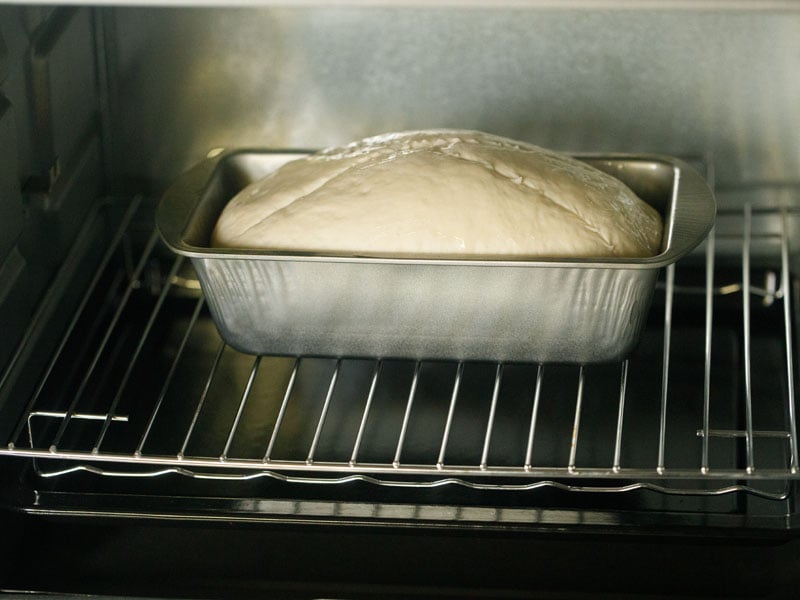
Baking
22. Place the loaf pan in the preheated oven. Bake for 30 to 40 minutes at 190 degrees Celsius (375 degrees Fahrenheit) until the loaf is golden brown. You will also see the sides slightly separated from the pan.
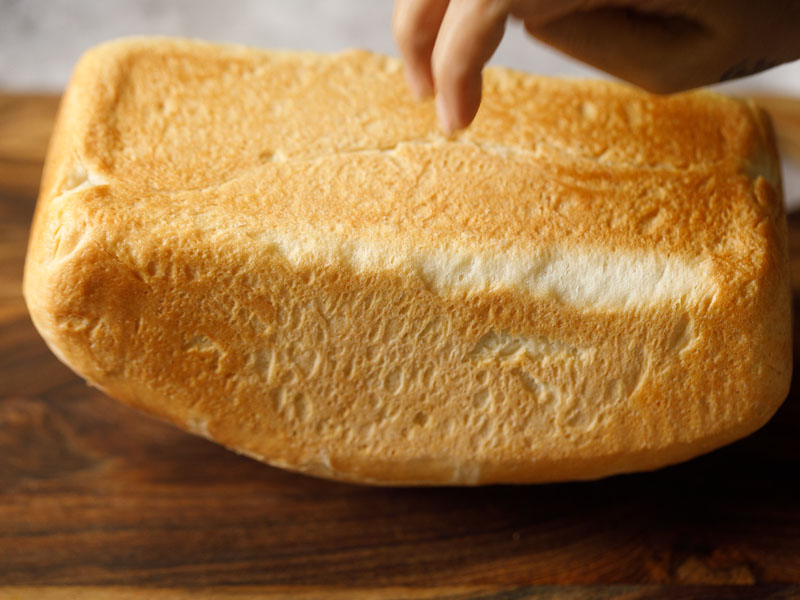
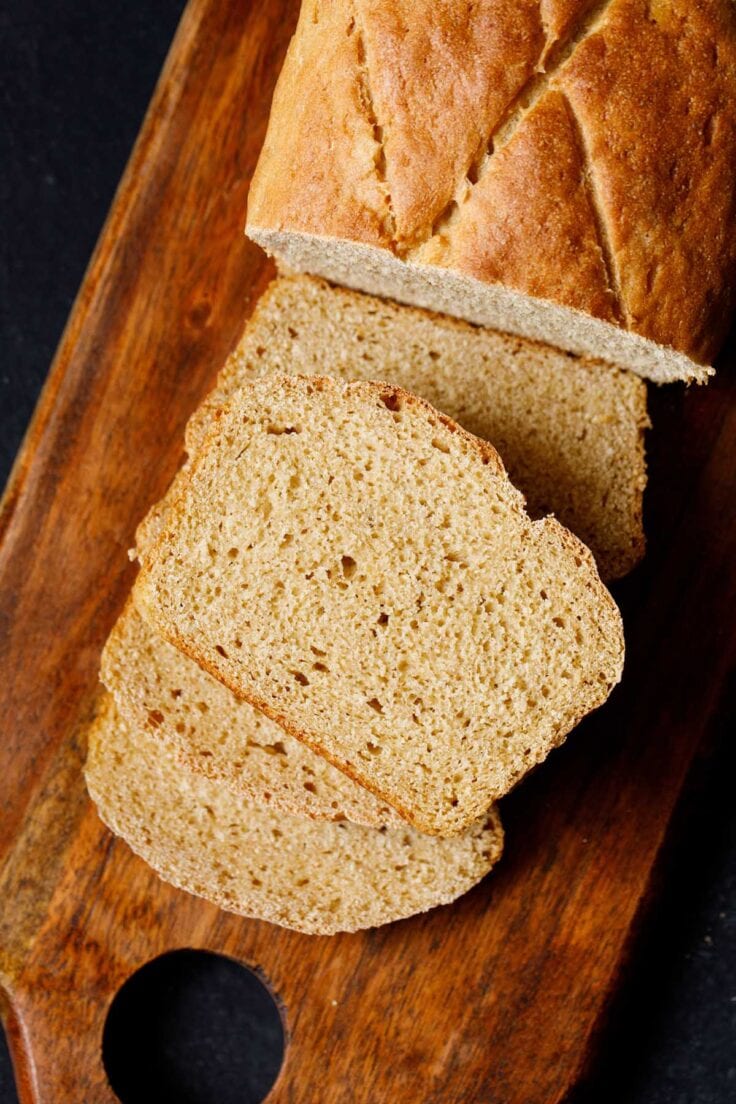
23. In the photo below, you see a lovely loaf of a well baked homemade bread. If your oven browns the surface very quickly, place a parchment paper or aluminium foil on the top of the loaf halfway through the baking – so as to avoid more browning.

24. Wait for 3 to 4 minutes after the bread is out of the oven. Firstly tap the bread and it should sound hollow – which means that the bread is baked well.
If the bread does not sound hollow, keep it back in the oven to bake for some more minutes.
This is an optional step and you can give it a miss. Remember the bread is hot and so is the pan. Use oven gloves or thick kitchen towels to remove the bread from the pan.
Lift one end of the white bread to check for an even browning at the bottom. If the bottom of the loaf is pale, then keep it directly in the oven (without the pan) for 5 more minutes and bake.
25. Transfer the loaf from the pan immediately and keep it on a wired rack. If you keep it inside the pan, the bottom will get soggy. Let the loaf cool at room temperature on the wired rack or tray.

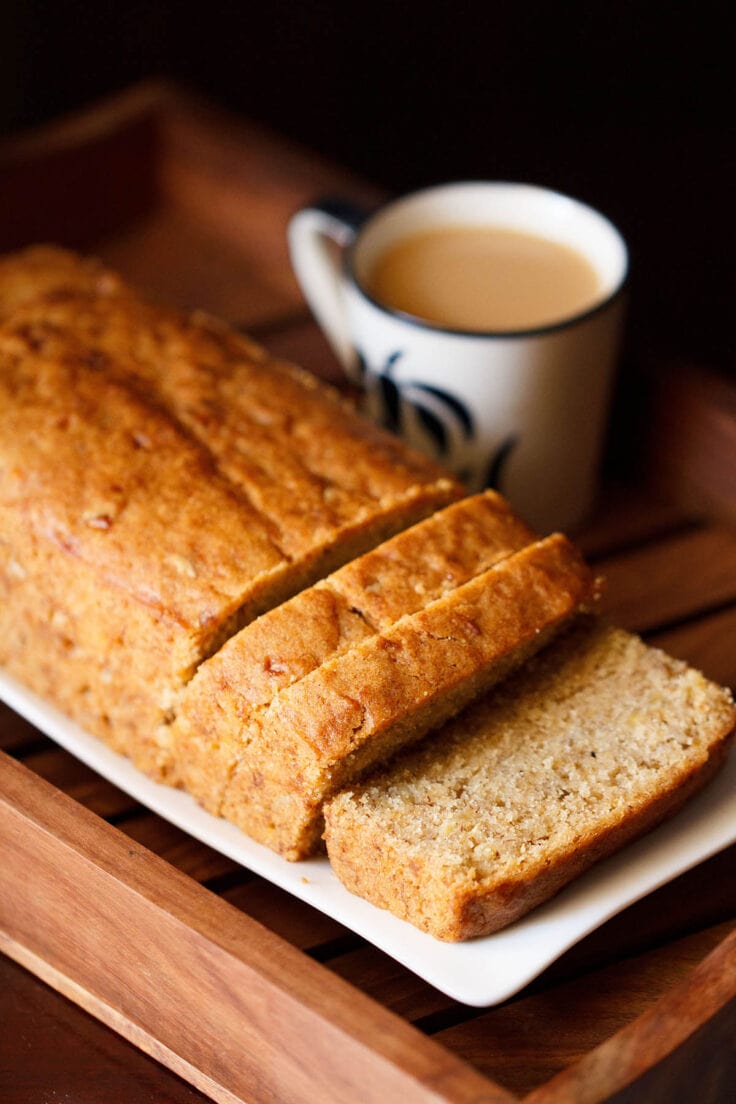
26. Enjoy homemade bread with your favorite curry or soup or just making one of your favorite sandwiches or toast.

Serving Suggestions
Enjoy slices of warm, freshly baked white bread plain or with a smear of soft butter or lightly toasted in ghee.
Serve toasted bread with jams or topped with slices of avocado, or a tablespoon of peanut butter or preferred nut butter for a yummy snack.
Homemade bread is great for making sandwiches – the only limit is your imagination!
Storage
Place the bread in a bread box or a covered box and refrigerate for a week. At room temperature, it keeps well for 2 to 3 days. You can also freeze it for a couple of months. Thaw before using or defrost it in the refrigerator overnight.
Expert Tips
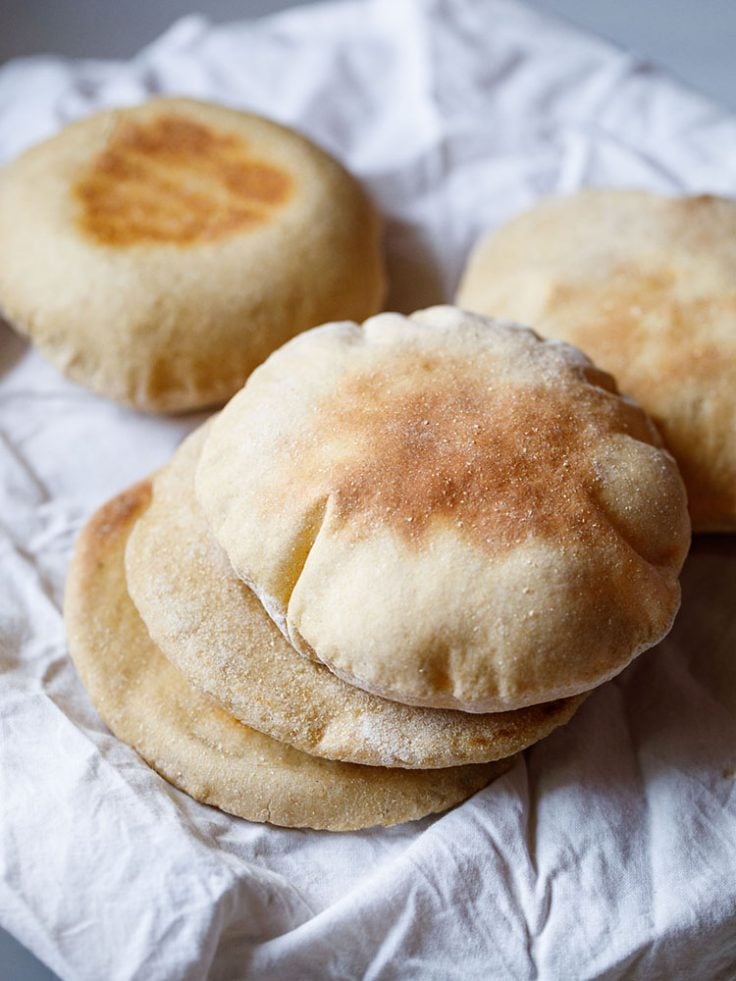
- Variations: You can divide the dough into parts and make dinner rolls. Add some herbs (fresh or dried) to make a fragrant herb bread. Replace water with milk (dairy or vegan) for a milk bread. Include some more sugar or nuts, berries, dry fruits for a sweet bread.
- Kneading: You can knead the dough with hands as I have done. If you have a food processor or a stand mixer, then knead the dough in these.
- Baking: Since no two ovens are the same, it can take less or more time for the bread to bake in your oven. If the top surface of the bread browns quickly in your oven then place an aluminum foil or parchment paper on the top. This stops the bread from getting browned more.
- Yeast conversion: Make this bread recipe easily with any kind of baking yeast that you have. Follow this yeast conversion: 1 teaspoon instant yeast = 1.5 teaspoon active dry yeast = 1 tablespoon fresh yeast.
- Scalable recipe: Make a large batch of 2 to 3 loaves by easily scaling this recipe.
FAQs
How should homemade white bread be stored?
To keep the bread soft I recommend that you store in an airtight bag or a bread box and keep at room temperature for up to 2 to 3 days.
Can I freeze bread?
Yes, white bread is great for freezing. Place in an airtight bag or a covered container and store in the freezer for up to 2 to 3 months. Allow the bread to defrost in the refrigerator overnight before enjoying.
What other baked goods can I make with bread dough?
Divide the dough into equal parts and bake for individual dinner rolls or Pav.
How do I make gluten free white bread?
Substitute all-purpose flour with your favorite gluten free substitute for an easy GF-friendly white bread recipe.
Step by Step Photo Guide Above
Ingredients
- 3 cups all-purpose flour or bread flour (preferably unbleached), 360 grams
- 1 cup water (lukewarm)
- 1 teaspoon instant yeast or 1.5 teaspoon dry active yeast or 1 tablespoon fresh yeast
- 1 tablespoon sugar
- 1 tablespoon oil neutral flavored oil or olive oil
- 1 teaspoon salt or add as required
- 1 to 2 tablespoons milk (dairy or vegan) – for brushing, optional
Instructions
Proofing yeast
- In a small bowl take the instant yeast or dry active yeast and sugar. Add lukewarm water.
- Mix well and set aside until the yeast activates. For instant yeast keep for 5 minutes and for dry active yeast keep for 10 to 15 minutes.
Preparing dough
- While the proofing is happening, sieve or mix the flour with salt.
- Add the oil and the frothy yeast mixture to the flour.
- With a wooden spoon mix everything.
- Now use your hands and knead the dough for about 8 to 10 minutes. The dough has to be smooth, soft and light.
- If the dough looks sticky, then add a few tablespoons of flour and knead. If the dough looks dry or floury, add a few tablespoons of lukewarm water and continue to knead.
- Keep in a large bowl and cover loosely with kitchen napkin.
First Rise
- Set aside until the dough doubles up.
- For instant yeast – leaven dough for 45 mins to 1 hour. For dry active yeast or fresh yeast – keep for 1.5 to 2 hours.
- If needed set aside for some more minutes until the dough has doubled up nicely.
Shaping into a loaf
- Grease or brush a 9 x 5 inches loaf pan with oil.
- Take the dough on a lightly floured surface and gently knead. This will deflate the dough.
- Flatten the dough with your fingers to a round or square shape. Then begin to roll it neatly.
- The place where the edges meet, join them first. Then press, flatten and smoothen them with your fingers. Smoothen the sides of the loaf as well.
- Place in the loaf pan with the seamed joined edges touching the bottom of the pan.
Second rise
- Cover again loosely with the kitchen napkin and let it rise again for until fully doubled.
- If you have used instant yeast – leaven for 20 to 30 minutes. For dry active yeast or fresh yeast – set aside for 45 minutes to 1 hour.
- Preheat the oven to 190 degrees Celsius (375 degrees Fahrenheit) for 20 minutes prior to baking.
- With a small serrated knife or any sharp knife or a lame, make one or two long slashes lengthwise on the center of the dough about ¼ inch deep.
- Brush the surface with some milk – dairy or vegan. This is an optional step.
Baking
- Place the loaf pan in the oven. Bake for 30 to 40 minutes at 190 degrees Celsius (375 degrees Fahrenheit) until you see a golden crust.
- If your oven browns the surface very quickly, place a parchment paper or aluminium foil on the top of the loaf halfway through the baking – so as to avoid more browning.
- Wait for 3 to 4 minutes after the bread is out of the oven. Tap the bread and it should sound hollow – which means that the bread is baked well. If the bread does not sound hollow, keep it back in the oven to bake for some more minutes.
- Transfer the loaf from the pan immediately and keep it on a wired rack. If you keep it inside the pan, the bottom gets soggy. Let the loaf cool at room temperature on the wired rack or tray.
- Now enjoy your homemade bread with your favorite curry or soup or just making one of your favorite sandwiches or toast.
Storage
- Place the bread in a bread box or a covered box and refrigerate for a week. Or you can freeze it for a couple of months. Allow the bread to defrost in the refrigerator overnight before serving.
Video
Dassana’s Notes
- Variations: You can divide the dough into parts and make dinner rolls. Add some herbs (fresh or dried) to make a fragrant herb bread. Replace water with milk (dairy or vegan) for a milk bread. Include some more sugar or nuts, berries, dry fruits for a sweet bread.
- Kneading: You can knead the dough with hands as I have done. If you have a food processor or a stand mixer, then knead the dough in these.
- Baking: Since on two ovens are the same, it can take less or more time for the bread to bake in your oven. If the top surface of the bread browns quickly then place an aluminum foil or parchment paper on the top. This will avoid further browning while baking.
- Yeast conversion: Make this bread recipe easily with any kind of baking yeast that you have. Follow this yeast conversion: 1 teaspoon instant yeast = 1.5 teaspoon active dry yeast = 1 tablespoon fresh yeast.
- Scaling: You can halve or double the recipe and make a small or large batch of homemade bread.
Nutrition
This Bread recipe from the blog archives first published in April 2012 has been updated and republished on April 2023.

Lovely – followed the recipe to the dot and it came out superb!!
Thank you and glad to know.
Hello Dassana, can you please share the sourdough recipe.
I will try to add in some time.
The Yeast conversion secret is very good.
Hi everyone I would like to know what size tin I should use for this recipe please and thank you. Looks delicious ?
You can use a regular bread loaf pan which is usually about 9 x 5 inches. Thanks.
Seems like a good recipe, with proper explanation for using different types of yeasts. What is the size of the loaf pan used here?
Thanks. The size of the loaf pan is 9 x 5 inches.
I love the recipe. It is the best bread recipe thus far. Can I replace all purpose flour with organic whole meal flour?
Yes you can do that, but chances are the texture can become a bit dense. You can check my recipe of Whole Wheat Bread, where I use a bit of acidic ingredient to get a softer crumb.
I tried the recipe and it tastes great – but I’d like it a little lighter. What else could i do? Is it in the kneading?
Yes do knead for some more time. The bread dough has to have an elastic like texture.
Hello Ma’am!
1) Do you use upper heating element or the lower one or both at the said temperature?
2) Why do some people bake breads with a cup of water in the oven?
Thanks!
Hello Siddhartha, I use both the heating elements while baking. If you have a small oven, then try to keep the loaf pan on the second lower rack. If the pan is close to the top heating element, the bread will get browned too fast from the top.
Baking with water helps to have a crispy crust and helps the loaf to expand more. It is done to mimic commercial baking ovens where steam is used. Usually I bake french loaves like baguette with water added in a separate baking tray.
The best recipe to make bread! My family always love it. Thank you for the amazing recipe 🙂
Thanks Ishika for the feedback and the review. Glad to know. Most welcome.
Mam,what’s the size of your loaf pan.I baked bread but it came out quite dense may be because of my pan’s size(8″×2.5″).I used to follow all your cakes recipe.
Thanks
Hi Jyoti, the bread is not dense due to the pan size, but due to the activating and proofing of the yeast not done correctly. Use a good quality or a good brand of yeast and activate in lukewarm water. A well activated yeast will help in leavening the bread dough very well and make it soft.
Thanks for your reply .I will bake again using different brand yeast.
I have tried both your whole wheat breads and they came out well, except once when the bottom of the loaf burnt!!Should breads be always baked in lower heating element of the oven?
At times the bottom of the loaf burns. what can be done to avoid this?
While baking bread, you can either only use the lower heating element or both the top and lower heating element. Keep the pan on the second lowest rack and not on the crumb tray which placed above the lower heating element. You can even keep in the center rack but then you have to see if the top is getting too browned when using both the heating elements (this varies with the size of the oven). If it does, then only bake using the bottom heating element.
Thanks a lot for your feedback.
Tried making bread today and it turned awesome..My family loved it..Thank you
Welcome Rashmi and thanks for the feedback and rating. Glad to know.
Hello Dassana,
Thank you for sharing the recipe. Tried it today. It was amazing. The crust was hard upon baking. But I brushed the crust with melted butter while it was cooling and that softened it . I saw this tip on the internet. We enjoyed the bread.
Thanks,
Shwetha
Thanks Shwetha for sharing the feedback and this tip too. Most welcome.
Hi Dassana
I tried this recipe. The bread was very yummy. It tasted good with soup. But it was dry. How to make it little moist and soft. What should I have missed here. Could you please help.
hi sailaja
dryness could be due to the bread getting over baked. you can reduce the time next time when baking. if possible you can make a slightly sticky dough. this will also help.
Hi Dassanaji
I have been wanting to bake my own bread for the longest time. I have never used yeast before. Could you please recommend the brand name of the yeast that needs to bought for this. I would love to try out this bread recipe.
Regards
Shivani
thanks shivani. i purchase instant yeast from amazon. this is the link – Amazon.
I tried the recipe today and it came out well..I have tried many recipes before but without any success..this time it was really good.. thanks so much
thanks for letting me know this bharti. i am glad that this white bread recipe worked for you. if you are fond of baking like me, you can try some bread recipes as well as cake recipes from the blog. welcome and happy baking.
Thanks a lot for all your recipes I love the way it’s explained step by step. I have one question. When I baked the bread I did it in my microwave oven in the convection mode and I baked it for 40 minutes in 190° C everything came out very well but the outer most part of the bread was very hard like a biscuit. What is the problem in the process I followed
thanks pawan. when baking in the convection mode of microwave oven, the outer crust gets baked quickly as compared to the inside dough. the reason is that convection ovens bake faster than regular ovens or OTG. even i would face this problem. so either you can bake at a lower temperature, say 170 or 175 degrees celsius or bake for less time. another tip is to cover the pan with an aluminium foil or parchment paper. but only use this aluminium foil or parchment paper in the convection mode. please do not use them in microwave mode. hope these suggestions help.
I tried whole wheat bread as per ur instructions. It came out very well. I must really thank and appreciate you for a very detailed and minute instructions.
Welcome R Srinivasan. Thanks for your positive feedback and appreciation on Bread Recipe.
Hello madam
I have tried many recipes of yours & it turned out really well thanks for sharing !!! Once I baked bread n pauv referring some other recipe it was a disaster???? but this time I will try once again using ur recipe method ….
Welcome Heena. Thanks for sharing positive feedback on recipes. Do try the bread and pav recipe as all recipes posted on the blog are tried and tested.
Hi Amit,
I tried your white bread recipe. I baked it using the convection mode of microwave oven at 200c for 40mins. The only change I did was adding milk powder into the flour and giving a egg wash just before baking. Though the bread turned out soft inside, the crust was hard. Can you please tell me how can we have a soft crust. Thank you so much for this overall full proof recipe.
Madhuri, the crust turned out hard, if it gets baked too much. Oven temperature varies with different types of oven. So next time you can bake white bread for less time.
Hi Dassana I am planning to make this today so should i follow the same baking method in convection mode also
yes the same method as in the post i have also used convection mode of microwave oven.
HI DASSANA AMIT JI
THANKS FOR SHARING THIS RECIPE.. I AM RIGHT NOW TRYING IT. BUT AS DIRECTED HERE, DRY ACTIVE YEAST STIRRED WITH WATER DN’T BECAME THICK EVEN AFTER MORE THAN 10 MINUTES AS SHOWN IN PICTURE NO. 3. KINDLY SUGGEST.
madhuri, the dry active yeast has not get activated. it should become bubbly and frothy. discard and make the solution again. if the water is slightly cold or hot, then yeast cells do not get activated.
Hi Dassana
Big fan of your blog.. yours is like a go to blog for any of my cooking expeditions.. I have tried the white bread recipes for 3 times now with great success and the taste of this plain white bread is also exceptional. I just love the way you write your blog with so much personal touch.. applaud your effort.
thanks a lot shraddha. homemade white bread tastes much better than store brought ones. in facts its better to use homemade white bread in recipes that call for it instead of getting bread from outside. happy baking.
Hi Dasanna, today I baked white bread , and am very happy with the result but outer crust very crunchy.. but taste very satisfied… Before this I tried and failed but your recipe just full proof … Step to step followed instructions and result am very happy other than outer layer crunchy…
Welcome Jyothi. Glad to know that you liked the bread. I think the outer top of bread has got baked little too much.
Hi Dassana,
I have tried both the wheat and white bread recipe. Wheat was a little dense however the white bread came fine. The only problem was that the crust was a little hard. How can this be rectified? I had kept in the oven with the top and bottom heating element on. Also in order to make the bread a little more sweeter, do I need to substitute milk as you have mentioned in the recipe. I had used water while baking.
thanks remya. for wheat bread, while baking just use the bottom heating element. this will ensure that the top crust does not become hard. too much heat or the pan kept closer to the top heating element, can create a hard or overdone crust.
to make the bread sweeter, you can add some sugar or jaggery in it. avoid adding honey as honey gets toxic when cooked or baked. you can add milk if you want. but milk won’t make the bread sweeter. it will make the bread rich in taste and flavor. for a sweeter taste, you can add sugar or jaggery.
I baked this bread exactly how you have written..The bread has great pores..Tastes awesome..But the only problem is the crust…Mine is 33 ltr otg from Croma… I baked at 190C for 45 minutes, placed the baking tray in the middle and turned both top and bottom rods on…Which led the crust was almost like a French baguette’s- very crisp. Though I love the hard crunchy burnt taste of the crust… People in my house don’t. Is there a way to ensure I can have a beautifully browned perfectly baked bread?
fine. whenever you bake bread and its get browned from the top and sides faster, then cover it with aluminium foil. thats why i do. so after 15 to 20 minutes of the baking, you can remove the pan and cover the top with an aluminium foil. due to this covering, the top does not get crusty or burned. alternatively, you can also use loaf pans which have lids.
Hi Dassana,
In OTG while baking bread do we need to bake with both upper and lower rods on?
Please explain. In Which temperature it needs to be baked?
Thanks in advance.
swetha, first i would keep both the heating elements on. but lately, when i had made whole wheat sandwich bread, i kept only the bottom heating element on and it worked very well for me. even the top was browned.
bake at 200 degrees celsius. preheat oven for 15 to 20 minutes before baking.
Firstly both rods on for pre heating and then below rod on for baking. I followed this but I dint get that golden colour on top of d bread. Mine is Morphy Richards 52 ltr otg.
okay. 52 litres is a big oven. i have 35 litre bajaj oven. so i think it depends on the size of the oven. to get the golden color on top, just keep the top rod on or both the top and bottom rods on. if keeping the top rod on, then you have to be careful as within minutes, the top layer gets browned.
thank you for the recipe. I tried it but my crust was very hard. any tips fr
the outer crust had got baked too much. since the timing varies from oven to oven, it could be that the time taken to bake is faster in your oven. so whenever baking, always check the time as per the oven you have. no two oven bakes at the same time. next time you can reduce the time for baking. also if the pan is kept close to the top heating element, the the outer crust will get hard. in this case, covering the pan with a foil helps the crust not to get overdone.
Hi,
I tried this bread today.my 1 cup measures 200ml.i followed the recipe as given but used instant yeast 1 tsp.
Dough rised well both the time .i baked for 30 min. but the outer part was hard inside seemed ok.
I really wanted to know that I baked for too long so is the outcome.?
Should i have reduced the baking time as my cup measures smaller than you (200ml)?
Before this i have tried twice , those times they were like hard stone.my hubby made fun of me saying whom you are going attack using this stone like that….:-)
Jokes apart, really need to know pls help
revathy, 200 ml cup gives less proportions of flour, water and other ingredients as compared with 250 ml. the time will reduce for baking, if using 200 ml cup. usually when the bread becomes hard, then the culprit most of the times is yeast proofing not gone well. the yeast mixture should bubble and become frothy. if you bake for too long, the top becomes crusty and hard, but the texture of the bread will have some softness. so here in this case, its the prolonged baking time. also you can try using a good brand of yeast. also the temp of water should not be hot or on the cooler side.
Actually i used recently bought instant yeast from the local bakery only.
I should try again again…
revathy, was it instant yeast or fresh yeast. usually bakeries sell fresh yeast. instant yeast comes in the form of fine granules which look similar to poppy seeds. fresh yeast is in a form of a solid block and is soft. if using fresh yeast, the amount will increase for any recipe that calls for dry active yeast. in this recipe, if using fresh yeast, you will need to add 1 tablespoon of it.
Hi Dassana,
I am a fan of your blog and it is my first go to place when in doubt.
Tried making whole wheat bread in the past and white bread today, in both cases the dough rose very well, and had a beautiful crust on baking: however the loaf was dense and doughy on the inside both times, even after baking it for an extra 20 mins. What could have gone wrong?
Can’t wait to try again, but will wait for your reply before i do. Thanks in anticipation 🙂
thanks girish. dense loaf can be due to yeast not proofing well or the quality of yeast. second not kneading the dough very well. if kneading with hands, then the dough has to be kneaded for 8 to 10 minutes. for yeast quality, you can buy a good brand of yeast like red star, mauripan/gloripan or you use fresh yeast, which is available in bakeries. but for fresh yeast the amount to be added will be more as compared to dry active or instant yeast. most of the times when the bread becomes dense, its the yeast proofing which is at fault. but since you mention that the dough had risen well, i am doubting if it is the yeast. if the proofing is done well, the dough also rises well. also try adding some more water while kneading. a faint slightly sticky dough is fine.
Hi,I followed your white bread recipe and it turned out fine as you described. I’d probably add another tsp of salt to suit my taste next time I make this bread. I used instant dry yeast.Thanks for the recipe.
welcome reen and thanks. salt can always be added less or more depending on one’s taste preference.
Hello mam, whenever I use milk (3/4cup milk and 1/4cup water to proof active dry yeast) dough proofing is very slow and less especially the 2nd raise., whereas when I use water alone the dough proofing is good. So should I use more yeast if using milk? Kindly reply.
there is no need to use milk for proofing. you can add milk when kneading the dough. i have never used milk for proofing yeast, so i am not aware about it being slow. i always use water. if more yeast is used, then the bread gets a too much yeasty aroma and sour taste.
No mam, I used only water to proof the yeast. I used 1/4cup water to proof the yeast., and then directly added 3/4cup milk while kneading the dough. I didn’t use milk to proof the yeast.
okay benny. did you use warm milk or cold milk or milk at room temperature. its best to use milk at room temperature or lukewarm milk. if cold milk is added, it will affect the yeast multiplication in the dough.
Hi dassana..i tried your bread recipes and it comes out very well…one thing what you said is correct…once we start to make homemade breads ..we wil not feel to buy store bought breads..thanks to you that now in my home we have a chemical free bread
thank you savitha for the feedback. homemade breads are so better than the store brought ones. even a simple white bread like this one is much better than the store brought white bread.
Very good recipe really
Thanks Susrita
hi mam, this is benny from chennai. Hope u remember me. Already I have commented on your paneer-butter-masala recipe. made this white bread and it came out well. And also saw your link for making whole wheat bread and the secret tip u gave to make it softer. So next I’m planning to try that also since it’s healthier than white bread. your blog helps even men to cook easily. All your recipes are so easy to follow that even a 10yr old can make it. Will share the results after making whole wheat bread. Thank you very much. bye for now.
surely share your feedback 🙂 once you make the whole wheat bread. thanks for your kind, encouraging words and positive views. you are welcome.
I tried this today…. it became too hard… outside crust was perfect but from inside it was just like a dough??? what to do?
shona, looks like the yeast did not proof well, hence the inside had a doughy texture. white bread is one of the most easiest breads to make. the only key point is that the yeast should proof well. if the yeast does not proof well or does not proof at all, then always throw the solution and start again. if the water is too hot, the yeast cells die. if the water is on the cooler side, the yeast cells do not get activated. a properly proofed yeast will help in leavening the bread well.
Hi, Dassana! I would love to try this recipe but can I use bread flour instead of maida? will it change anything else in the recipe? Please advice.
Siyamala, yes you can use bread flour. just add water as required.
I am new to baking..after using my microwave for 5 yrs for purely reheating food ..I finally made bread today..it came out perfect. Thanks 🙂
welcome always nimmo, thanks for positive views on white bread recipe 🙂
Hi Amit
So well you have described the process with pics. Thank you .
I am planning to buy Panasonic bread maker and would like to know if anyone has used bread maker
Also can we use our normal chapati atta for the flour.
Can you help please?
thanks ram. i have never used a bread maker, so i cannot comment on how it is or its advantages or uses. but i have heard bread makers are good for bread making. you can use normal chapati atta, but with chapati atta, the bread texture becomes dense. you can check this recipe on whole wheat bread on the blog, where the texture is light and soft, due to using vinegar or curd in the dough.
you can also use half-half or 2:1 proportion of atta flour & maida respectively.
Thank you Amit for your quick response
I will try adding vinegar or curd as you have described
Can we add gluten powder instead?
you can add gluten powder instead of vinegar and curd.
Hi mam,
I tried ur white bread recpie but instead of loaf i made cinnamon rolls amd garlic rolls which were perfect..second tine i made loaf with the same. Recpie but d bread was crumbley and crust was very hard.third i prepared stuffes mozorella chesse and sauted onions with corns and shaped like dominos garlic bread..it was also perfect..dont know what is the provlem wiyh loaf??
could be that more moisture/water was required in the dough. crumbliness could be due to not kneading the dough properly or less moisture. since a loaf is the entire dough being baked at once, try kneading very well and let the dough be soft, smooth and pliable.
hi can we bake this bread in any aluminium pan like rectangular cake pan or we must bake in a bread loaf pan alone? and i kept the dough for rising for 2hrs even though it doubled in 1hr.is this could be the reason for the dense bread i got after baking?please clarify?bread was not very soft and little bit crumbling.
krithika, if making in a round pan, the structure and the shape of the bread can go awry. instead of spreading the dough completely in the pan, you can make small to medium sized buns and then place them in the pan leaving some space between them. dense bread is mostly due to yeast proofing not done well or quality of yeast. in a warm and humid climate, the dough can rise quickly.
i have posted my doubts once again i dont know what happened to my previous posts?if it is a long post it wont appear?clarify my doubts regarding yeast smell, the pan to be used,if the dough increases in one hr is that enough,and can i insert a toothpick to check the bread ,i want to try once more.sorry for bothering u with too many questions.
harini, not received any of your queries. nothing like if its a long comment, it won’t appear. its alright, you can ask too many queries 🙂
1. yeast smell depends on the quality of yeast. sense of smell is relative and for some there can be a sensitivity to the aroma of yeast.
2. the rise of the dough depends on the temperature. in a hot and humid temperature, the dough will rise first. so if the dough has risen well, then its fine.
3. you can try with a toothpick. i always knock on the loaf and only when i hear a hollow sound, i remove the loaf from the pan.
If using instant yeast
Then should v add 1/2 tbsp or only 1 tsp ?? Directly in flour
Pls help ṭhank you
i have mentioned the amount of instant yeast in the notes section of the recipe card. its 1 teaspoon instant yeast. if using instant yeast, either you can add directly in flour and knead everything together. or dissolve the yeast in water + sugar solution and then add. but do be sure that it is instant yeast. i have seen a few packets in india where it is actually dry active yeast but labelled as dry instant yeast. both are different.
hi, forgot to tell this. the yeast i used is good it frothed like urs in the picture.
harini, not received your previous comment related to this one. let me know what happened.
Hi!! Thanks for the stepwise pictures. Gives more confidence to novice bakers like me:)
Tried this recipe yesterday. The bread came out slightly more dense than expected but the crust was too hard. I had a tough time cutting it into slices. Any idea what could have gone wrong?
thanks sandhya. the texture of white bread comes out very well if the yeast has proofed well. if the yeast has not proofed well, then the texture can becomes hard. so i feel this would be due to the yeast proofing or the quality of yeast. the crust also would become hard in this case. do try to use a better quality of yeast. also the water should be lukewarm when adding yeast. if its on the cooler side, the yeast do not activate and if on the hotter side, the yeast die. hope these tips help.
Thanks for your response 🙂
I did take great precaution with proofing the yeast. It did froth but the entire vessel was not covered with froth. Only the centre portion was frothy. I used Bakers’ brand and the yeast is well within the expiry. Do you have any suggestions on a good brand available in India?
okay. even i used to have issues with baker’s brand, so i stopped using it. the froth should cover the entire bowl. it should be very frothy and bubbly. you can use mukhsha brand or bluebird. i use gloripan/mauripan brand of dry active yeast and instant yeast. instant yeast is better while making breads as the time taken is less.
Thanks for the suggestions. I will try my next batch with these.
sure sandhya and thankyou.
i have a doubt. my bread is sticking to bread pan even after applying oil. i know its the pan fault. i cant get a new one now. i bake bread every week. my doubt is can i bake bread by placing a parchment paper in the pan, so it wont stick.
yes you can place the parchment paper or butter paper and bake. what i do at times is, i grease the butter paper also with oil.
thank you so much for the quick reply. keep up your good work. u r helping novice bakers like me a lot.
welcome durga 🙂
this is a great recipe. i tried this twice and on second attempt it was awesome. everybody liked it. thank you for posting this recipe. its a keeper. all your recipes r so good. i tried few recipes which turned out great. have to try a lot more.
thanks a lot durga. i use this recipe at times to make white bread at home when family demands it.
I am a great fan of your cooking . Please do help by telling how to bake a bread in microwave convection mode. For how much time we need to preheat the oven. I don’t have auto preheat option in my microwave. Do we need to keep the baking tin on a small stand or rack while cooking. Please help . it’s urgent. I am new to baking.
thanks sweta. oven needs to be preheated for 15 minutes. you have to manually preheat the oven in the convection mode. set the temperature to 190 degrees celsius and then preheat the oven for 15 minutes. then stop the oven. keep the loaf pan. again set the temperature to 190 degrees celsius and then bake the loaf.
hi
i tried this recipe with exact measurements and it came out fluffy and nice.
i had some problems.
1. it had yeasty smell even after baking. can i reduce yeast to 1 tsp for this recipe. didn’t like the yeasty smell. i used active dry yeast(blue bird)
2. it was tasting a bit bitter.can u say why it is tasting like that.
the yeasty smell is due to the quality of yeast. i am not sure why the bitter taste. guessing could be due to the quality of flour. you can reduce the yeast to 1.5 tsp.
1.5 tsp(7.5 ml) is same as 1/2 tbsp(7.5 ml) right. pls correct me if i’m wrong.
i thought as the bread was yeast smelling i can reduce yeast to 1 tsp or even less.
in volume, the things are measured in ml. but in weight (as in grams), i think 1.5 is equal to 1/2 tbsp. so try using 1 tsp. i would also suggest that you buy a good quality yeast, if you plan to bake often.
Lovely recipe
thankyou sarita 🙂
Dear dassana,I love the way you share your recipes they are so very well described and written.i tried the whole wheat bread but it turned out dense not that soft like market??plz suggest me where could I had missed also the top became hard n in this recipe how should I try half of this recipe??will wait for your reply
did the yeast proof well. meaning was the mixture bubbly and frothy. whenever a bread loaf turns out dense, its the yeast proofing thats at fault. you can halve this recipe. use water which is warm for proofing the yeast and it should not be hot.
I wanna try it but there is a query. While searching on homemade yeast on Google I came across a site in which how to prepare yeast was given . One cup maida two tb dahi two tsp sugar and one tsp saunf were to mix together with luke warm water for about 5-6 minutes. Then stored in airtight container for 18-24 hours for yeast to form . Can I use it and what propotion should be for baking bread if not then where can I get dry active yeast.
harsimrat, i am not sure about the proportions and the time taken is too long. overnight should be fine. you will have to try this method to see if it works or not. i use the khameer or homemade yeast method for making bhatura.
just use baking soda instead of baking powder in the above method and add the whole mixture to the bread recipe. use 2.25 to 2.5 cups flour and add water as required to get a soft smooth dough. don’t add any sugar. just add salt and oil. try this way if it works. you can also halve all the ingredients and make a small size of bread.
yeast you can buy online also.
Hello,
Your recipe is very easy, did you cook this in microwave oven? If not, how to set the microwave oven to bake this bread, what is the temperature exactly? Thanks a lot.
i have never cooked this bread in a microwave oven. so i am unable to help.
Awesome awesome…first time in my life I BAKED MY OWN BREAD!!!!Lovely recipe and so simple…thank you…
thanks mahima. great and nice to know:-)
just made …has come out perfect.
thanks for your awesome ..simple one
welcome hema
can i bake any cake in aliiminium tray used at sweet shops…?
pooja, it should be baking safe. you have to ask the shopkeeper before buying that the tray is baking safe or not. the tray should withstand high temperature.
Hi, thank for your reply. I just now tried Banana Cake and everybody loved it. My whole house was smelling of this cake. I wanted to know if you had any recipe for Khara(Spicy) bread and Palya bun(stuffed potato). Kindly help.
thanks for the positive review usha. i don’t have any recipe for khara bread and stuffed buns. plan to make them soon.
Hi, I tried this bread receipe and it came out fine. I tried 1/3 rd of the quantity as this was my first time bread baking experience. I had a few issues. I wanted to know the time for baking 1/3rd of the quantity…Will it be the same 40-45 mins or less? I tried for 18 mins and it was baked completely however, the outer crust was extremely hard. I even brushed a few tsps of milk on it. Inside was soft but outside was hard. I did not wait for the bread to cool. I started to cut the bread immediately. Was it wrong?? Also i dissolved the yeast in water + milk mixture. Hence, the whey and milk fats were separated and through out the baking the bread smelt like curds. Is that wrong again? Pls advice.
hi usha, 1/3rd of the bread will take less time. the bread was baked must have got baked much earlier than 18 minutes. hence the crust got hardened due to over baking. if you cool, the crust will soften a bit. while proofing yeast, i always use water and not milk. i think some reaction has happened with the yeast and milk and hence the milk has got curdled. if adding milk, then add milk while kneading the dough. so in this case, you take half of water and proof yeast in that. then add milk when kneading. do keep the milk at room temperature or lukewarm.
Hi! I have instant yeast.. Please suggest the amount n can I put it directly or I need to dissolve in water?
ruchi, you can put 1 tsp instant yeast directly in the flour.
Dassana yesterdays dinner rolls turned out good as left for frothing in milk and water, they befores dinner rolls were slight hard not vry, except for the stuffed chicken rolls which turned out soft may be due to filling. If i happen to go to town will check on the packing again. Dassana a request for doughnuts and jalebis pls. Thks!
chalo, good to know. do check the pack. yes doughnuts and jalebi recipe, i will be adding in some weeks.
Dassana it took 2hrs for dough to risen, had kneaded dough with warm milk and water (qty as u mentioned). Pack mentioned dry instant yeast, so i had directly added to dough not left aside to froth. Is 2hrs ok after using dry instant yeast… Thk!
hi mohini, i think, its dry active yeast and not instant yeast. instant yeast packs are just labelled as instant yeast. ideally it should not take so much time. when i use it just take about 45 minutes. miracle… if the bread has doubled up, then you can bake. i hope the bread turned out good.
Gd Mrng Dassana i did check the table u sent regarding qty of instant and dry active yeast, thks. In above recipe u hv mentioned dry yeast half tbsp so if using instant yeast it will b 1tsp right and sugar will b same 2tbsp…
good morning mohini. sugar quantity will be same. you are right, use 1 tsp of instant yeast. the time for rising of the dough will be less, while using instant yeast. that you have to check.
Ok Thks!
Gd Mrng Dassana, made the white bread turned out excellent, thks a million. My hubby was vry happy that i culd bake bread at home. Next time i wuld like to give it a shape of dinner roll, culd u pls tell me hw that is dn. Thku!
thanks mohini for sharing positive review on white bread. i cannot explain how to shape the dinner rolls without photos. there are many shapes. you can check some youtube videos on how the rolls are shaped.
hi..
can i make bread in aluminum mold??
and how to know… the dough is perfect for bread??
what is mold is small in size?? can i divide in to two part??
is it easy to make in otg?
you can make in aluminium pan, but it should be oven proof. meaning it should stand the high heat of the oven. when the dough has risen and doubled up, it means the bread can be rolled into a log and placed in the oven. you can divide into two parts. yes easy to make in OTG.
Hi. I have a Pullman loaf pan with lid to bake breads. How do I use it for this recipe?
I mean when shud I put d dough in d loaf pan n when shud I lid it?
there is no need to place the lid while baking. its for some bread recipes that lid is used. when the bread dough is getting risen in the loaf pan, that time you can place the lid.
Had a dream of baking a bread. Looks like it’ll fulfill soon. But I don’t have a rectangular bread mould. Only cake moulds and I do have a rectangular aluminum/hindalium (not sure 🙁 ) ice cream maker mould. Can I use that to bake bread?
i am not sure about the ice cream mould. you can bake the bread in a cake pan. just the timing may vary due to the size of the pan. so do keep a check while baking.
Hi dasanna…
Nice to meet you. ..again☆☆☆;-)
Since a few days I found the bread recipes but I can actually understand.
But after reading ur article. .its so nice and u wrote it step by step. ..and briefly. .that I like it. ..now I can make it at home easily. .u know ur article became s very helpful to me. ..Thanks a lot. ..
thanks a lot saba. welcome and happy baking 🙂
Hello Dassana,
I am a big fan of ur recipes and have tried many recipes of urs and have never been disappointed by the results… Have recently started baking and have tried ur whole wheat pav and bread recipes and they turned out just too perfect.
Need ur help in this recipe. I have instant yeast so can I follow the same steps as mentioned for whole wheat bread? also can I Use curd for white bread also,as m sure it helps make bread soft as u had mentioned in the whole wheat bread recipe. If not plz let me know the time I should leave the dough to rest after using instant yeast. Will await ur response. Thanks
thanks a lot rashmi. the amount of instant yeast required is much less as compared to dry active yeast. in this recipe you need to add 1 tsp of instant yeast. you can also use this online yeast conversion tool from google search.
you can add curd in white bread. they will become soft. but just little curd. about 1/2 tbsp. as white bread is already soft when made without curd. after kneading the dough, keep it to leaven for about 35 mins. if the temperature is cool or cold outside, you can keep for some more minutes. after the second rise, make a loaf and then again keep for the second rice for 20 to 25 minutes or more if the temperature is low. then bake in a preheated oven.
Hi my yeast didnt get frothyI tried trice.please tell where i went wrong.
shalini, the water has to be warm. if the water is hot or not enough warm the yeast will not get activated. the quality of yeast also matters.
If your bread became hard find a bread bag or a closed container to store it in once it’s cooled down….. I have the same problem but once i do this it cuts nicely. How ever i do not use canola oil…. i use organic sunflower oil but all in all an amazing and great recipe…… few ingredients and great directions/pictures to follow.
thanks christie for your suggestions. i also do the same. i keep the bread in a box or container.
Hi,
Could you please let me know how to bake bread in microwave as I have LG GRILL MICROWAVE.
prashant, i have never made bread using the microwave mode. so unable to help you.
Hi dassana
Easy recipe to try. I just baked it today. Texture was alright … It raised well too. Because my pan was round and small, I baked them as smaller buns . Their outer crust was hard and could nt cut them at all due to this. Wonder what went wrong. I baked at 170 c for 40 minutes on convection mode . Do u think I should have reduced the temp further as their size was smaller ?
Suparna
hi suparna. the buns have got over baked and thats why the outer crust was hard. small buns take less time to bake than a whole loaf. the temperature is fine. but the time should have been less. next time you can just bake for 25 to 30 mins. when the top gets browned, just tap the buns. they should sound hollow.
Hi Dassana,
Happy to spot ur bread making site which I was searching from a very very long time,!!!
! I have had many attempts with 100 percent whole wheat n which all wer all very dense
l
later 2cup maida n 1 cup wheat turned out to b somewhat k.
When I use 2teaspn yeast for 3 cup flour it s smelling yeasty,but the commrcial. Breads never smells so. Any idea? Also wen u say I 1 cup , how it’s n ltrs or mg
Cd u tell me
Ur locatn as wen we keep the dough for 3-4 hrs for rising in India ,it can make. It too sour as the climate is hot
If u don’t mind my last question is, I use a convection microwave 200 degrees for 45 mts doesn’t cook well near sides ,can u suggest me an ideal temp n time for baking n preheating, my
Crest is always correct but below dat I seed some thing powdery n looks like. Uncooked
Thanks in advance!love to hear from u!!!!
Cheers !!!!!
Jisha
hi jisha
whole wheat bread will be dense. you can try the whole wheat bread recipe from the blog and this one is not dense. apart from yeast, a lot of additives and preservatives, gluten enhancers are used in commercial bread. thats why they don’t have a yeasty aroma. 1 cup is 250 ml. but when you weight a dry substance, the weight differs as per the density of the substance.
if the climate is hot or very hot, then you have to keep for a less time than mentioned in the recipe. the dough should be doubled. once its doubled, you can make the loaf and keep again for some minutes.
i suggest you to keep the bread covered with butter paper or aluminium foil and bake for a longer time. it seems your breads are not getting baked thoroughly. you can bake from 180 to 200 degrees C in your microwave oven in the convection mode. preheating should be atleast for 15 to 20 mins.
What a wonderful recipe. But actually I am looking for a white bread recipe without yeast. Can you help me out with that please?
till now i have never made any bread without yeast. so i am unable to help you. there are soda breads, beer breads which do not use yeast, but i have never tried them.
I have tried to follow the recipe but when i baked it in microwave oven the end result was not satisfactory. the bread was not presentable
did you use convection baking in microwave. you have not mentioned what went wrong with the bread.
Hi. Just wondering if this has to be done in convection mode since I have many failed attempts in microwave mode.
Ofcourse in the convection mode. This recipe won’t work in microwave mode,
Hi.. loved your recipe.. tried first with maida.. came out great only thing is crust gets very very hard.. can you tell me how to make soft bread like we get in store? also in brown bread I had to cook it longer so crush was ver hard again and bread was very dense.. please tell me proper ratio of yeast and water for 3 cup of whole wheat flour.. and how to make it less dense(I know as for whole wheat it will be dense)
Thanks in advance
hi sapana. let me know which oven you use. regular oven/OTG or the convection mode in microwave. i generally use 1/2 tbsp of dry active yeast for 3 cups of whole wheat flour. check recipe for 100% atta bread on the blog where i have used yogurt to make the bread light & soft.
for the brown bread, depending on the type and quality of flour, you can increase the quantity of water. a slightly moist and wet dough is good and does not make the bread dense while baking. again the yeast must have not proofed well, which might have contributed to the denseness. the yeast should bubble up and cover the whole bowl.
Hi Dassana,
Thanks for replying! I made it in convection mode in microwave. I have added 1/2 tbsp Gloripan yeast in 1 cup of water and not used yogert at all.. I used ashirwad atta 3 cups and added yeast mixture and it was too thick so i have added little milk to make it soft but bread came out very very dense…
Also My biggest problem is hard crush.. When my bread is cooked it very hard to cut through..
Please tell me what temperature I need to cook it and for how long. Also suggest me how to make less dense whole wheat bread.. Yeast I use is fantastic quality.. anything else I can do to make it less dense?
BTW , I tried your pizza recipe.. Its FANTASTIC 🙂 .. Everyone loved it… the pictures u take are tooo goood 🙂
~ sapana
hi sapana. from your description, its looks like the bread was very very dense. i have also made whole wheat bread without adding curd etc. they were dense but not too much. i think its the flour quality. i know gloripan yeast is good. i use the same brand for active yeast. now for the crust, the issue here is both the denseness as well as the baking time. i keep bread loaf at 200 or 220 degrees C and bake for about anywhere between 35 to 60 mins, depending on the recipe and the size of the bread.
since you use convection mode, i suggest you to use -10 to -20 degrees less than what the recipe mentions. since microwave have fans in it. so if the recipe calls for 180 degrees in aregular OTG, you can bake for 170 or 160 degrees C. bread should not be hard to cut through.
whole wheat bread has a denseness. it cannot be as light as the ones made with maida or all purpose flour. the denseness will vary though. if you can get your hands on vital wheat gluten, then it helps to leaven the bread well. then you can also use some yogurt or vinegar. they also help in the gluten development.
i have also seen two methods of making bread which help to make the bread lighter and softer. one is a japanese tangzhong method and the other uses a sponge and biga mixture. you can get more of these methods in books or in other blogs or websites.
Hi! Thanks for your detailed recipe. Luv to try it. Pls tell me if baking has to be fm top and bottom or bottom alone. Eagerly waiting for d response…
when i bake breads at home (which i make every week), i keep the bread in the center rack and both the top as well as the bottom heating elements are on. for this bread however, i used the convection mode in the microwave oven and only the top element is heated.
Can i replace pressure coocker instead of OVEN??
Nirav
breads can be made in the pressure cooker. but i have not tried. so don’t know how this bread recipe would turn out.
Hi Dassana
Wanted to know if we can try this with any other flour. My husband has gluten allergy hence wanted to bake bread at home with other flours such as ragi / rice/ rajgira/ jowar flour.
hi shalu, breads can be made with other flours, but the proportion of the ingredients have to be changed. the whole recipe becomes different. in the market there are gluten free flours available. these are used for making breads and cakes. let me know and i can send you the online links. if you live in india you can buy online. if you live in america then you will be able to get them in the stores.
if you use exclusively ragi or jowar or rajgira, the results are different. i usually combine ragi with wheat flour to make ragi breads. however i have seen that when i increase the proportion of ragi, the bread becomes way too dense.
Can I use baking powder instead of yeast n how much stud I use
you cannot use baking powder.
Turned out perfect!!!! No more bread from the store!
megha, thanks for the positive feedback.
Can v do this in microwave.. and if v can for how minutes should I keep… Thank u.
we can not make this white bread in the microwave
I have tried it but my bread became very hard…
I am not even able to cut it…
Please suggest some thing to avoid it….
the bread become hard as the yeast did not get activated. generally this is the number one reason for bread becoming hard.
Yet another great recipie. Tried this and came out very well in convection itself
thanks shilpa for the feedback and trying out the recipe.
Hi Dassana,
Can this be dough be used to make pizzaz too?
in pizza dough less sugar and a bit more of oil is added. the oil used is olive oil. so the texture is very different from the bread dough. you can check this veg pizza recipe from the blog.
hi dassana,
thanks for this recipe.. i tried it yest and it was really good.. i have posted it in my space too.. do check it out in your free time 🙂
thanks preeti for trying the white bread recipe. i will check on your blog too.
hi Dassana,thanks a lot fr ur white bread recipe.i tried it in microwave ,it cm out vry well.it was soft n all my family members lovd it vry much.all ur recipes are fabulous.i hv tried sm.pls cn u post me th recipe of [atta] brown bread.th expirence of making th bread was great,n th taste n texture was too gud.u just made my day.
Thanks a ton.
thats nice rima. i will post the atta bread soon. bread making is a very satisfactory and lovely task. in fact i make so many breads at home, but just never take pics. there are a few bread recipes in drafts that i will post soon.
Hi Dassana,
My yeast water is not frothing… i bought fresh yeast. What could be the reason
i have never worked with fresh yeast, so cannot pinpoint whats gone wrong.
Hi Dassana,
Sorry to have mislead you, what i meant is dried yeast(but bought new). Since it was not frothing, i went and bought another pack and that did froth. The bread was yummy.
Thanks for the recipe and the many other recipes…. love your blog!
Ida
alright ida. the first packet that you got, the yeast must have deteriorated. hence the frothing did not happen. good to know that finally the bread recipe worked.
Hi Dassana,
My second bread baking trial happened yesterday, and the result was even tastier than the last time 🙂 Thanks!!!!
The top did not brown, but the bottom was the right color and was cooked perfectly. Would glazing the top with some oil before baking help?
thats great. glazing with oil won’t give a golden brown color. but it does help. the top does not dry out or become crusty. you can also brush some milk or beaten eggs. both will give a nice golden brown color on top.
Tried by glazing with milk and got a nice light brown color… and yummy bread. Thanks a bunch!
thanks ida
Hi Dassana,
I tried the bread recipe last week and it came out good. I however could use only 3/4 cup of maida to 11/2 cup of wheat flour when using 1 cup of water….it could be because of the quality of the wheat flour or the weather like you mentioned. Nevertheless,it came out pretty good and everyone at home seemed pleased. The next day i made chaat style aloo cheese toast sandwich from the bread that i had baked and it not only tasted great but the whole experience was very gratifying…thank you.
thanks ashwini. the quality of the flour does contribute to the bread’s texture. it is so much satisfying to bake your own bread for your loved ones and family. when the bread is baking in the oven, the aroma of the bread baking is soooo nice 🙂
the chaat style aloo sandwich is also a great option for sandwich. but at home i am so much partial to bombay sandwich, that i often make it, apart from bread pakoras.
Can you please post some recipes of whole wheat cookies…..sweet and savory ones.Thank you dassana.
dear ashwini, there is one post in the drafts of cheese biscuits made from whole wheat flour. this one is like cheese straws. i had made these spiced biscuits some week ago, but still have to post them. i will also try to make some sweet cookies. i had made a few like banana cookies and semolina cookies. but did not take pics.
Hi, I loved the recipe and thinking of trying it. Can I substitute bread flour instead of all purpose? Also do you think adding chillies, cilantro, onions will make the bread hard? Ypur bread looks soft and perfect
sure sinduja, you can make the bread with bread flour. i have also made the same bread recipe with whole wheat flour many times and the bread was soft and moist always. you can add onions, herbs to the bread. they won’t make the bread hard. just chop them finely when adding to the dough.
The bread looks so fresh and yummy..I am fasting at the moment but cannot help drooling..
thanks.
how can i pre heat microoven for making basic white bread.
i don’t know which microwave oven you are using. if it is just microwave than you cannot preheat. if your microwave oven has convection/baking and grilling facilities in it than only you can preheat the oven in the convection mode. check the manufacture’s manual to know what kind of microwave oven you have.
also this bread recipe cannot be made in the microwave… i mean it is not a microwave recipe.
Hi Dasana,
I made the bread this weekend it was just fantastic.The shape was a bit flat …next time will correct it as I cud nt slice but cut as Pav.The taste n texture was just too good.
Thanks a ton !
welcome bhavna
lovely lighting on the pictures. 🙂
thanks shelvia.
hi Dassana,
thank you for the links, probably i have done some mistakes as mentioned in the quaker oats link.
my friends think the bread is quite good, may be i am being too critical. thanks again!
happy recipe posting
hi dassana
made wheat bread instead of white has come out well but appears a little dry, don’t know where i went wrong, hope it will turn out better next time
even i had made the whole wheat bread. mine were not dry but dense. there are many factors responsible for the bread to become dry. it also depends on the quality of the wheat flour.
yes truly homemade bread aroma is simply worth making.and your pics wow!! they make it all the more tempting. one query which brand dry yeast is advised?
previously i was using crown brand. but i did not like the results it gave. the bread would not rise to its optimum. currently i am using another brand. its very good. i made many breads with it and all were excellent.
only these two brands are available where i stay. but i do not remember what is its name. i have been struggling hard to remember the name. i have a poor memory for names. i remembered the crown brand as i still have the plastic jar with me. i will update you once i buy the same yeast again.
This bread looks so good! I have never made white bread at home! I mostly end up making whole wheat or brown bread. Will try your recipe soon.
Beautiful photos…
those are some gorgeous pictures! love the light play.. and a gorgeous loaf. those intangible ingredients are so necessary:)
Thanks for the comment on brendan’ s interview.. i wouldnt have been able to do it last year.. things are looking up this year,.. lets hope they keep looking up!
i think in point no 14, you have mentioned 11/2-2 hours but i suppose it will be 1/2-2 hours
it is 11/2 hours and 2 hours. the leavening takes about 1 hour 30 minutes to 2 hours.
Hi Dassana
Wow what a lovely post and congrats on your 300th Post, its really great that u have completed so many fabulous recipes for we readers. Soon you will complete 500 and then 1000.
take care
sunita
thanks sunita for your good wishes.
There is nothing more comforting and delicous then the process, smell and taste of fresh baked bread. Your recipe sounds great! And your photos, WOW! I love the shadows and small highlights. Perfect all around.
thanks a lot nancy…. i am a great admirer of your photography. feeling so good to hear such positive & encouraging comments from you 🙂
The bread looks just perfect!
Hi dear,
My name Nantini, from Malaysia. I try your bread recipe the result same like yours. First time im doing bread. Thank you very much.
thank you nantini 🙂