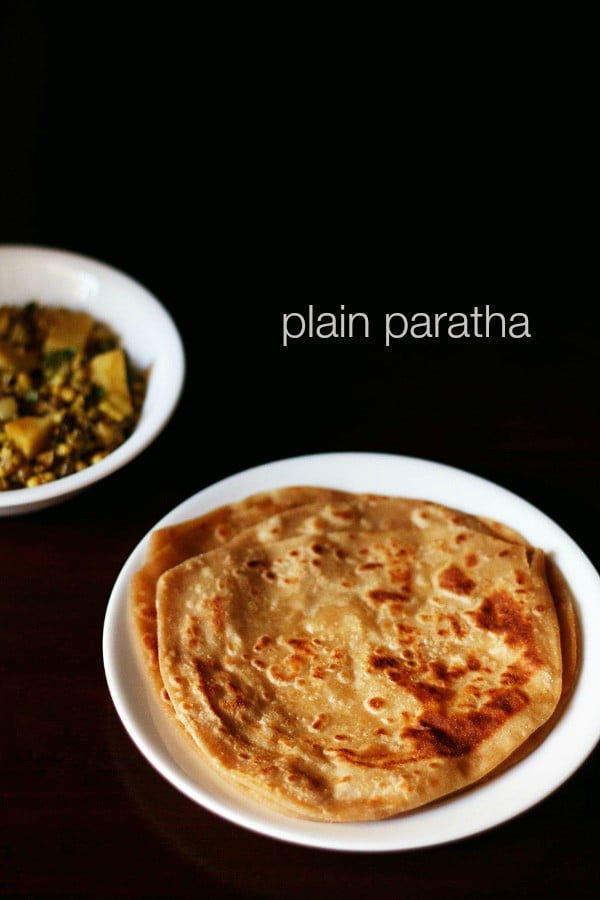
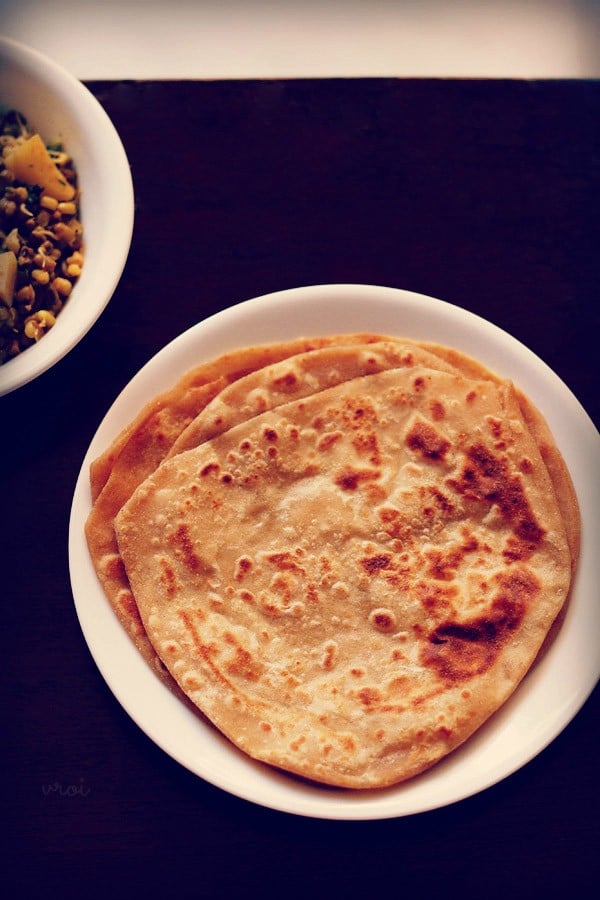
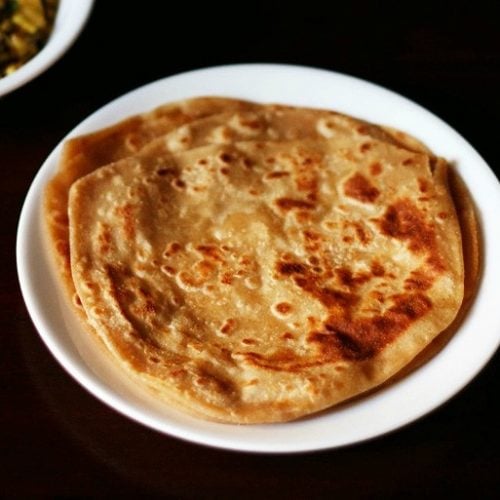
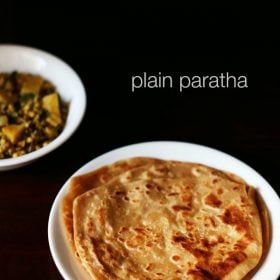
Crispy, flaky paratha is the perfect side to serve with dals and curries. This traditional Indian flatbread is unleavened, and is filled with tender and crisp layers. Try my classic plain paratha recipe with step-by-step photos to make a batch for enjoying with your favorite saucy dishes.
About Paratha
Parathas are simple flatbreads that are made with whole wheat (or atta) flour and just a few other simple ingredients. A soft dough is prepared by hand, formed and flattened, and then folded several times to create lots of flaky layers. They are then roasted to perfection and served warm with a variety of Indian dishes.
Plain parathas, like the ones made with this recipe, the layered & flaky Lachha Paratha and the South Indian Parotta, are staples of Indian cuisine. In fact, they are made and enjoyed in nearly every household and restaurant.
There are also stuffed parathas like Aloo Paratha, Gobi Paratha, Mooli Paratha and Paneer Paratha, which I make often.
However, this classic paratha recipe is by far my favorite. It’s my go-to side for whenever I’m making rich gravy dishes like Paneer Butter Masala, Chana Masala, Dal Makhani or Shahi Paneer.
The crunchy fried exterior and layered interior are great for scooping up these and nearly any other saucy or stew-like mains.
They are also terrific to eat by themselves, or with a cup of tea. And I love to snack on paratha with Mango Pickle or other condiments like a fruit jam.
Here I share with you two different but equally effective methods for rolling and shaping the paratha:
- Triangle form
- Square form
Choose whichever version looks most appealing to you!
How to make Paratha Recipe
Knead Dough
1. In a large mixing bowl add 2 cups of whole wheat flour, 1 teaspoon of oil or ghee, ½ teaspoon of salt.
Add ½ cup water in portions as you go on mixing and kneading the dough. Keep in mind not to add all of the water at once.
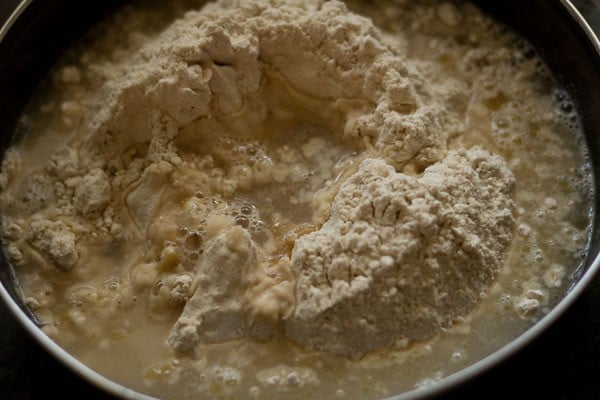
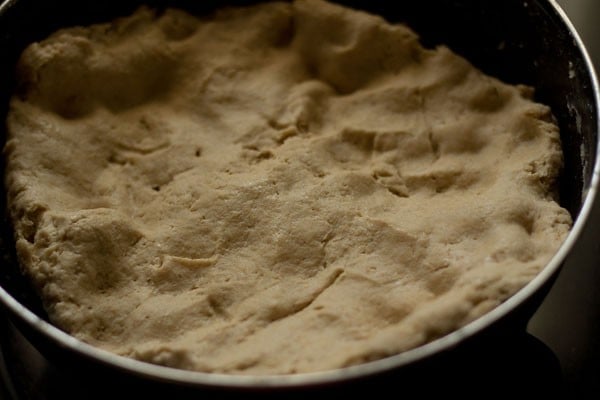
2. Mix and knead into a smooth, soft dough. Continue to add a bit more water a splash at a time if required while kneading.
Cover with a kitchen towel and set the dough aside to rest for 30 minutes.
Triangle Folded Method
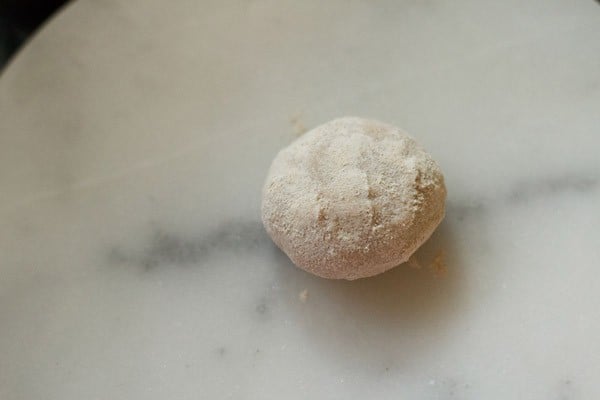
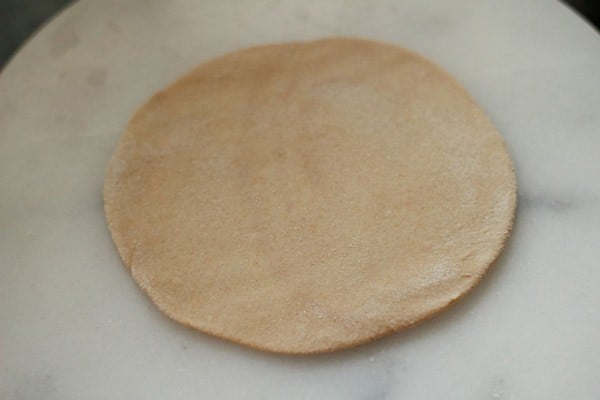
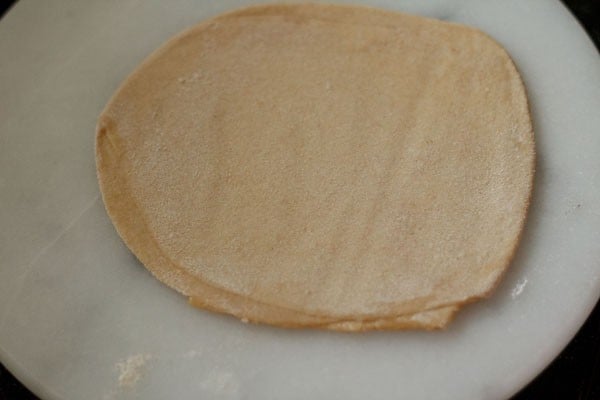
3. Pinch a medium-sized ball from the dough. Dust with flour and flatten on a clean surface that’s also dusted with a bit of flour.
4. Use a rolling pin to roll the paratha dough into a circle that’s about 4 inches in diameter.
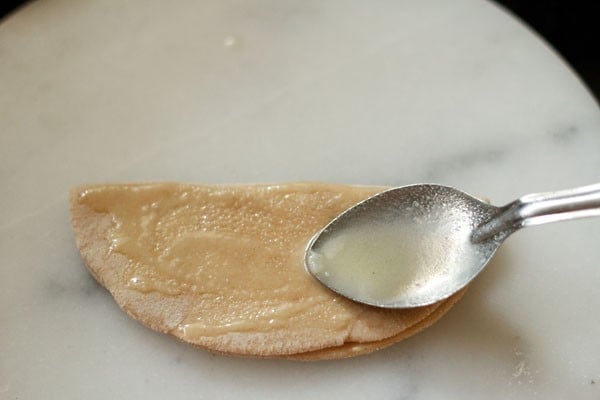
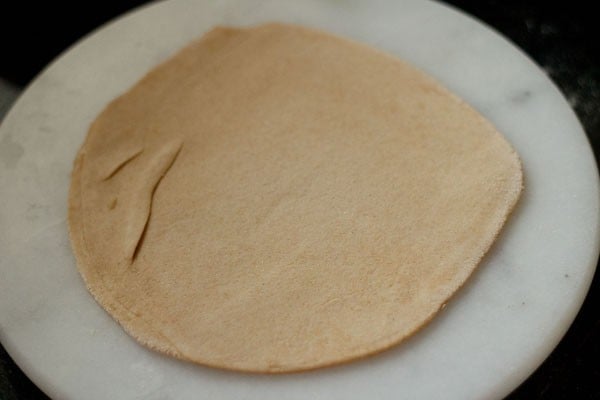
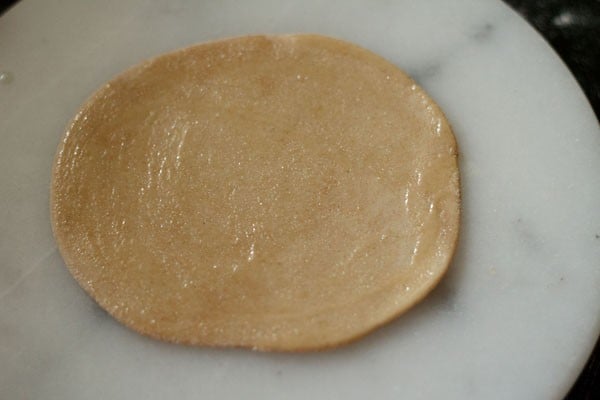
5. Next, use the back of a spoon to spread some ghee (or oil) to coat the surface of the dough circle.

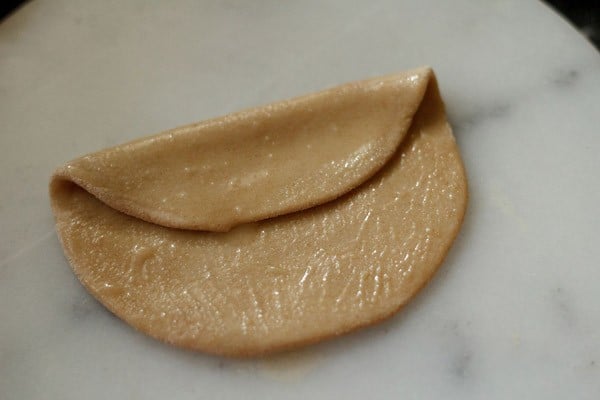
6. Fold the dough circle in half with the spoon.
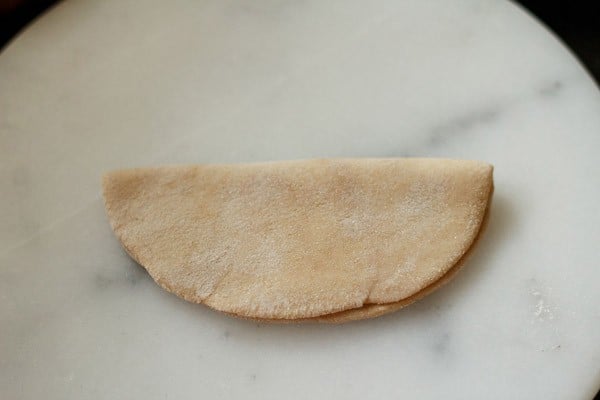
7. Now spread some more ghee on this folded half of dough.
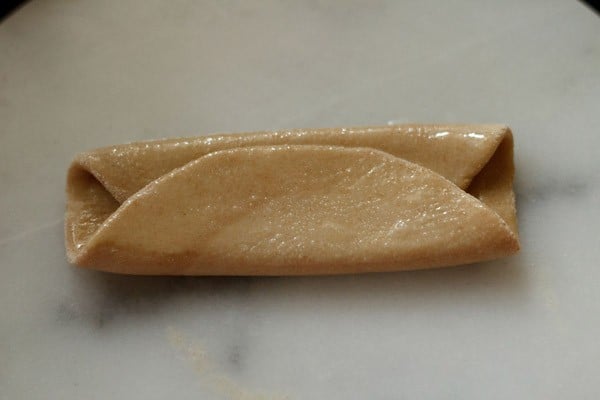
8. Fold sideways to create a triangle shape, like in the photo below.

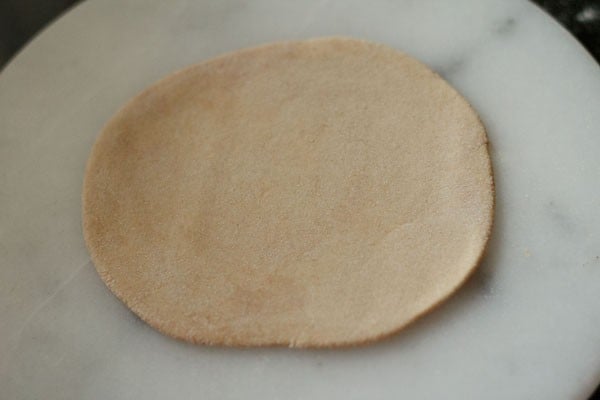
9. Dust some flour on the folded triangle.
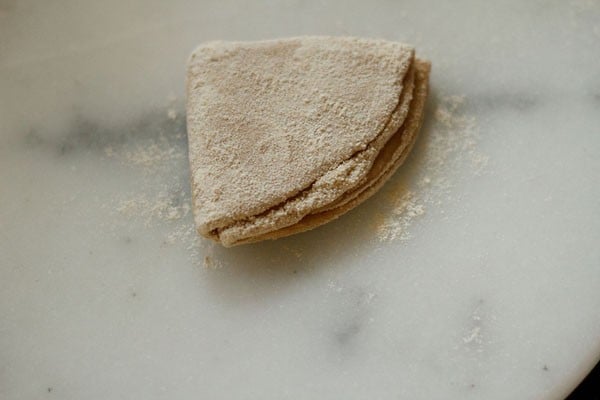
10. Roll the folded triangle back into a round disc of dough or in a triangular shape.
11. As you roll you can add some flour as needed to keep the dough from sticking. The dough should be rolled into a circle that’s about 6 to 7 inches in diameter.
Square Folded Method
This method does not change the taste of the paratha, but does create a more square-shaped flatbread.
12. To make a square version of paratha, first flatten a medium-sized ball of dough on a lightly dusted board. Roll out to form a circle of about 4 to 5 inches in diameter.
13. Use a spoon to evenly spread some ghee or oil on the rolled dough.
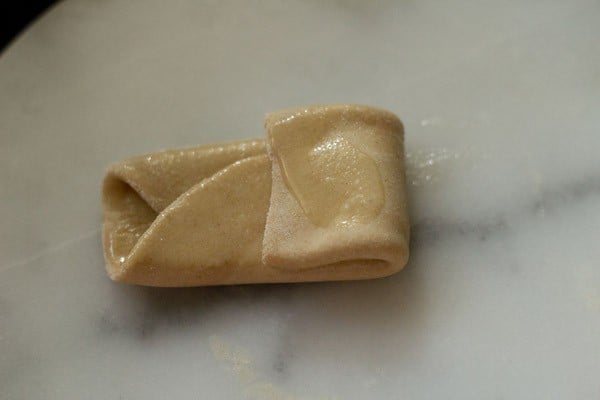
14. Bring one side of the rolled dough towards the center and press lightly. Spread more ghee on the folded part.
15. Fold the opposite side of the rolled dough on top of the folded part. Press lightly, and again spread the ghee on this second folded part.
16. Next, fold the right side of the paratha dough to bring it towards the center. Spread some ghee on this fold, too.
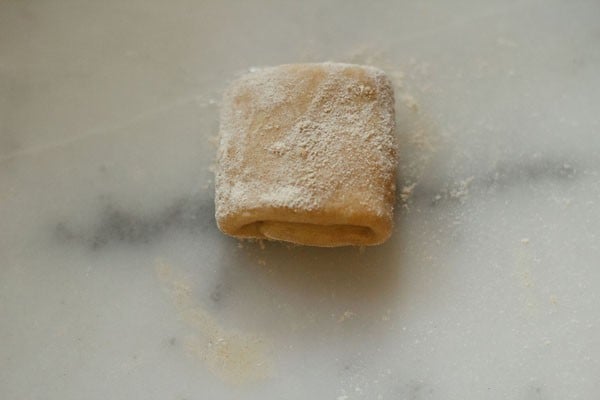
17. Lastly, fold the left side on top of the right fold. You should have a nice little bundle of dough, like in the photo below.
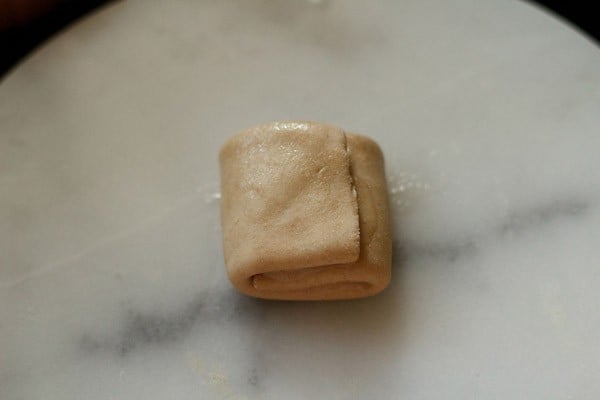
18. Sprinkle some flour on the folded paratha.
19. Begin to roll. Add some more flour if needed while rolling so that the dough doesn’t stick.
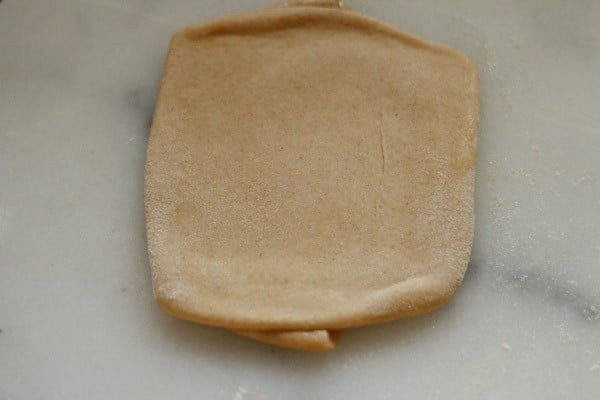
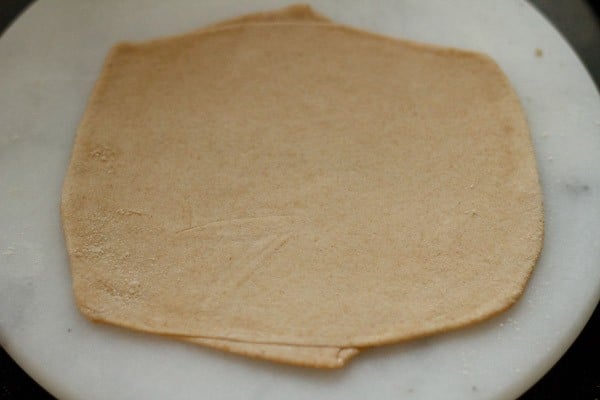
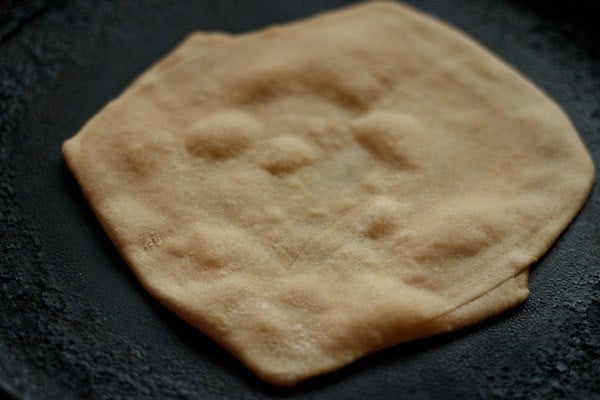
20. Roll the dough into a square shape.
Cook Plain Paratha
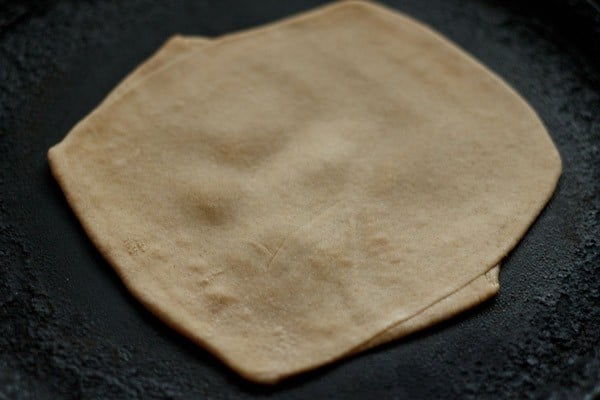
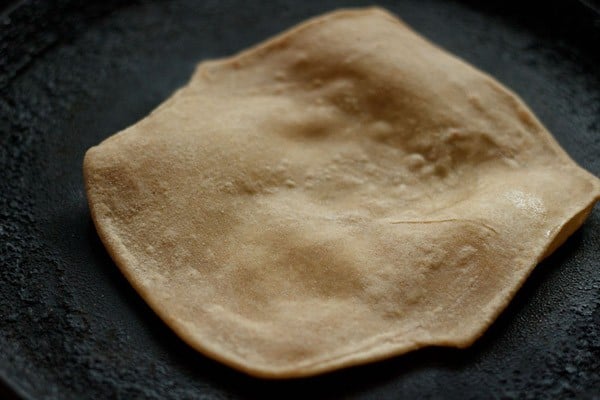
21. Once you’ve rolled out all of the paratha dough discs or square, heat a tawa (skillet) over medium heat on the stovetop. Working one at a time, place one of the paratha onto the tawa.
To test the hotness of the skillet, sprinkle a few pinches of flour in the center. if it browns in a few seconds, the tawa is hot enough to begin with the paratha roasting.
With a kitchen napkin, wipe off these browned flour particles from the skillet before you begin roasting paratha.
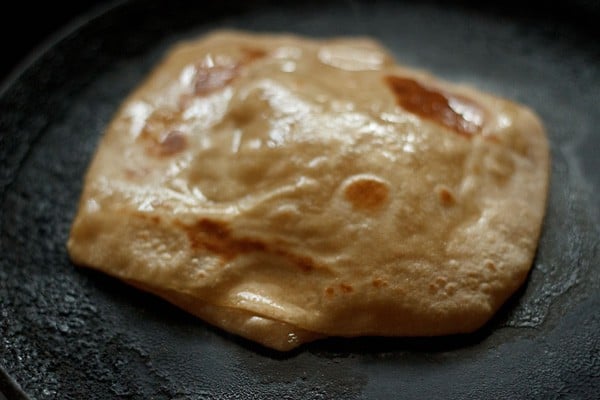
22. The paratha will begin to puff up and bubble from the heat. Roast paratha on a medium to high heat and do regulate the heat as needed.
A thin skillet or pan will need medium heat and a heavy skillet or pan will need medium-high to high heat.
23. When the bottom of the paratha is about ¼ of the way browned (you will see the paratha having some air pockets), flip it over with a spatula.
24. Spread on some ghee.

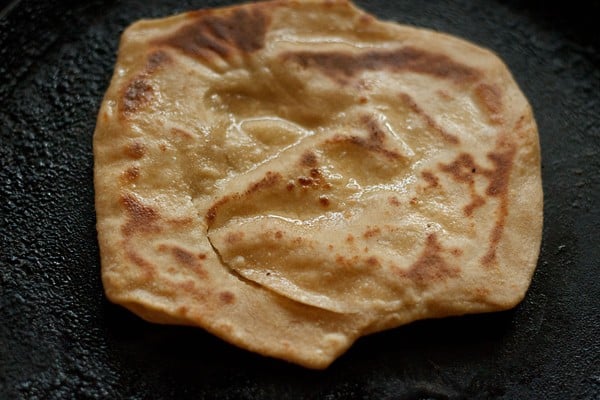
25. Flip again when the second side is about ½ way cooked. You will see brown spots now.

26. Now spread ghee on this side.
27. Flip again a couple of times until you see more brown spots and the paratha is cooked evenly.
Transfer to a holding plate or a casserole container or a roti basket/box, and repeat the process to cook all of the flatbreads.
28. Serve the plain paratha right away while hot or store in a roti basket until ready to enjoy.
Paratha can be served with any Indian mains like lentils, curries, gravies and even dry sautéed or steamed vegetable dishes. You can also enjoy them with mango pickle or lemon pickle.
FAQs
If you want more crisp parathas then simply fry them for a bit longer on each side to get more brown crunchy spots.
Enjoy homemade Indian flatbread warm with lentil recipes like dal makhani or mango pickle or green chilli pickle, or any Indian vegetable curry or any paneer gravy.
These breads are best when enjoyed as soon as they are made. If you serve them after storing or resting for some minutes, the crispy texture is not there and they soften, but the paratha still tastes delicious.
For health reasons, I recommend to eat the parathas the day they are made and not make ahead or store them for the next day.
More Paratha recipes
Please be sure to rate the recipe in the recipe card or leave a comment below if you have made it. For more vegetarian inspirations, Sign Up for my emails or follow me on Instagram, Youtube, Facebook, Pinterest or Twitter.
Paratha Recipe | Indian Flatbread Recipe (Plain Paratha)
Ingredients
- 2 cups whole wheat flour (atta) – 240 grams
- 1 to 2 teaspoons oil or ghee (clarified butter)
- ½ teaspoon salt or add as required
- ½ cup water or add as required
- oil or ghee add as required, for roasting
Instructions
Kneading dough
- In a bowl take whole wheat flour, salt, oil. Add water in portions and begin to mix and knead the dough.
- Mix and then knead into a smooth, pliable, soft dough.
- Add more water if required while kneading.
- Cover and keep the dough aside for 30 minutes.
Method to make triangular folded paratha
- Pinch a medium sized ball from the dough. Flatten and dust with some flour.
- With a rolling pin, roll into a circle of about 4 inches diameter.
- Spread some ghee on the dough circle. Fold in a half.
- Now spread some ghee on this half folded dough.
- Fold sideways and this time you will get a folded triangle.
- Dust some flour on the folded triangle. Now begin to roll the folded triangle.
- Add some flour if required and roll into a circle of about 6 to 7 inches diameter.
Method to make square folded paratha
- Roll a medium sized ball on a lightly dusted board to a circle of about 4 to 5 inches in diameter.
- Spread some ghee on the rolled dough.
- Bring one side of rolled dough towards the center and press lightly.
- Now spread again some ghee on the folded part.
- Fold the opposite side of the rolled dough on top of the folded part. Press lightly.
- Again spread some ghee on this second folded part.
- Fold the right side and bring towards the center. Spread some ghee on this fold too.
- Lastly fold the left side on top of the right fold.
- Sprinkle some flour on the folded paratha.
- Begin to roll. Add some more flour if required while rolling. Roll into a square paratha.
Roasting paratha
- Heat a skillet or tawa or a frying pan and place the rolled paratha on it. The skillet should be medium hot.
- You will soon see the paratha puffing up from the base at some places and will also see some air pockets on this side.
- Flip the paratha when the base is ¼ cooked. Spread some ghee or oil.
- Flip again when the second side is about ½ cooked. You will see brown spots now.
- Spread some ghee or oil on this side now.
- Flip again a couple of times till you see more brown spots and the paratha is cooked evenly. You can press the edges of the paratha with a spatula, if needed.
- Make all parathas this way. Either serve them hot or stack them in a roti basket.
- Serve these plain paratha with any indian dal or vegetable curry or pickle.
Notes
- The recipe can be doubled or tripled.
- If the dough looks dry, then add some water. If the dough looks sticky and moist, then add some extra flour and knead again.
- For a vegan paratha, use any neutral flavored oil for layering and roasting paratha instead of ghee.
- To make the parathas more crispy you can fry them for a bit longer on each side so that you get more brown crunchy spots.
Nutrition Info (Approximate Values)
This Paratha Recipe post from the archives first published in June 2010 has been republished and updated on June 2021.
First time to make, they were delicious – thank you for taking the time to give such easy looking instructions.
Happy to know that. Thanks for sharing your feedback.