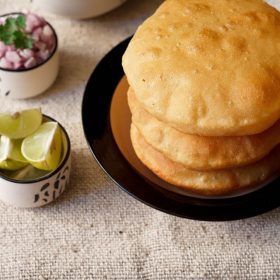
Poori or Puri is a traditional Indian fried bread that is delicious to enjoy with almost any main dish. It’s a simple unleavened bread made from just whole wheat flour, salt, and water. Here I share my poori recipe with step-by-step photos and the best tips for making puri at home – crispy, fluffy, and soft and I bet you’ll love making homemade puri to enjoy with your favorite meals!
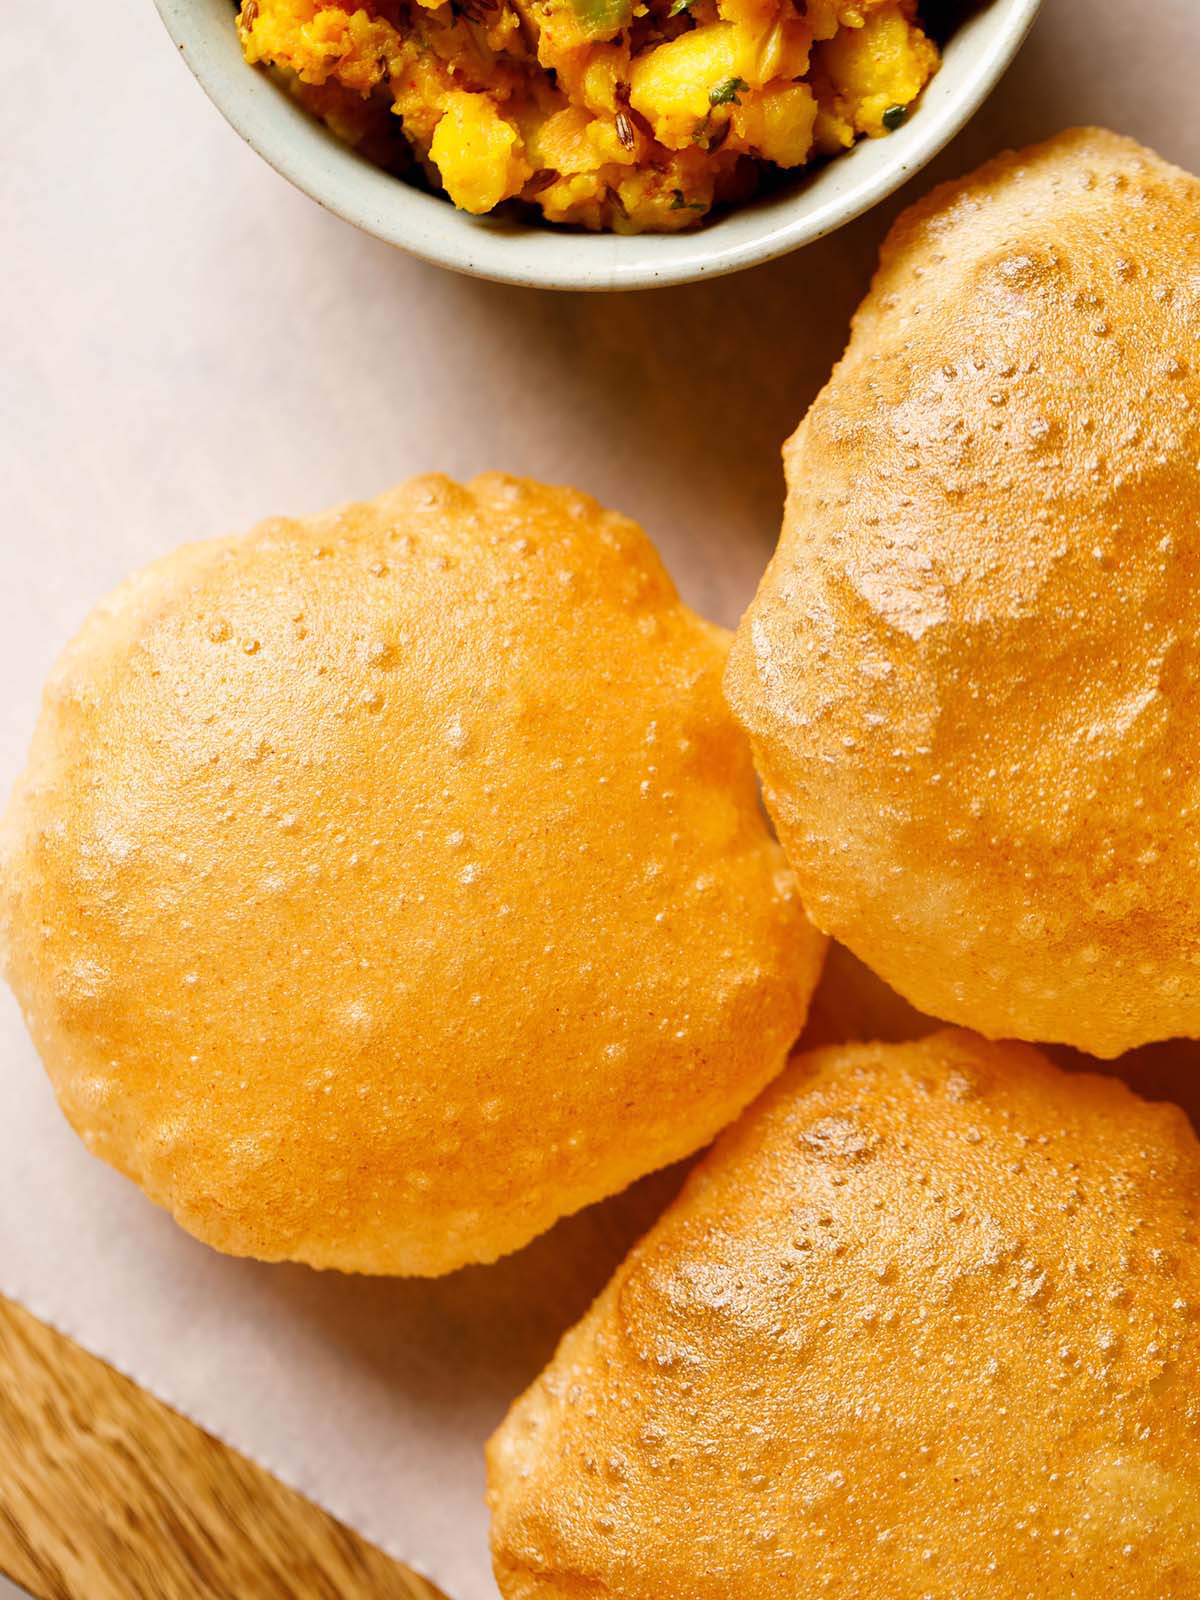
Table of Contents
What is Poori
A basic poori recipe is made with whole wheat flour, salt, and water. These are only three ingredients you need. A bit of oil or ghee can be added to the whole wheat dough optionally. The dough is not leavened or fermented, so it’s a wonderfully quick and easy bread to make.
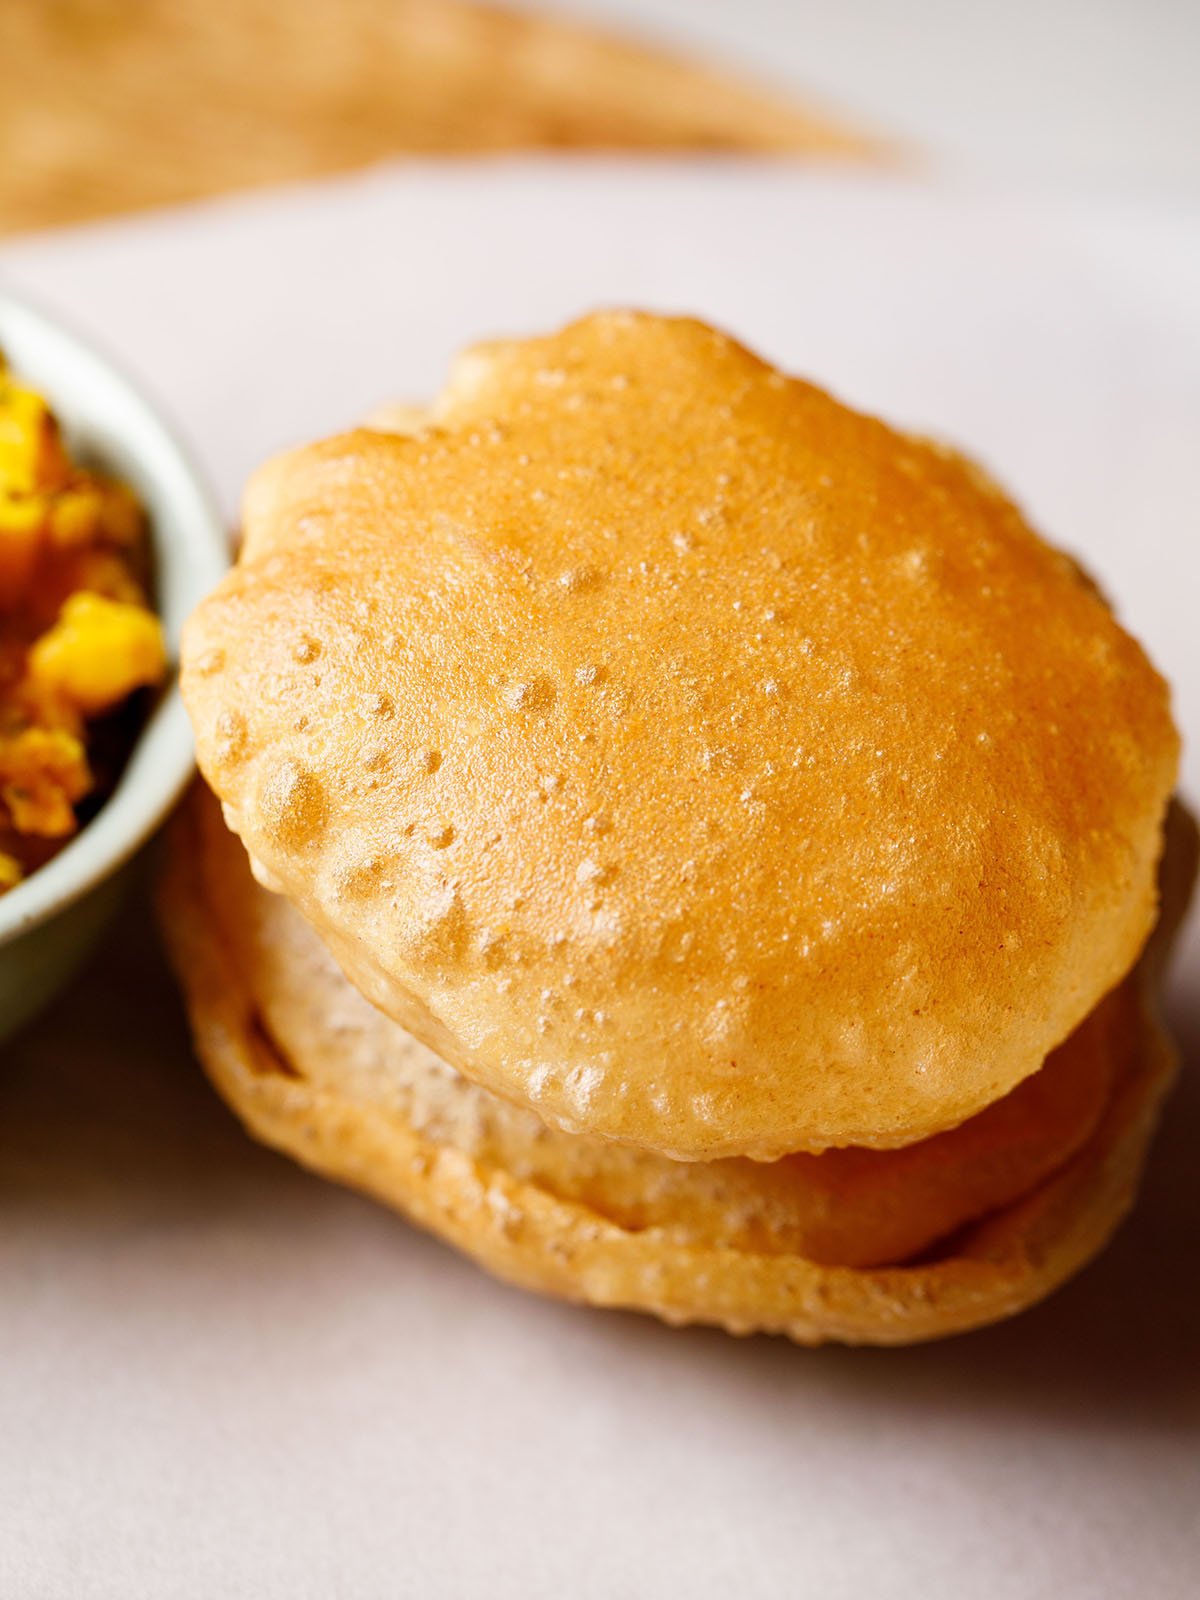
Small balls of dough are rolled and flattened, and quickly fried in hot oil. The poori puffs up to create light, crispy pillows that just beg to be bitten into. Inside is soft and tender, and perfect for using to scoop up a hearty curry.
Make a batch of this poori recipe for a snack now or for your dinner tonight, then have leftovers with breakfast in the morning. There is never a wrong time to enjoy soft and crispy poori!
I am sure with my plenty of troubleshooting tips you will be able to make the best crispy, soft and fluffy poori.
How to Make Poori
Homemade puri only takes about 40 minutes to make from start to finish. Be sure to read the entire poori recipe, including my tips for the best puri below before you get started!
Make The Dough
1. First, mix together 3 cups whole wheat flour (360 grams), 1 teaspoon salt, and 1 teaspoon oil (optional) in a large bowl. For more crispy puri, you can add ¼ cup fine rava (sooji or semolina).
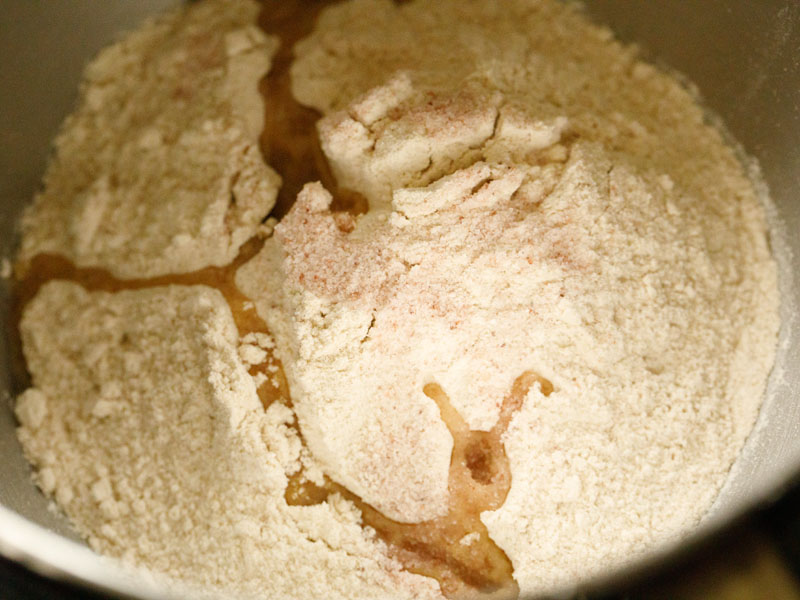
2. Add just a bit of water at a time as you begin to form the dough, making sure to not oversaturate the mixture.
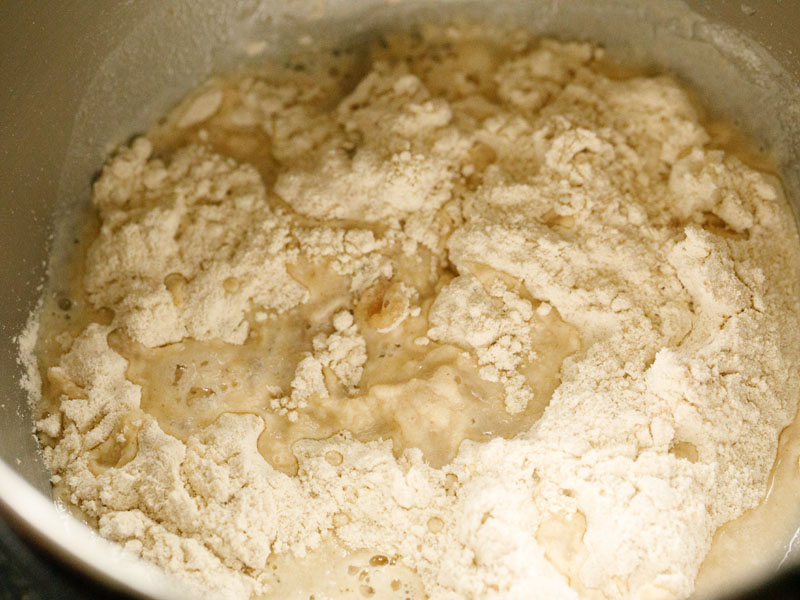
3. Knead the dough with a wooden spoon or your hands, or use a standing mixer. Again, add only a splash or two of water at a time as you work.
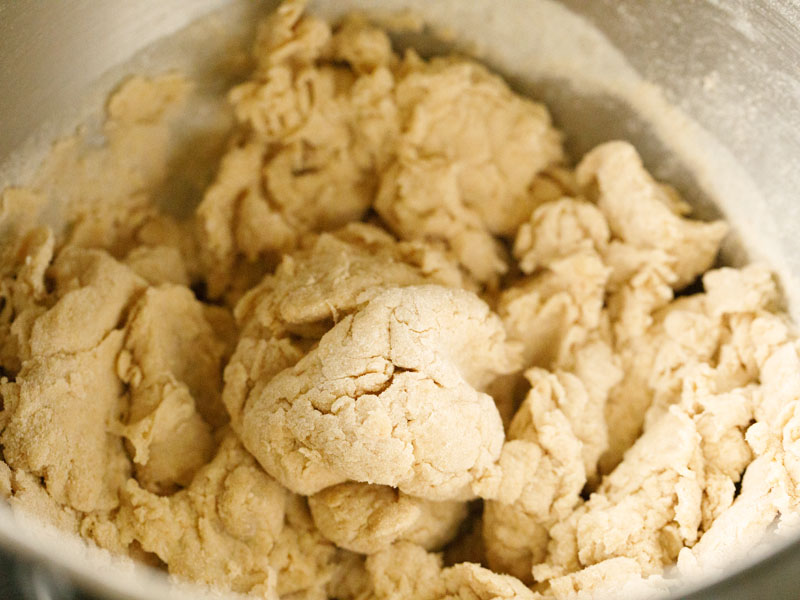
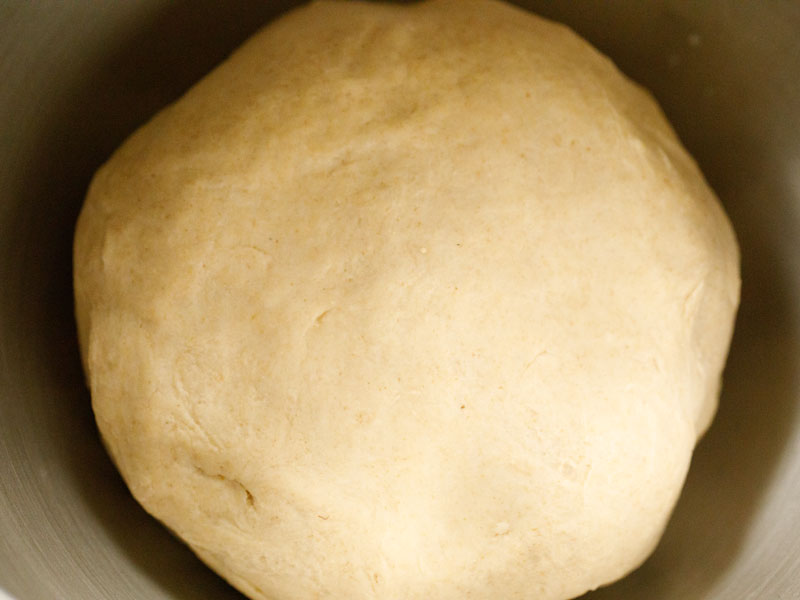
4. Continue to knead until you form a stiff, tight dough. It should not be soft like a roti or a bread loaf. You can add about ¾ to 1 cup of water in total.
Cover the bowl with a kitchen towel or plastic wrap, and let the dough rest for 20 to 30 minutes at room temperature.
Form Poori
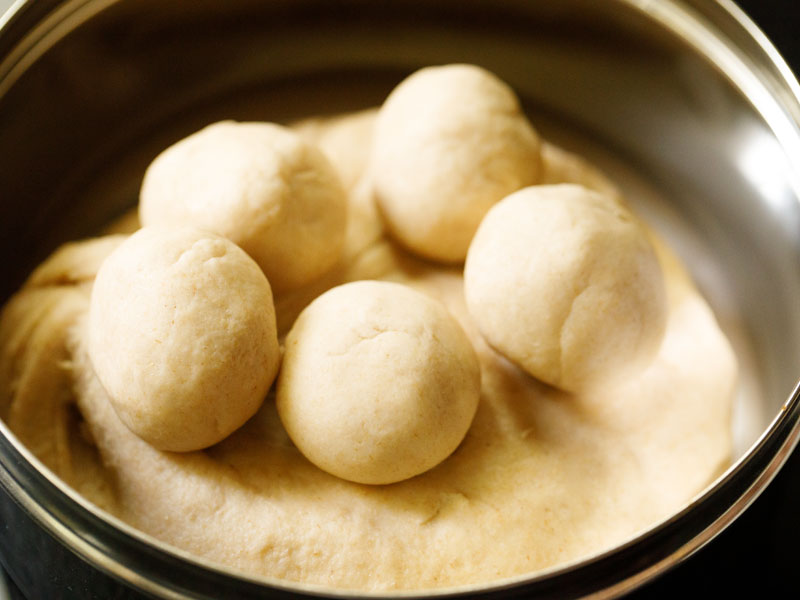
5. When ready to use, divide the dough into about 30 small or 25 medium pieces, and roll each into a tight ball.
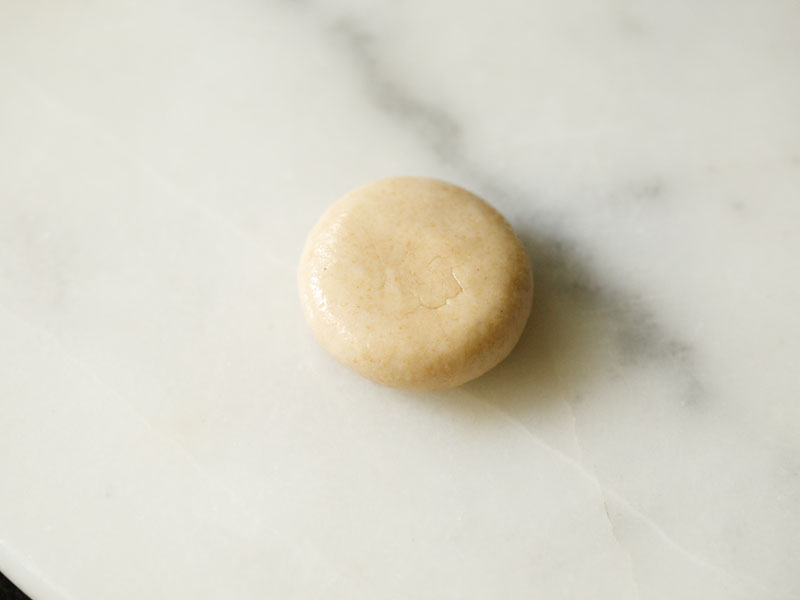
6. Next, use the palm of your hand to lightly flatten the dough ball, and then apply a bit of oil to the entire surface.
This helps the bread fry evenly and rise properly, without the need to dust with flour first (which runs the risk of creating burnt flour particles in your oil).
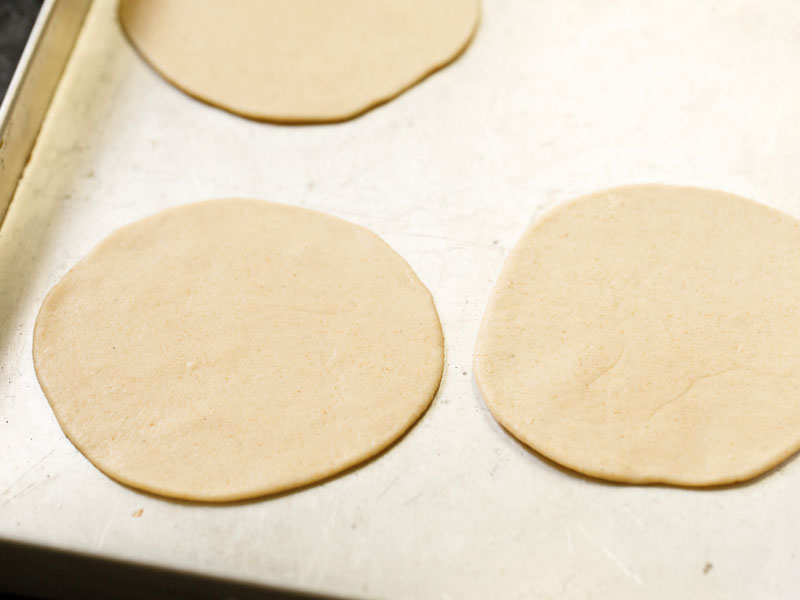
7. Use a rolling pin to roll the poori dough evenly into circles that aren’t too thick or too thin. Ideally, you want them to be about ¼ inch thick.
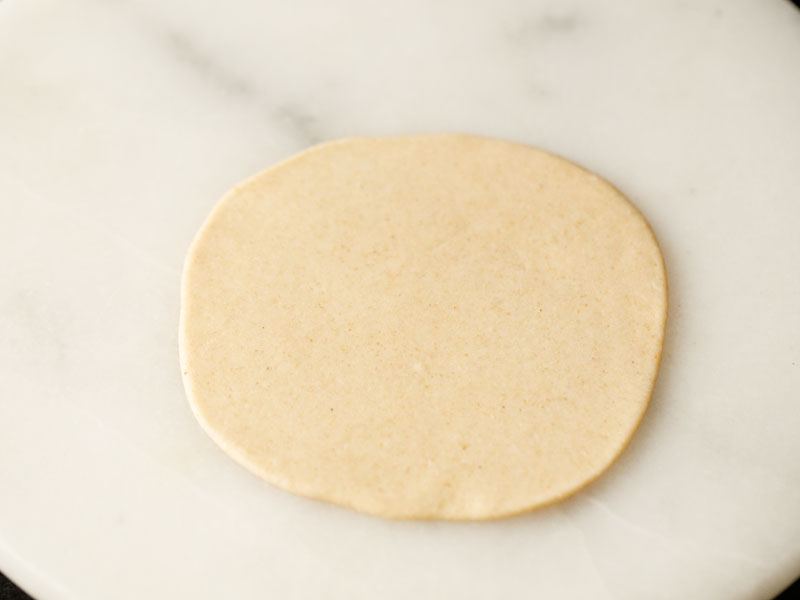
8. Then place the rolled poori on a plate, and loosely cover with a clean kitchen towel so that they don’t dry out.
Deep Fry
While it is easy to fry puri at home, it does take a gentle touch. Because they need to puff up you should be extra careful not to crack them, otherwise oil will seep into the dough as it cooks and get soggy.
Follow these simple steps for making sure you fry perfect puri every time:
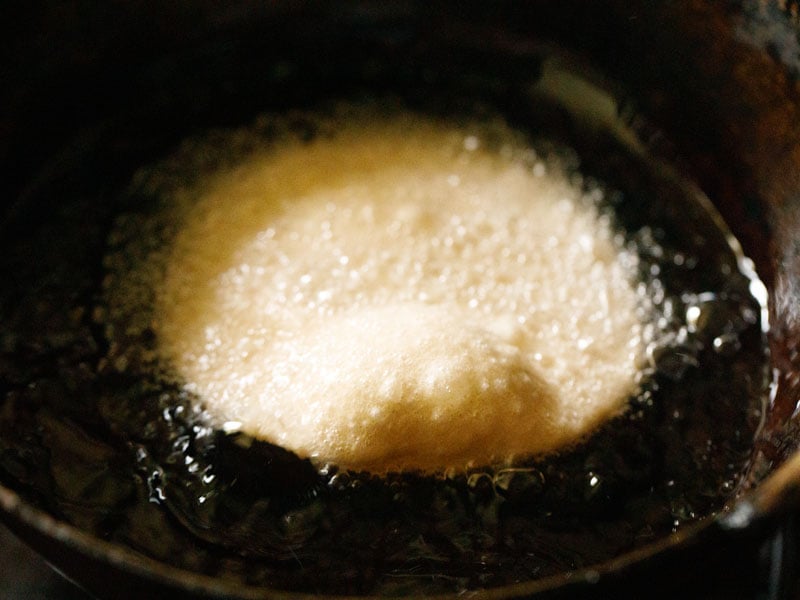
9. First, heat oil in a deep pan (kadai). Test the oil by dropping a small dough ball into oil. If it rises quickly to the top, then the oil is hot enough for frying.
Once you have the oil to the right temperature, carefully add one puri at a time.

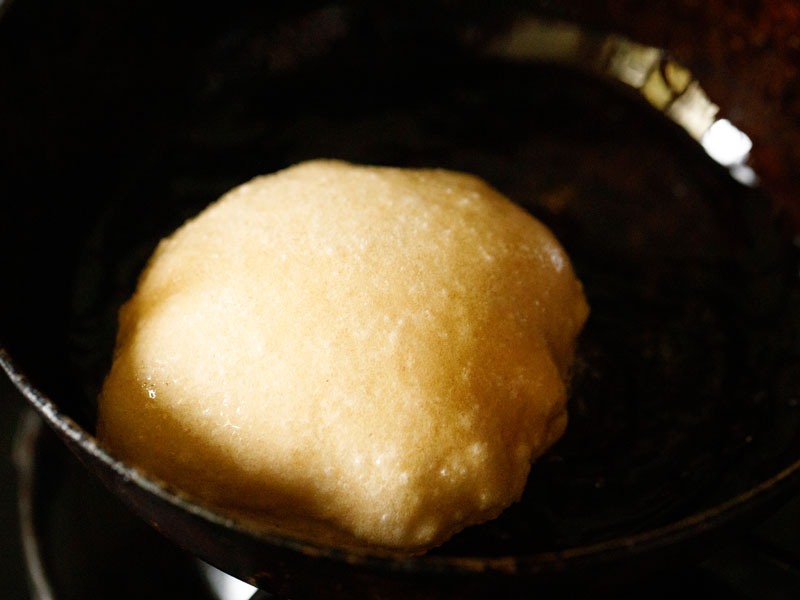
10. It should begin to puff up almost immediately after it hits the hot oil.
11. Give it a nudge with a slotted spoon or spider spoon to keep the puri moving and therefore cooking evenly.
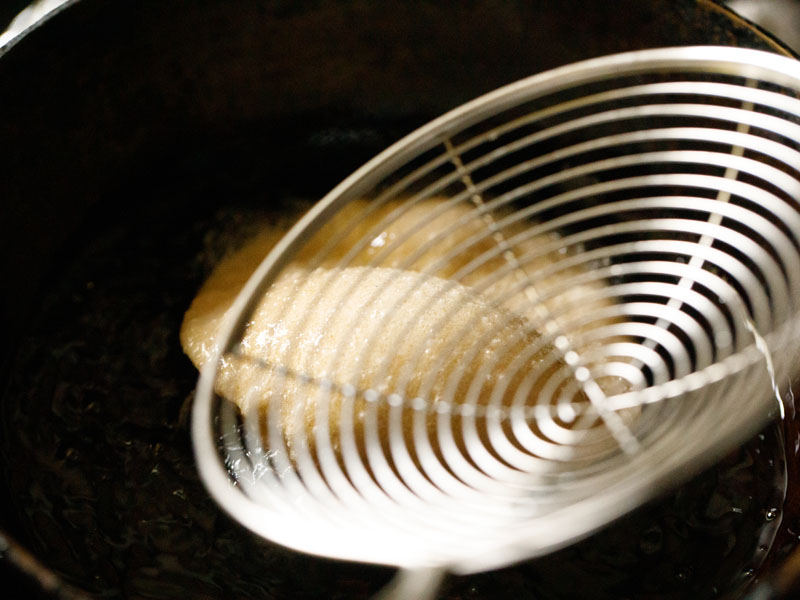
12. Gently press and nudge the puri on the sides with a slotted spoon or spider spoon to help it puff up completely.
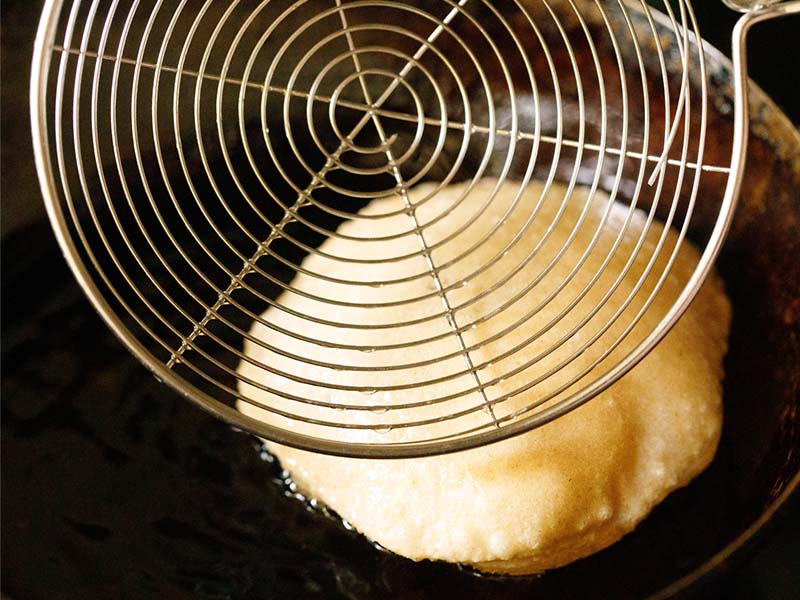
13. Continue to fry for just a minute or two, until the oil stops bubbling and the bottom of the puri is golden to your liking.
14. Next, turn over the poori and gently press down with the slotted spoon as it fries for a few more seconds. This will ensure that there’s a lovely brown color on all sides.
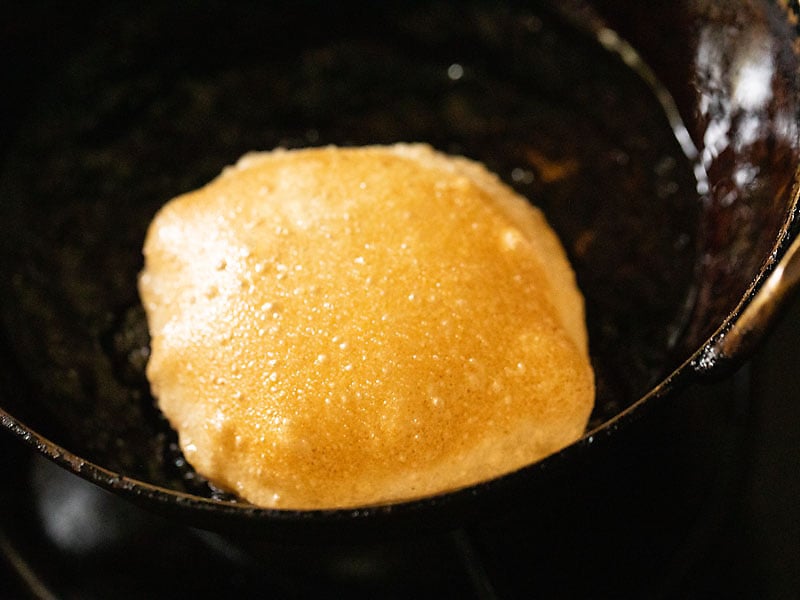
15. Then transfer the fried puri to a plate lined with paper towels to absorb any excess oil.
Fry the remaining poori this way, lowering or increasing the oil temperature as needed to maintain the right level of heat.
Very hot oil will darken the color or there may be uneven color patches on the puri.

Enjoy Homemade Poori
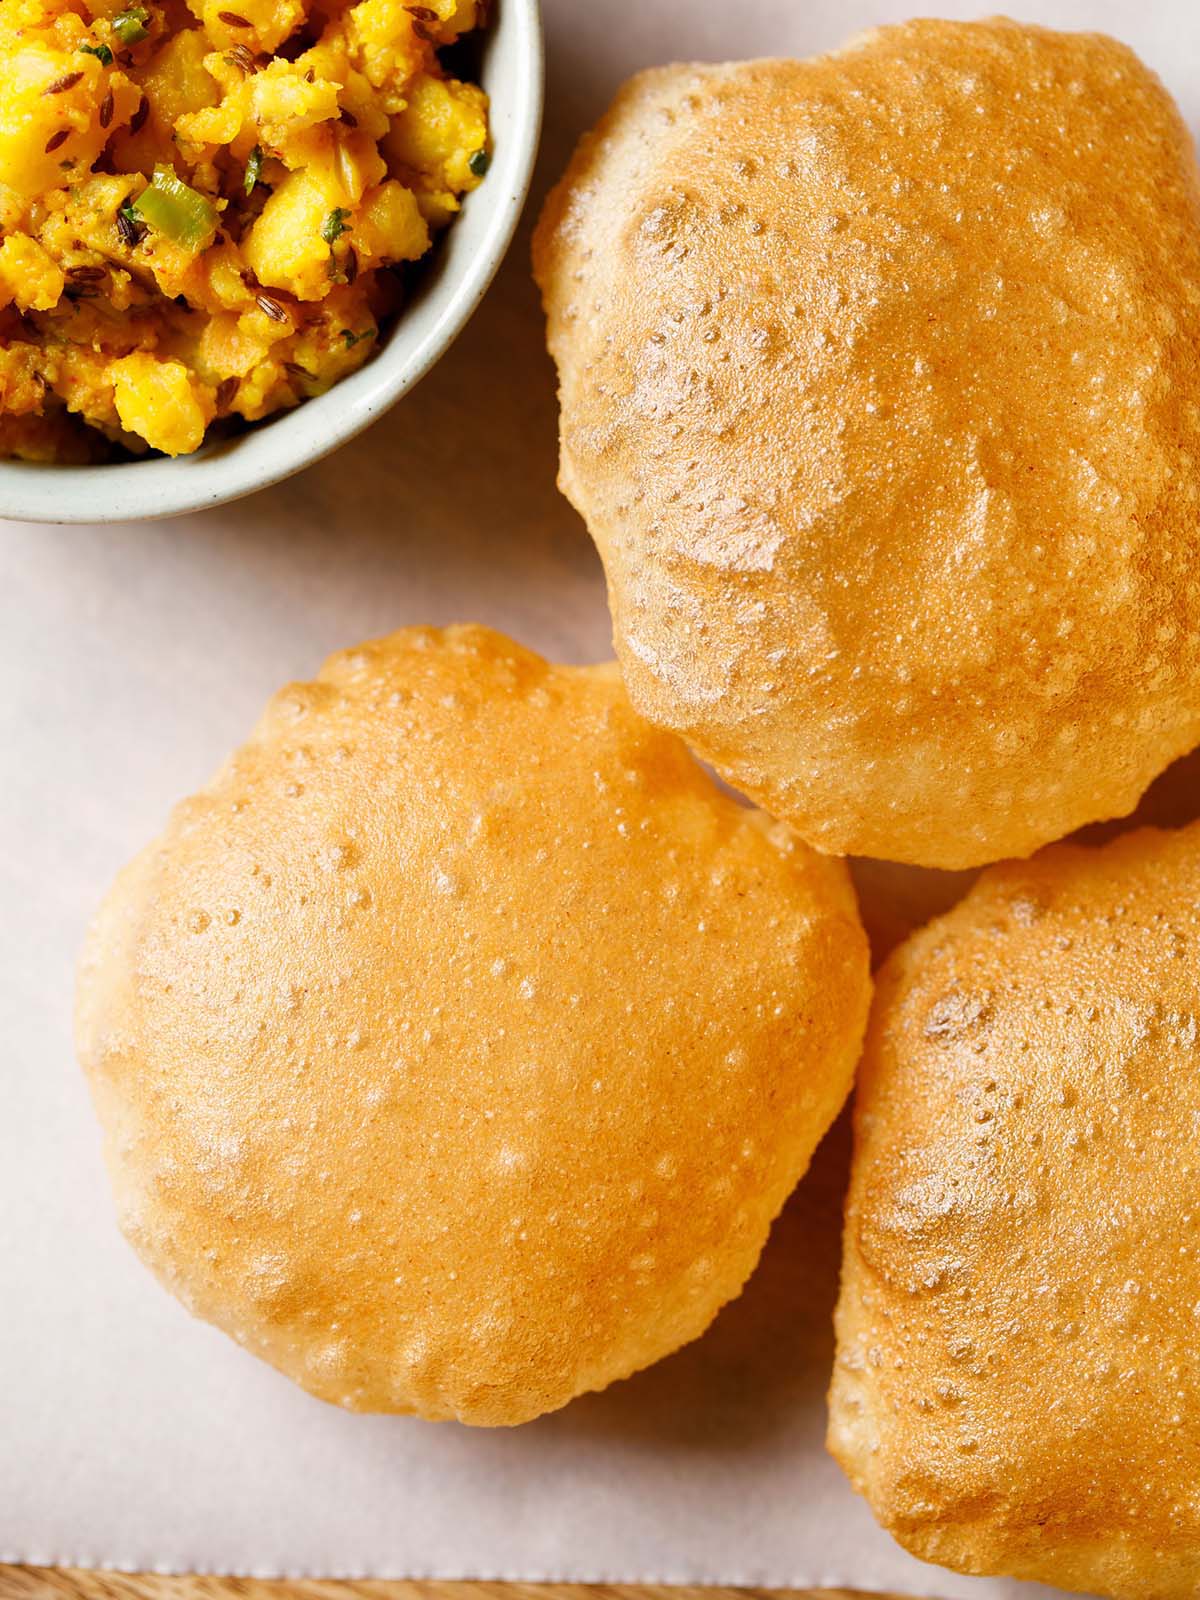
16. Serve poori hot with any number of sweet or savory dishes, as I have mentioned below. Or enjoy by themselves for a tasty snack!
To keep puri soft for a few hours, stack them in a steel container, sealing with a lid at room temperature. They will remain soft and won’t become dense and chewy.
Leftovers can be stored in closed container at room temperature for up to 1 day. Because they will lose their crispy exterior, I suggest to rewarm you either bake for just a few minutes in the oven.
Serving Suggestions
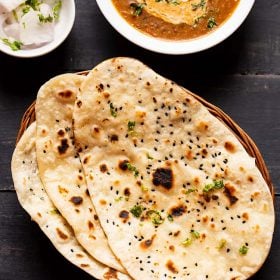
Poori is a common side in Indian cuisine and is typically served with a dry or curried potato dish. Crispy fried poori and this saucy, bright Potato Curry are a perfect combination!
Together they make a wonderfully comforting and delicious meal that happens to be vegetarian and vegan-friendly.
Not only do puri go well with savory dishes, they can be paired with sweet breakfasts and desserts. Sooji Halwa is a breakfast staple that is sweetened with sugar.
A seasonal Indian favorite is Aamras (mango pulp) that tastes so good with puri. A great dessert to enjoy with fried poori is Shrikhand, made with greek yogurt/hung curd and flavored with saffron and cardamom.
They also can be quickly made as a side for a filling lunch along with curry leftovers and/or a simple sautéed veggie dish (sabzi).
Recipes that pair well with Poori
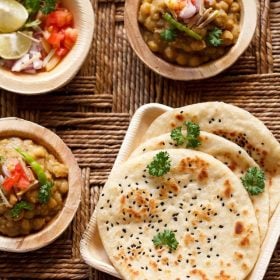
- Chana Masala – The classic North Indian curry made with white chickpeas, onions, tomatoes, and spices.
- Veg Kurma – Also called korma, a saucy mixed vegetable dish with coconut, spices and herbs.
- Kadala Curry – Made with black chickpeas, coconut, and lots of spices.
- Aloo Gobi – A classic side dish featuring spiced cauliflower and potatoes.
- Aloo Chole – This very filling breakfast dish includes potatoes and chickpeas.
- Jeera Aloo – A simple side of boiled and sautéed potatoes with cumin, lemon, and coriander leaves.
- Poori Bhaji – Flavor packed potatoes with onions, spices, herbs and tastes best with poori.
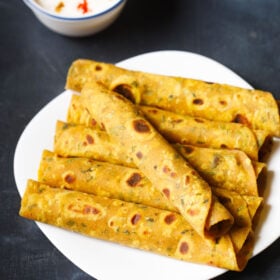
Poori Variations
There are so many fantastic versions of poori breads, here are just a few for you try:
- Masaledar Poori – Spiced puri recipe which is also known as Teekhi Poori.
- Luchi – In the Bengal region, a popular variation of poori recipe with all-purpose flour (maida) is made and usually served with Bengali Dum Aloo.
- Mangalore Buns – Sweet banana poori.
- Palak Puri – With palak puree added to the dough making for a green-colored puri.
- Beetroot Poori – With Beetroot puree added to the dough giving a vibrant crimson red color poori.
- Rice Puri – Soft puri made with rice flour makes for a good gluten-free puri recipe.
- Potato puri recipe – Poori stuffed or mixed with spiced mashed potatoes.
- Sweet poori recipe – Made with sugar or jaggery are also known as Meethi puri.
- Vegetable Poori – Variant of poori made with grated vegetables or pureed vegetables.
Ways to test oil for frying
For deep frying, the temperature of the oil should be 180 degrees to 190 degrees Celsius (360 degrees to 375 degrees Fahrenheit) and you can easily measure it with a deep fry or candy thermometer.
If you do not have a thermometer, you can check the temperature using these following three methods:
- Firstly, place a small piece of dough in the hot oil. If it rises to the top gradually and begins to bubble at the surface, the oil is ready. If it rises slowly or is still at the bottom, then the oil is cold and if it rises too fast or briskly, then the oil is very hot.
- Secondly, you can drop a small cube of bread in the oil. If it becomes golden brown in a time-frame of about 60 seconds, the temperature is right. If it remains pale, the oil would need more time to heat up. If the bread becomes very dark or burnt, the oil is too hot and needs to be cooled a bit.
- Thirdly, drop a kernel of popcorn in the hot oil. The popcorn will pop at about 180 degrees Celsius (360 degrees Fahrenheit). Once the kernel pops that would be the suitable temperature to begin frying.
Expert Tips
- Dough texture: Make sure your dough is nice and tight because a soft dough will not hold its shape as well when frying. Add a sprinkle of flour to the dough while kneading if you notice it feeling too squishy and loose.
- Rolling: Along with adding a bit of oil to the flattened dough ball, you can lightly grease the rolling pin with oil to help keep it from sticking to the dough. Again, you don’t want to dust with flour because these particles will burn in the hot oil.
- Frying: It is very important that the oil is exactly at the right temperature. If the oil is too hot the poori will burn. However, if the oil is cold they will become soggy during the cooking process.
Frying oil should be between 360-375 degrees Fahrenheit, or 180-190 degrees Celsius. The poori should puff while frying. If not, then something has gone wrong. Either the dough has not been kneaded well, the poori has not been rolled out evenly, or the oil is not hot enough. - Digestion: Fried food have you feeling a bit heavy? Add ajwain seeds (carom seeds) to the flour before kneading! Carom seeds (ajwain) are very helpful in digestion, and add a lovely light flavor to the puri.
- Crispy texture: For a crispier poori, you can add ¼ cup fine suji (rava or semolina flour) to the dough.
FAQs
Puri becomes hard when it does not puff up in the hot oil while frying. Poori does not puff when the discs are not rolled evenly. Thus they remain flat and harden when frying.
Frying at a low temperature of the oil will make poori absorb more oil and it becomes soggy. If the poori cracks when frying, the oil will seep into it making it oily.
It is best to use oil having a high smoke point. I would suggest using peanut oil, sunflower oil, vegetable oil, avocado oil, or grape seed oil.
Puri is a deep-fried food. Thus best indulged occasionally and not every day, depending upon your health and body constitution. It is best to use fresh oil for frying. Never use reused oil as it is extremely unhealthy.
Using a deep fryer is not suitable for frying poori. The Indian kadai (similar to a wok) with its open and broad surface is the best utensil to fry poori. The open surface of the kadai helps the poori to rise, expand, and puff up easily in hot oil.
Firstly you have to knead the dough very well. Then roll the dough balls evenly to the same thickness of about ¼ inch all over. Do not make the discs too thin or thick. The oil has to be hot enough when frying. You can fry at medium to medium-high heat.
While rolling, the poori has to be rolled to an even thickness of about ¼ inch in a neat round shape. When frying the oil has to be medium hot that when you place the poori in the hot oil, it will come on the surface and then start puffing up. Gently nudging with a spider spoon or a slotted spoon helps poori to puff up well.
Even though both the roti and puri dough are made with the same ingredients – flour, water, salt. The difference is in the texture and consistency of the dough. A roti or chapati dough is soft and a poori dough is firm and tight.
More Indian Breads To Try!
Indian Breads
Indian Breads
Please be sure to rate the recipe in the recipe card or leave a comment below if you have made it. For more vegetarian inspirations, Sign Up for my emails or follow me on Instagram, Youtube, Facebook, Pinterest or Twitter.

Poori Recipe | Crispy, Fluffy, Soft Puri
Ingredients
- 3 cups whole wheat flour – 360 grams
- 1 teaspoon oil or melted ghee (optional)
- 1 teaspoon salt or add as required
- ¾ to 1 cup water or add as required
- oil for deep frying – as required
Instructions
Making dough
- In a mixing bowl or on your work-surface, take the whole wheat flour, salt and oil or melted ghee.
- Add little water at a time and knead well to form a dough. The dough should not be soft but stiff and tight. You can also make a semi-soft dough.
Assembling and rolling
- Divide the dough into small or medium pieces – about 25 to 30
- Make into medium sized or slightly small balls.
- Spread a bit of oil on both sides of the dough ball. Spreading oil and not dusting with flour helps the oil to stay clean and you won’t see dark burnt flour particles inside the oil.
- Roll the dough evenly into circles of about ¼ inch – neither too thin nor thick.
- Place the rolled poori in a plate and cover with a clean kitchen towel, so that they don’t dry up.
Frying
- Heat oil in a deep frying pan or kadai.
- When the oil is sufficiently hot then add one poori at a time and fry gently pressing down with the frying spoon or slotted spoon in a circular motion.
- Turn over when puffed up and fry till golden brown.
- Serve poori hot with a vegetable curry like korma or sweet dishes like suji ka halwa or aamras or potato curry.
Notes
- Poori Dough: Make sure the puri dough is tight and firm as a soft dough will not hold its shape when frying. Add a sprinkle of flour to the dough while kneading if you notice it feeling too loose.
- Rolling: Along with adding a bit of oil to the flattened dough ball, you can lightly grease the rolling pin with oil to help keep it from sticking to the dough. Again, do not dust with flour because these particles will burn in the hot oil.
- Frying: It is very important that the oil is exactly at the right temperature. If the oil is too hot the puri will burn. However, if the oil is cold they will become soggy. Frying oil should be between 360 to 375 degrees Fahrenheit or 180 to 190 degrees Celsius. The poori should puff while frying. If not, then either the dough has not been kneaded well, the poori has not been rolled out evenly, or the oil is not hot enough.
- Digestion: Add ajwain seeds (carom seeds) to the dough as they are very helpful in digestion, and add a lovely light aroma to the puri.
- Crispy puri: For a crispier texture, add ¼ cup fine suji (rava or semolina flour) to the dough.
Nutrition Info (Approximate Values)
This Poori recipe from the archives first published in April 2014 and has been updated and republished on December 2020.

Superb easy recipes
thank you.
Hi
I tried this and my poories were a little hard and they didn’t puff completely. I tried for the first time using a deep fryer and heated pool to 375 F and pressed the dough using roti presser (or tortilla press).
What went wrong? I kneaded the dough really well. Please advice. I wanted poori to be in my son’s birthday party menu and I am planning to prepare. So I have been trying to get the perfect poori.
i don’t think using a deep fryer is a good idea for frying poori. a kadai with its open surface is best to fry poori as the poori has a lot of surface to expand, rise and move in the hot oil. so you can try frying poori in a kadai. make sure the oil is hot enough. the first poori may not turn out well, but the second one and thereafter the remaining ones will be good. gently keep on nudging them and pressing lightly for even frying and also so that they puff well. using a presser is fine. hope this helps.
Hai dassana
Am so happy that my poori and aloo Mattar was a huge hit.. I followed your recipe and my hubby loved it very much.. Poori really puffs up when the flour is rightly kneeded.. I would have posted the pic of my food.. But here I didn’t see any option for that.. Thank you so much..