Homemade Pita Bread Recipe
Pita Bread is a soft, leavened flatbread popular in Middle Eastern and Mediterranean cuisines. Traditionally made with flour, yeast, water and salt, this bread is known for its characteristic pocket that forms while baking. It can be cooked either on a skillet or baked in the oven, making it simple and versatile to prepare at home. This homemade whole wheat Pita Bread recipe yields soft, well-puffed flatbreads that are perfect for making wraps or serving with dips, curries and lentil dishes.
About Pita Bread Recipe
Pita Bread is a popular Middle Eastern/Mediterranean leavened flatbread made with simple basic ingredients – flour, salt, water and yeast. It puffs up when baked creating an air pocket in the middle.
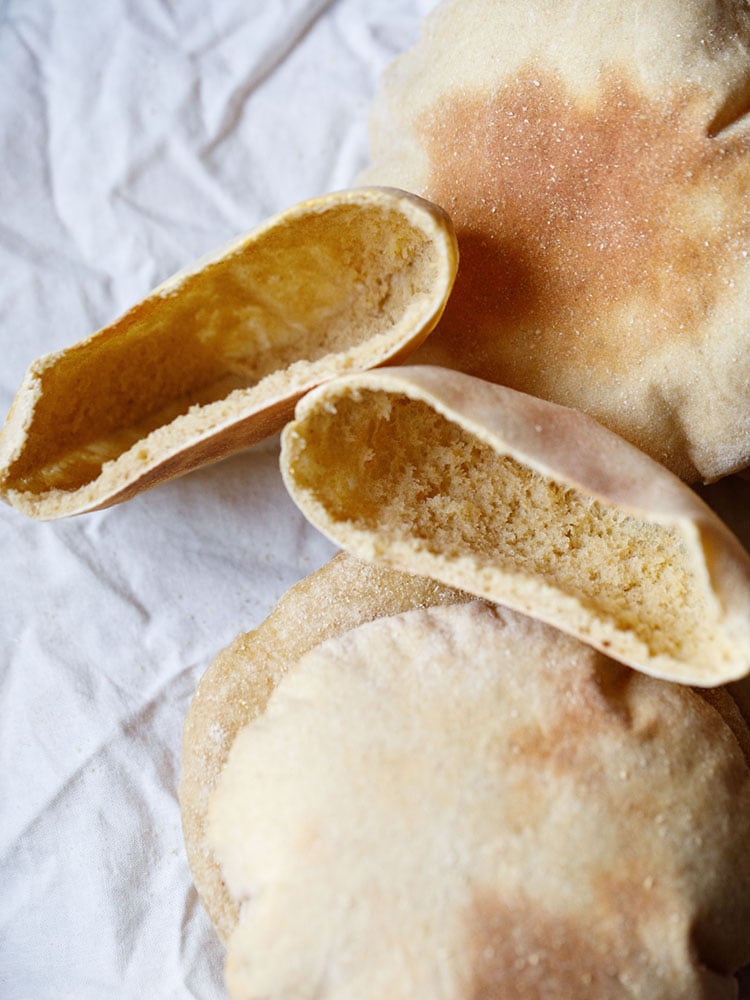
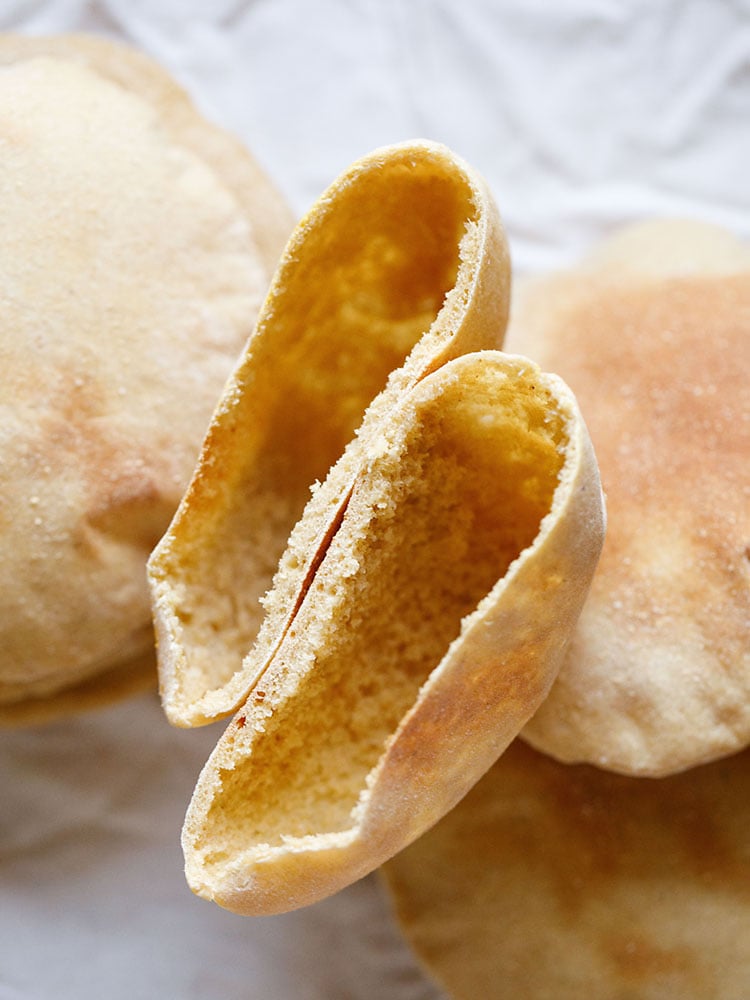
As it cools, it deflates and flattens, but the pocket remains. Then, when you cut it into halves, each half has its own pocket. This flatbread looks simple, but is unique in its formation.
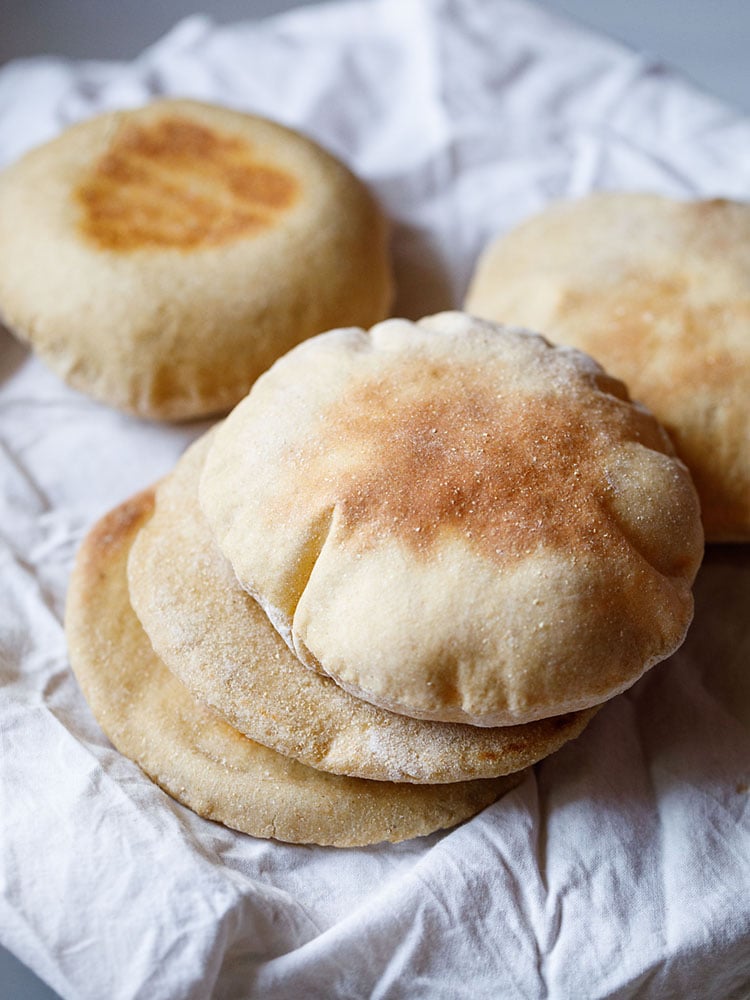
Table of Contents
A classic and traditional pita bread is made with all-purpose flour. However, I make mine with whole wheat flour.
Even though this Pita Bread recipe is made with whole wheat flour (atta), it yields a lovely soft and light texture. It also has the trademark pita pocket perfect for stuffing or serving with Tahini, Hummus, Falafel, Tzatziki, Tabbouleh, Muhammara or anything else you’d like.
Pita Bread is one of the easiest breads to make. It is versatile and the uses are so much more than a pocket to put yummy things in. You can toast it to make pita chips or even use it flat to make a quick and easy pita pizza.
All you require for this Pita Bread Recipe is a handful of ingredients like whole wheat flour, extra virgin olive oil, salt, sugar, yeast (instant or dry active) and water.
Then, follow the recipe to make the dough, keep it to leaven, shape the breads out of it and cook in the oven or stovetop.
I used my stovetop to make the Pita Bread for the first time at home decades back. It was thrilling to watch the bread puffing up.
Then later, I started making these flatbreads in the oven and found that this caused it to puff up even further.
As compared to making the bread on a pan or skillet, baking in the oven is better. It prevents the bread from browning too much. However, I like a slight more browning because I prefer my bread well baked.
This Pita Bread Recipe is adapted from one of my favorite bread cookbooks “The Bread Bible: 300 Favorite Recipes” by Beth Hensperger. I can tell you from a lot of experience that this is a really good recipe for making Pita Bread.
How to make Pita Bread (Step-By-Step)
Make Dough
1. Firstly, take 1 teaspoon instant yeast and 1 pinch sugar in a stand mixer bowl or in any bowl in which you will knead the dough.

2. Pour 1 to 1.25 cups water and mix very well with a spoon. Depending on the quality of flour, you may add 1 to 1.25 cups water.
Slightly coarse and grainy wheat flour will need 1.25 cups water.

3. Add 3 cups whole wheat flour, 2 tablespoons extra virgin olive oil and 1 teaspoon salt.
Note: I have used sea salt in this recipe, but you can use any kind of salt. Since saltiness varies by brand and grain size, start with ½ teaspoon and adjust to your taste, especially if your fillings are already salty.
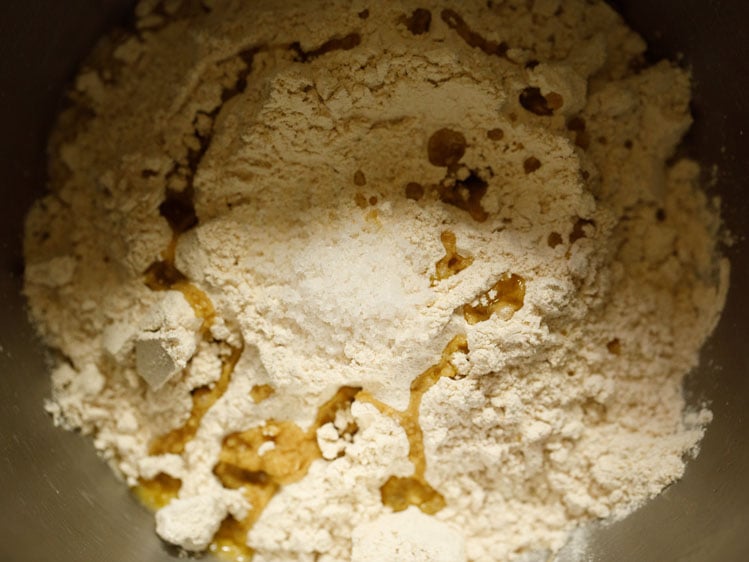
4. Mix everything with wooden spoon.
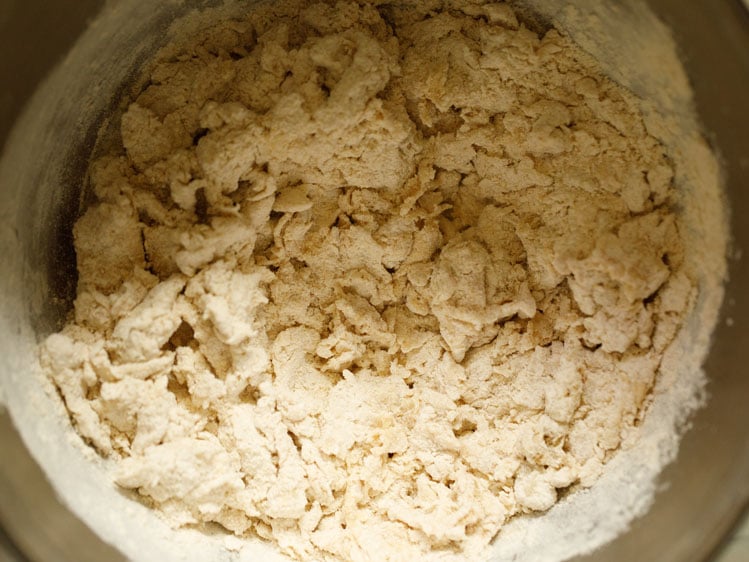
5. Then, using the hook attachment, begin to knead.
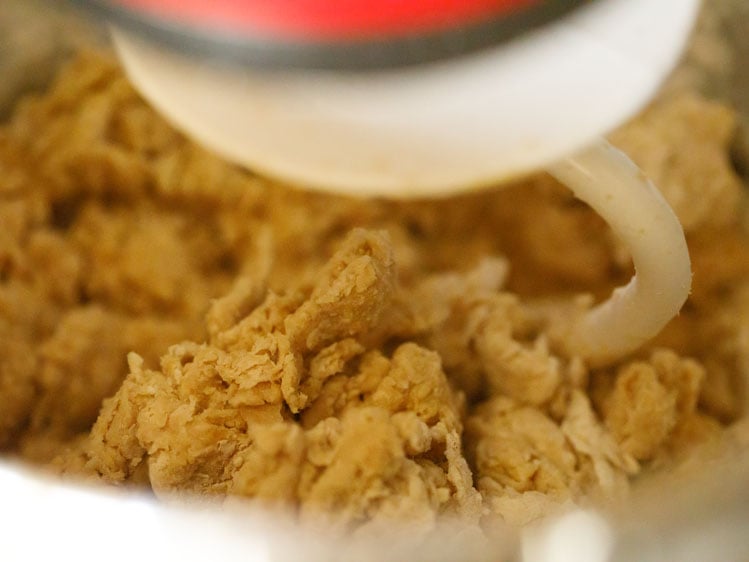
6. Initially, you will find the dough sticky. Continue to knead and you will see the flour absorbing the extra water.
The stickiness will also go away like this. If the dough looks very sticky even after kneading well, then add 3 to 4 tablespoons whole wheat flour.
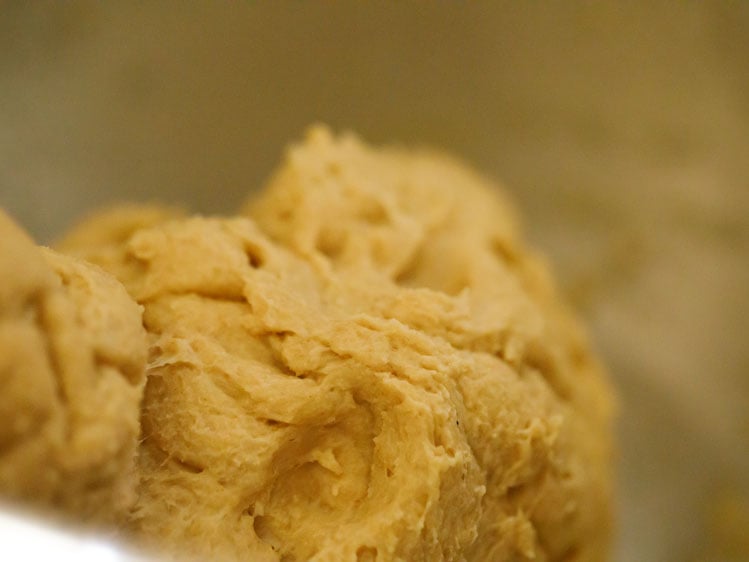
7. Knead to a smooth, supple and soft dough.
8. Rub or brush some water or olive oil all over the dough.

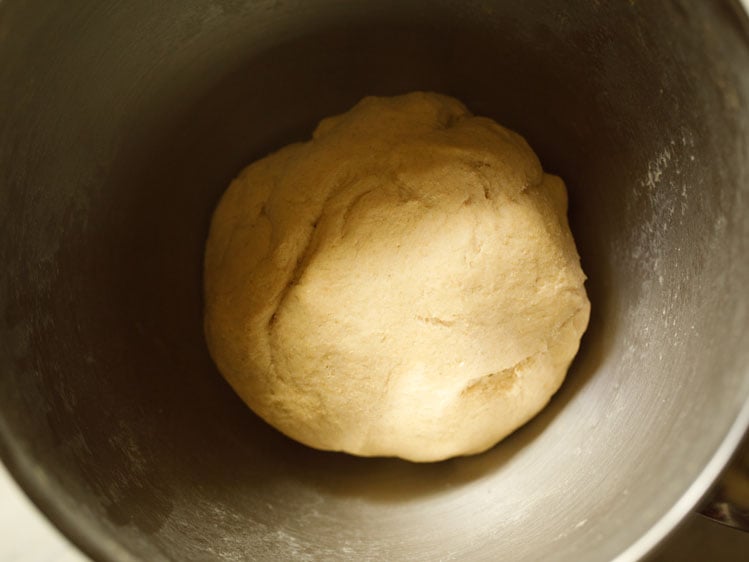
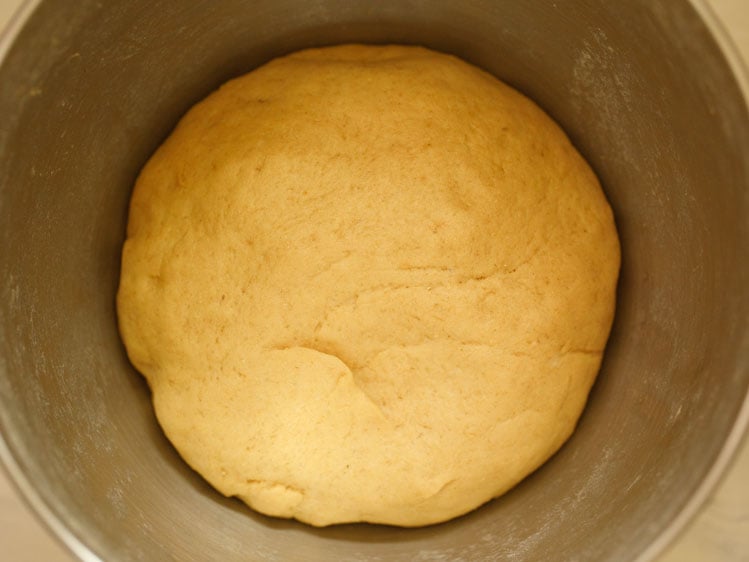
9. Keep it in the same bowl covered loosely with a kitchen towel for 45 minutes or 1 hour or until the dough has doubled in volume and size.
10. This is the photo of the dough after 1 hour.
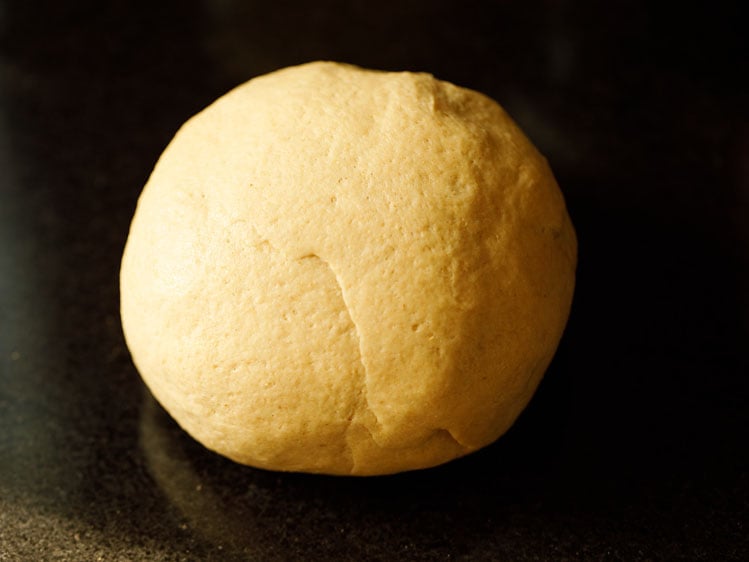
11. Deflate the dough gently and knead lightly.
Assemble, Shape & Roll Dough
12. Make into a log shape and cut equal portions from the dough. Keep these covered again for 10 minutes. Keep the dough balls covered all the time so that they don’t dry out.

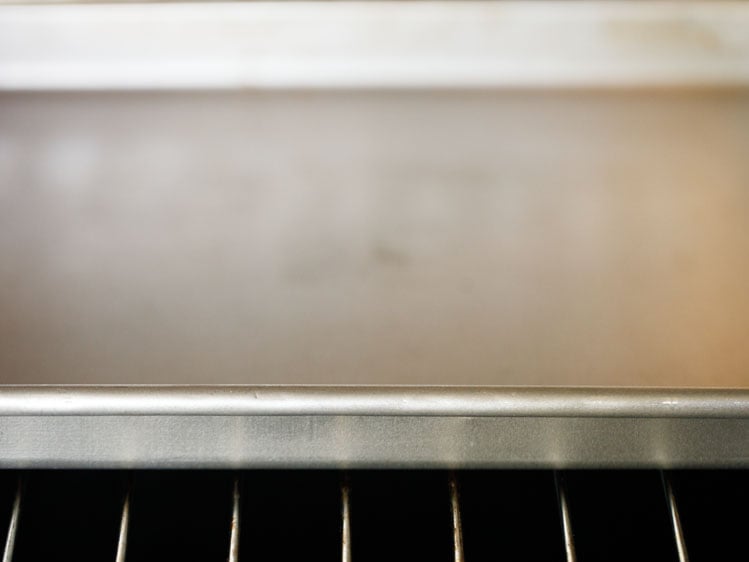
13. Meanwhile, place a baking tray in the oven. Then, preheat oven at 230 degrees C (446 degrees F) for 20 minutes.
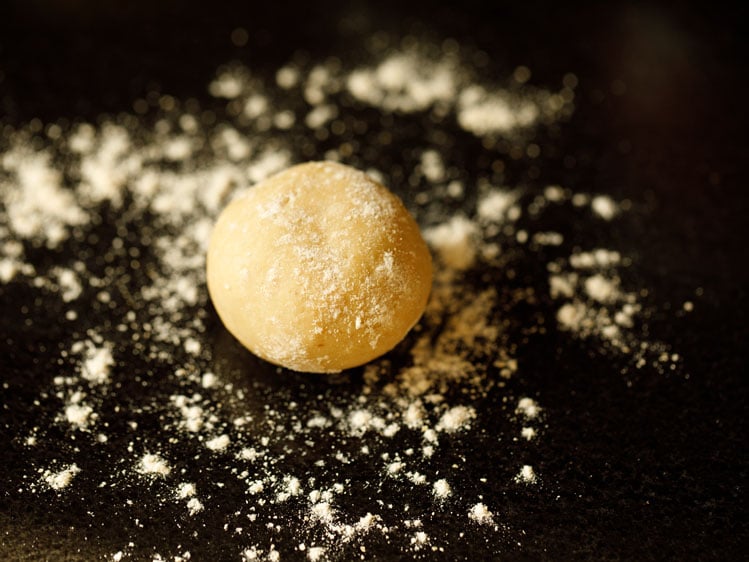
14. Take each dough portion and shape into a ball. Keep it on the work surface and sprinkle some flour on it as well as on the dough ball.
15. Roll evenly into a 5 or 6 inches round shape. You can also make them oval shaped, if you want. For puffing, it is very important to roll evenly.
So, dust with slightly more flour. When you roll the dough with the rolling pin, the bread disc should also move clockwise while rolling.
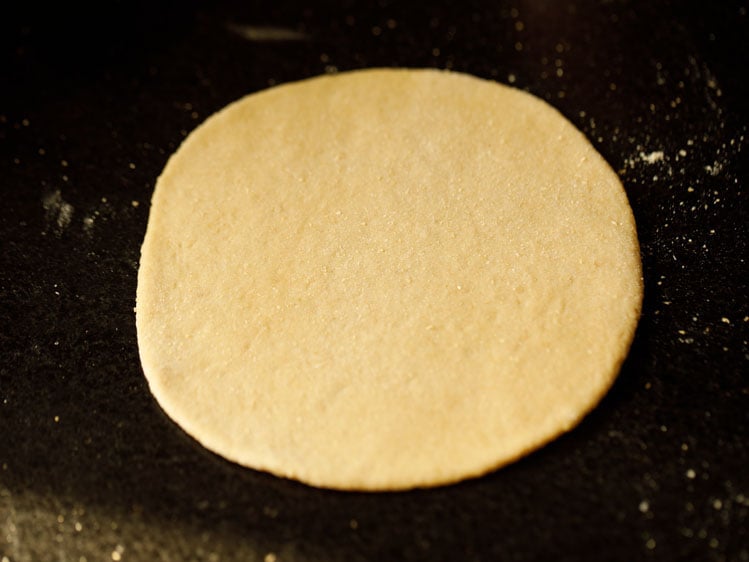
16. Keep the bread a little thick while rolling.
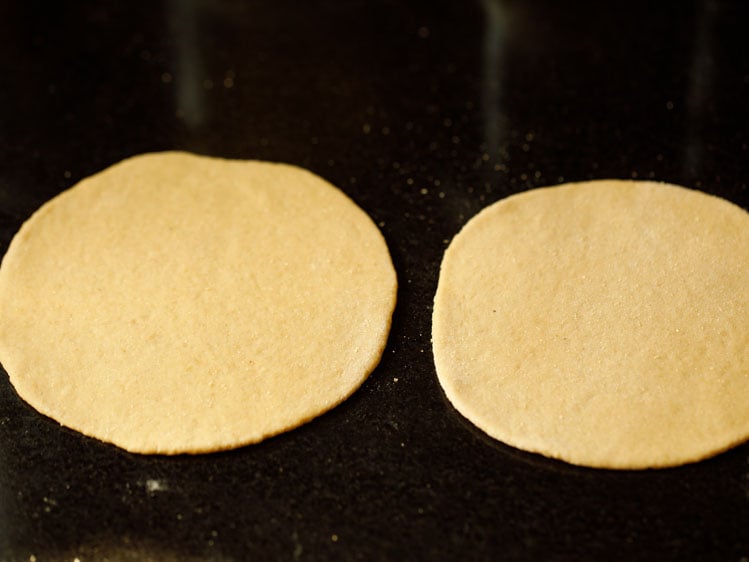
17. Keep these rolled discs covered loosely for 10 minutes.
Bake Pita Bread in oven
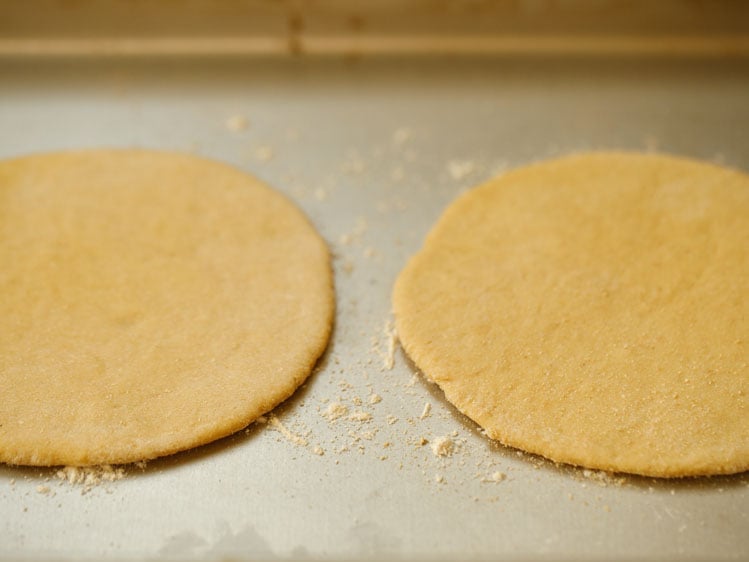
18. Carefully remove the baking tray from the oven with mittens. Sprinkle some flour and place the rolled discs in the tray.
Use oven mittens when removing and placing the baking tray from the oven.
19. Place the tray back in the oven. Bake at 230 degrees C for 7 to 10 minutes. Mine took 7 minutes to cook and 1 minute to brown. Heat both the top and bottom heating rods of the oven.
If using a convection oven, then preheat as well as bake at 200 or 210 degrees C (392 to 410 degrees F).
Note that the baking time will vary from oven to oven.

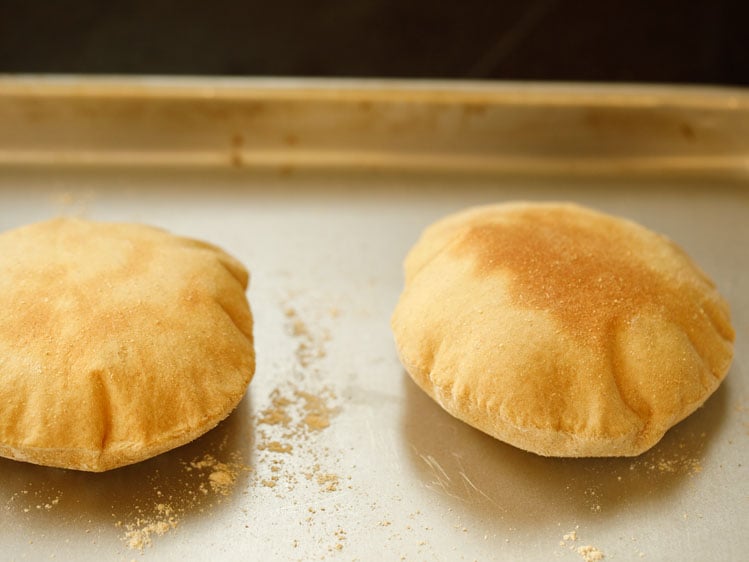
20. The Pita Bread will nicely puff up in the oven. Once they are puffed up and have a pale golden color, remove the tray.
With a spatula remove, them and place on a wired rack.
Cook on a skillet (Stovetop Method)
21. Heat a cast iron skillet or a frying pan on medium-high flame. Sprinkle some flour on the pan and it should get browned. This means that the pan is hot.
Before you place the rolled dough on the pan, brush off the browned flour or using a cotton kitchen napkin remove the browned flour from the pan.
Use a heavy pan so that the Pita Bread does not get burnt from the bottom. Place the rolled dough on the pan or skillet.
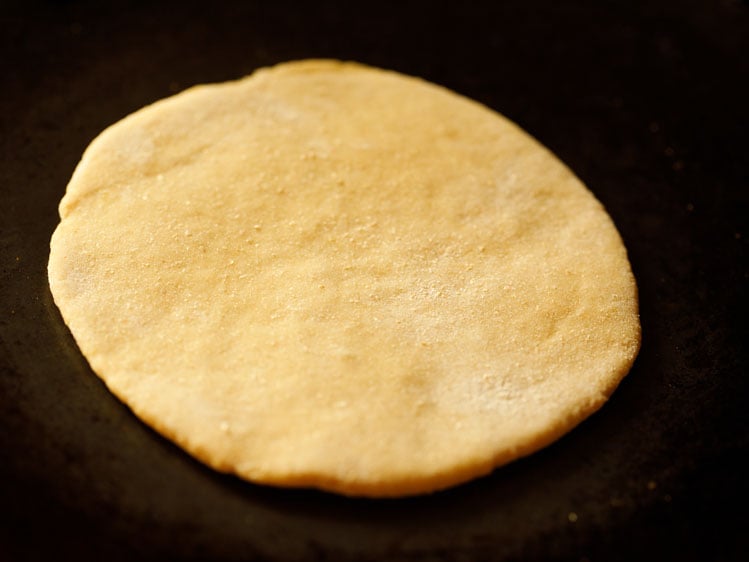
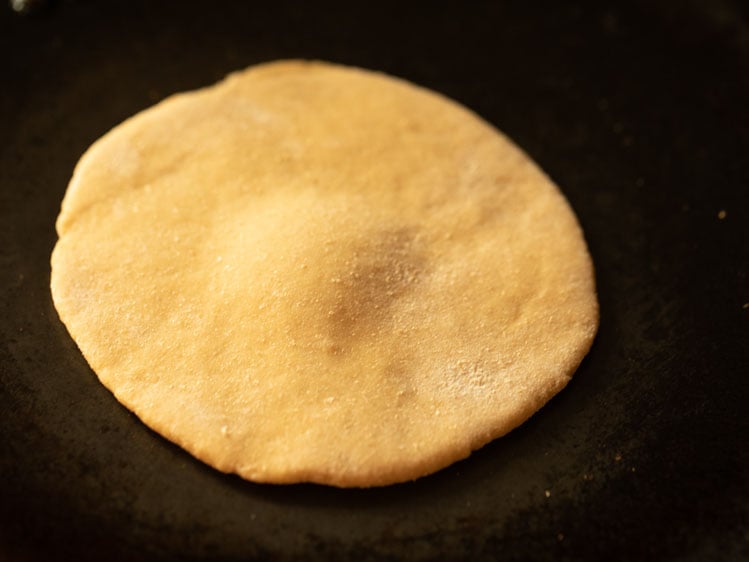
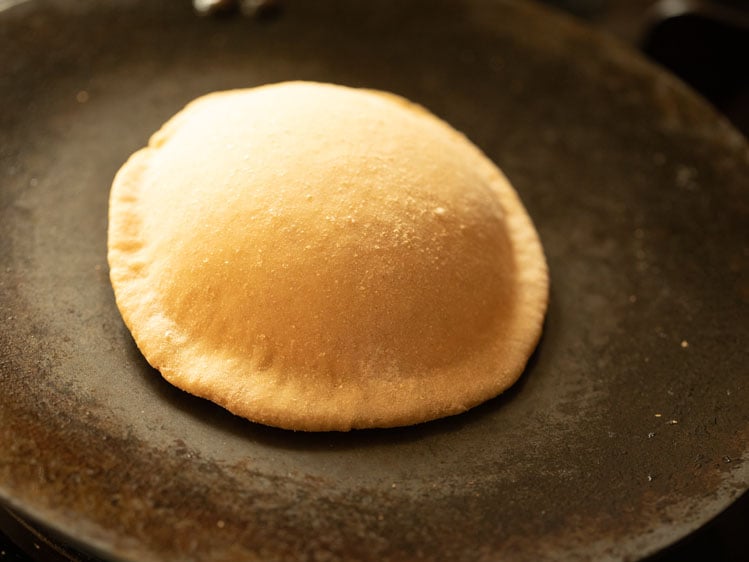
22. As soon as you keep the rolled dough on the pan you will see it getting puffed up.
23. Cover with lid for 1 to 2 minutes.
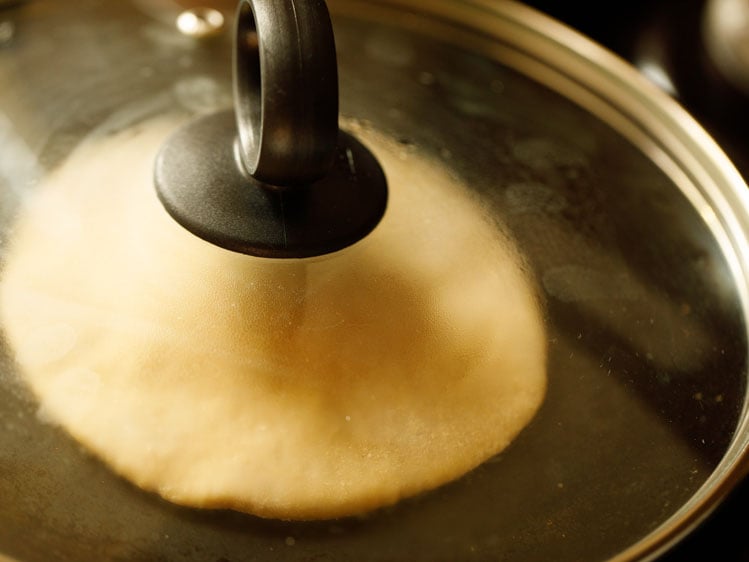
24. Here is the Pita Bread nicely puffed up.
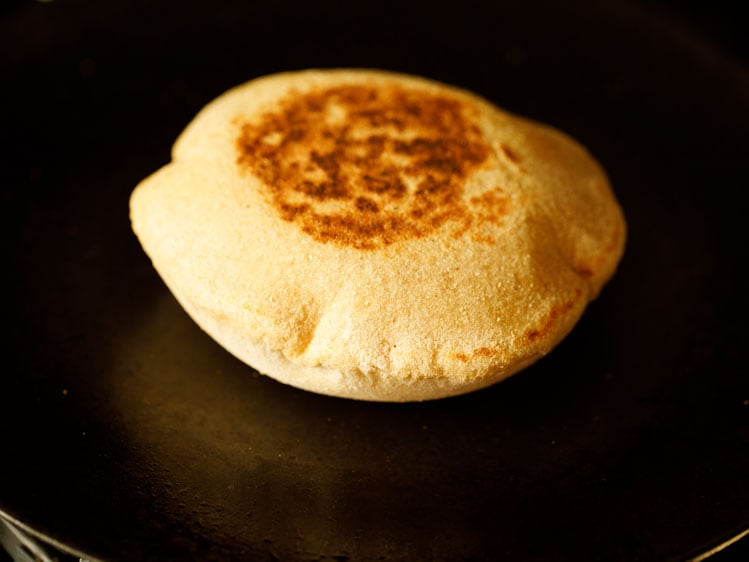
25. Turn over and cook for 1 to 2 minutes more or until the Pita Bread is cooked well and has brown spots appearing on both sides. Roast all the breads this way.
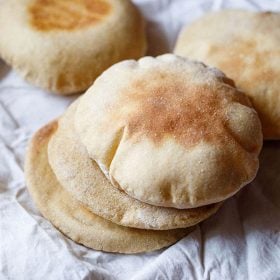
26. Stack and store them in a kitchen towel or bread box. Slice the Pita Bread into 2 and you will see the pockets.
Stuff the pockets with a filling of your choice and your Pita sandwich is ready. You can make Pita sandwiches with falafel, hummus, tahini and pickles or salad.

Serving Suggestions
Once you have made your homemade Pita Bread Recipe, you can get creative and come up with different sandwich combinations and fillings.
Falafel is a traditional filling. However, you can really stuff it with anything you like. Any type of mixed salad and dressing works well as the bread allows the taste of the salad to come through while also turning it into a filling meal.
For a more authentic Indian or Middle Eastern experience, fill your Pita Bread with some spiced sautéed vegetables or mushrooms, potatoes or Chole Masala.
Add some onion rings, tomato slices, Mint Chutney and tamarind chutney. Or make some Vegetable Kababs or pan-fried Vegetable Cutlet and add some classic Indian chutneys.
If you enjoy clean and fresh flavors, this Mediterranean-style Chickpea Salad makes a delicious and wholesome filling for your pita pockets.
For a flavorful fusion twist, try a Paneer Shawarma wrap, tucked inside warm pita and topped with crunchy vegetable salad and tangy pickles.
You can also toast the pita to make crispy Pita Chips; with or without cheese, and season them with your favorite blend of spices and herbs. Serve these crispy chips with a smoky Baba Ganoush dip.
Reheating: When reheating or warming the Pita Bread, place the bread of a hot pan or skillet. Keep it for 10 to 12 seconds on medium heat or until lightly hot on both sides.
Dassana’s Recipe Tips
- Using dry active yeast: Make sure to activate and proof the dry active yeast, if using. If not done so, then your dough will not leaven properly. This will result in a hard bread. Ensure that the water used for the yeast is lukewarm. Not hot or cool.
- Dough: The dough has to be kneaded with the apt quantity of water. Less water results in a hard or dense dough. With this, your pita won’t puff up. Add more or less water based on the quality and type of the whole wheat flour used. You should have a well kneaded, smooth, supple and soft dough.
- Kneading with hands: You can easily the knead the dough with your hands. This has to be done for about 10 to 12 minutes. If, after kneading well, the dough looks sticky, then add some more flour, mix and knead till desired consistency is achieved.
- Rolling: Your Pita won’t puff well, if you haven’t rolled the dough evenly. The quintessential pockets will also be missing in this case and there’ll be puffing at some areas and flatness on others on the bread.
- Heating the oven: Make sure that your oven is very hot. If your oven is not well preheated or hot enough, then it will result in flat breads.
- Storing: You can store the breads in a zip lock bag or steel box. Then, put in a refrigerator or freeze.
- Substitutes: Use all-purpose flour (maida) in place of whole wheat flour (atta); use dairy or vegan milk in place of water; use dry active yeast in place of fresh yeast.
- Scaling: This Pita Bread Recipe can easily be halved or doubled as per your requirements.
Troubleshooting
Why my bread has no pockets?
There are a few things that, if done correctly, will puff the bread resulting in pockets.
– Water: The dough needs to have the perfect amount of water in it. Less percentage of water will make the dough hard. Bread won’t puff up.
– Texture: The dough has to be kneaded really well to a soft and smooth texture.
– Rolling: If the dough is not rolled evenly, the bread won’t puff.
– Oven temperature: Sometimes, the oven isn’t actually reaching the temperature that it is set at. Then, it needs some calibration. If not thoroughly preheated or hot enough, the bread will be flat and not puff.
Can I use all-purpose flour?
Yes. Add about 1 cup of water while kneading.
Why a hard bread?
If you use dry active yeast, you need to activate it. If not done well, the dough won’t leaven, resulting in hard bread. While activating, use lukewarm water.
Can I add milk over water?
Yes, you can add same quantity of milk as that of water. Subject to change depending on the quality of flour.
Why some parts of the dough rise, some don’t?
Because the dough is not rolled evenly. Some parts will be thick and others thin. Makes the dough partially puff up at some spots.
If I want to add yogurt in this recipe, can I do that?
Yes, you can. It will result in softer bread with a faint sourness.
Can I use a water-milk combination?
Yes, you can.
What is the quantity of fresh yeast over instant yeast?
Add 1 tablespoon fresh yeast. Make a note that you will need to activate and proof fresh yeast like dry active yeast.
Can we skip yeast and use baking soda as a leavening agent?
You can but you will need to experiment with the recipe.
Can I make the dough at night and leaven in the refrigerator?
The dough has to be leavened outside, at room temperature. Once the dough is doubled, then you can refrigerate it.
Is it possible to freeze the homemade dough and Pita bread?
Yes. Freeze them in zip lock bags or in boxes for 1 to 2 months.
Step by Step Photo Guide Above
Homemade Pita Bread (Oven & Stovetop)
Ingredients
- 1 teaspoon instant yeast or 1.5 teaspoon dry active yeast (for dry active yeast check the notes below on activating and proofing it)
- 1 pinch raw sugar or white sugar
- 1 to 1.25 cups water or add as required
- 3 cups or (360 grams) whole wheat flour
- 2 tablespoons extra virgin olive oil
- 1 teaspoon salt
Instructions
Preparing dough
- Firstly take the instant yeast and sugar in a stand mixer bowl or in any bowl in which you will knead the dough. Pour 1 to 1.25 cups water and mix very well with a spoon.
- Add 3 cups whole wheat flour, 2 tablespoons extra virgin olive oil and 1 teaspoon salt. Mix everything with wooden spoon.
- Then using the hook attachment of the stand mixer and begin to knead. Initially you will find the dough sticky, but continue to knead and you will see the extra water will be absorbed by the flour. Knead to a smooth, suppled and soft dough.
- Rub or brush some water or olive oil all over the dough. Keep it in the same bowl covered loosely with a kitchen towel for 45 minutes or 1 hour until the dough has doubled in volume and size.
Assembling, shaping and rolling dough
- Deflate the dough gently and knead lightly. Make into a log shape and cut equal portions from the dough. Keep these covered again for 10 minutes. Keep the dough balls covered all the time so that they don't dry out. You can even pinch portions from the dough and roll them into balls.
- Meanwhile place a baking tray in the oven. Then preheat oven at 230 degrees celsius for 20 minutes.
- Take each dough portion and shape into a ball. Keep it on the work surface and sprinkle some flour on it as well as on the dough ball. Roll evenly into a 5 or 6 inches round shape. You can also make them oval shaped if you want. Keep the bread a little thick while rolling.
- Keep these rolled discs covered loosely for 10 minutes more.
Bake Pita Bread In Oven
- Carefully remove the tray with oven mittens. Sprinkle some flour and place the rolled discs on it. Use oven mittens when removing and placing the baking tray from the oven.
- Using oven mittens, place the tray back in the oven. Bake at 230 degrees C for 7 to 10 minutes. If using a convection oven, then preheat as well as bake at 200 or 210 degrees celsius. Note that the baking time will vary from oven to oven.
- The pita bread will nicely puff up in the oven. Once they are puffed up and have a pale golden color, remove the tray. With a spatula remove the pita bread and place on a wired rack.
Stovetop Method
- Heat a cast iron skillet or a frying pan on medium-high flame.
- Sprinkle some flour on the pan and it should get browned. This means that the pan is hot. Use a heavy pan so that the pita bread does not burnt from the bottom. Before you place the rolled dough on the pan, brush off or remove the browned flour from the pan with the help of a cotton napkin.
- Place the rolled pita bread disc on the pan or skillet.
- Cover with lid for 1 to 2 minutes.
- Turn over and cook for 1 to 2 minutes more till the pita bread is done and has brown spots appearing on both sides. Roast all pita breads this way.
- Stack pita bread and store them in a kitchen towel or bread box. Just slice the pita bread into two. You will see the pockets. Stuff the pockets with a filling of your choice and your pita sandwich is ready.
Video
Dassana’s Notes
- Pita Bread Dough: The dough needs to have the perfect amount of water in it. Less percentage of water will make the dough hard or denser in texture and the pita bread won’t puff up. Depending on the quality and type of flour used, you can add less or more water. The dough has to be kneaded really well. It should be soft and smooth.
- Kneading with hands: The pita bread dough can be easily kneaded with hands. Knead the dough very well for about 10 to 12 minutes.
- Rolling the dough discs: If the dough is not rolled evenly, then the pita bread won’t puff. So there won’t be the pockets or you may have the pita bread puffing on some spots and remaining flat on others.
- Oven Heating: The oven has to be very hot. Sometimes the oven isn’t actually reaching the temperature that it is set at. Then you will need to calibrate the oven. If the oven isn’t thoroughly preheated or hot enough then this cause the pita bread to stay flat and not puff.
- Using dry active yeast: If you use dry active yeast then you need to activate it and proof it. If the activation and proofing is not done well, the dough won’t leaven resulting in hard bread. While activating, the water has to be lukewarm and not hot or cool. Note for instant yeast, you don’t need to proof or activate it and can use room temperature water
- Salt: I have used sea salt in the recipe, but any salt works. Saltiness can vary a lot by brand and grain size, so start with ½ teaspoon and adjust to your taste, especially if you’re adding salty fillings.
- Scaling: You can easily halve or double the recipe.
- Storing Pita Bread: Place them in a steel box or ziplock bags. Then you can either refrigerate or freeze the pita bread.
- Reheating: To warm or reheat pita bread, heat a skillet or pan. Place the pita bread and cook it for 10 to 12 seconds on medium-heat till lightly hot on both sides.
- Substitutes:
- Whole wheat flour: Replace with all purpose flour.
- Water: Can be replaced with milk (dairy or vegan).
- Instant yeast: You can use 2 teaspoons of dry active yeast and 1 tablespoon fresh yeast instead. Both these yeast will need to be activated in lukewarm water with sugar before adding to the flour.
Nutrition
Pita Bread recipe from the archives was first published on July 2012.

Can we make it in Indian tandoor??
Yes, you can make it in an Indian tandoor. It puffs well and gets a nice smoky flavor, similar to naan.
This was fantastic. So many flavors. Great recipe.
Thanks Stacy. Happy to know you liked the pita bread.
I like this recipe, quick and easy to make and have made it often but the 1 teaspoon salt is way too much. I only add ¼ teaspoon of sea salt as even a ½ teaspoon is far too salty, especially if you have to then add butter and other salted fillings. The pita should only be mild salted.
Thank you for sharing your experience. I also use sea salt, but the saltiness varies a lot by brand and grain size, and everyone’s taste for salt is different too.
For me, 1 teaspoon works well in this dough, especially when the pita is eaten plain or with mild fillings. But if you prefer a softer, lightly salted pita or use salty fillings, reducing the salt is absolutely fine.
I’ll add a note so readers can adjust the salt based on their taste. Thanks again for making the recipe often.
Always trust your recipes and find them awesome. Have been following your recipes for about 7 years now.
Hi Priyanka, thank you so much for the trust and support over the years. It’s readers like you who keep me inspired!
Love this pita bread recipe. It is a bookmarked one for me, for all times, whenever me or my family is craving for something to do with pita!
So happy to read that. Thank you for bookmarking the recipe and making it a go-to for your family cravings. It means a lot to know it’s become a trusted one in your kitchen.
Thank you so much for the recipe! I’ve been waiting to try this in my pita oven for some time now, and I’m excited to see how it turns out. I love making homemade pita. Can’t wait to give it a go!
Hi Dassana,
Can I half the recipe
Yes you can.
Hi Daassna,
I would first like to thank you for helping me with recipes.
Your blog was my real savior when I started cooking post marriage.
Ever since whenever I get stuck I always refer to your nicely elaborated recipes with pictures and video.
I am trying your Pita bread recipe and would really request you to share “Baba Ganoush” recipe too.
Thanks you so much. Glad to read your lovely comment. Sure, I will try to add baba ganoush and have noted down your recipe request.
Firstly I love your blog .. and I keep coming back to it every now n then… Now I never bake pitas since a shop closeby sells good ones pretty cheap… But I made few during lockdown with the help of your recipe and they came out pretty good .. thank you! We also eat lot of fish and fish curries .. so whenever in Goa we eat it with Goan poi… Now it never occured to me till I actually baked pitas… But is there major difference between the two if I skip using all purpose flour to bake the poi? Also other than rolling them with wheat bran etc ? The texture /method would mostly be the same for poi as of pitas right ?
Thank you Archana. By the way I stayed in Goa for some years and we would buy the poi on occasions. It is one of my favorite bread but I have never made it at home. May be I should give a try. Yes the method would be the same. For the poi, you can only increase the sugar say 2 to 3 teaspoons. Other than this all ingredients will be same except for the wheat bran. You can even use half-half of all purpose flour and wheat flour. The texture of pita is different from poi which is feel is due to the addition of wheat bran.
I am trying the recipe for the 2nd time..for pita bread..I used 250 ml water and 360gms flour today..i added some more flour..i still could not make a dough after kneading for 15 mts..its very sticky..kindly reply asap..
Suchitra, sometimes due to the quality of flour, less water will be needed. I would suggest you to start with ¾ cup water and then add more 1 to 2 tbsp more water if required. Usually if the dough becomes sticky, add flour helps and kneading it for some more time also helps as the excess moisture is absorbed by the flour while kneading. I hope this helps.
The pita bread receipe looks really good,I’ll try thanks
Just made pita bread using your recipe – stovetop method and it came out really well. Thank you for the detailed instructions.
The bread didnt have a pocket so i could use it as a wrap. Did i have to make it thicker or was the dough too soft?
Would appreciate pointers if possible. Thanks
thanks jayashree for the feedback and rating on pita bread. thickness is not a problem. if the dough is too soft, then it cannot be rolled evenly. if the dough is not rolled evenly, then the pita bread won’t puff. so there won’t be the pocket. when the dough becomes too soft, then just add some flour so that you get a dough which can be rolled evenly and easily. hope this suggestion helps.
Thanks for taking time and replying
welcome poonam.
sorry please ignore the msg i just sent.. i just saw ur reply.. i am soooo sorry..
thank you..
fine natasha. no problem ????
Please share your pita bread recipe mixed with other whole grains and can we add milk to wheat pita breads if yes what should b the propertion please reply thanks
yes you can add milk. you can use the same amount of milk as that of water – 1 to 1.25. but depending on the quality of flour you may need to add more or less milk. when i get time i will add the recipe or include the proportions of other grain flours in this recipe itself.
Namaste Dassana Ji,
Thank you for all the efforts you put into making these easy step by step practical recipes with perfect ingredients. I have tried alot of your recipes and they have ALL come out perfect and delicious.. only thanx to you I have got the confidence to try out new dishes without any doubt.
Next I wish to try this pita bread rcp. but have a couple of questions..
1. i don’t have dry active yeast, i generally use instant yeast and add it directly to the flour so is it possible to use Instant yeast instead. does the quantity of yeast change?
2. to knead the dough you have suggested 1.25 cups of warm water. I was wondering can it be a combination of warm water and milk? will addition of milk make the dough soft and moist? and will make any difference in the taste?
Lastly, my sister has celiac and she is on a 100% gluten free diet so i was wondering, can this recipe be used with different vrat flours/ gluten free flour.
Thank you once again.
May God always bless you.
Regards,
thank you natasha for these lovely words. glad to read them.
1. for the pita bread you can use instant yeast. add 1 teaspoon intant yeast.
2. yes, of course, you can use a combo of warm water and milk. addition will milk will make the pita bread slightly rich and soft. yes there will be a difference in the taste.
3. with vrat flours or gluten free flours you can make. but then you don’t need to add yeast. some experimentation will be required. the gluten free flours have to be kneaded with hot water. this will make the texture soft and the dough is easy to roll.
thanks again natasha and wish you all the best.
Thanks for the suggestion, Dassana!
welcome lalita.
Hello Dassana,
Your site is my go-to site for everything cooking! Cannot think of another site which can easily put things together with the help of a detailed description and images of various stages of the process. Kudos to the great work!
I would like to check if you have experimented with Quinoa Pita bread, ever? The idea crossed my mind this morning and i am lost with the measurements. I am going to experiment with your wheat flour measurements and see how it folds out.
I’d be ever so grateful to get your expertise on this.
Thanks and waiting in anticipation,
Lalita
thank you much lalita for this lovely comment. i have not experimented much with quinoa. you can easily make a pita bread with it. i have worked with other flours like buckhweat, amaranth, finger millet, rice etc in making indian flat breads. so definitely quinoa flour can also be used to make breads. you can add 1:2 ratio of quinoa flour to whole wheat flour. its safe for experimentation as the amount of whole wheat flour is more. the quantity of water may be less or more. so just dissolve yeast in one-fourth cup warm lukewater first. then you can add lukewarm water or water at room temperature as needed to make a soft dough. hope this helps.
Hi Dassana
Thank you for a good bread recipe which I have precisely followed and been using for about two weeks. It is the only recipe which worked for me so far especially the first time when all the 6 loaves I made puffed. However, subsequent bakings have not been successful as far as puffing is concerned. In the same baking session some loaves puff while others don’t. And sometimes, some areas of the same loave puff while the rest don’t. What could be the reason? I still have problems with the flattening process which I am unable to get right. I don’t see “wholewheat” flour here in Sydney. The available one is called Wholemeal. Are they one and the same thing? The taste is ok but what can be added to get a better taste? I have seen recipes using yogurt. Will that improved the taste? Will it affect other the puffing and softness? The bread comes out generally soft but the crust is a bit stiff, a biscuit like feeling. I am not sure why but I am guessing that the reason could be due to the fan in our wall mounted oven. This oven does not have the capability to run without the fan. By the way, how much is a pinch of sugar? I have been using 1/2 tsp. One more thing about olive oil. Can it be dispensed with? What is the effect of not using it? Could it Be the cause of that stiffness or the biscuit like feeling I mentioned earlier?
thank you Mahmoud. wholemeal flour and whole wheat flour are one and the same. the pita breads not puffing up can be due to less water content in the bread or they are not rolled evenly. if these two things are taken care of, then the pita bread will puff up. you can add some yogurt in the dough and it will help in making the bread soft as well as give it a faint sour taste.
your guess about the crust is right. its due to the top getting a bit overdone and the fan is responsible for it. in convection ovens which have a fan, the baking is faster as the fan accelerates the baking process. so you can cut down the time by 10 to 15 minutes or reduce the temperature by 15 to 20 degrees celsius for any recipe. you can skip olive oil. it just gives a nice flavour but can be skipped. olive oil is not the cause of the biscuit like crust.
hope I have answered all your queries.
Hi there! You have got such lovely baked pita breads there. It just looks like the one that I find in the Middle East. I tried to make pita bread twice. Tried both stove top and baked version. I love the baked ones. But my bread didnt have that brown spot like what your pictures have shown. I baked at max temperature of 250 C for nearly 3 min each bread. The bread was soft but didnt have the browning at all.
thanks rima. brown spots are not required and essential. the pita bread one gets in cafes and restaurants, do not have brown spots. to get them you can keep the bread near the top heating element and just bake for some seconds. this method is called as broiling and will give visible brown spots or charring. but care has to be taken or else the bread can get burnt from top. alternatively you can keep the pan on the center rack and use both the top and bottom heating elements while baking.
Hi, good recipe but can I avoid the yeast step coz of yeast allergies? What would be the end result if I skip the yeast. Thanks.
harry, for the leavening of the pita bread dough yeast is required. if yeast is not added, obviously the bread dough will not leaven and won’t give a light and soft texture. that said, a leaving agent like baking soda or baking powder can be added. but i have never tried preparing pita bread using baking soda or baking powder.
My husband & I live in Brampton, Ontario, Canada – Brampton is a suburb of Toronto, Canada. Brampton has A HUGE EAST INDIAN POPULATION with LOTS of East Indian grocery stores. We eat mostly 100% organic food at home, & recently I found ORGANIC 100% WHOLE WHEAT ATTA flour to make chapatis. But I still have not made any chapatis because we don’t like those burnt dark spots on the surface of the chapatis when they are made on top of the stove in a TAVA. We prefer chapatis to look like your beautiful whole wheat pita bread made with 100% whole wheat ATTA flour and baked in an oven. Could you please give me a recipe for 100% whole wheat chapatis baked in an oven so they won’t have those ugly dark burnt spots on the surface>
sheila, those dark spots are the plus point in chapatis and they taste good too. usually i prefer to have nice dark spots on chapatis. the same applies to naan and tandoori roti. i am not sure if chapatis can be baked in oven. but since i have baked naans and tandoori roti in ovens, i can say that at times the naans or rotis become like papads in the oven. they just don’t bake well. so at the most, you can cook chapatis on tawa till done and not proceed to the stage where you get dark spots. some spots will be there as that is an indication that the flour is cooked.
I tried this but my bread didn’t puff ????
not sure why. you can tell me in more detail.
Hi Dassana! Love your website 🙂
I tried these pita breads and they puffed well. However, there was this slight yeast-y flavour which was bothering me. When I get pita breads from outside they don’t have that yeast taste. What did I do wrong?
Sania, it depends upon the quality of yeast. next time you can add little less yeast. bakeries use fresh yeast.
Thanks, will try again 🙂
welcome sania.
I’m from a Muslim family , really wanna make it , please reply , is there alternative for yeast , it’s very difficult to find good quality yeast here ????
there is no alternative for yeast as such. usually baking soda can be used, but it does not work in all recipes. you can buy good quality yeast online from amazon.com or amazon.in etc.
I kept the yeast for proofing , but it dint bubble like urs, so was scared to even try , I have once made dhokla with eno the thing bubbled up so well , so could we use baking soda , any idea how ? ?
good you did not try. the pita bread would have become heard. in this recipe i am not sure if baking soda will work. as i do not know if the pita breads will puff if used baking soda.
Thank a lot for the recipe….just what I was looking for ..:) ..I was wondering if I could store the extra dough in the freezer for future use?..if yes, for how many days can I freeze it?
yes you can store the dough for a couple of months in the freezer.
Can I leave the dough for like 3-4 hours.
in a cold climate, you can leave for 3 to 4 hours. but if the dough has leavened well and increased in volume, after 1 to 1.5 hours, then you can refrigerate the dough.
Sounds great. one question though, can I leave the dough for a longer time to leaven instead of using yeast, like dosa batter? Or is it a bad idea?
sindhu, for the method that your are suggesting, the steps are different. first a small part of the dough or mixture is made and then kept overnight for some hours. then this dough or mixture is mixed with the rest of the flour and kneaded, which again is kept to rise for some hours. the steps, method, amount of ingredients to be added, everything will change and you will need to experiment.
Thanks for this wonderful recipe. Tried it today, and the pitas turned out beautifully. I’d never baked with yeast before, so I was a bit scared. It was easy enough though. Bake away, people!
thankyou marlies for your positive feedback 🙂
Hi,
Can I use fresh yeast instead? And in what quantity?
stuti, add 1 tablespoon fresh yeast. you will need to proof fresh yeast also like dry active yeast.
hi
can u guide me how to make pita in commercil basis like recipies for 25 kg maida how much i should add all the ingridients
thnk u
welcome ansar. i am afraid i won’t be able to help you. as it needs some experimentation and experience of making pita bread on such a large scale.
Hi Dasana,
I tried pita breads and it was a disaster. I made whole wheat pita& All purpose flour pita as well. My yeast had frothed well & dough had also risen well. I had tried tried same recipe before on gas & it was good. But today with the oven it became very hard 🙁 I mean we can chew them but they are not soft.I have a regular oven. Can you pl tell more about preheating the oven, is there a standard time & temperature for preheating? If not then what is it for this recipe?pl help……
looks like the pita bread got baked too much or the yeast did not proof well. with regards to the yeast proofing, a dough made with or without yeast will be soft, if cooked on the stove top. but if the yeast does not proof well, in the oven, the bread will become dense and hard. for baking in the oven, the dough has to leaven very well. preheating is a very important part for baking. usually for most baking recipes, a 15 minute preheat is essential. the temperature will vary depending on the recipe. usually i keep the same temperature for preheating as well as for baking. for this recipe the preheat time is 15 minutes and 200 degrees celsius is the temperature for convection mode of microwave oven and 250 degrees celsius is for a regular oven or OTG.
Ok gr8 , thanks Dasana, I will try it again.
Hi… Love your recipes… Is there a particular brand of dry yeast that you use? Pl revert
i use mauripan/gloripan brand of dry active yeast and instant yeast. hope this helps.
Very nice recipe! They did come out too thick though as I was scared they would stay flat if I made them too thin.. so next time I will make them thinner. I made 1batch with whole wheat and onr with all purpose flower. Thank you for sharing 🙂
pleased to know this abdia glad you liked the pita bread recipe. you are always welcome.
Very nice pictorial explaination. I hv made my pita bread tonight in both ways on tava and in the microwave(convection oven). But I hv used sour curd instead of yeast(ofcourse it takes more time but…) and it turned out so well., and really very tasty… yum 🙂
thanks tehmina. good to know that you used sour curd. i know it takes more time. but glad that the variation you made turned out good for you.
Hi dassana, yesterday I tried pita bread and it was a disaster………It didn’t puffed. ..though I followed it exactly. …?
let me know more details, like did the yeast solution proofed well and how was the texture of the dough. it has to be smooth and well kneaded.
Ok Dassana wll try once again, so the qty of instant dry yeast i used was right na 1/2tsp if making half qty mentioned above.
mohini, yes its right. 1/2 tsp
Dassana tryd mkg pita bread, as ws mkg for the first time usd half qty mentioned abv( Took 1.5 cup whole wheat flour). Followed the procedure, but my bread bcame vry hard while baking in oven (250deg) and did not puff up….(usd instant dry yeast 1/2 tsp…1/4 cup warm water…pinch of sugar….had not forthed so well). Made two on stove top they puffed up but were little raw frm inside. I had kneaded the dough soft, but dough had nt risen well even after 2hrs….cnt figure out where i went wrong. Later tested the yeast i have to see if it was active or not by putting 1tsp in 1/2 cup of warm water and pinch of sugar…. after 15 min it had frothed. Pls guide!
hi mohini, after reading your comments, it looks like the proofing did not go well. thats why the dough did not rise well. may be the water was hot enough for the yeast. for instant yeast, you can just use water at room temperature. halving this recipe will also work. since the dough did not rise well enough, thats why the bread was hard.
I stumbled upon your blog during a Google search for a receipe. I love that fact that Indian vegetarians have a one stop for many good receipes. I’ve tried a few and they have never failed me. Picto-representation is the USP. So much easier than YouTube.
thanks divya for sharing positive feedback. glad to know that you liked the recipes presentation.
Wonderful breads! Easy recipe to follow.
thanks
Hi, I have never tried this recipe before as this concept was new for me. I experimented the stove-top version and it turned out to be good. Your step-by-step instructions and photos have help me lot. Thank u for this wonderful recipe. I would be trying the oven version very soon.
welcome bini. glad to know this. thanks for sharing your positive feedback.
Hi ! I want to give this pita bread with paneer alu tikki to my daughter in her tiffjn tomorrow… So is it OK if I make the dough at night and leave it for proofing in the fridge ? And morning I can bake it… Is it OK to keep the yeast added dough for so long…pls advice
sangeeta, allow it to proof for at least one hour outside and then keep in the fridge.
Hello,
I have never worked with active yeast can I use instant yeast? How much?
yes you can. reduce the doubling time. add about 1 tsp of instant yeast.
Thank you
welcome shaheen
Hey
Just wanted to say I love your website, i am about to make this recipe and i just wanted to suggest maybe adding the amount you use in grams too. I didn’t have exactly 3 cups (plus my measuring cup was a different scale 240 rather than 250), which meant i had to spend awhile convert and scale everything down which was hard because different websites have different conversations.
It would have probably been easier if i had the exact amounts in grams it would have made the scaling down much easier.
Can’t wait to try this recipe!
thanks maya. thats some trouble you took 🙁 when i added this recipe, i did not have a weighing scale. so i could not add the weight in grams. but i will update soon. thanks for the reminder 🙂
I used whole integral wheat flour but they didn’t puff. Do you think it’s because of that? The dough seemed too heavy to let the air inside puff.
maria, i don’t know what is whole integral wheat flour as its not available in india. perhaps thats the reason. may be try with other types of whole wheat flour.
Recipe seems to prefer about 450F in my large convection oven: get a better rise than 392F (200C). Also, be careful not to over-flatten when rolling, otherwise you get tasty but not poofy. If you’re still having problems getting poofy try subbing AP or bread flour for 1/3 of the whole wheat flour. Great recipe!
thanks for the suggestions tom. my microwave oven only has maximum temperature 200 degrees celsius. so i baked these pitas at this temperature. however, your suggestions will help readers who have a higher temperatures ranges in their oven. i agree with the over flattening.
I am making these right now and they are turning out SO amazing. I did half all-purpose and half whole wheat flours (my whole wheat is a little grainy). I can’t believe they are actually puffing! Great great recipe, Thank-you for posting and the directions were so easy to follow.
My last batch just came out and I’m so impressed. So soft and a nice balanced flavor.
Welcome UmmKhaled. glad to know that you are liking the pita bread recipe.
Wow…..love this recipe, thankyou for sharing. Gbu.
welcome ghesy
pleasure to see the india kitchen , good for you.
thanks edmond
Can i use baking powder?
you can use baking powder.
Also cb u xplain d microwave part in detail..i mean do v hav to preheat n ol?
for baking in microwave, you have to preheat your oven at convection mode for about 15 minutes. then place the bread in the oven. perhaps due to insufficient heating as no preheating was done, the pita did not puff up.
Made this tday..bt d bread didnt swell up so no pockets
Very good pitta bread recipe
need more related recipe
thx in advance
chef victor
bon appetit
thanks for the feedback.
this recipe rocks. can we preserve excess dough. for how much time. plz reply me.
yes you can preserve the excess dough. freeze the dough and it stays good for more than a week. if you refrigerate, then stays good for 2 to 3 days.
Mam cn u plz tell me how cn v store these pockets..i mean in fridge or outside? Also for how long ll it stay gud?
store in a fridge in an air-tight box or container. stays good for about 10 to 12 days.
K thnku so much!!
welcome nikita
Hey,
Your recipie looked very awesome. I am currently live in Germany. So it was a bit hard to understand the measurements. So I turned everything in ml and it gone horribly wrong. Too much dough and it was so sticky I couldnt knead it and just stabbed it with a wooden spoon. Could you write exactly how much water you need for the yeast and how much exactly you need to add please?
oh… sorry about that. i will add in a few days the measurements in ml.
thanks !
even tho it came out perfect in the microwave ! 🙂
thank you very much for the recipie
welcome simona
hi, I followed the recipe word by word. the dough came out perfect n even the pitas were perfect just until they were in oven (though didn’t brown the way, yours have). So after a while the breads hardened, like really hard. Do we need to serve them immediately or did I miss something?
pitas need not brown. the bread should not harden. pitas are soft. not sure what went wrong. better to serve them immediately. you can also wrap them in a foil or a kitchen napkin and then have serve later.
I have not tried this recipe yet but intend to do so, but I have a question. Years ago when I first made pita bread the instructions said that at some point after baking (fuzzy here on timing) to put the pita rounds in a paper bag to cool. This process allowed the pocket inside the round to open. Any clues?
i do not use paper bags. but i wrap them up in a kitchen towel or keep them in a roti basket.
Hi , Thanks for the recipe.I tried it. It puffed for a bit on the stove top. but the oven ( I used convection mode in the microwave) was a flop. It dint raise at all. And smelled a tad yeasty ( bt it dint smell so on the stove top/tava). The dough was soft and it did raise well.Another question I have is for how long can Pita dough be stored and for how long can we keep it after it raised before we make the Pita bread(s)? Thanks
the puffing depends upon the amount of water that is added and the way the dough is kneaded and rolled. i guess either the water quantity was less (different qualities of flour require different amount of water) or the dough was not kneaded nor rolled evenly. its just like we make pooris. if the pooris are not rolled evenly, they don’t puff up in the hot oil. the yeasty smell depends upon the type and quality of yeast used. you can keep the dough for about 2-3 days in the refrigerator or you can even freeze the dough for more than a week.
Dear Dassana, Thank you for sharing such an wonderful recipe. However, When I prepared the dough It was more darker than pics u have posted here, more wheatish color. Also It had a strong odor of Yeast. Can you help me out ?
i think the color depends on the quality of wheat flour. the yeast odor also depends on the type and quality of yeast. i would suggest to buy a good brand of yeast.
I followed the recipe, made 6 balls, rolled and let rise 10 minutes. one puffed up and the other 5 stayed flat. Why do you think this happened?
not sure why. may be some thing to do with the oven temperature…. just guessing.
I check your site almost everyday but never actually left a comment. I love your recipes and photos and what I like most is that you try to use ingredients that are found in everyone’s kitchen. So I don’t have to go hunting for some fancy and exotic items 🙂
I’m hoping to make these pita breads this weekend and I have a question. Since you tried the oven and stove versions both, which one do you think turned out better?
thanks for commenting preeti. both are good. but the stove top will have brown burnt marks that is not usually there in pita breads. for an authentic version, you can try the oven method. if in a mood for experimentation, then try the stove top method. i gave the stove top version since many people do not have or use oven in india and they may like to try pita bread at home.
These pitas look great! I have been searching for the perfect pita recipe and am going to try this next! Mine turn out hard and crispy with no pocket, but I’m not giving up 🙂
thanks and do try the pita breads.
Hi, I have a query. Is it ok to prepare the dough and leave it overnight? Considering Bangalore chill weather at night at present and room temperature, would this be alright?
Thanks, Shreya
no. don’t leave the dough overnight. i suggest to increase the leavening time to 3 or 4 hours. other suggestion is to keep the dough in a warm place. wrap the bowl with some warm napkins and place in a warm corner. you can also keep the bowl near a window where you get sunlight.
Hi Dassana,
Tried the pita bread,hummus and falafel from your blog.It came out good,though a bit bland for my taste. This was the first time I tried a middle eastern dish and was happy bout it. Will definitely try it again.Thank you.
all of them are not at all spicy ashwini. however the falafel can be spiced and indianised. next time you can add some more chilies or red chili powder to the falafel.
Can I use All-Purpose flour (white)/ Maida
instead of wheat four ?
zaynab, yes you can use all purpose flour to make pita bread but then less water be needed to knead it.
Dassena,
Pita bread is a new concept for me. Its looking great. Appreciate the effort for making this recipe look amazing.
Thanks for the wonderful recipe. I’ve decided to experiment today itself. I’ll try both modes oven and stove.
Nayeem
welcome nayeem. would like to hear your feedback about oven and stove method.
Hi Dassana,
I tried doing pita bread as per your recipe but dassana i am dissappointed by it as the bread did not fluff. I did as per your recipe with the yeast as frothy as mentioned by you.
I am very dissappointed. Do let me know what shall i do.
Thanks,
Usha K Iyer
which flour you used? since they did not puff up, i think the dough must have been hard. the dough has to be soft and smooth. also we have so many varieties of flour, that each flour has different water absorbing capacities. so the recipe is just like a guideline and the water has to be added accordingly. did the yeast froth too and which yeast did you add.
2 things that affect artisan breads from rising correctly which might affect your pitas, make sure the yeast is still active (when you let it sit in the warm water for a while, it should bubbleup) and, you may need a thermometer in the oven to make sure it’s the correct temperature. Almost all ovens need recalibrating at some point (and the oven isn’t actually reaching the temperature it is set at). If the oven isn’t thoroughly preheated or hot enough, that will frequently cause bread to not get the rise it should and can cause a denser, harder bread. Maybe this will help someone.
thanks laura for your suggestions and tips. i am sure it will help the readers.
Hi Dassana,
I actually tried doing pita bread but it did not sem to fluff. I got the yeast as it has to be frothy with bubbles but still the bread did not come so good instead they came very stiff as khakara. Please do write to me as to how can i get it done fluffy. I am really dissappointed at this time.
Thanks,
Usha K Iyer
have replied to you usha. the dough has to be like a chapati dough – soft and smooth. also the oven has to be pre heated for at least 15-20 minutes. you can try making next time. don’t be disappointed. many things can go wrong when baking. happens with me too. we all learn and keep on learning 🙂
Mine just didn’t puff up 🙁 I followed everything in the recipe but the yeast – instead of active dry one, I used 17 g of fresh one. Any suggestions?
hi ana. i just checked on the yeast conversion tool and the amount of yeast you have used is more. for 1/2 tbsp of active dry yeast which is 4.25 gms yeast… the conversion would be 8.5 gms of fresh yeast. 17 gms is too much of yeast. may be due to this, the quality of the dough must have got affected.
Thank you, Dassana, you were right! I made them again today and they turned out just fine. 😀
thanks ana
Thank you for this useful recipe, i tried it and it worked great, mine dont look as good as yours but i´m sure it takes practice, thanks a lot
welcome valentina.
Hi dassana,
First of all…thumbs up for such wonderful blog. I have tried lots of recipies from your blog from cakes to breads..idli to methi matar malai..needless to say pita and hummus…all turned out very well. I have a LG convection which i have for last 5 years but aftr a few failures was too demotivatwd to baked in it..your commentsinspired me try pita in convection once again…but no luck this time either. Though otg pita were just perfect. The convection ones dint puff and also dont brown.. Anusuggestions ? Though the temperature same
thanks shilpa. was the oven preheated enough. while baking in microwave at the convection mode, the oven has to be preheated well. preheat for about 8-10 mins. i have made pita breads as well as regular breads, rolls and buns in both OTG as well as in the convection mode of microwave oven. never had any issues, except for the quick browning in the microwave. pita breads are usually not browned.
Thanks Dassana,
I think preheating was a probelm. Since i just preheated for about 4-5 mins. Will try again ..Thank you fo your advice. I am going to try you orange cake tonight in the convection.
alright shilpa.
Finally my attempt at baking in the convection turned out to be a success. I followed your instructions to the T for the orange cake and like all your recipies this one was also a big hit.
Thank You.
thanks shilpa for trying this orange cake recipe and also writing a positive feedback.
Hi! I am making Pita breads today for the very first time following your recipe 🙂
I have a question – For many days can a cooked pita bread survive ? Like a regular bread ?? Or it should be consumed within the same day ???
Also i used instant dried yeast , mixed it in warm water with a pinch of sugar as mentioned but there no bubbles at all 🙁 Any idea why ? It a fresh opened yeast packet.
PS : I love your blog <3 I follow it regularly and whenever I am trying something new, yours is the first blog I look up to 🙂
thanks anuradha.
hi anuradha. if you keep the pita bread packed in a cling film or in a box in the fridge, it stays well for a week upto 10 days. its just like regular bread. if you keep out for more than day then like regular bread, they will get spoiled.
you have to give a time of atleast 10 mins to see all the yeast bubbled up. if you don’t see any bubbles after 10 or 15 mins, the water must be not warm enough for the yeast to get activated or the water is hot. since its a freshly opened yeast packet, i assume the yeast must alright.
The bread came out ok… they didn’t fluff up as yours but still managed to make pockets … I guess the problem was with the yeast … there were no bubbles, the water was warm but I guess it requires even warmer water . Will try again.
Thank you 🙂
if the yeast does not bubble up, then its best to throw away the solution and make a fresh one. all the best for the next time.
Hi
Can these be frozen for future use? How long can they be frozen for?
before baking, the leavened dough can be frozen. i would suggest to keep only 3-4 days. after baking, pita breads are best consumed fresh. you can refrigerate the pita breads for 2-3 days.
I have been looking for a pita bread recipe for long time now, never googled it though! 😛 Came across your top ten posts and so glad that I did! Whole wheat pita bread is just the thing I want. Thank you lady! 🙂
welcome charul
Hi Dassana
I followed your reciepies for falafel & pitta bread. Oh boy I made full Lebenies meal humas &salad too, everything was great but my pitta bread didn’t rise although the taste was so good. My husband was very impressed we put everything on top of the bread instead of inside. Yum ! so thanks, but it bugs me my pitta bread didn’t rise so will try again.
thats great to know monika. i often make a lebanese spread at home too. may be the yeast did not proof well. just ensure that the water is warm… not too cool or hot. when you dip your finger in the water it should feel warm and not feel heaty to your finger. better luck next time.
Hi… just came across your blog… pita bread truly looks perfect… thanks for sharing the recipe and easy step by step photos… this surely has inspired me to try out the recipe soon…
Hi there. Thank you so much for the recipe! I’m going to try it right now with whole wheat, but I just wanted to know for the future, do you think I could make it with all purpose flour instead? My husband prefers the white flour pitas over the whole wheat ones, but I know nothing about baking bread so I don’t know if it would turn out the same.
Thank you for letting me know!
you can easily make the pita breads with white flour. no issues. they will still turn out good, in fact better.
Hi Dassana, first time here and I am glad I stumbled here. Never tried pita bread before…..I should try this ASAP….amazing pics.
Hey Dassana, I actually made these pitas and I am so glad I did. They have turned out beautifully:) Thank you!
thats nice to know family cook
I would definitely be making plenty of gyros with these pita breads! Looks wonderful =)
Thanks Dassana for sharing this recipe, I was looking forward for it.
alright renu & thanks.
Hi Dassana,
Your pita looks perfect! Pita was one of the first breads I learned to make and still love baking it. Thanks for the stove top tips, I’ve never done that. Can’t wait to try it thanks for sharing:)
thanks & welcome nancy.
Hi dassana.. i made the pita breads yday following ur recipe..they were very tasty thugh it did not puff up as well as urs..
i tried the stove tp and the oven method.. i found the stove top more comfortable..
i had afeeling taht my dough was a litle dry.. shoudl be better next time..
i will be lining my post to ur page..wil notify u .. anyway thanks for this yummy recipe!!
thanks renu. you could have added some water to the dough. the yeast also has to be proofed properly. but anyways i will look forward to your post. i still have to check your falafel post.
these definitely look the best pita breads.. puffed up so beautifully! and the first shot is so gorgeous! i need to make some pita breads
Hi Dassana,
This comment is not regarding this recepie but as I could find a space where we can put general queries… I came here..
I want you to teach us rajasthani gatta subzi….the art in this recepie is to make gattas soft ..rest things are easy…I have made this subzi number of times but the gattas don’t come up soft…..I thought you are the best person to address the problem …
sorry for putting the post in between…if there is any particular place to put such comments then please guide..
looking forward to your recepie and comment..
you can comment on this post renuka. no issues. also you can use the contact form and write to me from there.
i have been asked by mil also to add gatte ki sabzi, but the punjabi gatte ki sabzi. not much difference though in the preparation. i will surely add the gatte ki sabzi and both versions.
thanks for that in advance
WOW THIS IS SO COOL. So I made the bread because I liked the idea of it being whole wheat, and I was a little dubious about it working, puffing up like yours did. But it worked! And it was definitely the coolest thing to watch! I was so glad I made it. It was so much fun. Thank you SO MUCH for sharing this recipe =)
thats great to know vivien. thanks for making the bread and also writing about your experience.
this post made me so happy! These pitta looks just perfect .. PERFECT. I have to give this a try… saving it. will let ya know 🙂
sure kankana 🙂
Wow, this is so amazing! Very impressive. I wish I were good at making this. But I am going to give it a serious shot.
do give it a serious shot asmita. pita bread is one of the easiest bread to make.
Thank you so much for the love and care you put into your blog. I have been absent from visiting for a while. I have some enjoyable reading to catch up on your posts. I am planning on making your Pita bread tomorrow. Best wishes.
thanks lydia for your beautiful comments. do read the posts when you get time.
Lovely photos and step by step instructions. I love pita and like that this is whole wheat too!
thanks shumaila.
superb pics,mouthwatering….sure going to try.
loved the daintily puffed beauties- good one !
Such beautiful pictures! Pita looks perfect!
These pita pockets are perfectly baked!
I tried it earlier and it did not puff this much and that was a disappointment since I had excellent falafel to go along with it. Will make it this way… thanks for the step by step method
Amazingly puffed up pita breads, dassana! I love how well the pockets have formed!! I’ve made stovetop and oven pitas but have never tried firing them directly on the flame like a phulka. Definitely gonna try that next time. Thanks for sharing. 🙂
thanks susmitha.
Hey dassana, I wanted to let you know that thanks to you, I made beautiful, puffy pitas yesterday! 🙂 I used a mix of whole wheat, maida, bajra and besan flours. Other than that, I stuck to your recipe completely. I also noticed from your photos that when you say oven, you’ve used a microwave. I normally don’t like to do my bread or cake baking in the micro, but I decided to try it out for the pitas since that’s what you’ve used and it did the trick to make them puff up beautifully!! 🙂 Yay!! afterwards, I lightly toasted a few on the direct flame like phulkas and that added an additional yumminess.
So from now on, I’ll be baking all my pitas in the microwave. 🙂 Thank you.
thanks susmitha. you have even made such a healthy version of the pita bread.
i do use microwave oven but mostly for baking. i bake in the convection mode in the oven. i don’t use the microwave mode for baking. is there anything wrong in baking in convection mode…. may be i don’t know.
Hi dassana, I wasn’t trying to make it healthy, I had very little wheat flour at home so had to add maida and I felt so guilty to add so much Maida that I decided to compensate by adding Bajra and besan. Hahaha It was totally experimental. :p
Even I used the convection mode in my micro for the pitas, because the bread won’t come out well in the microwave mode. Normally though, the reason I prefer a regular oven to the convection mode of the microwave oven for breads and cakes is because they come out much better in texture in a regular oven. It might be because of the fan in the microwave or because there are always some waves present even in convection mode, but for whatever reason, the baked goods made in a microwave’s convection mode don’t retain moisture well.
But in the case of your pita recipe, that worked to my advantage and the pits puffed up. 🙂 I think those people who have tried this recipe and said their pits didn’t come out as perfect as yours must have used a regular oven. Maybe you can suggest the convection mode of the microwave to them and see if that makes a difference.
Ahhh so sorry for all the spelling mistakes. My iPad did auto correct and messed everything up!
I meant maida and bajra in the first paragraph.
i have corrected your comment with the correct spellings. i do get comments with incorrect spelling. if i am able to spot them, i correct them.
thanks susmitha for the detailed reply. i really appreciate this gesture.
i bake everything in the microwave because i don’t have a regular oven. the only problem i face while baking is quick browning. so i cover the cakes or breads with a butter paper or aluminium foil. otherwise texture wise i have not had any problem. even moisture wise, the breads which i make are moist. they are not dry. i bake a lot of breads at home. just that i don’t take pics and post about them…. i am lazy 😉
the original recipe uses the regular oven. plus the only change i made is making the pitas with 100% whole wheat keeping the rest of the ingredients same. in the original recipe maida and whole wheat flour proportion is half-half (i also don’t like maida like you). so i think the breads should come out well in a regular oven. my readers who tried and it did not come out well may be due to the yeast proofing not done well – which is the most important factor to make good yeasty breads and loaves. i will mention a point though about convection baking in microwave in the post.
dassana, so my falafels came out well yday and next is the pita bread and i am going to follow ur recipe.. BTW, the custardwe get in india( have a light coclour.. i usedto use brown and polson there….
here teh powder we get is alight pink coclour but as soon as it is mixed witha liquid,it gets a deep yellow colour.. i used a brand called daily fresh..the custard jam drops i have posted were also from same custard and they also turned more yellow than they had when i had made them in india..
thanks renu for the info on custard powder. i must say that the color of the custard pudding looks very good.
This is just cool! the way it looked like balloon is ecstatic..haha. 🙂 I love to try it.
thanks leona.
Thanks for sharing the recipe – they look sooo good!
welcome jenny
Dear Dassana, yesterday we had lebanese food and the pita bread looks ditto as in the pics as we had over there..and that is known to be as the one of the best restaurant in Dubai for lebanese food… i am now inspired to make them at home…wonderful work by you:)..
Request…Pls post kesar Ras malai receipe… I have tried couple of times from different blogs (showmethecurry, vahchef, manjulas kitchen) but it did not come out spongy and porous like available in the good sweet shops… in some youtube video they said that professionals add baking/ soda to make it porous and spongy but didnt mention when to add and how much to add…
with love, meeta…
hi meeta, i approved your comment but was going to reply later and then eventually forgot.
in fact yesterday after reading your comment, i decided to make rasmalai as it is hubby’s favorite too. i made the chenna yesterday and today i was going to make rasmalai, but it is too dark here with very heavy rains.. so photographs won’t come good. so hope to make them later and will post too.
also thanks for all your positive comments. do try the pita breads at home. you won’t miss the restaurant ones 🙂
thank you dear… i will definately going to try…u knw u r my confidence… whenever i am stuck with any receipe, i kwn i will get the answer / guidance from u…lots n lots of love to you…
thanks for your lovely words meeta. but to tell you a fact – i am not very good at making traditional indian sweets. hence i don’t post them. i just saw vahchef’s & manjula aunty’s videos. also referred some books and they have added baking soda/powder to the chenna mixture. the chenna which i have made has not become soft. so i just hope that the rasmalai becomes soft.
hey meeta, i started making the rasmalai today only to meet up with a disaster. the chenna balls disintegrated in the sugar syrup 🙁
so i strained the cooked sweet chenna and will make sweet paneer parathas tomorrow 🙂
i have to find out the reason for this. i have made rasagullas before, but never ever this things has happened.
Did it happen!! it will be blessing in disguise now as you will put more effort to find out the reason and we will all be blessed for the perfect rasmalai receipe then:) You know my Pita bread turned out hard bread and my husband was laughing at me that it can break anybody’s head…i was overconfident seeing how you have done but may be lack of experience at my end..i also forgot to place napkin on the rolled pitas for ten minutes before putting them in the oven…even the oven i have, takes double time..it is provided by the builder…now i do not know where i went wrong?
i am actually planning to make the perfect rasmalai now 🙂
either the yeast did not proof up or must be an outdated yeast. also too much baking can make them hard. you could have made them on the tava instead. plus it is required that you keep them covered for 10 minutes.
Pita bread cant be any better..looks so perfect but can I try this in my OTG too??
thanks sharmilee and yes… you can make them in your OTG too. just bake them in a preheated oven at 200 or 250 degrees C for 5 to 10 minutes.
This is a superb reciepy. I am definitely going to try this. Only thing I have to buy yeast.Thanks
Dassana, I will let you know the results.
sure monika 🙂
Delicious home made pita bread, love that you made whole wheat version. Both baked and phulka version looks perfect.
So perfectly fluffed pitas. I made them at home once loong back but don’t remember them coming out as perfect as yours. I like them a lot too – I usually fill them with our indian tikkas or grilled veggies and top with green chutney…and as you say..I can live on them for days!
I love the first picture..so simple but so rustic! Have a nice week ahead!
thanks tanvi.
These really look the best wholewheat Pita breads..so soft and fluffy!
I tried pita bread once a while back and failed misreably. I should try this… Your pictures are so tempting… Pita bread with perfect pockets.
Nice to know that we can make pita bread on stove top like phulkas.. I also own a bread bible book and it is amazing. I have tried some quick breads recipe and mango bread recipe is my fav. If you get time, do try mango bread. you will definitely love this.
i will try to make mango bread. thanks for letting me know kanan.
dassana thanks for this awesome recipe.. i have made some falafel mix reday and ma going to make some falafels today.. if that is cleared .. i wildefinitely make the pita breads and have it a falafel sandwich.. honestly.. 3 months in DUbai and i ma yet to taste a falafel.. so decided to make one.. i am bookmarking this.. will definitely let u know when i make this.. ur step by step makes it soooo easy.. thanks a ton dassana.. i love ur blog!!!
sure renu and thanks a ton.
Dear Dassana, yesterday we had lebanese food and the pita bread looks ditto as in the pics as we had over there..and that is known to be as the one of the best restaurant in Dubai for lebanese food… i am now inspired to make them at home…wonderful work by you:)..
Request…Pls post kesar Ras malai receipe… I have tried couple of times from different blogs (showmethecurry, vahchef, manjulas kitchen) but it did not come out spongy and porous like available in the good sweet shops… in some youtube video they said that professionals add baking soda to make to porous and spongy but didnt mention when to add and how much to add…
with love, meeta…
amazing nice to know all the methods …yummy looking forward to make these soon Dassana 🙂
Wow I’ve never seen homemade pita bread that looks so perfect! Your work is impressive! My kids love stuffing delicious food in the pocket. I hope to try this recipe one day!
Whoa…thanks a ton for sharing the recipe… this is a must try!!! thanks again:)
Dassana thanks for sharing the pita bread recipe. Loved the step by step information..
Awesome is the word :)….wanting this right now for my breakfast, I am going to try both the methods oven and stove asap….lovely clicks Dassana as usual!
wow thanks for beautiful explanation… perfect pita bread…
Dassana, I can tell you by the pictures, you have been so successful in making the best pita bread ever. I prefer the look of the oven baked ones. They look adorable:)
My next effort will be an attempt to try your recipe before I take a break! Thanks for inspiring me:)
This is a nice pita recipe. Just a note for those people whose breads do not rise in the oven: In addition to yeast you should check that the type of flour is suitable. There are many kind of whole wheat flours. It is best to use flour that is fine grained and contains the core parts of the wheat grain, too. Especially, graham flour is type of whole wheat flour that is often coarsely grained and sometimes the wheat germ is removed completely. This leads to very non-elastic dough that will eventually rise when in room temperature, but it is going to stay very flat in the oven so that the pita bread won’t rise properly when baked.
thankyou so much for sharing your suggestions 🙂