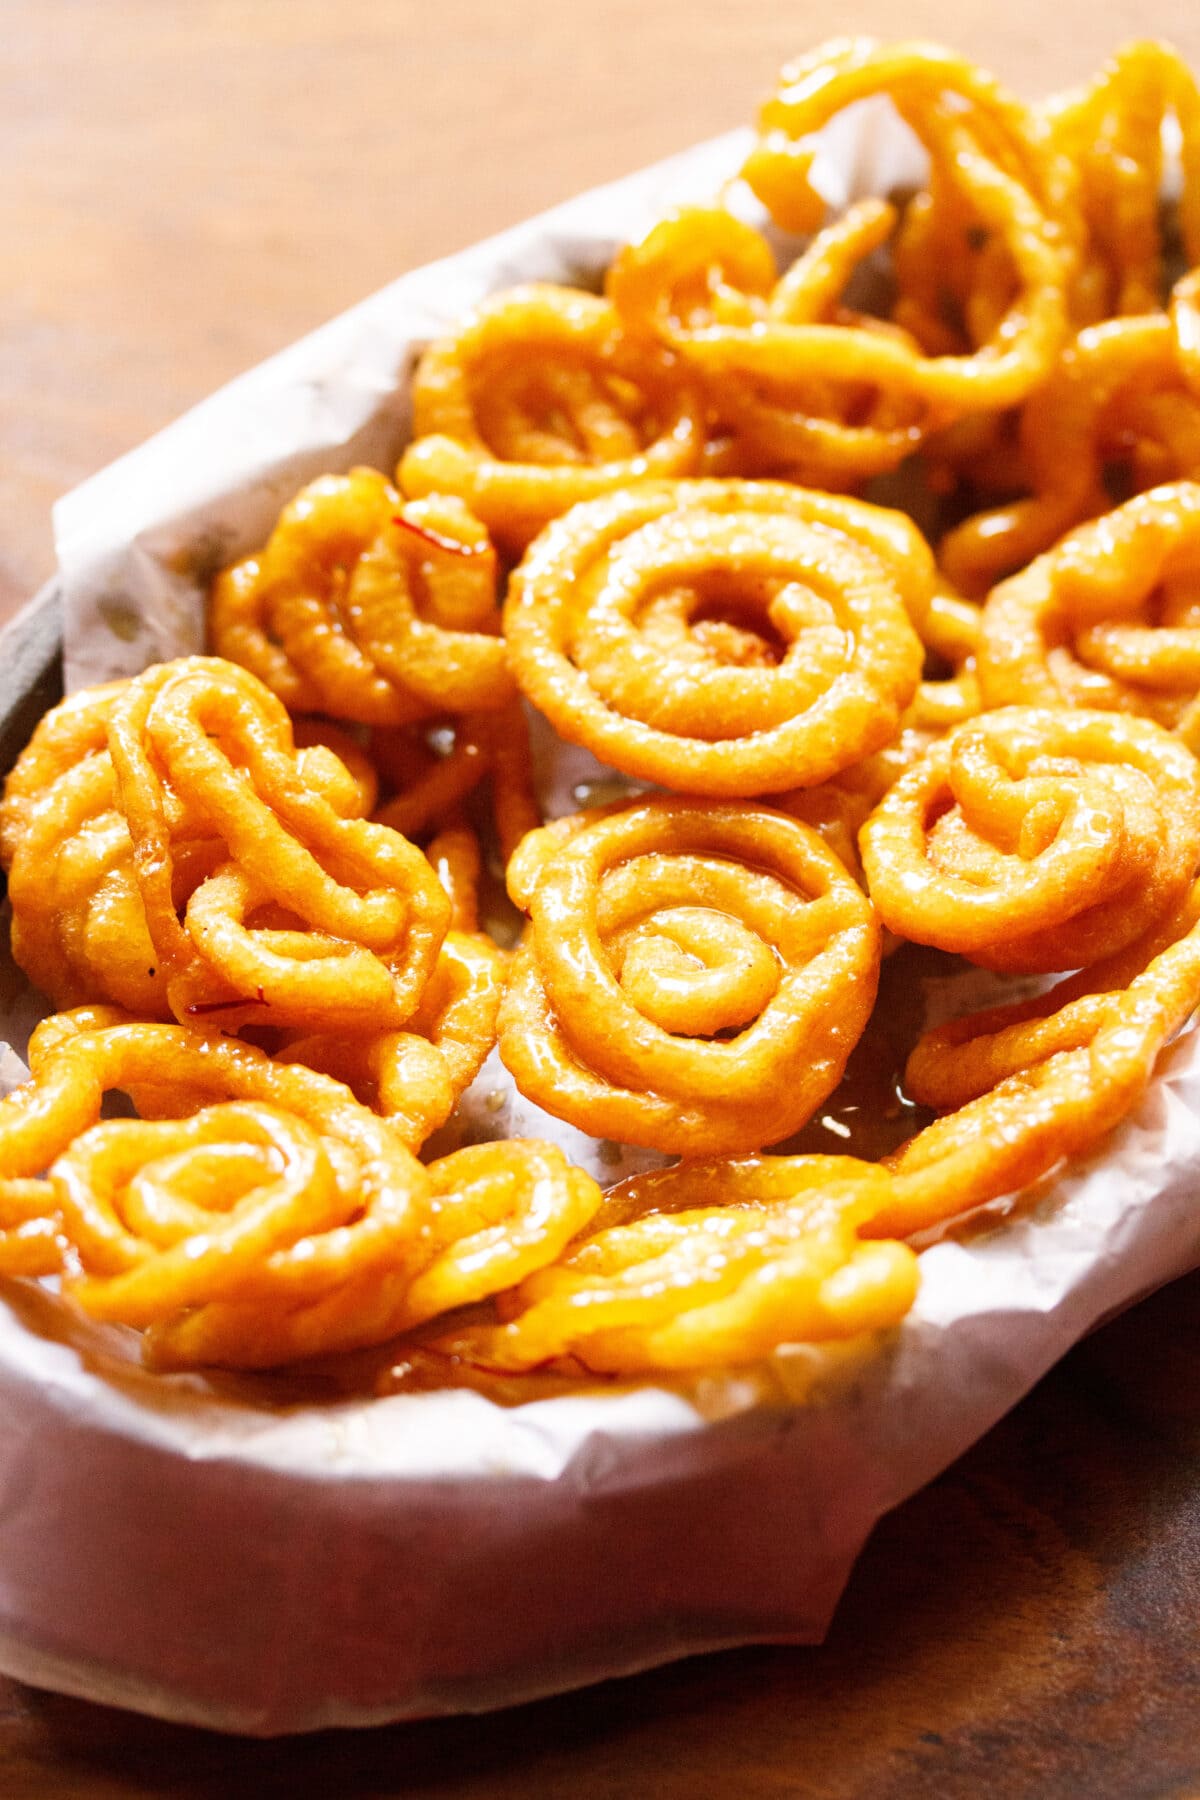
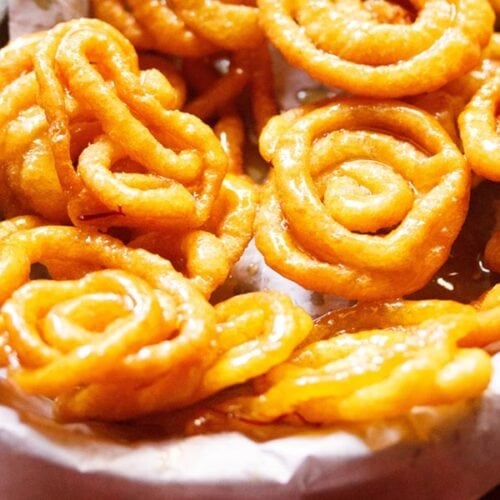
Of all the many delectable Indian sweets, Jalebi are considered superlative the world over. Crisp, crunchy funnel-cake style fried spirals are doused in a syrupy sweet sauce for a delightful treat that everyone in your family will love. This traditional recipe for homemade jalebi is tried and true, and will result in a pile of sweets that any mithai shop would be happy to sell!
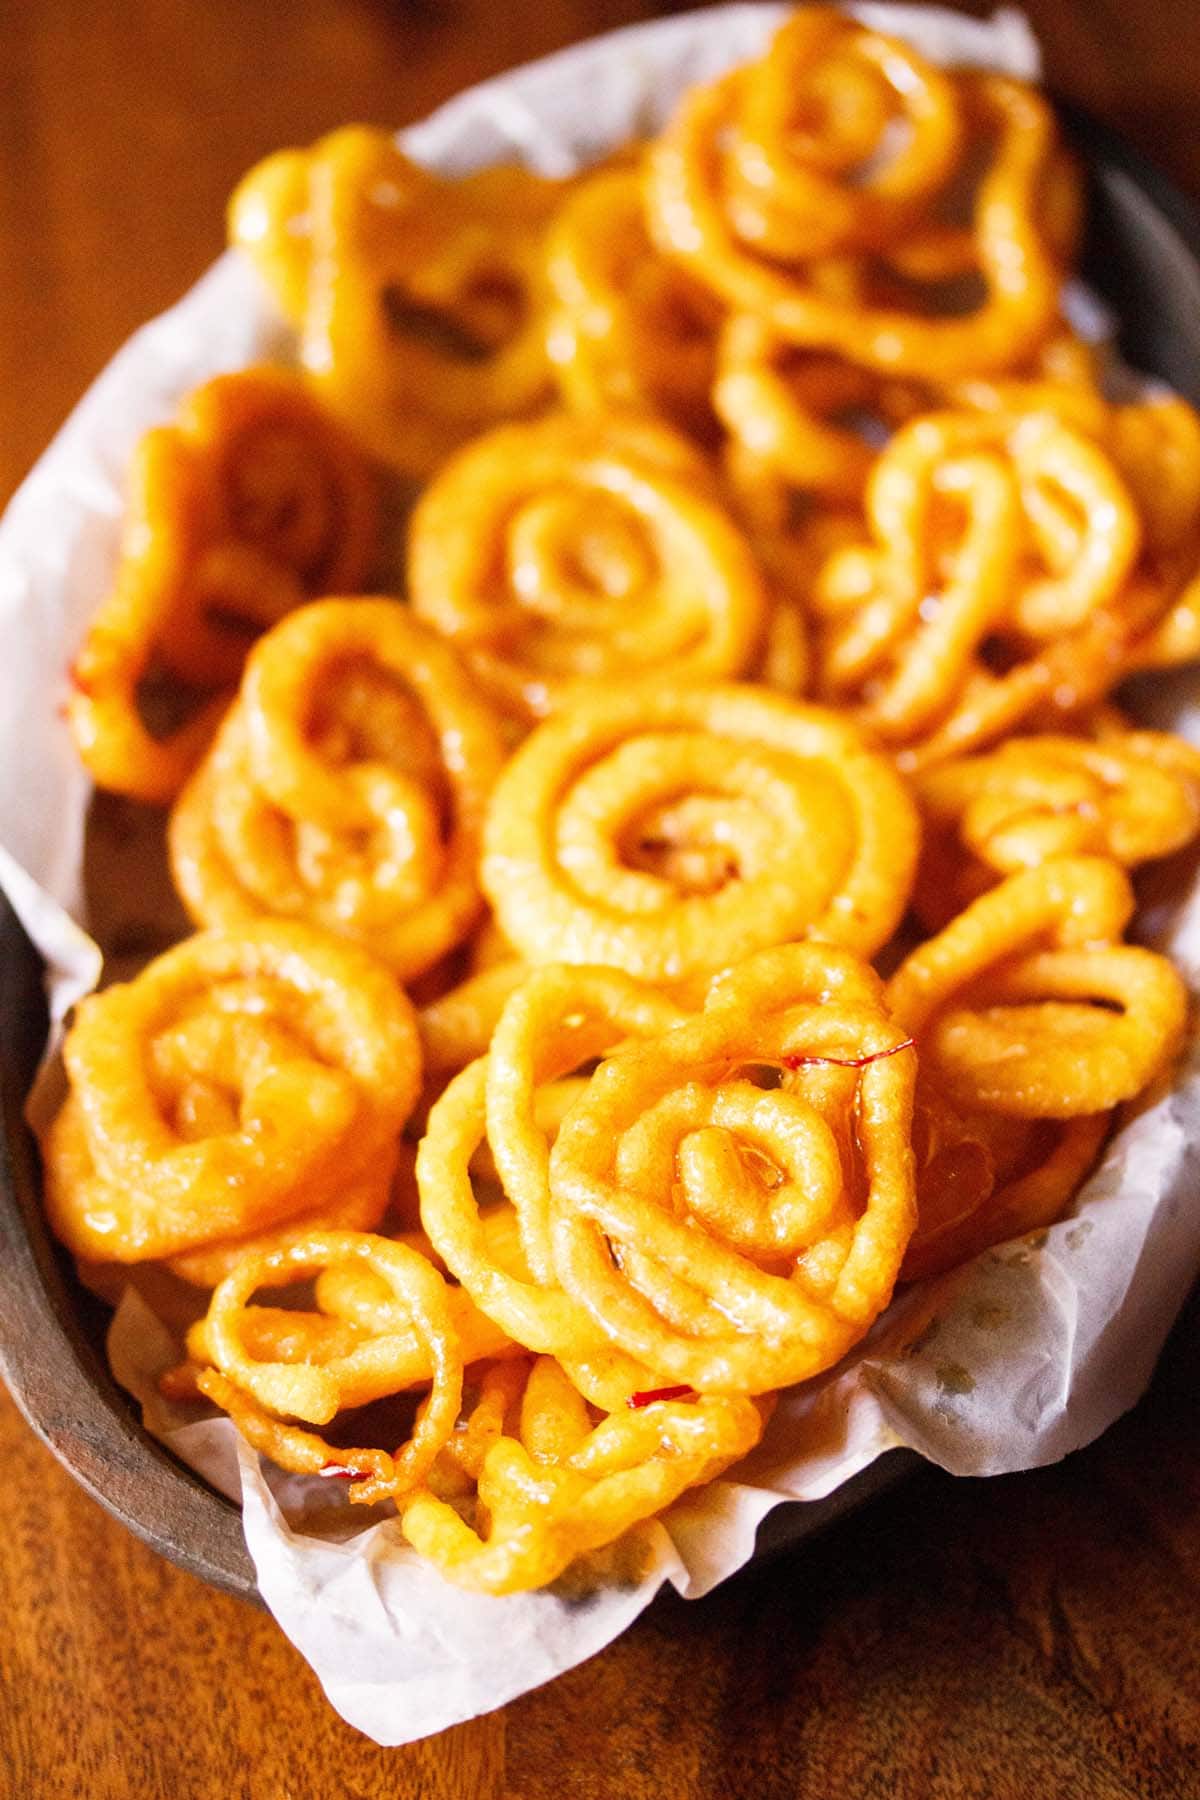
Table of Contents
What is Jalebi?
Jalebi is a popular sweet from the Indian cuisine. It is sold in all mithai shops (sweet shops) and is also a popular street food sold by cart vendors in western and northern Indian cities and towns.
Traditionally, the jalebi recipe is made with a batter of all purpose flour, gram flour (besan), baking soda and water that is fermented for several hours.
The fermented batter is then poured in concentric circles in hot oil and deep-fried. These fried spirals are then soaked in a flavored sugar syrup and served.
While the jalebi are quite similar to American funnel cakes prior to soaking, the fermentation gives the dough a bit of a tangy flavor.
These donut-like treats are crispier and crunchier than their American counterparts, which makes them perfectly suited for soaking in syrup. The syrup helps to balance out the tanginess of the dough, making jalebi an addictively delicious treat.
Try making these for Indian festivals like Diwali, Holi or any celebration. I am sure you will love this jalebi recipe.
Variations In Method
Jalebi recipe can be made in one of two ways. The traditional method calls for 12 to 24 hours of fermentation, giving the batter a slightly sour flavor. I use the traditional method, which results in treats that taste like they came from the mithai shops.
The other option is using the instant method where the batter is made and then immediately fried. To create the same tangy flavor, lemon juice or curd (yogurt) is sometimes added to the instant batter. (Curd is also sometimes added to the traditional batter, but I believe the fermented batter is tangy enough on its own.)
The instant method of making jalebi recipe is useful if you are short on time, but I think that it is always better to ferment the batter. If you ask me, the traditional batter results in a better taste and texture than the instant method.
Tips & Tricks
Making jalebi is not difficult, but you need to keep few things in mind while making it. I have assembled my best tips and tricks for making this yummy Indian dessert taste just like you got it from a food vendor.
- Batter consistency is the key! The batter should be thick and flowing. If the batter is too thick, the jalebi won’t be crisp or soak up the sugar syrup. If it is too thin, then it becomes difficult to get it to hold shape in the oil and it just disintegrates.
- Sugar syrup consistency is also important! The sugar syrup should be one string consistency. If you stop cooking the syrup before it reaches one-string consistency, then the fried jalebi absorbs too much sugar syrup and they will break or disintegrate. If the sugar syrup is cooked to more than 1 string consistency, then the sugar syrup will crystallize on the jalebi and it won’t be juicy and syrupy.
- Sugar syrup should be warm. The sugar syrup has to warm or lightly hot when you dunk the fried jalebi in it. If it’s too hot, then due to the heat the crisp crust of the jalebi will soften.
- Fermentation takes time. Fermenting jalebi batter may take more or less time depending on the temperature in your city. In a hot or warm temperature, the fermentation will take less time. In a cool or cold climate, fermenting the batter will take more time. Keep this in mind when making jalebi with the traditional method.
NOTE: When I made these, the outside temperature was about 26 degrees Celsius, so I kept for about 15 hours. - Oil temperature should be just right. The oil temperature has to moderately hot when frying jalebi; it should be 350 degrees Fahrenheit (176 degrees Celsius). If the temperature is too high, it will brown the outer crust fast and keep the insides uncooked. A lower temperature will make the jalebi absorb more oil and they will be soggy and not crisp. So fry at a medium temperature on a medium to medium-high flame.
- Use a heavy bottomed pan for frying: A heavy, thick-bottomed kadai (wok) is perfect for frying jalebi. You can use a heavy steel kadai or iron kadai.
- Work quickly when shaping the jalebi. Once the oil is hot, be quick in dropping the batter in oil in concentric circles. A squeezy tomato ketchup bottle works perfectly for this purpose. A reader also shared a tip to get a quick and better shape – first make a line with the batter and then quickly turn it into a loop (like the shape of letter ‘P’) – and then make spirals around the loop that touch the line.
How to Make Jalebi
Before you begin to make this homemade jalebi recipe, you need to do some prep work of fermenting the batter. Simply mix in the dry ingredients with water to make a smooth batter and set it aside for fermenting.
Make Batter
1. In a mixing bowl, take 1 cup (125 grams) all-purpose flour. Add 2 tablespoons besan or gram flour, a pinch of baking soda and ⅛ teaspoon turmeric powder.
NOTE: Use ¼ teaspoon baking powder if you do not have baking soda. I don’t use synthetic food colors, hence I have added turmeric powder which is a natural coloring ingredient.
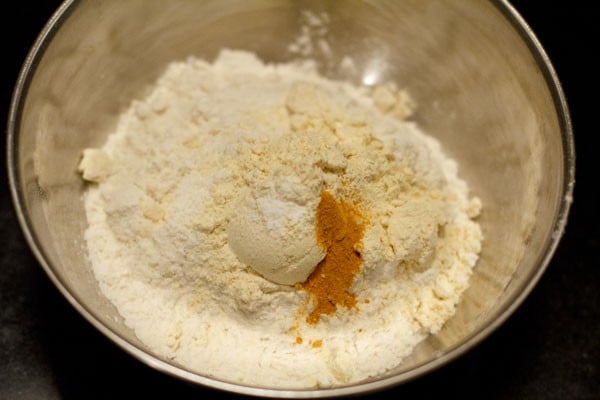
2. Mix all the above dry ingredients very well with a spoon or spatula.

3. Now add ¾ to 1 cup water. The amount of water to be added depends on the quality of flour used; I added 1 cup water.
Make sure the batter has a medium consistency and is flowing.

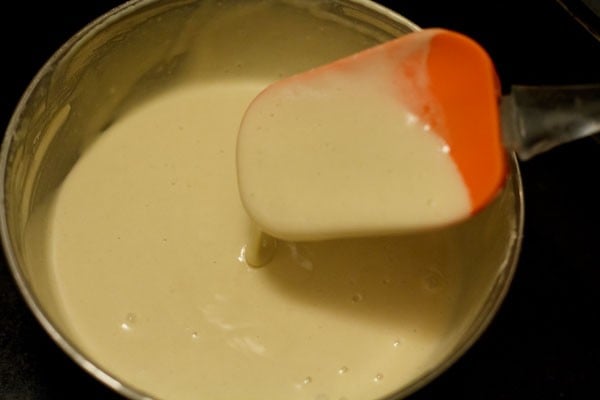
4. With the spatula, spoon or wired whisk, first mix. Break any lumps while mixing. You can also use your hands for mixing.
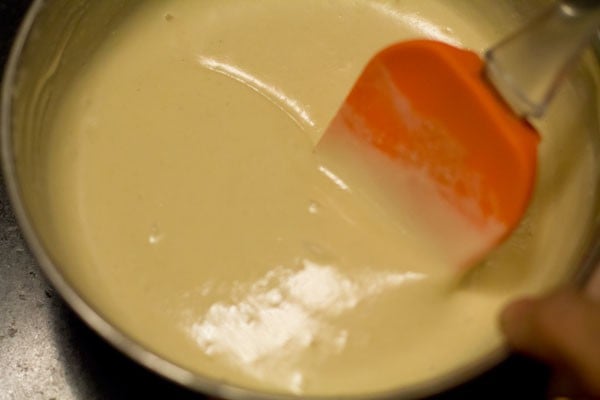
5. Then in round circular directions stir the batter briskly for 4 to 5 minutes. This adds volume to the batter and makes it even, flowing and smooth. There should be no lumps in the batter.
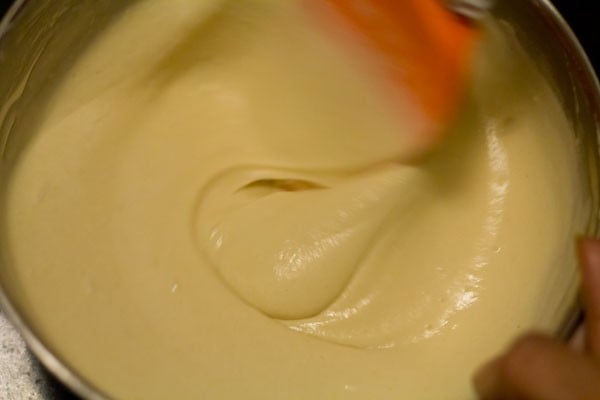
6. The batter should have a flowing consistency. Cover and keep the batter to ferment in a warm place for 12 to 24 hours.
In a hot and humid climate it will take about 6 to 7 hours for the batter to ferment. Whereas in a cool or cold temperature, it can take more than 10 hours and above.
Make sure not to over-ferment the batter as it will become very sour with an unpleasant smell.
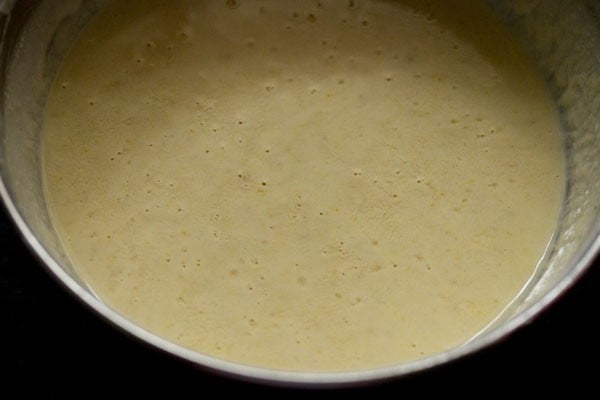
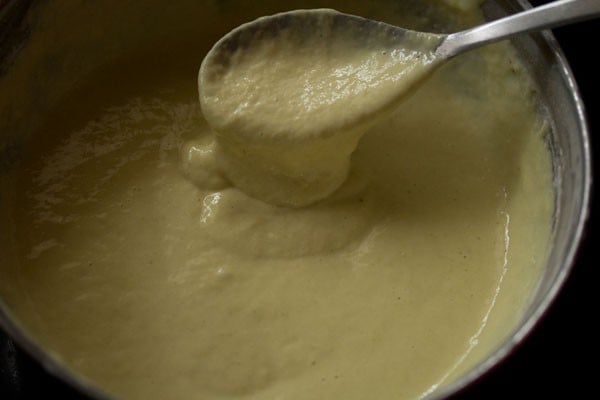
7. This is how the batter looks the next day. You will see small and tiny bubbles on the top.
I kept the batter to ferment for 15 hours as the room temperature was 26 degrees Celsius on this day.
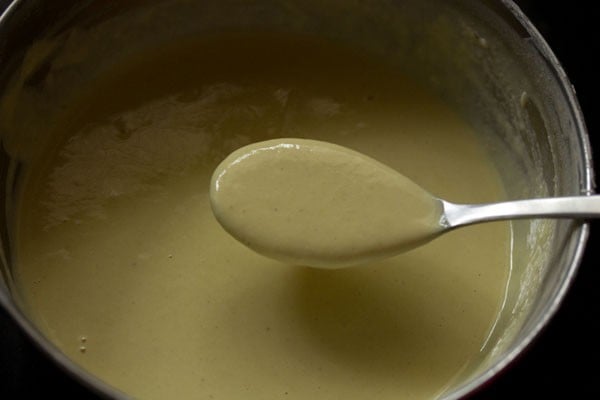
8. Stir the batter. If you look carefully, you can see the batter has become slightly thinner than what it was before fermentation.
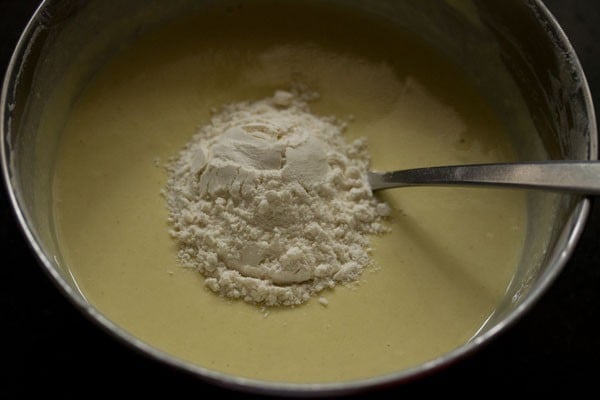
9. To thicken the batter again, add 1 to 2 tablespoons of all purpose flour. At this step, add flour accordingly.
Remember you need to get a batter which is thick but flowing.
10. Mix very well with a spoon or wired whisk.
11. Pour the completed batter in a squeezy bottle (old ketchup bottles are great for this!). Keep aside. You can also use coconut shell with a small hole in it, a piping bag or make your own piping bag with parchment paper.

Make Sugar Syrup
1. Take 1 cup sugar in a pan. Add ¼ teaspoon saffron strands to it. I highly recommend that you add saffron, as it gives a nice orange-yellow color and a fragrant aroma to the jalebis.
If you do not have saffron, then add ½ teaspoon cardamom powder for aroma and ⅛ teaspoon of turmeric powder or natural yellow or orange food coloring extract for color.
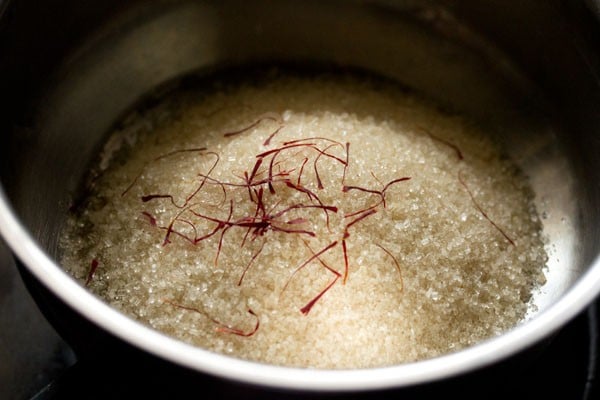
2. Add ½ cup water.
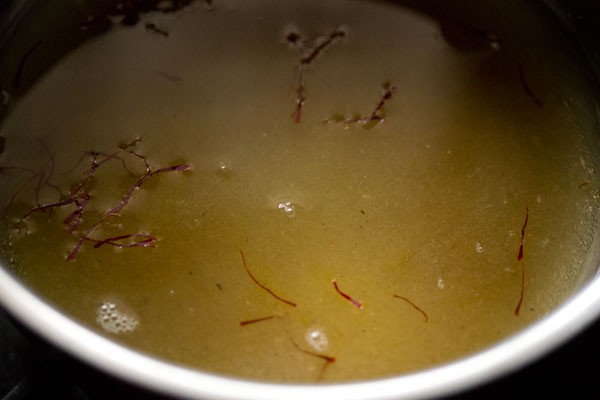
3. Place the pan on the stovetop over a low heat and begin to stir so that all the sugar dissolves.
4. On a low to medium heat, cook the sugar syrup. Stir at intervals.
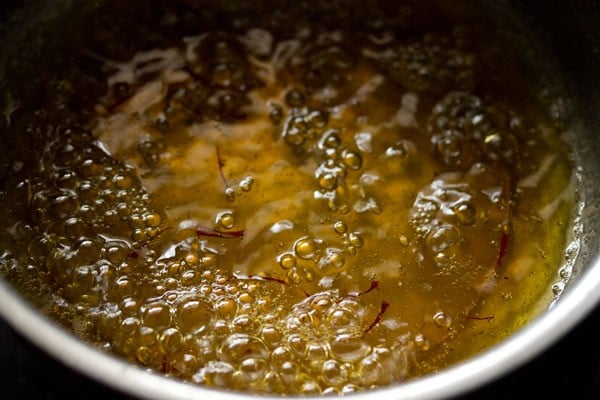
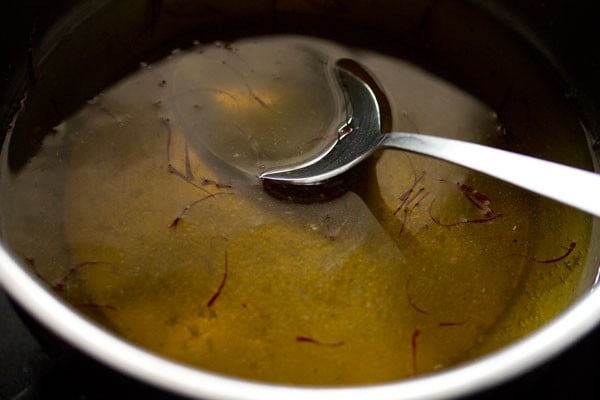
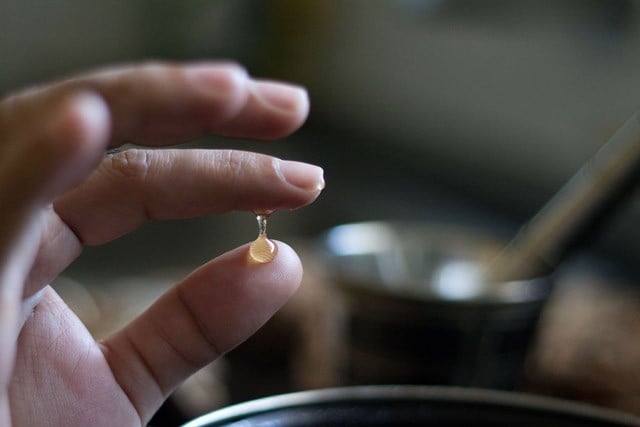
5. Cook till you get one string consistency in the sugar syrup. To check, touch slightly cooled drops of the syrup between your index finger and thumb. You will see the formation of a single strand or one string when you join and and pull your fingers apart.
Note that the sugar syrup will be very hot. So before checking the consistency, take it in a small spoon or add a few drops of it on a plate. Allow it cool slightly for some seconds till the heat can be tolerated and is fine to touch.
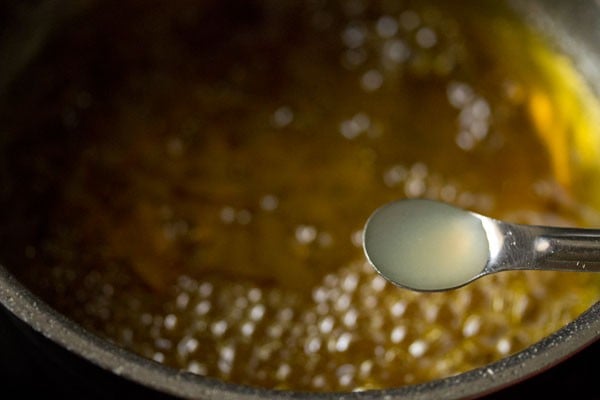
5. Once you get the one string consistency, switch off the heat and add ¼ teaspoon of lime or lemon juice. Stir well.
Keep the sugar syrup on the burner itself so that it remains warm when you add jalebi in it.
Fry Jalebi
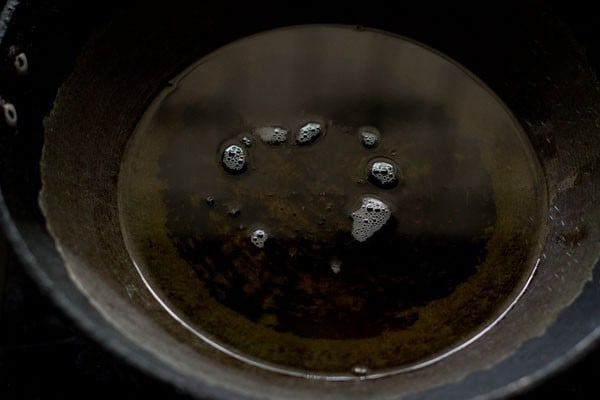
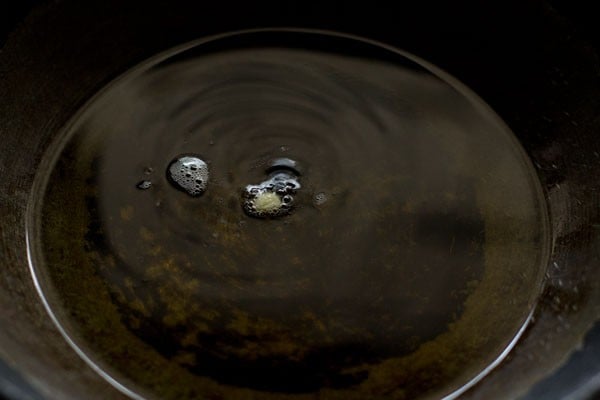
1. Heat ghee or oil for deep frying in a heavy bottomed kadai or pan. Ghee gives a better flavor, but you can use either or a 50/50 split of the two.
If you opt for oil, be sure to choose a high smoke point and neutral flavored option like sunflower or a good vegetable oil.
2. To check the temperature of oil, add a tiny amount of batter to the oil. If it comes up quickly and gradually the oil is hot enough for the jalebis to be fried.
Proper frying temperature is 350 degrees Fahrenheit/176 degrees celsius.
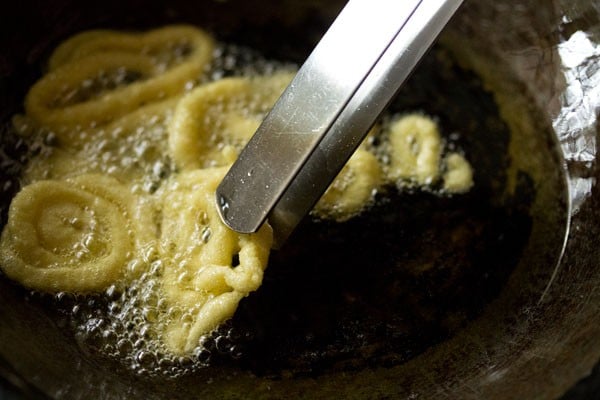
3. Now squeeze the bottle and make concentric rings with the batter.
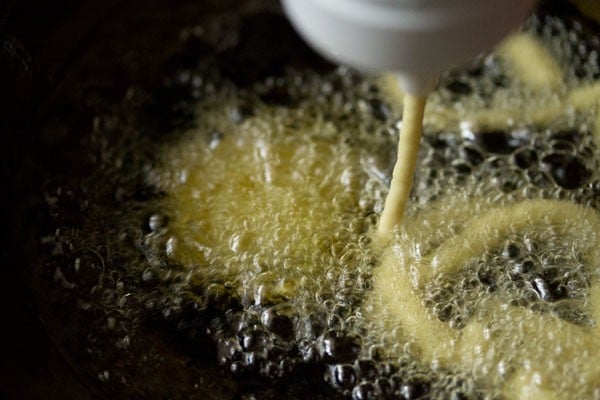
4. Either start from the center and move outside or vice versa. Be careful while making jalebi as the oil is hot.
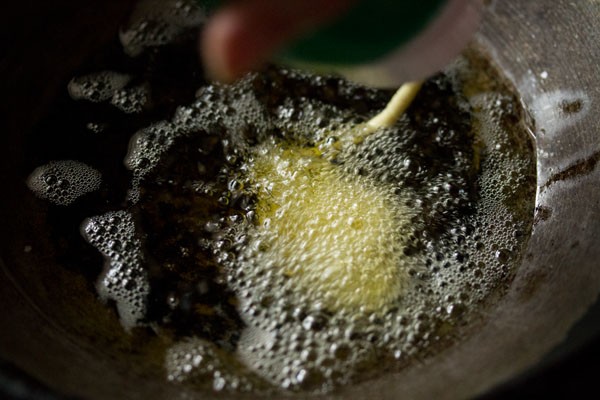
5. You won’t get perfect shapes as the jalebis keep on moving while you make the circles. This does require practice and it also depends on what equipment you are using to make them.
6. When one side is partly cooked and the batter has firmed up, turn over with a pair of tongs and fry the other side.
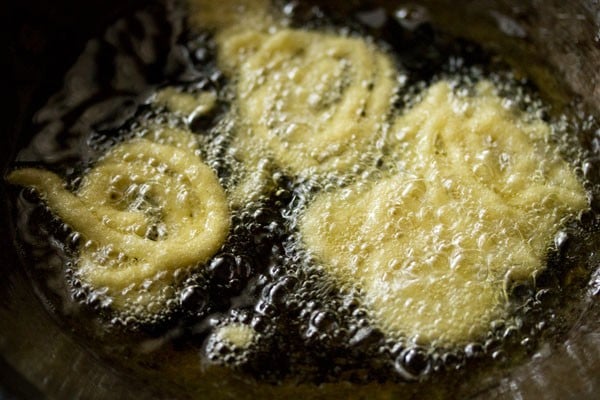
7. Some jalebi will cook faster than others.
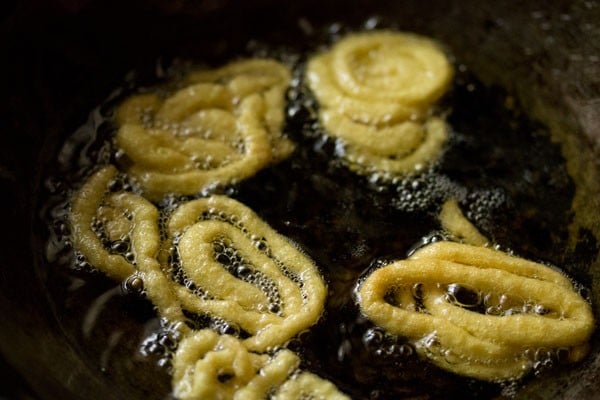
8. Fry till the oil stops sizzling and the jalebis are a light golden. Remove with tongs or a bamboo skewer, shaking them to drain the extra oil.

Soak Jalebi In Sugar Syrup
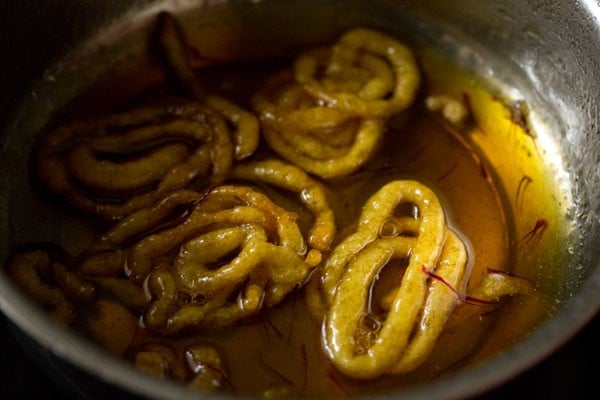
9. Immediately put the fried jalebi in the sugar syrup. The sugar syrup should still be warm when you add the jalebi to it.
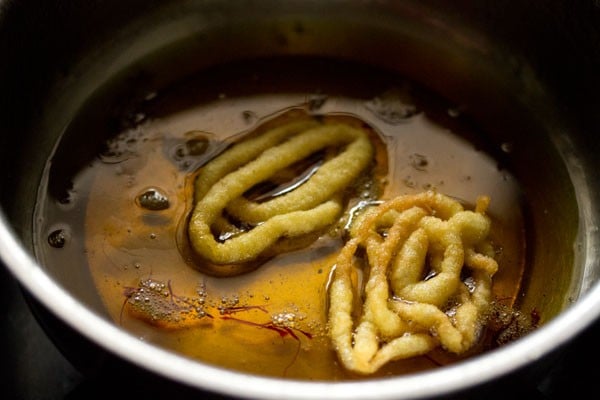
10. With a wooden skewer, tongs or spoon, turn over after a minute so that both sides are coated with the syrup.
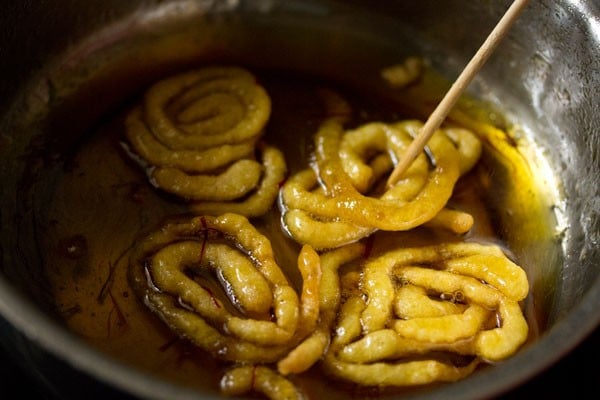
11. Keep them in the syrup for about 2 to 3 minutes. If you keep for two minutes, they will be lightly colored and if you keep for 3 minutes or more, they will have a deeper color.
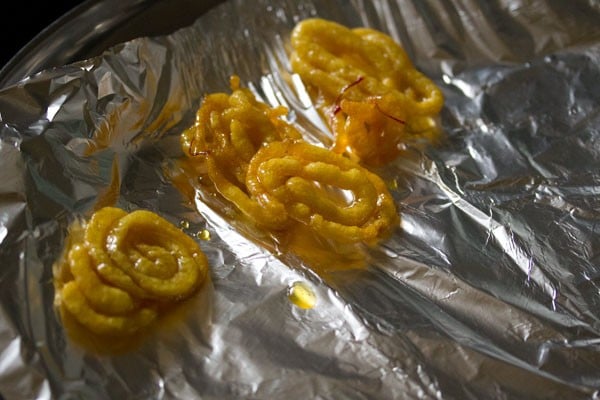
12. Remove with a wooden skewer or tongs. Shake lightly so that the excess sugar syrup falls back in the pan. Place them on a plate or tray lined with a foil or butter paper.
13. Make all jalebi this way. If possible, I recommend you get help making the jalebi otherwise you’ll be very busy multitasking.
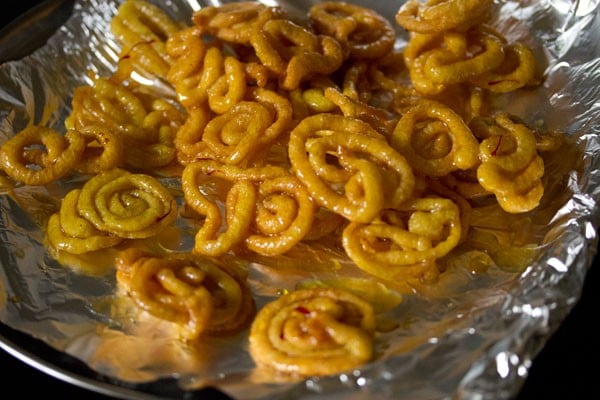
14. Serve jalebi hot, warm or at room temperature. The leftovers can be kept in an air-tight container and refrigerated for up to 5 days.
How to Serve Jalebi
Jalebi can be served alone or in combination with other food items. For example, some people like to have jalebi with milk or with Rabri, the sweetened thickened milk dish.
In Gujarat, Fafda is a popular combination with jalebi, whereas in Indore city, it is served with Indori poha. Jalebi can also be served for breakfast with a glass of warm milk.
FAQs
I personally think ghee is the best in terms of flavor, however, you can absolutely use any other kind of neutral flavored, high smoke point oil that you have on hand. Grapeseed oil, vegetable oil or sunflower oil all work well here when making jalebi recipe.
Sure! They can be made and refrigerated for up to 5 days.
Yes! This recipe yields about 175 grams of jalebi. The recipe can be halved or doubled too.
More Indian Festive Sweets!
Ladoo Recipes
Sweets Recipes
Sweets Recipes
Sweets Recipes
Please be sure to rate the recipe in the recipe card or leave a comment below if you have made it. For more vegetarian inspirations, Sign Up for my emails or follow me on Instagram, Youtube, Facebook, Pinterest or Twitter.
Jalebi Recipe | Best Homemade Jalebi Recipe
Ingredients
for making jalebi batter
- 1 cup all purpose flour – 125 grams
- 2 tablespoon gram flour (besan)
- ⅛ teaspoon turmeric powder
- 1 pinch baking soda or ¼ teaspoon baking powder
- 1 cup water
- 1 to 2 tablespoons all purpose flour to be added later after the batter has fermented
for sugar syrup
- 1 cup sugar – 150 grams
- ½ cup water
- ¼ teaspoon saffron strands
- oil for deep frying, as required – you can also use ghee instead
Instructions
Making batter
- In a mixing bowl, take the 1 cup of all purpose flour or maida. Add besan or gram flour, a pinch of baking soda and turmeric powder.
- Mix all the above dry ingredients with a spoon or spatula.
- Then add water. The amount of water to be added depends on the quality of flour used. I added 1 cup water. Depending on the quality of flour and besan, you can add from ¾ to 1 cup water.
- With the spatula or spoon, first mix. Break the small or tiny lumps with the spatula or spoon while mixing.
- Then in round circular directions stir the batter briskly for 4 minutes. This adds volume to the batter and makes it even and smooth.
- The batter should have a flowing consistency. Cover and keep the batter to ferment in a warm place for 12 to 15 hours. I kept for 15 hours. If you live in a cold climate, you can keep for 20 to 24 hours and if you live in a hot or warm climate, keep for 6 to 10 hours.
- After fermentation the batter will have tiny air-pockets in it with a tangy taste.
- Stir the batter and if you carefully see, the batter would have become thinner than what it was before fermentation.
- So to thicken the batter again, add 1 to 2 tablespoons of all-purpose flour.
- With a spoon mix very well.
- Now pour this batter in the squeezy tomato ketchup bottles that we get in the market. You can also use coconut shell and make a small hole in it. You can also use a piping bag or make your own with butter paper. Depending on the capacity of the bottle, you can pour less or more in it.
Preparing sugar syrup
- Take 1 cup sugar in a pan. Add saffron strands to it. Do add saffron as it gives a nice orange yellow color and also its aroma to the jalebi.
- Add ½ cup of water.
- Keep this pan on stove top on low heat and begin to stir, so that the sugar dissolves.
- On a low to medium flame, cook the sugar syrup.
- Cook till you get one string consistency in the sugar syrup.
- Once you get the one string consistency, switch off the heat and add ¼ tsp lime or lemon juice. Stir well. Keep the sugar syrup on the burner itself so that it remains warm when you add the jalebi in it.
Frying jalebi
- Heat oil for deep frying in a kadai or pan. You can also use ghee or half-half of oil and ghee. Ghee gives a better flavor.
- To check the temperature of oil, add a tiny amount of batter to the oil. If it comes up quickly and gradually the oil is hot enough for the jalebi to be fried. The frying temperature is 350 degrees Fahrenheit/176 degrees Celsius.
- Now squeeze the bottle and make concentric rings with the batter.
- Either start from the center and move outside or vice versa. Be careful while making the jalebis as the oil is hot.
- You won't get perfect shapes as the jalebis keep on moving while you make the circles. This does require practice and it also depends on what equipment you are using to make them.
- When one side is partly cooked, turn over and fry the other side.
- Some jalebi will be cooked faster than others.
- Fry till the oil stops sizzling and the jalebis are a light golden. Remove with a tongs or a bamboo skewer. While removing shake to drain the extra oil.
Adding fried jalebi to sugar syrup
- Then immediately put the fried jalebis in the sugar syrup. The sugar syrup should be slightly hot or warm when you add the jalebis in it.
- Turn over after after a minute so that both sides are coated with the syrup.
- Keep them in the syrup for about 2 to 3 minutes. If you keep for two minutes, they will be lightly colored and if you keep for 3 minutes or more, they will have a deep color.
- Remove with a wooden skewer or tongs. Shake lightly so that the excess sugar syrup falls back in the pan. Place them in a plate or tray lined with a foil or butter paper.
- Make all jalebi this way. Its better to have a help while doing so. Otherwise it is kind of multi-tasking.
- Serve jalebi hot, warm or at room temperature. The leftovers can be kept in an airtight container and refrigerated.
Notes
- Consistency of the batter: Ensure that the batter consistency should be flowing yet thick. It can also be medium-thick. Do not make the batter runny, watery or very thick.
- Fermentation: Consider your city temperature when fermenting the jalebi batter. A hot climate will make the fermentation go fast and a cool or cold climate will slow it down. In a hot temperature, ferment the batter for 6 to 7 hours. In a cool climate, ferment it for 10 hours or as needed. You can also use the Instant pot for fermenting the batter. Also keep in mind not to over do the fermentation. A batter which has got fermented way too much will taste very sour and have an unpleasant smell.
- Consistency of sugar syrup: The sugar syrup must have a one-string consistency. If it is cooked less than the 1 string consistency, the jalebi will absorb it like water and will soften and break them. If you cook the syrup more than 1 string thread, it will crystallize on the jalebi after cooling.
- Frying: While frying jalebi, keep the heat to medium or medium-high heat. Fry them in a moderately hot oil.
- Scaling: This recipe can halved or doubled.
- Note that the approximate nutrition info is for 1 jalebi.
Nutrition Info (Approximate Values)
This jalebi recipe from the archives, first published in November 2015 has been updated and republished on 1 November 2021.

Any chance you could substitiute anything for saffron???
Add green cardamom powder.