How to Make Paneer | Homemade Paneer Recipe
Make fresh paneer at home with only a few simple ingredients. This easy homemade paneer recipe creates the softest, most tender paneer cheese from scratch.
Servings: 200 grams
Calories: 145kcal
Ingredients
Ingredients
- 1 litre full fat whole milk
- 2 to 4 teaspoons lemon juice or vinegar or 3 to 4 tablespoons curd or yogurt
Materials required
- cheese cloth or muslin or a thin cotton napkin
- some bowls and a heavy weight object or plates
Instructions
Boiling milk
- First, rinse a large, heavy duty pot with water. Add milk to the pot.
- Then begin to heat the milk on a medium-low heat.
- Stir occasionally so that the skin does not form on the surface and also so that the milk does not get burnt from the bottom.
- Meanwhile, take a pan or a bowl. Place a strainer on the pan. Line the strainer with clean muslin or cheesecloth or cotton napkin. You can even line the pan directly with the muslin.
Adding food acid
- When the milk starts boiling, add the lemon juice or vinegar. Begin to stir.
- The milk has to curdle completely. Stir the milk when it is curdling so that the curdled milk does not stick to the base of the pan.
- Sometimes you will see the milk has curdled partly but no watery whey can be seen. In this case also add 1 to 2 teaspoons more of the food acid and stir again. You should see the greenish colored whey in the milk.
- After the milk has curdled completely and you see the greenish whey, switch off the heat and then immediately pour the entire mixture in the strainer lined with the muslin, cheesecloth or cotton napkin.
- Carefully gather the edges of the muslin as the coagulated milk mixture will be very hot. While doing this more of the whey will be strained.
- Run some clean fresh water on the gathered muslin all over.
Making paneer
- With the ends tightly gathered, run clean, fresh water all over the cloth to rinse.
- Keep a heavy weight on top of the muslin or cheesecloth for 30 to 40 minutes. Use a heavy object having 500 to 600 grams weight. You can even hang the muslin bundle for an hour on your kitchen basin faucet if not using a heavyweight object.
- Some more whey will be strained when you place the heavyweight object. So remove the whey from the plate.
- After 30 to 40 minutes the paneer will set.
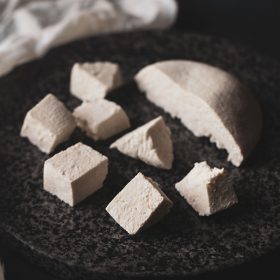
- Once warm or cooled cut homemade paneer into cubes or any shape.
- You can also refrigerate the paneer. Keep it in an air tight container or immerse the paneer block in a bowl of water and keep in the fridge.
- Homemade paneer stays fresh for 2 to 3 days in the fridge in an air-tight container. You can slice the paneer cheese later and use it any recipe.
Video
Notes
- Milk: First and foremost use good quality milk. Again full fat whole milk yields excellent results just like it does for making homemade curd. You can use both raw milk or homogenized milk.
- Food acids: Three ingredients that coagulate the milk. You can use any one of them: Lemon juice, curd or vinegar. Each of these will add a faint hint to the paneer you make. Remember this. If you don't like lemony or vinegar taste, add curd (yogurt) or buttermilk instead.
- Cream: If there is plenty of cream floating on top of milk surface, then there is no need to remove it. The natural cream present in the milk, makes the paneer cheese soft.
- Curdling milk: When you add the lemon juice or vinegar the milk will begin to curdle. The milk has to completely curdle. You should be able to see the whitish or greenish whey. When the milk has curdled completely then do not simmer or cook it further. Remove immediately and strain the milk. This overcooking will yield a hard paneer when it is set.
- Storing: Refrigerate paneer in an air-tight container for 2 to 3 days. Another way to keep the homemade paneer soft in the fridge is to soak the paneer block in water in a bowl and keep in the fridge. This way the paneer does not become hard. Alternatively you can soak the paneer in warm water after you have removed it from the fridge.
- Scaling: You could easily make a large block of paneer by doubling or tripling this recipe. When the paneer is set, chop them in cubes. Place them in an air-tight box and freeze. You can even refrigerate the paneer cheese for 2 to 3 days.
Nutrition
Serving: 50grams | Calories: 145kcal | Carbohydrates: 1g | Protein: 7g | Fat: 13g | Saturated Fat: 8g | Cholesterol: 33mg | Sodium: 13mg | Calcium: 240mg