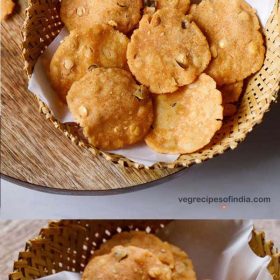
Bringing you one more recipe of a popular South Indian snack called Thattai or Thattu Vadai. This savory snack is common during the festivals of Diwali and Krishna Jayanti in the southern parts of India. Not just a festive treat, it is available all year round in sweet and bakery stores, in this part of the Indian subcontinent. This Thattai Recipe is one of those that’ll help you to master the art of making this dish. You just have to follow the methodology and give the tips, a read for even a better understanding.
What is Thattai
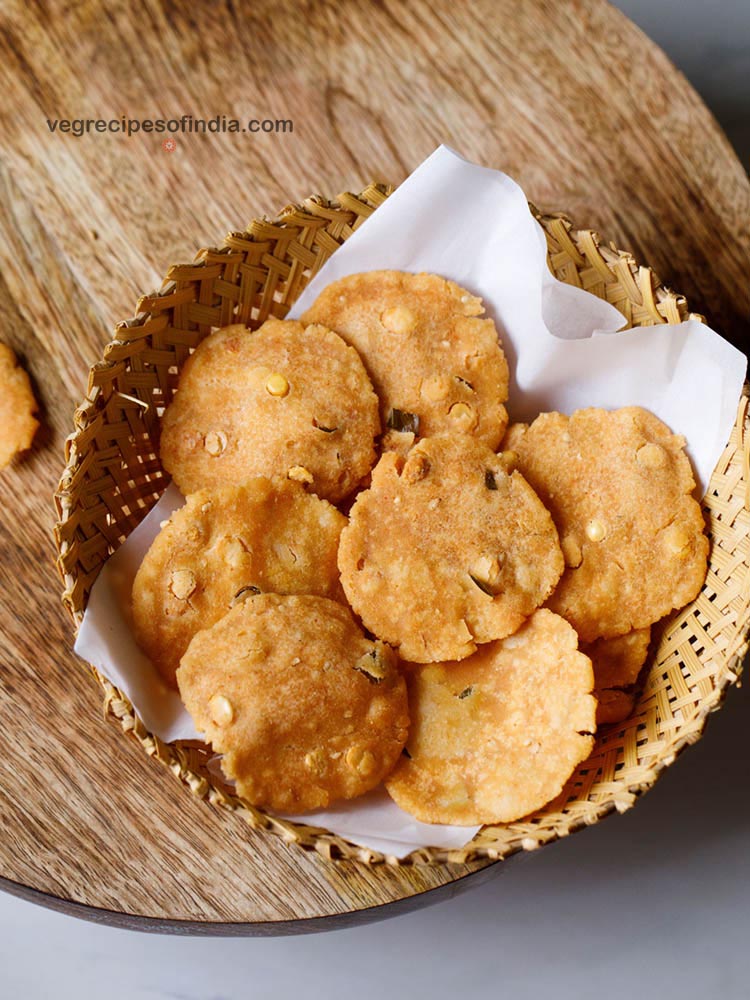
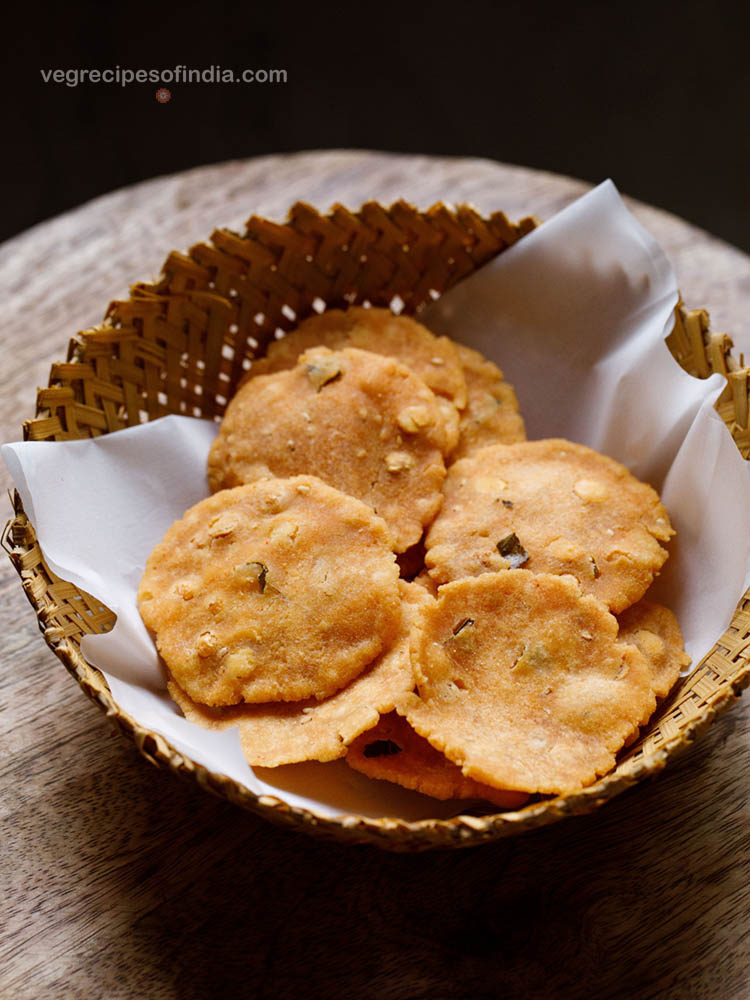
Thattai is a crisp, deep-fried cracker made with rice flour, lentil flours, spices, herbs and seasonings. A basic Thattai Recipe has a dough that is made by mixing rice flour, roasted and ground urad dal flour, soaked chana dal, curry leaves, asafoetida (hing), ground green chilies or red chili powder, salt, butter or ghee. An optional ingredient that may be also add is grated or sliced fresh coconut.
While in Tamil Nadu, the dish is known as Thattai, ‘Nippattu’ is what it is referred to in Karnataka and ‘Chekkalu’ in Andhra Pradesh or the Telangana region. It may also be known as Thattai Murukku or Thattu Vadai.
There are some variations in the method of preparation in each of these regions, but the basic ingredients remain the same. The different flavors that are available include masala, butter, ginger and some even stuffed with chutneys, and veggies like carrot, beetroot, etc.
Although available in both sweet and salty versions, my Thattai Recipe here is a salted variant.
More On The Recipe
I first came across the Thattai Recipe some years back, when one of our readers had shared it with me. For the longest time, it kept lying in my email, as I was just tied up with something or the other and couldn’t really give it a try.
However, one fine day, I really thought of giving the recipe a try and eventually made it. The Thattai really came out to be crispy, crunchy and oh-so good.
It turned out to be so much better than the ones available in the market stores, which are also way too spicy, most of the times. So, since then, I never really stopped making it at home!
I also felt that the Thattai Recipe was one of those which had to be shared on my blog. So, I incorporated a few changes in it, which only made the whole deal, even better. These Thattu Vadai also stay crisp. So, no worries of them turning soggy or soft in a few days.
This recipe will give you about 25 pieces of Thattu Vadai, and can be easily scaled up by increasing the proportion of the ingredients.
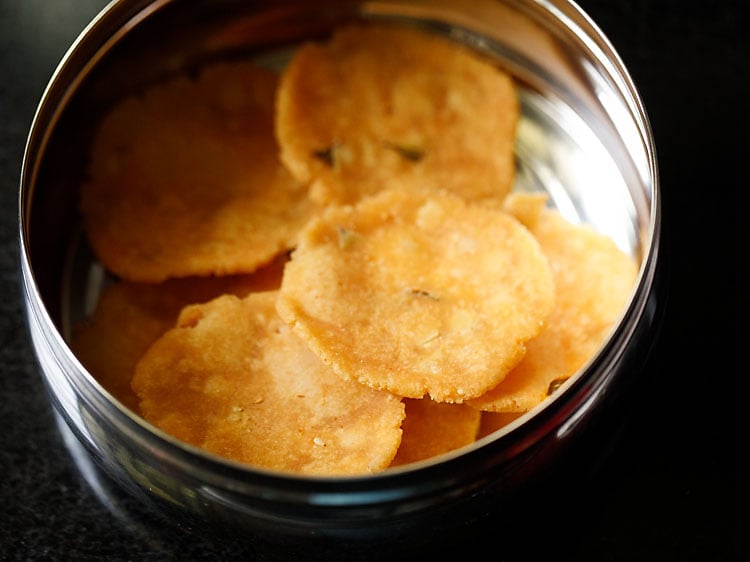
To keep them well, put in an air-tight jar and enjoy it as a super snack during your tea-time or as a festive snack. Another preparation where you can use this particular snack is in this Mixture Recipe.
How to make Thattai
Preparation
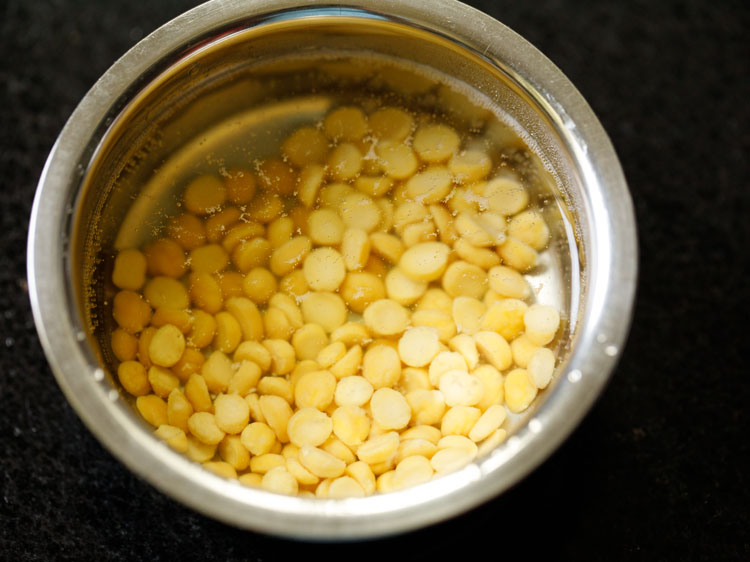
1. Firstly, rinse and then soak 1 tablespoon chana dal (husked and split Bengal gram) in hot water for 30 minutes.
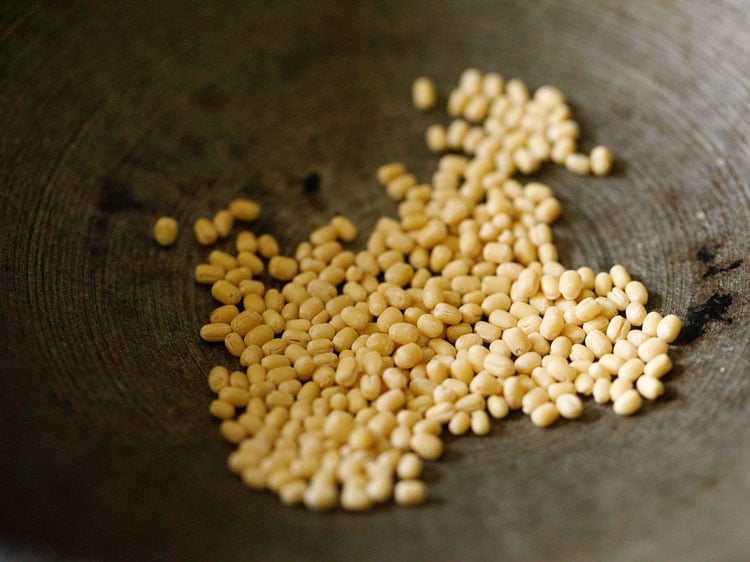
2. Heat a heavy kadai or pan. Keep the heat to low or medium-low. Add 1 tablespoon urad dal (husked and whole or split black gram).
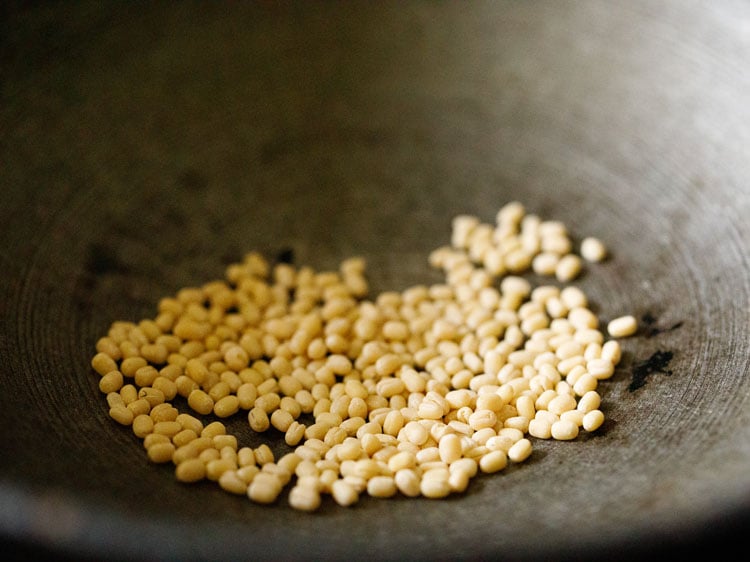
3. Lightly roast urad dal for 1 to 2 minutes. You don’t need to brown the dal. Remove the lentils and set aside.
Instead of using urad dal, you can also use urad dal flour. Just add 1 tablespoon urad dal flour in the dough mixture.
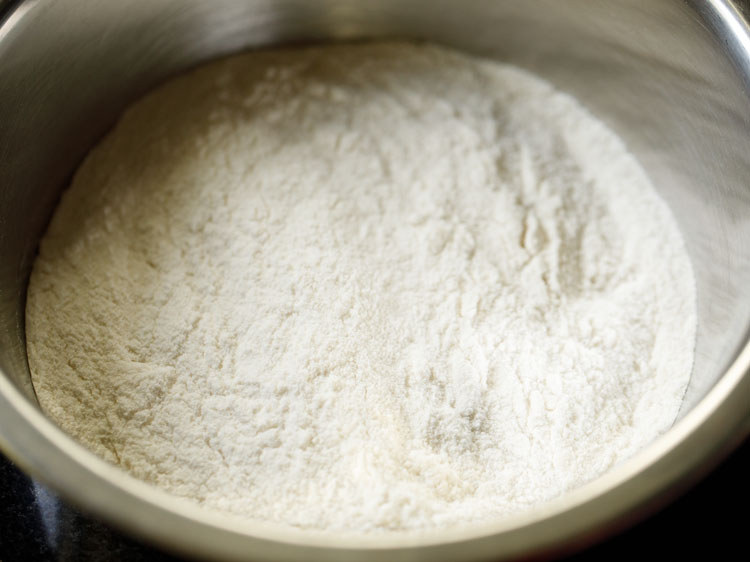
4. In the same kadai or pan, add 1 cup (160 grams) rice flour. Here, I have used packaged rice flour, but homemade rice flour can also be used.
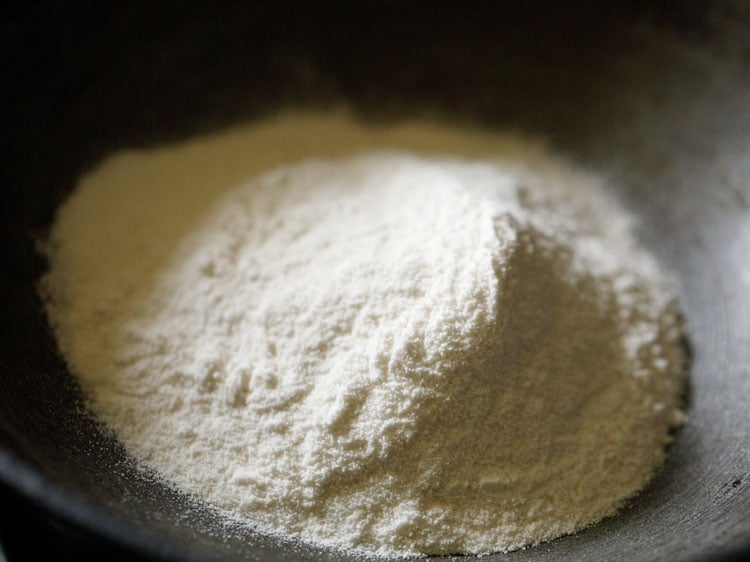
5. On low to medium-low heat, roast the rice flour. Stir often.
6. Roast rice flour till it becomes warm to touch.
7. Remove and keep aside in a mixing bowl.
8. In a small grinder, take the roasted urad dal. Add 1 tablespoon roasted chana dal. You can even skip roasted chana dal.
Roasted chana dal helps in making the Thattai light and crispy.
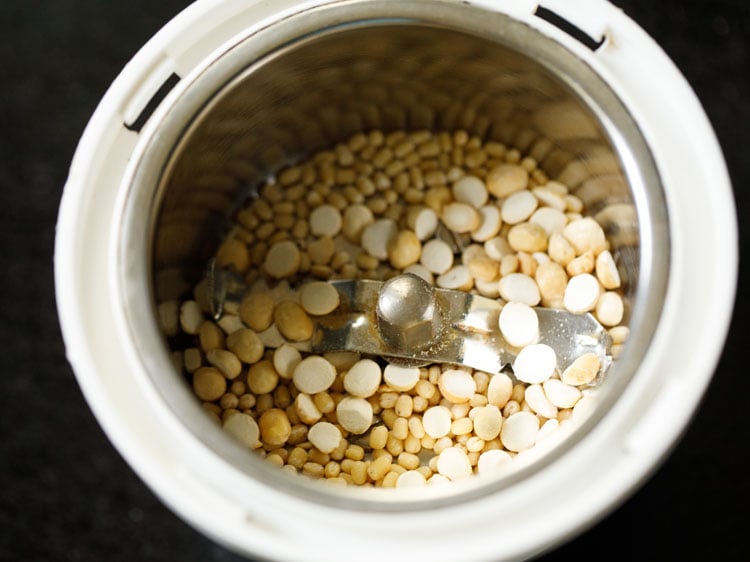
9. Grind to a fine powder.

Make Thattai Dough
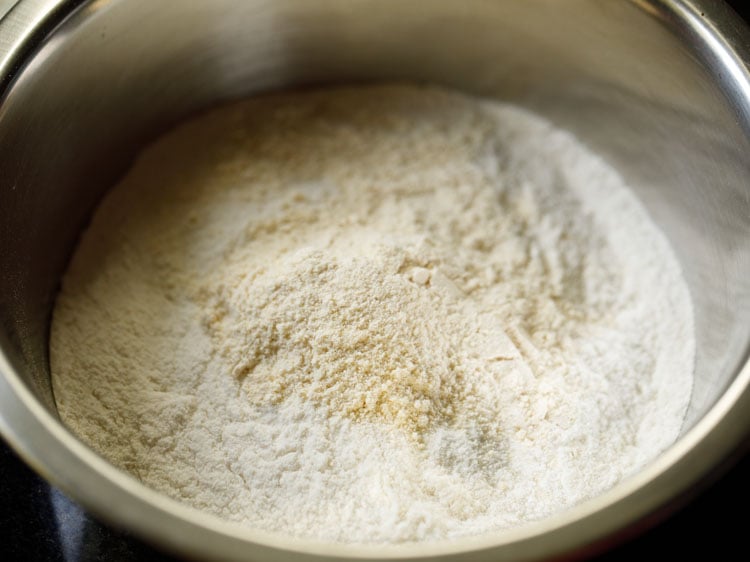
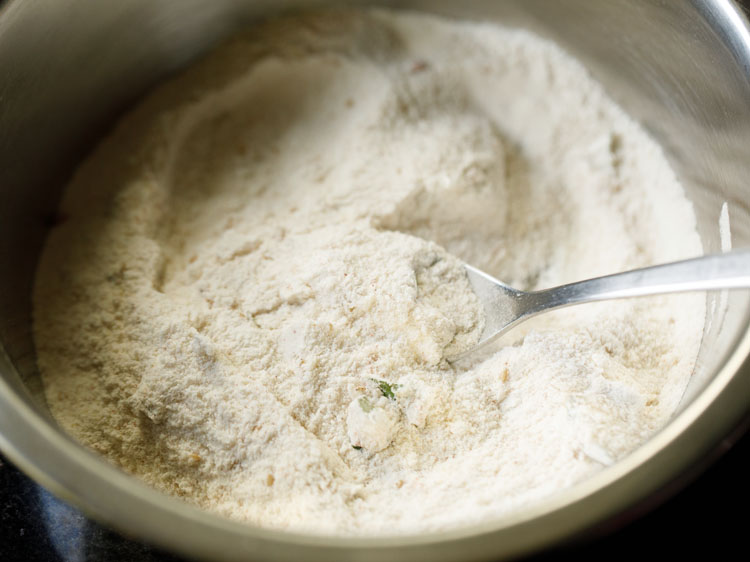
10. To the bowl containing the rice flour, add the prepared and ground lentil flours.
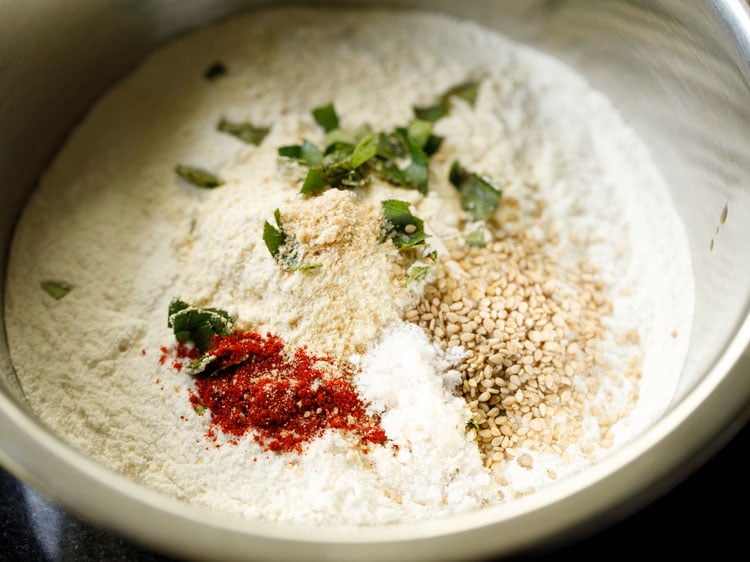
11. Add the below listed herbs, spices and seasonings:
- 1 tablespoon chopped curry leaves or 10 to 12 chopped curry leaves
- ¼ teaspoon asafoetida (hing)
- ½ teaspoon red chili powder or as required
- 1 teaspoon white sesame seeds
- ½ teaspoon salt or as per taste
You can even add 2 tablespoons fresh grated coconut or thinly sliced coconut (optional).
12. Mix the salt, spices and herbs with the flours to get an even mixture.
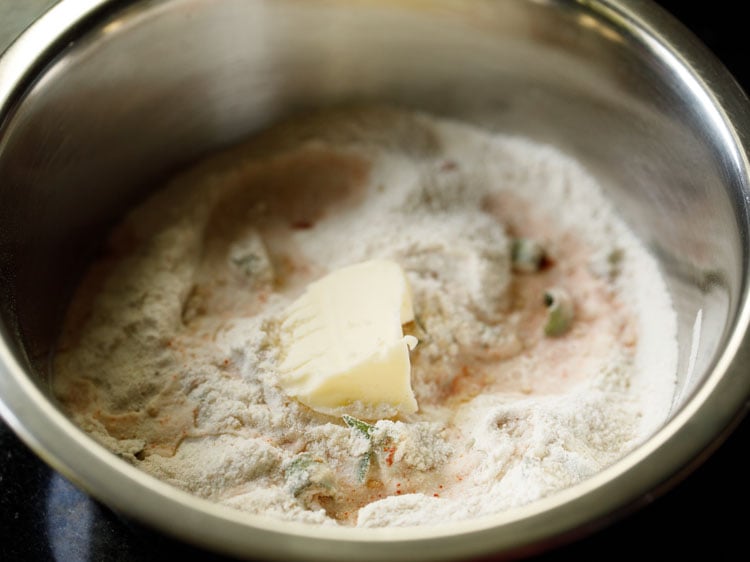
13. Now, sprinkle 2 tablespoons water and add 1 tablespoon butter. You can add 1 tablespoon ghee, instead of butter.
You can use both salted or unsalted butter. The butter can be cold or at room temperature.
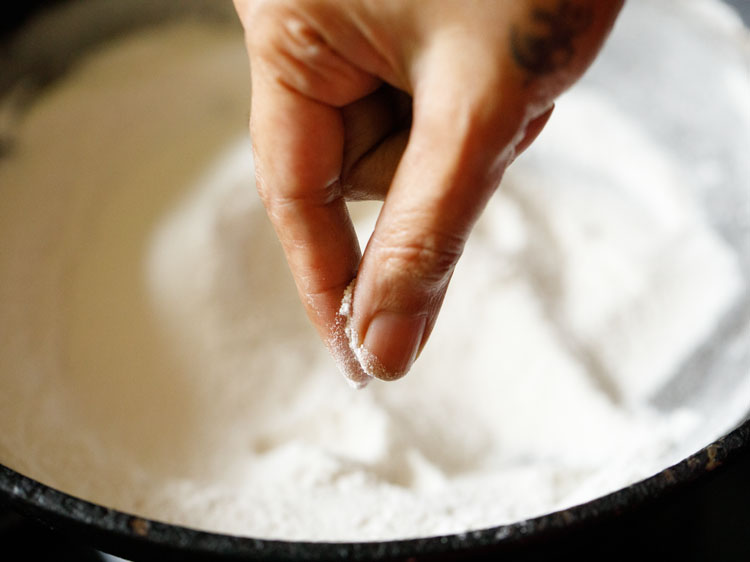
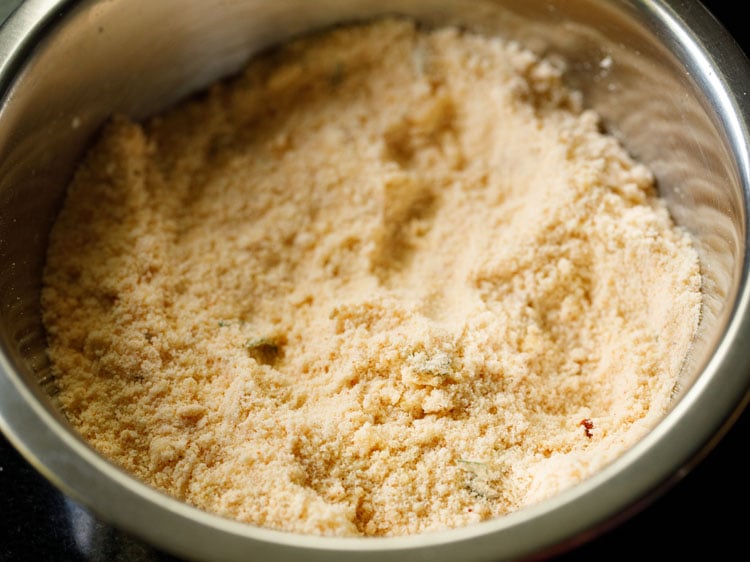
14. With your fingertips, mix the butter with the flour. Mix very well.
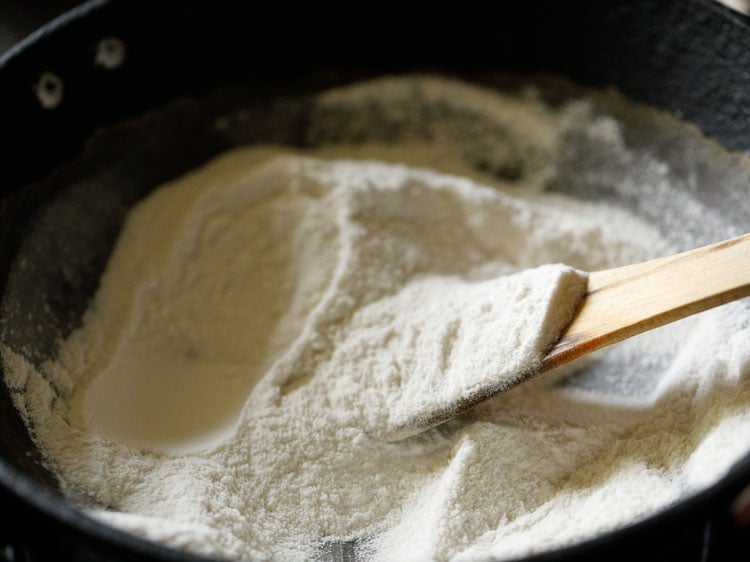
15. Add 3 tablespoons water.
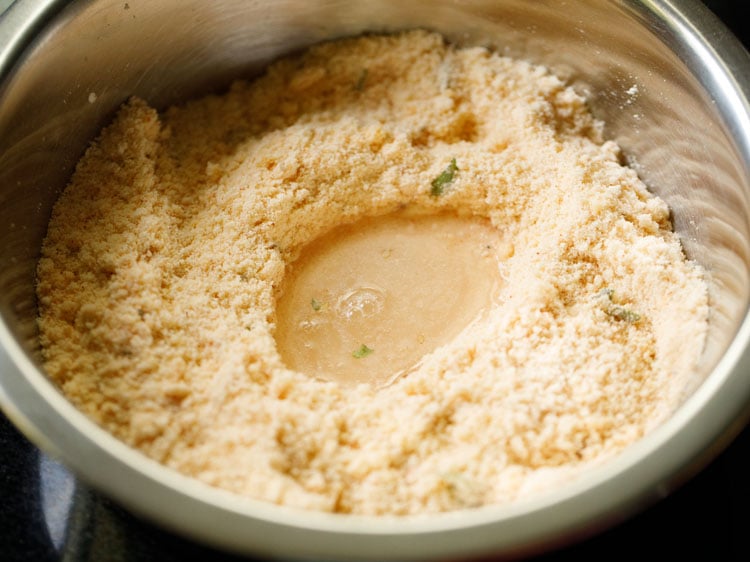
16. Gently mix and start bringing the mixture together.
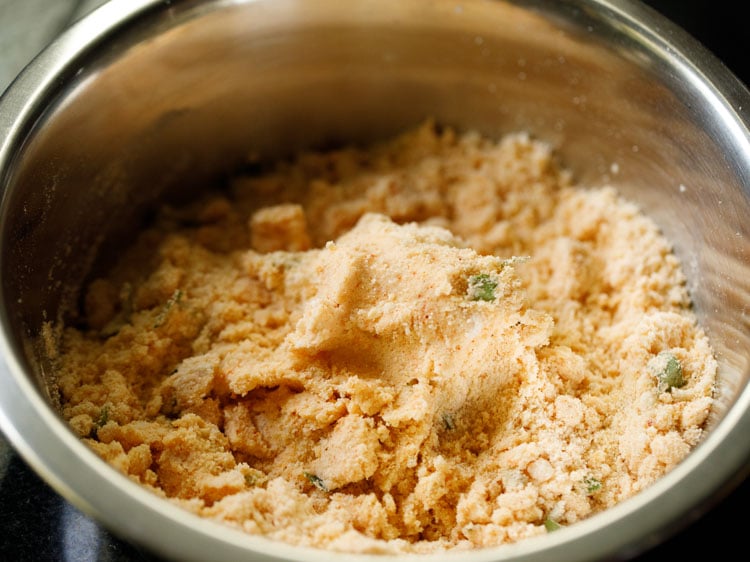
17. Drain all the water from the soaked chana dal and add to the dough mix.
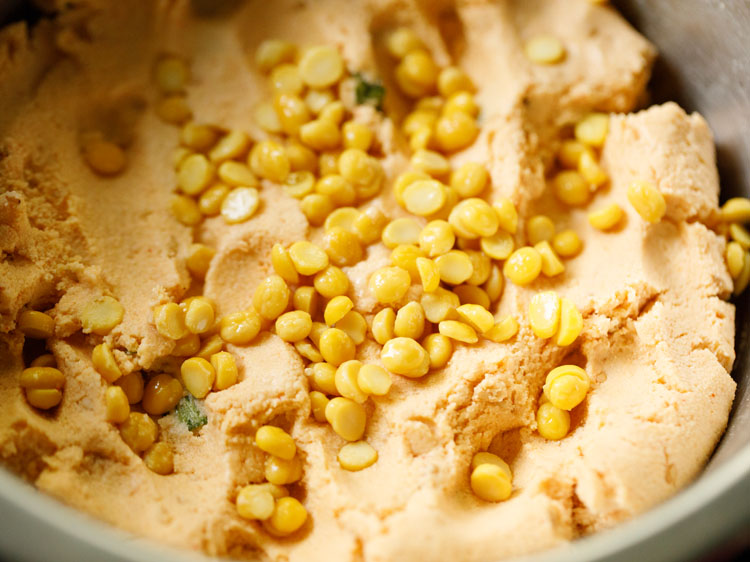
18. Mix and knead to a smooth, semi-soft dough or a slightly stiff dough. Add 3 to 4 tablespoons water or as required while kneading the dough.
I used about a total of 9.5 tablespoons water. Addition of water will depend on the texture and quality of rice flour. So, add in parts.
Do not make a soft dough as then it becomes difficult to shape and lift the Thattai. Do not make the dough too hard as then Thattu Vadai will not be crisp.
It will have a hard and dense texture. Also, check the taste of dough and add more salt if required. Cover and keep aside. Dough should not be sticky or pasty.
Tip 1: If dough becomes sticky, add some rice flour and knead.
Tip 2: If dough is dry and hard, sprinkle some water. Mix and knead.

Shape Thattu Vadai
19. Take a butter paper, parchment paper, zip-lock bag or a clean cotton napkin. Grease with some oil.
Also, keep oil for deep frying in a kadai or pan. Keep the heat to medium or medium-high. If using a cotton cloth or napkin, then no need to grease it.
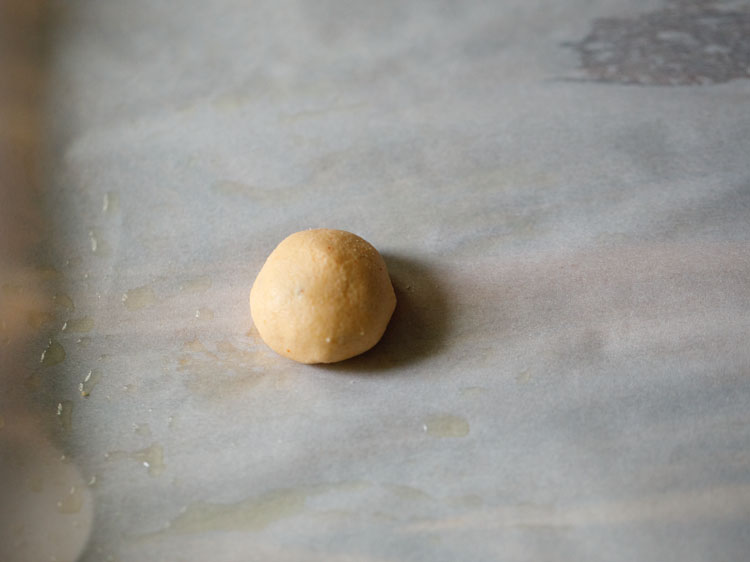
20. Make small balls from the dough.
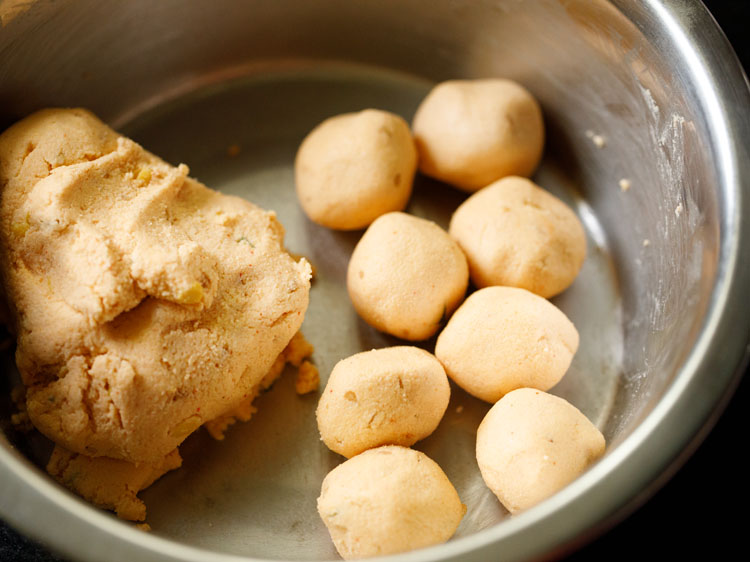
21. Place a dough ball on the greased parchment paper.
22. Press and flatten Thattai with your fingertips to a thin round. Spread some oil on your fingers while flattening them. Do not make them too thin and flat, as then you won’t be able to lift them.
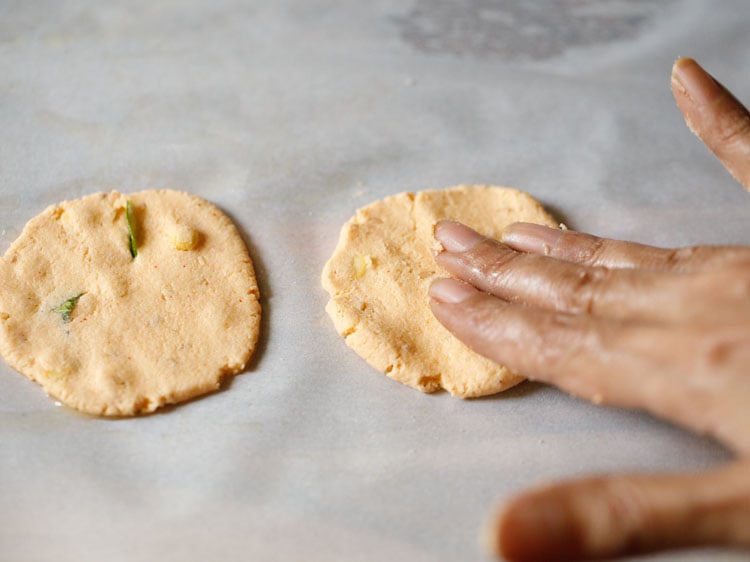
23. Make 5 to 6 Thattai on the parchment paper. Make them as you go on frying. Thus, make one batch and add in the oil.
When this first batch is getting fried, make the second batch. But do keep an eye on the batch that is getting fried.
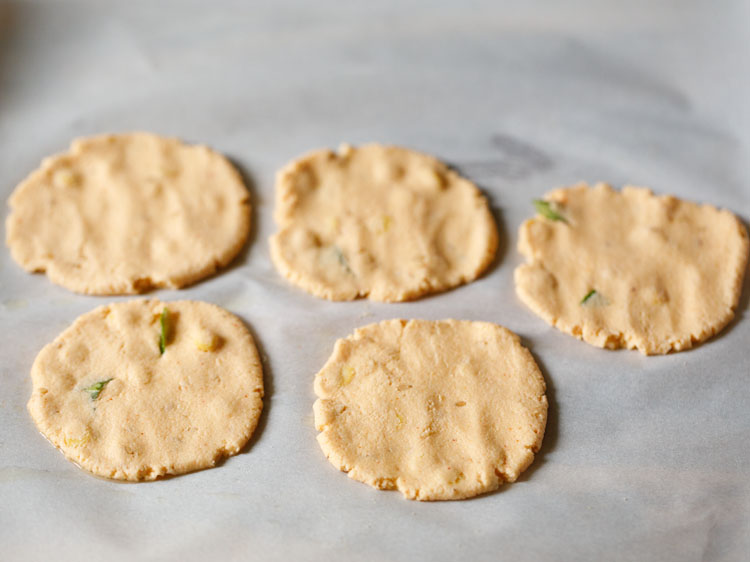
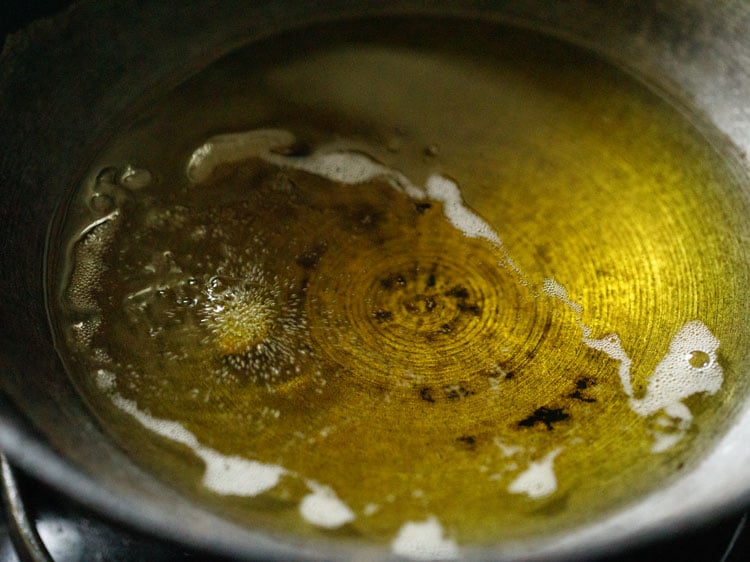
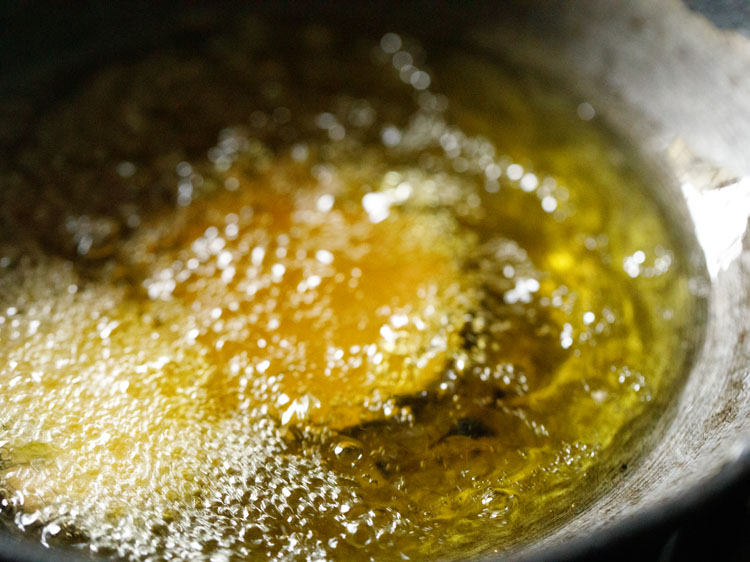
24. Check the temperature of oil by adding a tiny piece of the dough. If it comes up swiftly on top, the oil is hot enough.
25. Lift the Thattai gently from the paper. While lifting, lift the paper too slightly, as this helps to easily pull the Thattai from the paper.
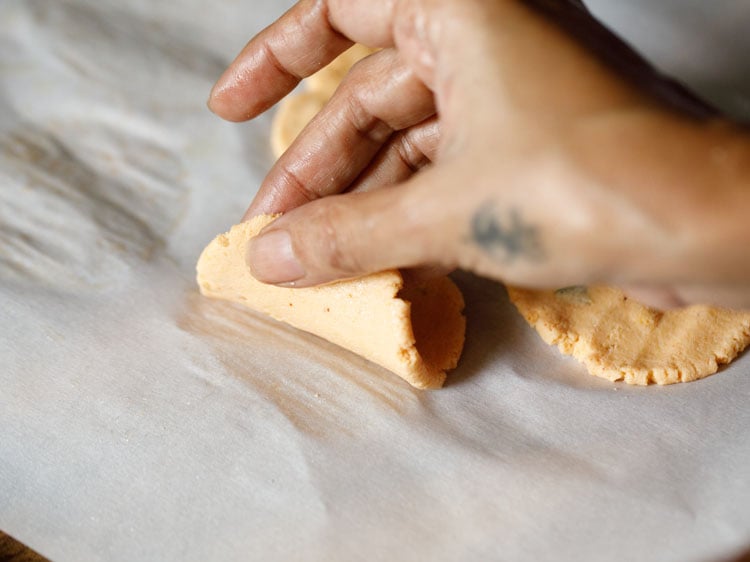
Fry Thattai
26. Gently place Thattai rounds in the hot oil.
27. Begin to fry. Keep heat to medium or medium-high while frying.
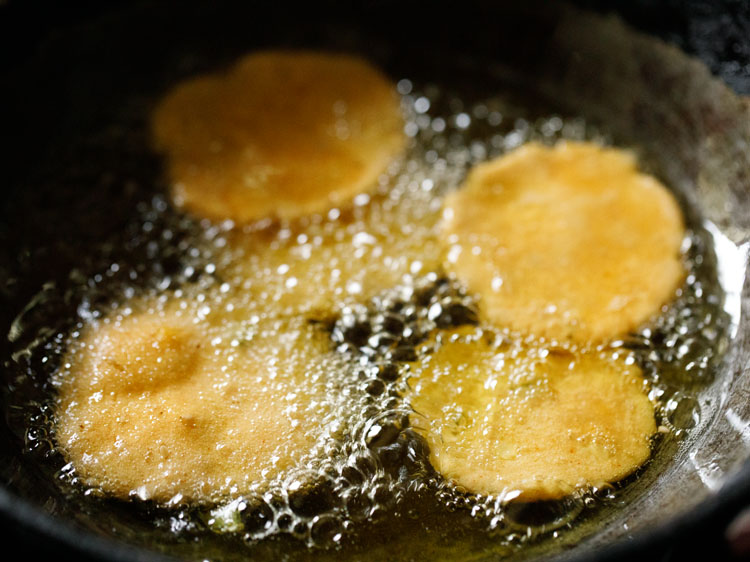
28. When one side is crisp, then flip over each thattai.

29. Fry the second side till crisp. You can flip a couple of times for an even golden color and crispness.

30. Fry till crispy and crunchy. When the oils stops bubbling and sizzling, this means the Thattai is fried and done. Remove with a slotted spoon or spider spoon.
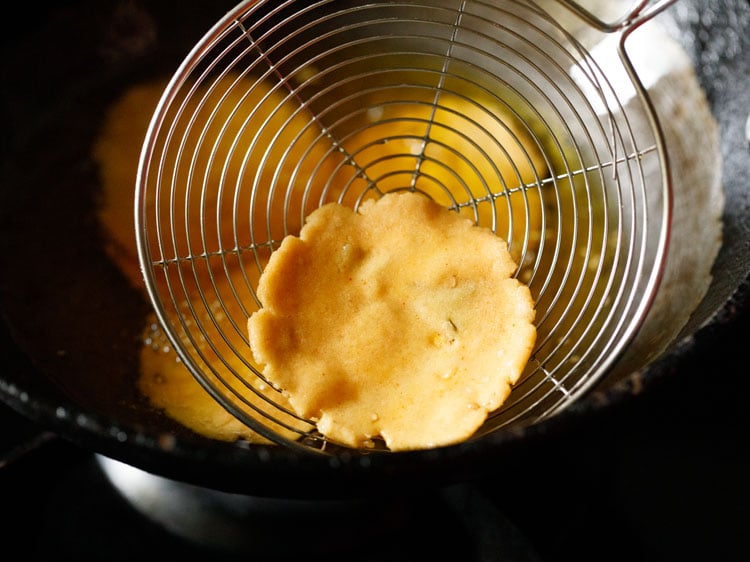
31. Place fried Thattai on kitchen paper towels.
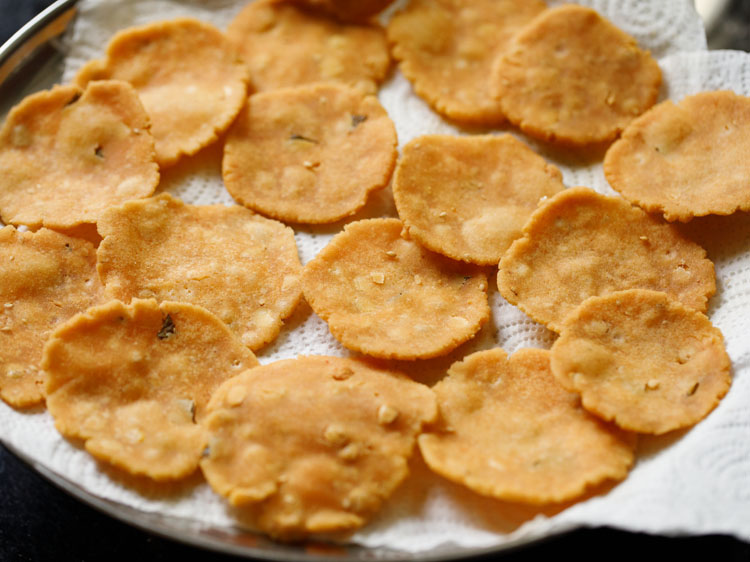
32. As soon as it cools to room temperature, place in a steel box or jar. Make more Thattai this way in batches.
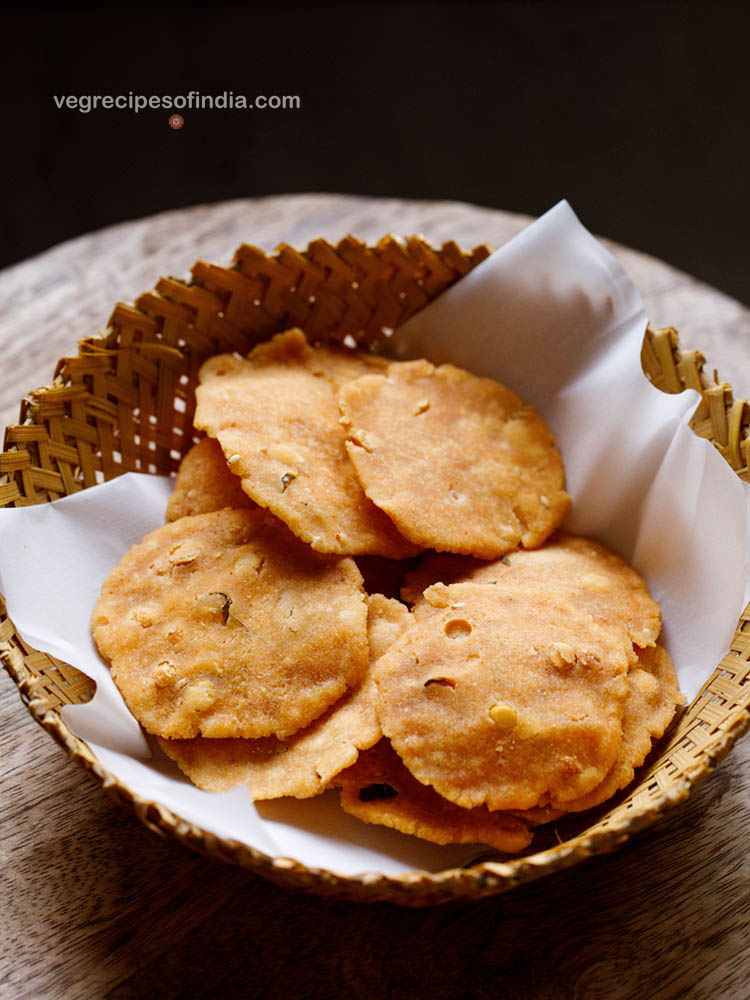
33. Serve Thattai to the deities if making for festivals. If making as an evening snack, serve with masala chai or filter coffee.
Expert Tips
- You can use your homemade rice flour or even parboiled rice flour in the recipe. If using packaged rice flour, ensure that it is within its shelf period.
- If you want, you may reduce the quantity of asafoetida (hing) in this recipe. Also, for a gluten-free version, skip adding it.
- I add the roasted chana dal to make Thattai lighter and crispier. But it can be skipped as well. Adding the coconut is also optional.
- Instead of urad dal, you can use urad dal flour as well.
- You have to keep a check on the quantity of water that goes into the dough. It will depend on the texture of the flour. So, its better to add in parts and then knead.
- Adjust the quantity of salt in the dough, if needed, after checking the taste of it.
- Ensure to knead a semi-soft dough. A soft dough makes it difficult to shape and lift. A hard dough makes the snack hard and dense, and not crisp.
- If you have a dough that’s too soft, add some more rice flour and then knead. If its too hard or dry, sprinkle some water, mix and knead.
- Use a parchment or butter paper, or a zip-lock bag. Spread some oil on it and press the dough balls with your fingertips. Don’t make too thin Thattai, as then it will be difficult to lift them up.
- You have to fry Thattai in oil on medium heat, till the oil stops bubbling. Turn over, when one side is crisp and fry till crispy and crunchy.
- For a vegan version, use oil or vegan butter instead of butter (salted or unsalted) or ghee.
More Diwali Snacks To Try!
Evening Snacks
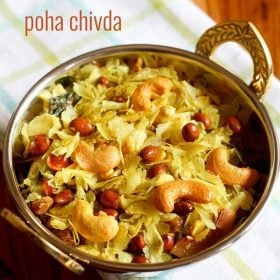
Evening Snacks
Evening Snacks
Please be sure to rate the recipe in the recipe card or leave a comment below if you have made it. For more vegetarian inspirations, Sign Up for my emails or follow me on Instagram, Youtube, Facebook, Pinterest or Twitter.
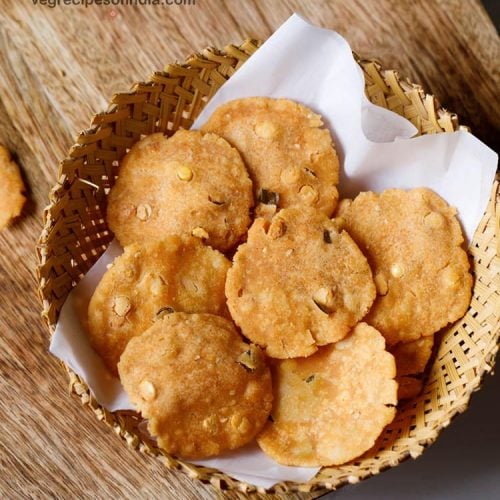
Thattai Recipe | Thattu Vadai
Ingredients
for roasting
- 1 tablespoon urad dal – 10 to 11 grams
- 1 cup Rice Flour – 160 grams
other ingredients
- 1 tablespoon roasted chana dal – 5 grams
- 1 tablespoon Butter (salted or unsalted) or ghee
- 1 tablespoon chopped curry leaves or 10 to 12 curry leaves chopped
- 1 tablespoon chana dal – soaked in hot water for 30 minutes
- ¼ teaspoon asafoetida powder (hing)
- ½ teaspoon salt or add as required
- 1 teaspoon white sesame seeds
- ½ teaspoon red chilli powder or add as required
- 2 tablespoons fresh grated coconut – optional
- 9 to 10 tablespoons water or add as required
- oil as required – for deep frying
Instructions
Preparation
- Firstly rinse and then soak chana dal in hot water for 30 minutes.
- Heat a heavy kadai or pan. Keep the heat to low or medium-low. Add urad dal (husked and whole or split black gram).
- Lightly roast urad dal for 1 to 2 minutes. Urad dal need not be browned. Remove and set aside.
- In the same kadai or pan, add rice flour.
- On a low to medium-low heat stirring often, roast the rice flour till it becomes warm to touch.
- Remove and set aside in a mixing bowl.
- In a small grinder, take the roasted urad dal. Also add roasted chana dal. Roasted chana dal can be skipped too if you do not have it.
- Grind to a fine powder.
Making thattai dough
- In the bowl containing the rice flour add the ground lentil flours.
- Add chopped curry leaves, asafoetida powder, red chilli powder, white sesame seeds and salt. You can even add freshly grated coconut or thinly sliced fresh coconut (optional).
- Mix the salt, spices and herbs with the flours evenly.
- Now sprinkle 2 tablespoons water and add 1 tablespoon butter or ghee in the flour mixture. You can add opt to add ghee instead of butter. The butter can be cold or at room temperature.
- With your fingertips mix the butter with the flour. Mix thoroughly.
- Add 3 tablespoons water.
- Gently mix and start bringing the mixture together.
- Drain all the water and then add the soaked chana dal to the dough mix.
- Mix and then knead to a semi-soft dough. Add 3 to 4 tablespoons more water or as required while kneading the dough. I added about a total of 9.5 tablespoons of water. Addition of water will depend on the texture and quality of rice flour. So add in portions.
- Tip – avoid making a soft dough as then it becomes difficult to shape and lift the thattai rounds. Do not make the dough too hard as then thattai will not be crisp. It will have a hard and dense texture. Also check the taste of dough and add more salt if needed. Cover and keep aside.
Assembling and Shaping thattai
- Take a butter paper or parchment paper or a ziplock bag or a clean cotton napkin. Grease the butter paper or parchment paper with some oil. Keep oil for deep frying in a kadai or pan. Keep the heat to medium or medium-high.
- Make small balls from the dough.
- Place a dough ball on the greased parchment paper.
- Press and flatten thattai with your fingertips to a thin round. Spread some oil on your fingers while flattening them. Do not make them too thin and flat as then you cannot lift them.
- Make 5 to 6 thattai on the parchment paper.
- Check the temperature of oil by adding a tiny piece of the thattai dough. If it comes up swiftly on top, the oil is hot enough.
Frying thattai
- Lift the prepared thattai round gently from the paper.
- Gently place in the hot oil.
- Begin to fry thattai on a medium or medium-high heat.
- When one side is crisp, then flip over each thattai with a slotted or spider spoon.
- Fry the second side till crisp. You can flip a couple of times to get an even golden color and crispness.
- Fry thattai till crispy and crunchy. When the oil stops bubbling and sizzling, this means the thattai is fried well.
- Remove fried thattai with a slotted spoon and place on kitchen paper towels.
- When frying the first batch of thattai, shape the second batch and keep them ready. However do keep an eye on the batch of the thattai that is being fried. This way make all thattai in batches.
- As soon as the thattai cools at room temperature, place them in a steel box or jar.
- Serve thattai to the deities. If making as an evening snack, then serve with chai or filter coffee.
Notes
- Amount of asafoetida (hing) can be reduced if you want.
- Check taste of dough and add more salt if required.
- Roasted chana dal can be skipped. Though it helps in making the thattu vadai lighter and crispy.
- Homemade rice flour can be used. Parboiled rice flour can also be used.
- Amount of water to be added will depend on the texture of flour. So add in parts and knead.
- You need to get a semi-soft dough. Do not make dough soft as then difficult to shape and lift. Do not make dough too hard as then thattai will not be crisp. The texture will become hard and dense.
- Fry thattai in oil till it stops bubbling. Fry on medium flame till crisp and crunchy.
- Use parchment or butter paper or a ziplock bag. Spread some oil on the parchment paper. Press thattai dough balls with your fingertips. Do not make very thin as then you cannot lift it up.
- For a gluten free thattai, skip asafoetida.
- To make a vegan thattai, add oil instead of butter or ghee. You can use vegan butter too.
- If dough becomes too soft, add some rice flour.
- If dough looks dry or hard, sprinkle some water.
Nutrition Info (Approximate Values)
This Thattai Recipe from the archives first published in 2019 has been updated and republished on 21 October 2022.
Tried making thattai with your recipe and it turned out great. Thanks!! I always refer your recipes with full trust. Thanks a lot!!
Great and thanks for the trust. Means a lot to me. Most welcome.
Tried this today. Came out exceedingly well. Didn’t add the coconut though.
Great to know and thanks for sharing the feedback. Coconut can be given a skip.
You are my favourite…all your recipes are easy to make ..simple
thanks so much bharti ❤️????